Using the Cricut Design Space App is a great way to enjoy your machine. You can access your images and ready-to-cut projects; best of all, you don’t need internet!
If you are already familiar with the Desktop version of Design Space, you will find this app very easy to navigate. Just dive in, tap, explore, and don’t be nervous. Your phone or iPad won’t explode!
On the other hand, if you have no experience, this is the best place; this article will take you to every little icon the app has.
I understand that learning a new skill can sometimes be a little frustrating, but when you take the time and are patient with it, you can become an expert.
Before we go into the nitty-gritty of the app, let’s see some differences between the desktop software and the iOS and Android apps, so you have an idea of the tools you gain and lose as you move across each option.
Differences between the Cricut Designs Space App and Desktop
Although the Design Space App is complete, you can do pretty much anything you can think of. There are some features that the desktop version DOES have.
I don’t want you to break your head trying to find those features on the app so let me list them for you:
- Select All: a button that allows you to select all of the elements and layers you have on the canvas area.
- Curve Text: The feature that allows you to curve text can only be found and used in the desktop version.
- Foil: You can’t use the operation “Foil” from the app.
- Patterns: unfortunately, you can only use and upload patterns on the desktop version.
- Templates: are an excellent way for you to visualize where your designs will go. This feature is only available on the desktop version. Read the full tutorial here.
- Photo Canvas: This allows you to see how a design may look on a surface.
- SnapMat (Only on the App): finally, something extraordinary that the desktop version doesn’t have! This option allows you to choose the exact location – on your mat – you want your Cricut to cut.
I have a full Cricut Design Space Desktop version tutorial, and I recommend you check it out!
Is there any difference between the Design Space App for iPhone and iPad?
Lucky for you and me, there’s not a big difference between these two options. Can you imagine trying to learn two different apps?
The only tiny difference between the app for iPhone and iPad is SPACE MANAGEMENT.
You will notice this first on the “Make it” interface. On the iPad, you see the entire mat preview, but on iPhone, you need to tap on the upper right corner to display other options (covered later on).
Something to keep in mind is that most of the time, when you tap on something, the menus are very long, so with the phone, you will have to slide them to the left and right to see all the options – sometimes, with the iPad too.
Also, since space is so limited on your phone, the layers button will be deactivated multiple times when you tap on other features. On the iPad, you can leave the layers button visible at all times.
Is there any difference between the Design Space app for iOS and Android Users?
When I started my crafting journey, Cricut didn’t even have an app for Android users!
Later, Cricut came with the app, and they’ve been working on it. iOS is more advanced and allows you to use your machine without the internet, and it has the offset tool, photo canvas, SnapMat, etc.
I bought an Android (a cheap one) to look at how the app behaves compared to iOS, and most icons are identical. I have the most updated version as well, and as far as I can tell, I can’t find how to use the 2×2 CardMat.
I do know that for the app to function fully; you need to have specific requirements; that’s why I think that my cheap Galaxy A12 doesn’t show particular features.
According to the app description on the google play store, if you have the system requirements and the latest software update, you should have SnapMat, kerning, etc.
Most screenshots from this tutorial are taken from an iPad pro. However, 95% of this tutorial will also apply to Android users. So if there’s an icon you can’t find on your device but can see on the screenshot, the feature most likely doesn’t exist for that particular phone or Android users altogether.
For a complete list of settings, head over to Cricut’s website.
Smart Hand Gestures for Cricut App
Let’s see all the hand gestures you need to know to manipulate the app.
There are five gestures you can use:
- Tap: use a single tap to select an image or layer (also to choose any menu options).
- Swipe: if you need to select more than one image, swipe your finger on your screen to select all the ones you need.
- Tap and hold: You can also select an image one by one. To remove the selection, do a single tap on the canvas area. Do a more prolonged tap and then select another design by doing the same thing.
- Two Finger swipe: if you need to move around the canvas, you must use two fingers simultaneously. Otherwise, you would be doing gesture #2 (Swipe)
- Pinch Zoom: zoom in and out using your thumb and index finger.
When you Open the Cricut App
Every time you open your app for the first time, you will be in the home interface. From this view, you can choose to make a ready-to-cut project or create a new one.
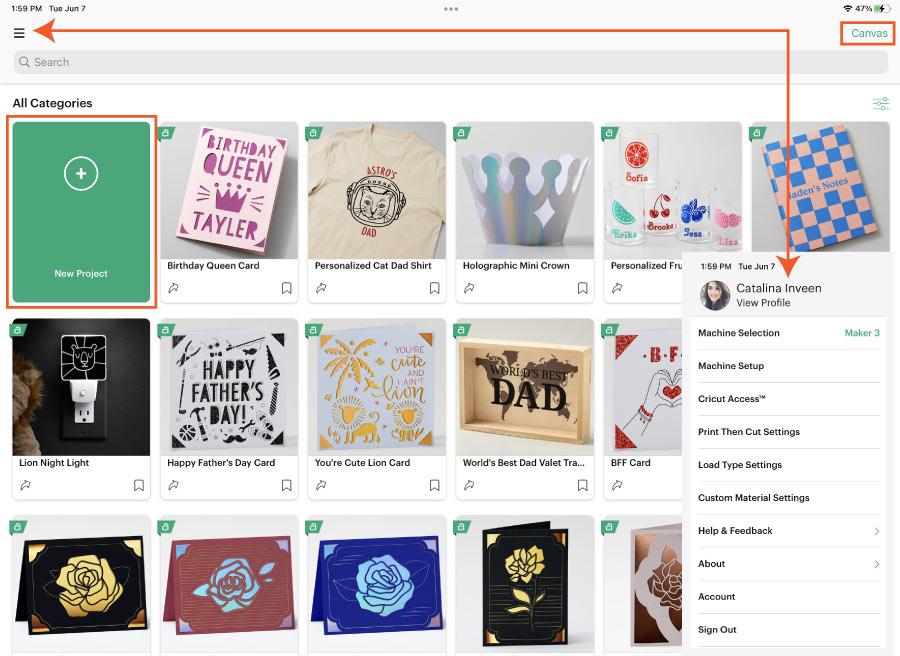
One essential thing about this menu is the “Machine Selection.”
Before designing, select the Cricut you have (Maker, Explore, or Joy).
You see, the Maker machines have options that are only available to that particular machine. So, if you have a Maker and you are designing with the Explore, you won’t be able to activate the tools for the Maker.
You can also set up your machine from this menu, and if you plan on using the “Print Then Cut” tool, you can calibrate your device, so everything goes smoothly.
There are other options here that I recommend you to look at. I won’t go into detail about them because I want to focus on the designing aspect of the app.
When you tap on “New Project” – the green square – you will be on the CANVAS; this is the area where we will put most of our efforts into learning.
I believe the best way to learn and master Cricut Design Space is from the beginning! When you have a clear concept of what every icon and panel is for, you can truly dig in and start exploring further and further.
Sometimes we are quick to jump from project to project – Hey, That’s ok too! BTDT – But knowing your work area will help you take your creativity to a new level.
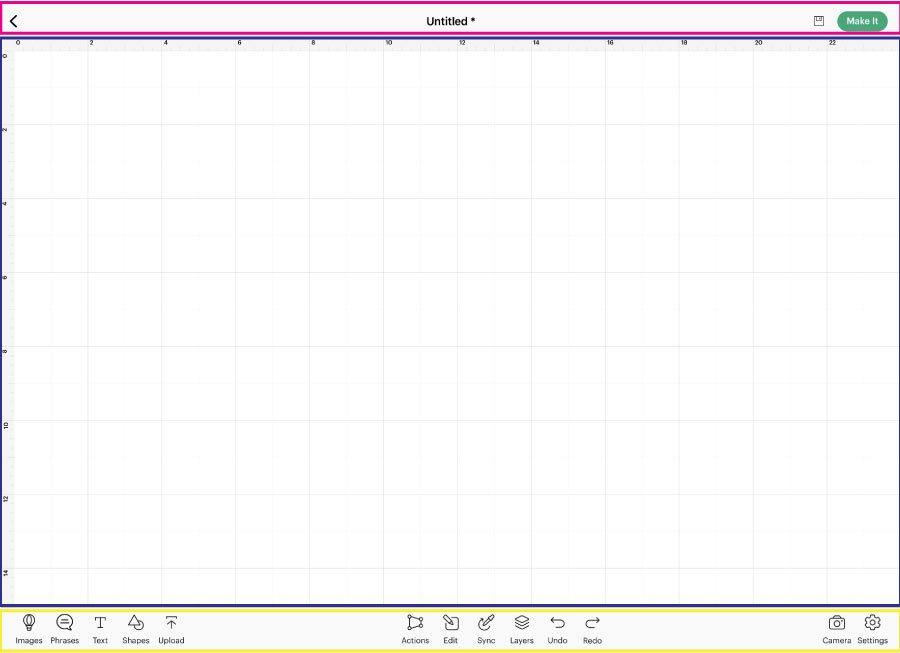
I have divided the design area into three sections to make this easy. Top panel (pink), Canvas Area (navy blue), and Bottom Panel (yellow)
Are you ready to tackle each panel/section and see what happens when you tap any available options?
Top Panel
This panel allows you to navigate from the Canvas to your profile and projects, and it also allows you to expand the Canvas Space to the max.
Let’s see how every icon works.

a. Go Back to the Home Interface

Tap here if you want to go to the home interface. If your app is open in the background, and you open it, you will land on the last project you were working on. The “go back” icon will allow you to open a new project.
b. Save

This option will activate after you’ve placed one element on the canvas. I recommend you save your project as you go because, even if you are working from your device and the cloud, you can run out of battery, your app can crash, and if that happens, your hard work goes with it!
c. Make it
Tap on “Make it” when you’re done designing and want to cut your project. When you send your project to your machine, you will be prompted to choose how to load your materials; the amount of options depends on the Cricut you own.
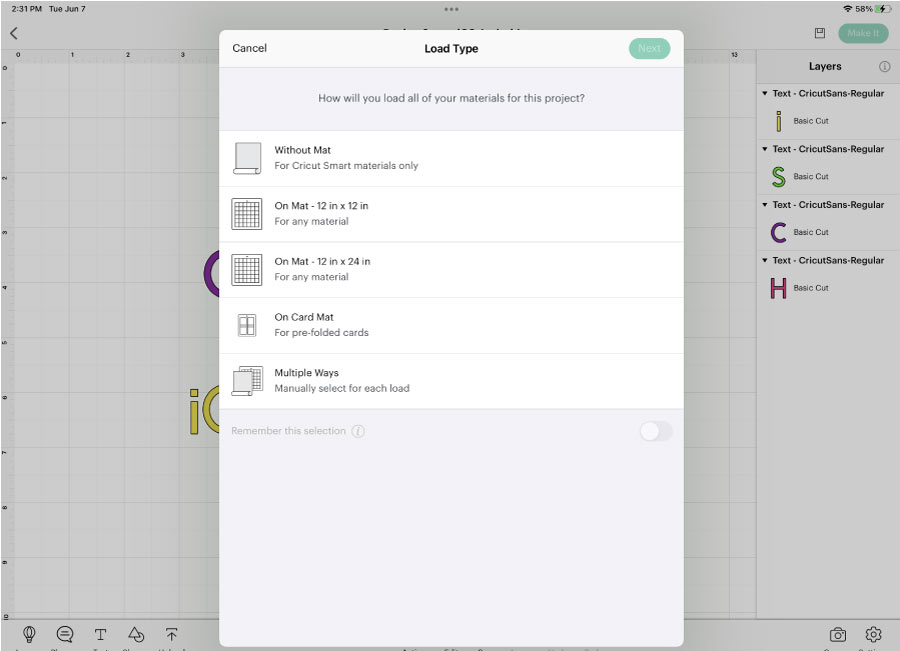
Below, there’s a screenshot of what you would see (it may change depending on how you want to load your material). Projects will be divided by color.
Before selecting your materials, you can rearrange the cutting order, increase the project copies and turn on the mirror setting for working with iron-on or other materials that require it.
You can also change the load type again if you change your mind.
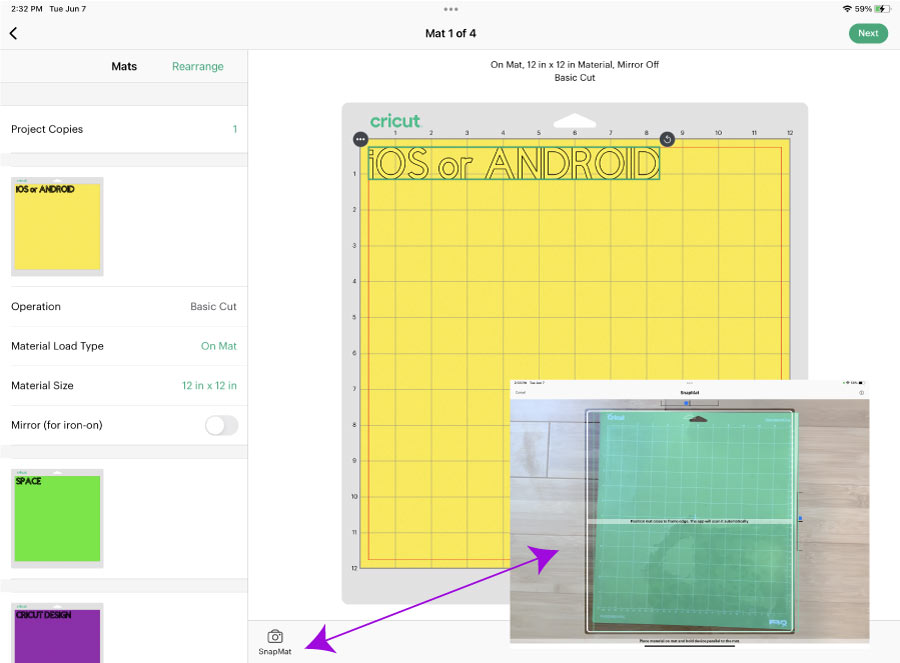
At the bottom, there’s a little icon called SnapMat, a tool that allows you to visualize and then choose where to cut your designs precisely.
When you tap on this icon, you’re supposed to take a photo of your mat (with the material you want to use already in place), then you can move your design where you want it to be.
Important: When using a small screen like a phone or iPad mini, tap on the upper-right mat icon to display the mats, project copies, etc.
When you are ready to cut, tap on continue to choose your materials and see the specific blade and other accessories you need.
Canvas Area
The canvas is where all of the magic happens! You can play with your designs, get creative, and touch things before cutting them.
a. Measurements
The canvas area is divided by a grid, and every little square you see on the grid helps you visualize the cutting mat.
You can change the measurements from inches to cm and turn the grid on and off when you tap on the “Settings” icon on the bottom panel of the app.
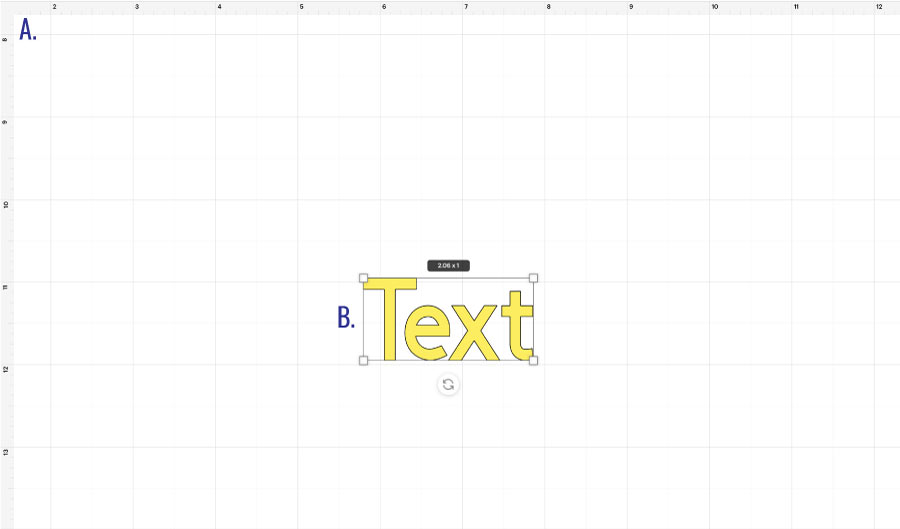
b. selection
Anytime you select one or more layers, the selection is grey, and you can modify its size from all four corners when you’re zoomed in enough.
Note: Depending on the app version you have installed, you may be able to perform different actions like deleting the layer, unlocking the proportions, resizing, 3d perspective, etc.
Bottom Panel
The bottom panel may feel like the most challenging one because pretty much everything is done from here.
On the desktop software, all options are divided into three panels; but on the app, they are all hanging out together at the bottom, and, while you get used to it, you might get frustrated trying to find the option you want.
Every time you tap on one of the options, the icon itself will turn green, and the options of that tool will either take you to another window or slide open another menu with more options.
Note: depending on your device’s size, you need to swipe left and right to see all icons.
You can only use one option at a time, except with the “layers” icon; this one can be active at all times. However, the layers panel can become deactivated on your iPhone very often.
Note: I noticed that on Android, you couldn’t have layers and other icons activated.
The bottom panel is grey and has 13 essential menus that allow you to edit your project.

| a. Image | g. Edit |
| b. Phrases | h. Sync |
| c. text | i. Layers |
| d. Shapes | j. Undo |
| e. Upload | k. Redo |
| f. Actions | l. Camera |
| m. Settings |
This app is very robust and has most of the things that the Desktop version has.
Important: something fundamental on this panel; unless you have Cricut Access, images, ready-to-cut projects, and Cricut fonts cost money. If you use them, you will have to pay before cutting your project.
If you still have doubts about Cricut Access. Do yourself a favor and read this ultimate guide I put together for you to find out whether you need it or not. It’s seriously a lifesaver.
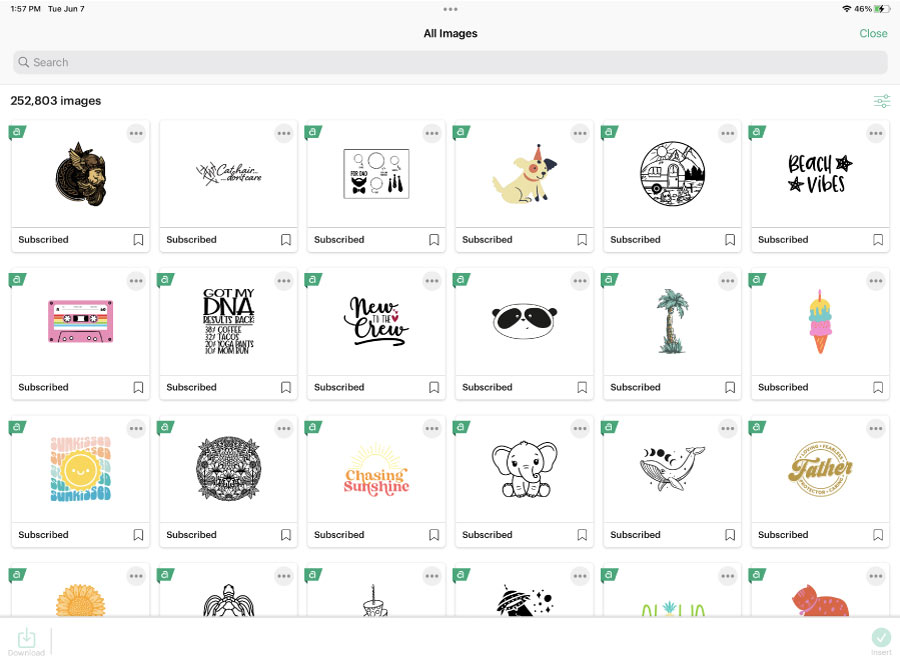
a. Add Image
Images are perfect when you are putting together your projects; with them, you can add an extra touch and personality to your crafts.
Cricut has terrific filters, you can type a keyword on the search bar, or if you tap on the upper-right corner, you search by categories, free images, operation types, etc.
I suggest you play with these filters, so you find images more efficiently.
You need the internet to find an image, but (for iOS users) you can download it and use it later on for an offline project.
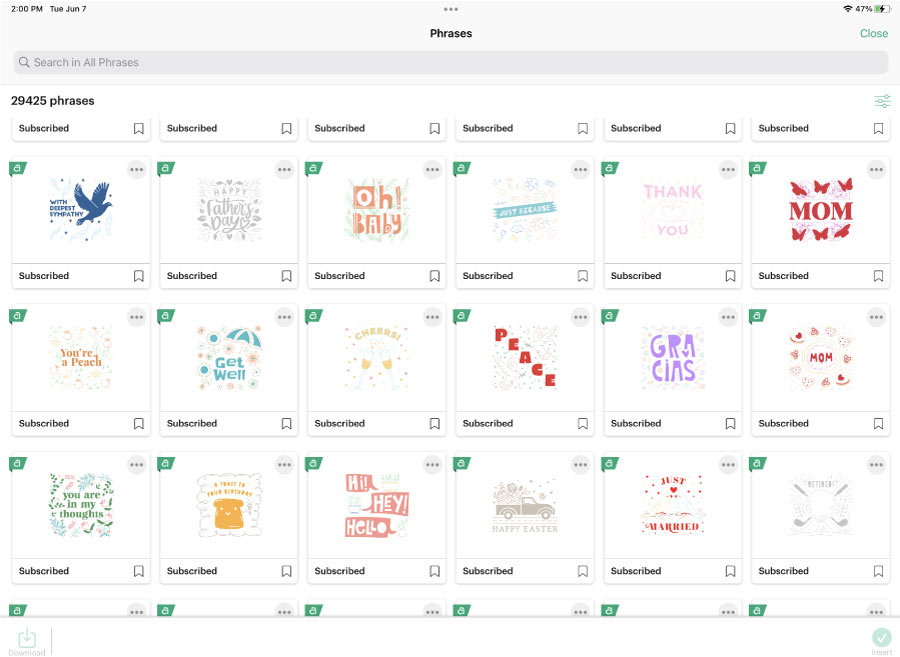
b. Phrases
If you just want images with text or find quotes or sentiments to go on your project, tap on “Phrases.”
This tool is very similar to “Images” and, in my opinion, a little redundant.
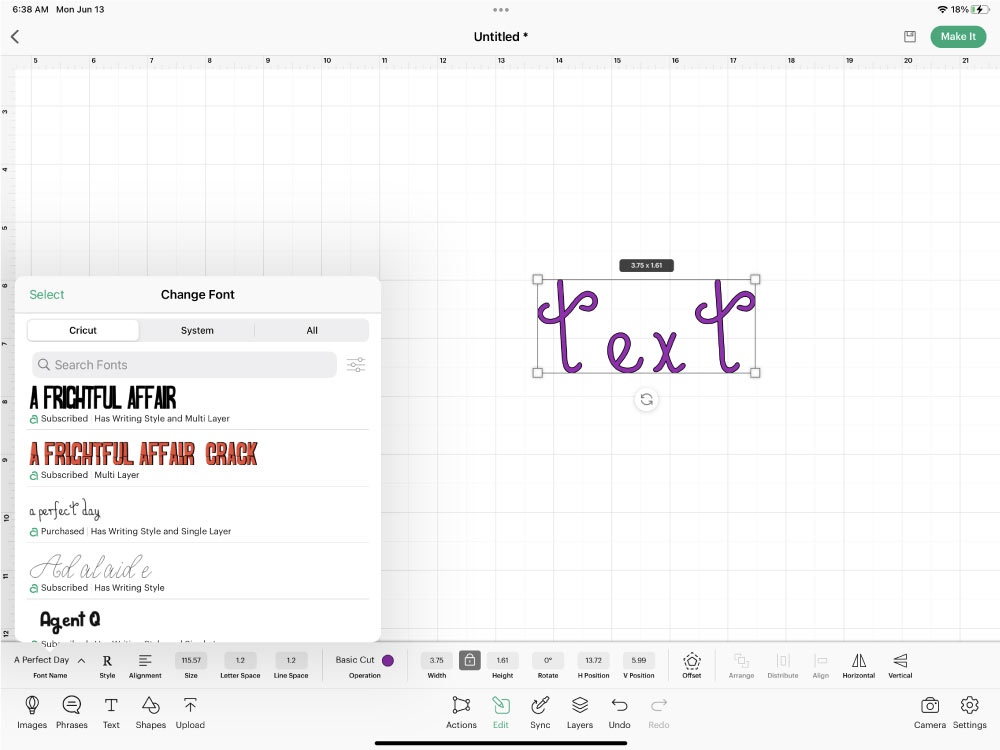
c. Add text
Tap on “Text” anytime you want to add text to the canvas.
After you tap, you will be prompted to choose the font you want to work with; then, a little box will appear on the canvas area for you to type in your text.
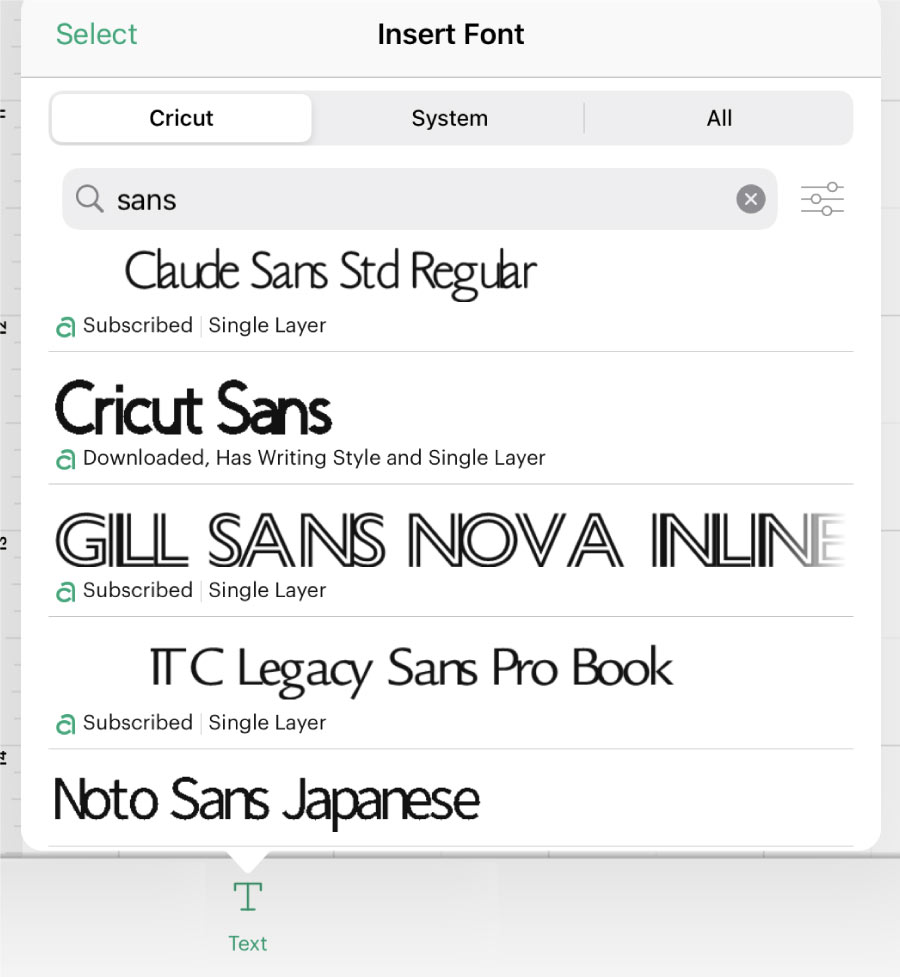
I noticed on “Android” you can text right away, and you’re not prompted to select a font first.
d. Add Shapes
Being able to use shapes is essential. You can create simple, less complicated, but still beautiful projects with them.

There’re nine shapes you can choose from:
- Square
- Triangle
- Pentagon
- Hexagon
- Star
- Octagon
- Heart
The first option is not a shape but a fantastic tool called “Line.”
You can change the operation of this line and set it to “Score,” “Engrave,” etc., if you want to make boxes cards, etc.

Important: Depending on the app version, the line will be a “Score Line.”
e. Upload
Cricut allows you to upload files and images you want to use on your projects. When you tap on “Upload,” you will have the opportunity to choose the location of your image or even take a photo.
The internet is filled with files for Cricut; tons of bloggers create projects for free. I am one of them.
If you have no idea where to find images or cut files, I have a growing library that you can access when you subscribe to my newsletter and become a daydreamer!
Note: All the uploads you see below are inside my great library! Check out a preview here, or get access right here.

e. Actions
The Actions subpanel is a very meaty one! From here, you can change your design into a whole new one.
Some of the tools here might confuse you initially, but don’t knock them until you’ve tried them!
Let’s see an overview.

Delete

This option will delete any selected elements on the canvas or layers panel.
On some app versions, this is the only way to delete a layer before you can delete a layer from the selection on the canvas.
Group – Ungroup

Group: tap here to group layers. This setting is handy when you have different layers that make up a complex design.
Let’s say you are working on an elephant. Most likely (and if this is an SVG or cut file), the elephant will be composed of different layers (the body, eyes, legs, trunk, etc.). If you want to incorporate different shapes or text, most likely is that you will be moving your elephant across the canvas area a lot.
Therefore, by grouping all the elephant layers, you can ensure that everything stays organized and nothing will get out of place when you move them around the canvas.
Ungroup: This option will ungroup any grouped layers you select on the canvas area or layers panel. Use this option if you need to edit (size, type of font, etc.) a particular element or layer from the group.
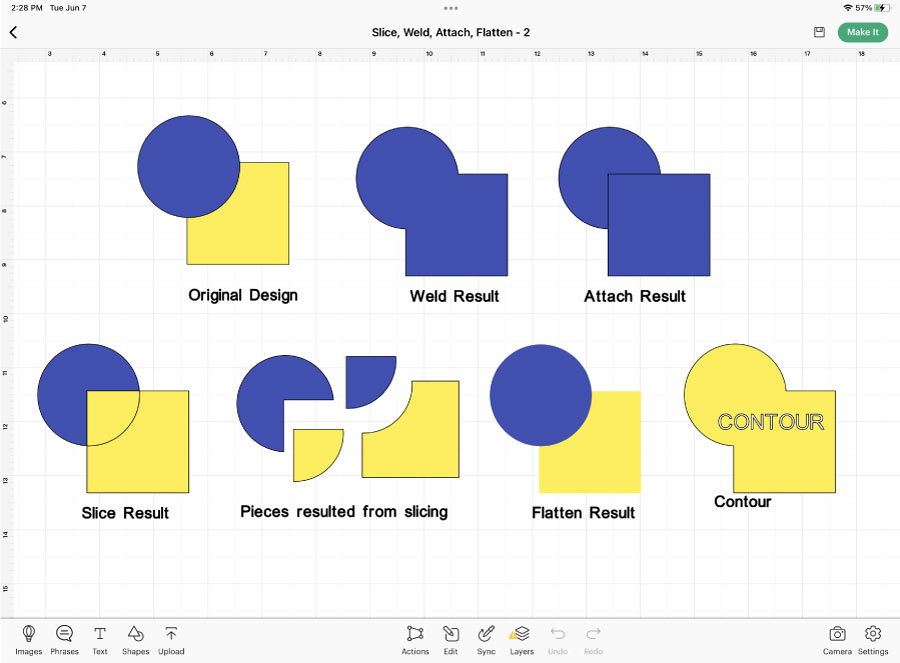
Check out this graphic to understand Weld, Attach, Slice, Flatten, and Contour.
Attach – Detach

Attach works like grouping layers, but it’s more powerful.
When selecting both shapes and tapping on “Attach,” you can see the layers just changed color (determined by the layer on the back). However, the shapes are connected, and this attachment will remain in place when I cut my project.
If you desire to separate your layers, select them again and tap on “Detach.”
Weld
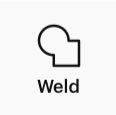
The welding tool allows you to combine two or more shapes in one.
When I selected both shapes and tapped on “Weld,” a new shape was created; the layer on the back determines the color; that’s why the new shape is blue.
Slice
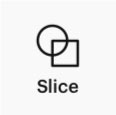
The “Slice” tool is perfect for cutting out shapes, text, and other elements, from different designs.
When I selected both shapes and tapped on “Slice,” you can see that the original file got all cut up; to show you the outcome, I copied and pasted the “Slice Result” and then separated all the pieces.
Learn more about the slice tool
Flatten – Unflatten
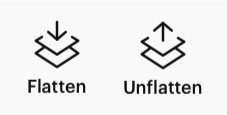
This setting is extra support for the “Print Then Cut” tool.
When you have “Print Then Cut” activated, that change applies to just one layer at a time. But what if you wish to do it to multiple shapes at the time?
When you are done with your design, select the layers you want to print together as a whole, and then tap on “Flatten.”
In this case, the design went from “Basic Cut” to “Print then Cut,” and that’s why it isn’t showing a black edge anymore.
Learn more about “Flatten” and “Print then Cut.
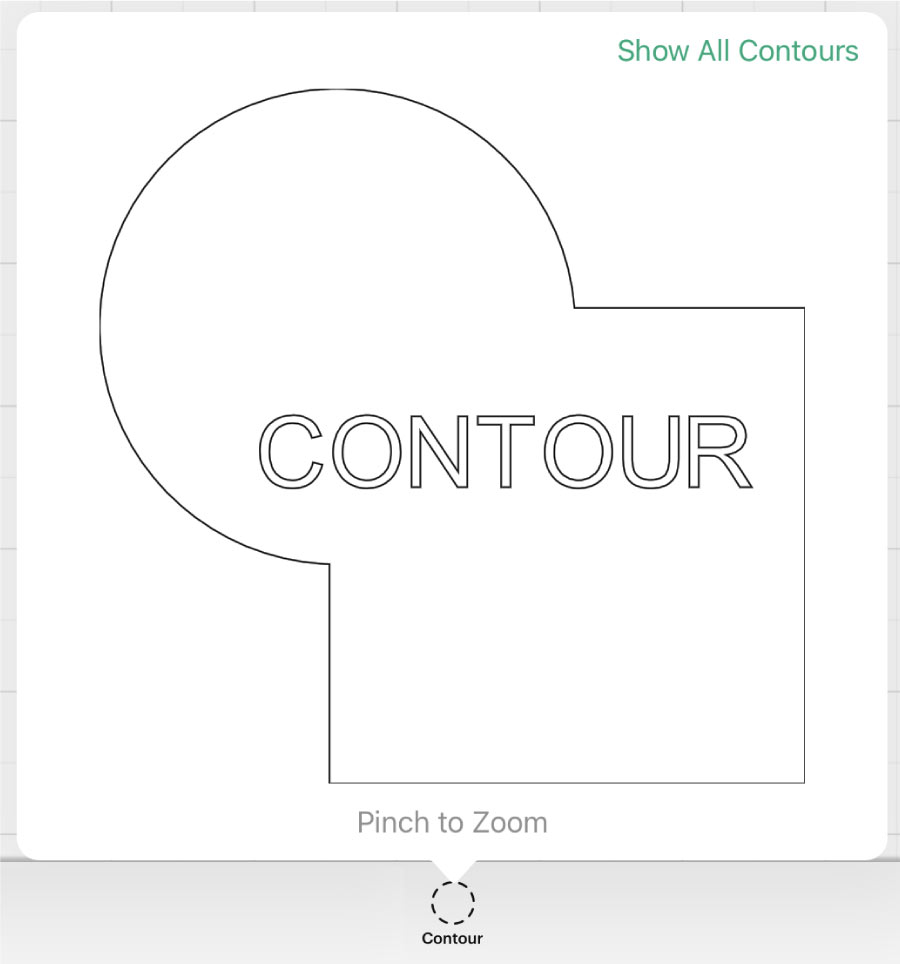
Hide Contour
The Contour tool allows you to hide unwanted pieces of a design, and it will only be activated when a shape or design has elements that can be left out.
When you tap on contour, a new window will pop up with all of the pieces on the design you can hide on the left.
I combined the original design in one shape with the weld tool for this example. Then I typed the word contour and sliced it against the new shape; then, I hid the inner circles of the two letters O and the inner part of the letter R.
Duplicate
This option will replicate any layers or designs you have selected on the layers panel or canvas.
From a desktop, you can use Ctrl + C and Ctrl + V. But from the app, the only way to copy-paste is from the “Duplicate” icon.
Advance
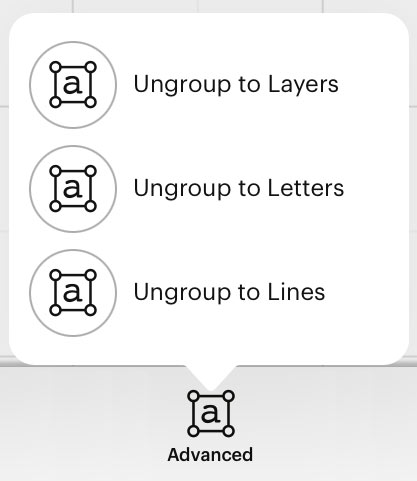
This option is only available for text layers. And in my opinion, this tool should go on the “Edit” menu.
Don’t be intimidated by the name of this tool. Once you learn what all options are for, you will see they are not that hard to use.
– Ungroup to Layers: This one is the trickiest of these options. This tool is only available for multi-layer fonts; these kinds of fonts are only available for individual purchases or Cricut Access.
A multi-layer font has more than one layer; these fonts are great if you want to have some shadow or color around them.
What if you like a multi-layer font and don’t want the added layer? Select your text and then tap on ungroup to layers to separate every layer.
– Ungroup to Letters: This option will allow you to separate each letter into a single layer (I will explain more about layers later on); use this if you plan to modify every character.
– Ungroup to Lines: This option is exceptional, allowing you to separate a paragraph on individual lines. Type your paragraph, tap on ungroup to lines, and there you have it, a separate line you can now modify.
Learn how to Edit Text in Cricut Design Space
f. Edit Menu
The “Edit” menu allows you to modify your text even further (if the text is selected on the layers panel). You can also align, arrange, and organize all of the elements you have on the canvas area.
Let’s see all the things you can accomplish when you tap this icon.

Font
When you tap on this option, you can select any font you want to use for your projects. You can filter them and search for them at the top of the small window.
Remember that if you have Cricut Access, you can use any fonts with a little green A on the font description.
However, if you don’t have Cricut access, Make sure you use your system’s fonts; otherwise, you will be charged when you send your project to cut.
Style
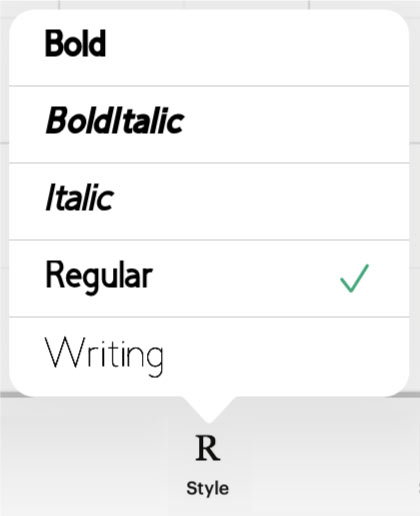
Once you pick your font, you can change its style.
Some of the options you have:
– Regular: this is the default setting, and it won’t change the appearance of your font.
– Bold: it will make the font thicker.
– Italic: it will tilt the font to the right.
– Bold italic will make the font thicker and tilt to the right.
– Writing: font style design to use pens, foil tips, etc. It will make your project look like you wrote it.
Note: not all fonts have the same options.
Alignment
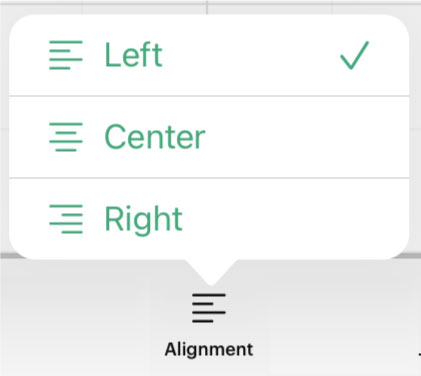
This alignment is exclusive to text. It’s excellent for you to organize paragraphs and lines of text.
These are the options you have:
– Left: Align a paragraph to the left
– Center: Align a paragraph to the center
– Right: Align a paragraph to the right.
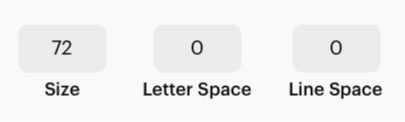
Size, Letter, and Line Space
I can’t express enough how helpful these options are.
Font Size: You can change it manually from here. I usually just adjust the size of my fonts from the canvas area.
Letter Space: Some fonts have a considerable gap between each letter. This option will allow you to reduce the space between letters very quickly. It’s seriously a game-changer.
Line Space: this option will tackle the space between lines in a paragraph; this is very useful because sometimes I am forced to create a single line of text because I am not happy with the spacing between lines.
Operation
This option will tell your machine what tools and blades you will use.
Remember that you will have different options depending on your machine (Maker, Explore, or Joy).
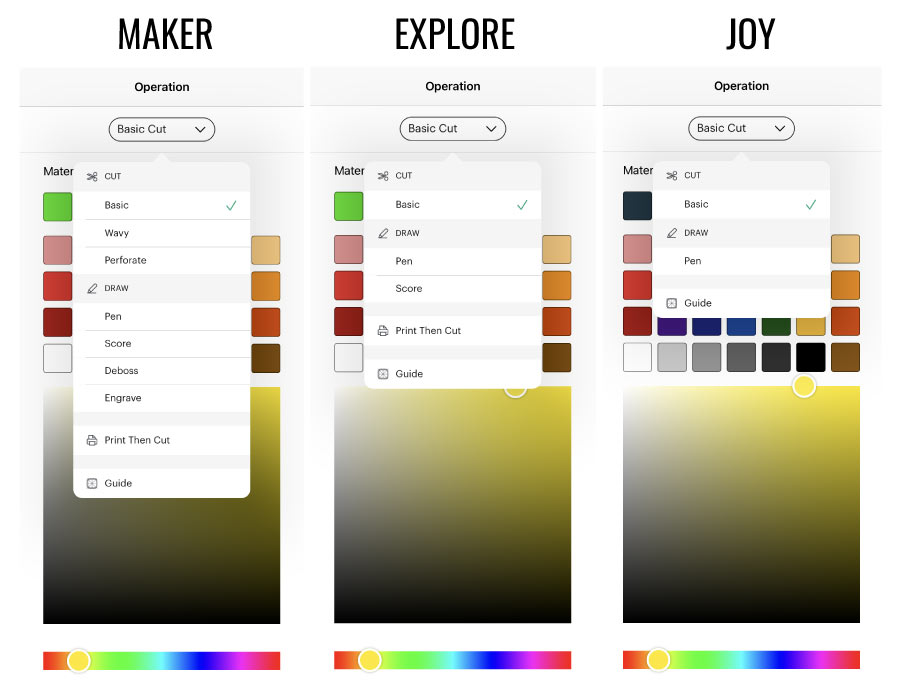
The app allows you to use nine operations (basic cut, wavy, perforate, pen, score, deboss, engrave, print then cut, and guide).
These are the options you have per type of machine:
- Joy: Basic cut, drawing with pens, guide.
- Explore: basic cut, draw (pen and score), print then cut, guide
- Maker: basic cut, wavy, perforate, draw (pen, score, deboss, engrave), print then cut, guide.
Note: You can’t foil from the Cricut app. If you’re into foiling, you must use a desktop.
Here is a more in-depth explanation of each tool.
Basic Cut
Unless you uploaded a JPEG or PNG image to the Canvas, “Basic Cut” is the default operation for all your canvas elements; when you tap “Make it,” your machine will cut those designs.
With the “Basic Cut” option selected, you can change the color of each layer to represent the materials you will use when you cut your projects.
If you need help learning about the Cricut Blades and their differences, I recommend this ultimate guide and tutorial. It’s the best on the web, just like this tutorial ????
Cut – Wave
This tool will create wavy effects on your final cuts instead of cutting on straight lines like the rotary or fine-point blade.
Getting curved lines in Design Space is complicated, so this tool will be useful if you like these effects.
Cut – Perf
The Perforation Blade is a tool that allows you to cut your materials in small, uniform lines to create perfect, crisp tear effects, such as those in raffle tickets, coupons, tear-out cards, etc.
Learn how to use the perforation blade
Draw – Pen
If you want to write on your designs, you can do it with your Cricut!
When you assign this operation, you will be prompted to choose any of the Cricut Pens you have (You need specific pens unless you have a 3rd party adapter). When you select a particular design, the layers on the canvas area will be outlined with the pen color you picked.
With “Pen,” when tapping “Make it,” your Cricut will write or draw instead of cutting.
Note: This option DOESN’T color your designs.
Draw – Score
The Score tool is a more potent version of the scoring line on the left panel. When you assign this attribute to a layer, all layers appear scored or dashed.
This time, when you tap on Make it. Your Cricut won’t cut, but it will score your materials.
For these projects, you will need the scoring stylus or wheel. However, the wheel only works with the Cricut Maker.
If you have doubts about what materials you need, I suggest reading this article. It’s the ultimate guide for learning what accessories and materials you need.
Draw – Engrave
It allows you to engrave different types of materials. For instance, you can create monograms on aluminum sheets or anodized aluminum to reveal the silver beneath.
Draw – Deboss
This tip will push the material in and create beautiful and detailed designs. The debossing tip will allow you to customize your designs to a new level.
Imagine debossing a beautiful gift box with flowers, hearts, stars, etc.!
Print Then Cut
“Print Then Cut” is one of the best features Cricut has because it allows you to print your designs and then cut them; this is fabulous, and honestly, it’s what motivated me to get a Cricut in the first place.
I design tons of printables for kiddos and adults, and for taking photos – for my posts – I had to cut every little thing!
Ahhhgggg, I seriously wanted to cry every time. I am a lefty, and scissors make my hands hurt, so the Cricut is a lifesaver for me.
Guide
It’s a feature that allows you to add elements to the canvas as a reference on your project, but that won’t be part of your project when you send it to cut.
Size
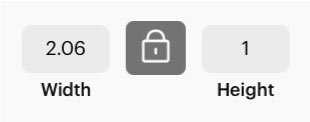
Everything you create or type in Cricut Design Space has a size. You can modify the size of an element from the canvas area. However, if you need an item to have an exact measurement, this option allows you to do so.
The little lock is essential; by tapping on it, you can tell the program that you don’t want to keep the same proportions. When you increase or reduce the size of an image, the proportions are always locked.
Rotate
Like “Size,” rotating an element is quick and easy from the canvas area. However, some designs need to be turned at a specific angle.
If that’s the case for you, I recommend using this function. Otherwise, you will spend much time fighting to get an element angled the way you want it to be.
Position
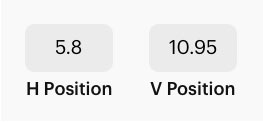
This tool shows you where your items are on the canvas area when you tap on a specific layer.
You can move your elements around by specifying where you want them on the canvas. It’s handy, but it’s a more advanced tool.
I don’t use it that much because I can get around better with the alignment mentioned below.
Flip

If you need to reflect on any of your designs, this is the way to do it.
There are two options:
– Flip Horizontal: This will reflect your image or design horizontally. It’s sort of like a mirror; It’s handy when trying to create left and right designs. Example: You are building some wings and already have the left side; with Flip, you can copy and paste the left wing, and voila! Now you have both (left and right) wings!
– Flip Vertical: This will flip your designs vertically. Kind of like you would see your reflection on the water. This option would be great if you want to create a shadow effect.
Arrange
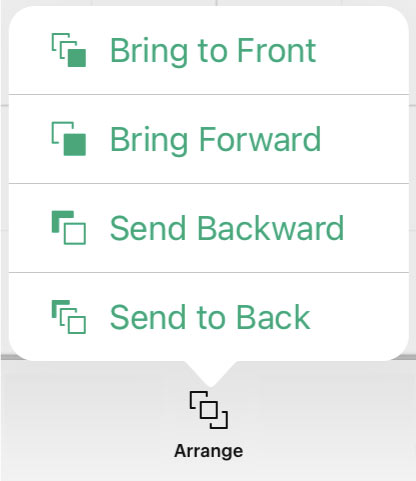
When you work with multiple images, text, and designs, the new creations you add to the canvas will always be in front of everything. However, some of your design elements need to be back or front.
With the arrange option, you can organize the elements very easily.
Something great about this function is that the program will know what item is on the front or back, and when you select it, Design Space will activate the available options for that particular element.
Cool right?
These are the options you get:
– Bring to front: This option will move the selected element to the front.
– Bring Forward: This option will move the element one step forward. Typically, you would use this option when you have four or more items you need to organize.
– Send Backward: This option will move the selected item one step back. If you have a three-element design, It will be like the cheese in a cheese sandwich.
– Send to back: This will move the selected element to the back.
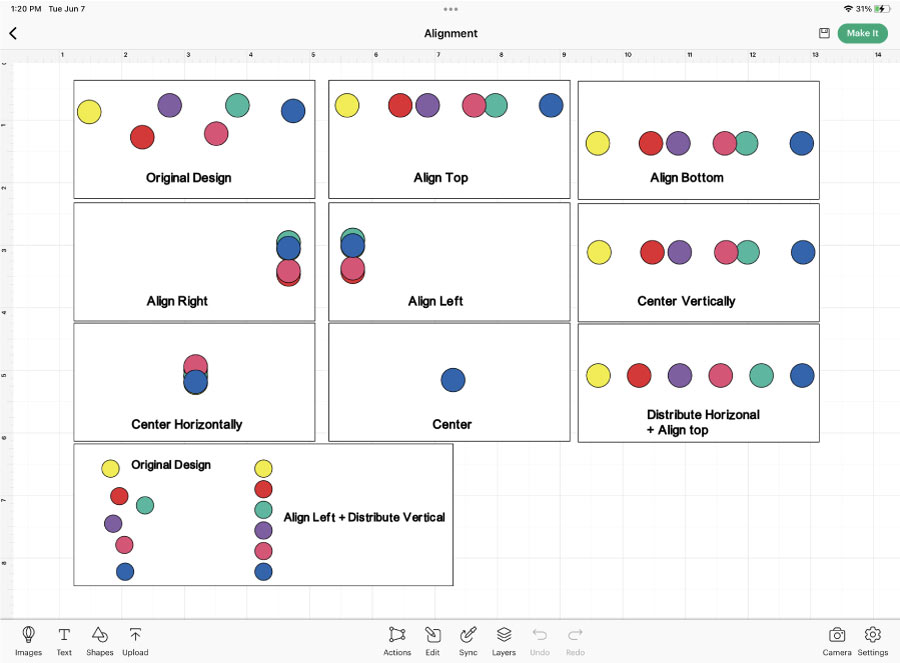
Align
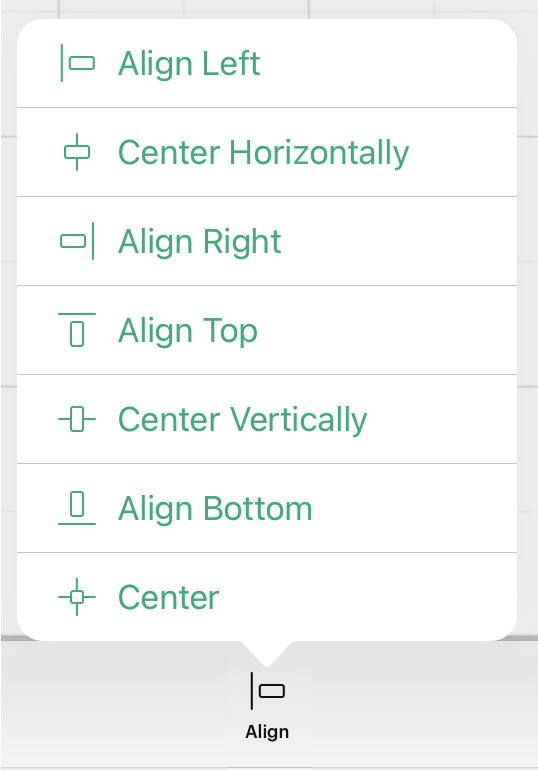
This setting allows you to align all elements, and it’s activated when selecting two or more pieces.
– Align Left: All elements will be aligned to the left when using this setting. The furthest element to the left will dictate where all other details will move towards.
– Center Horizontal: This option will align your elements horizontally and entirely center text and images.
Align Right: When using this setting, all of your elements will be aligned to the right. The furthest element to the right will dictate where all other parts will move.
– Align Top: This option will align all your selected designs to the top. The furthest element to the top will dictate where all other elements move.
– Center Vertically: This option will align your elements vertically. It’s handy when working with columns, and you want them organized and aligned.
– Align Bottom: This option will align all your selected designs to the bottom. The furthest element to the bottom will dictate where all other details move.
– Center: This option is a very cool one. When you tap on “center,” you are centering, vertically and horizontally, one design against another; this is particularly useful when you want to center text with a shape like a square or a star.
Distribute
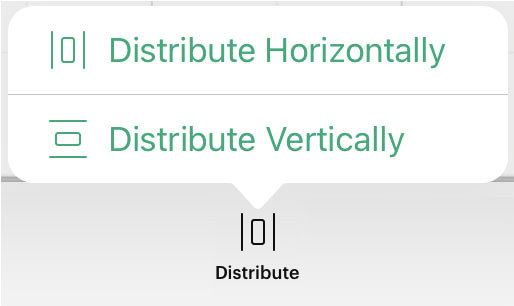
If you want the same spacing between elements, it’s time-consuming to do it independently, and it’s not 100% right. The distribute button will help you out with that, and to be activated, you must have at least three elements selected.
– Distribute Horizontally: This button will distribute the elements horizontally. The furthest left and right designs will determine the distribution length, and the items in the center will be distributed between the most distant left and right elements.
– Distribute Vertically: This button will distribute the elements vertically. The furthest top and bottom designs will determine the distribution length; the items in the center will be distributed between the most distant top and bottom elements.
h. Sync
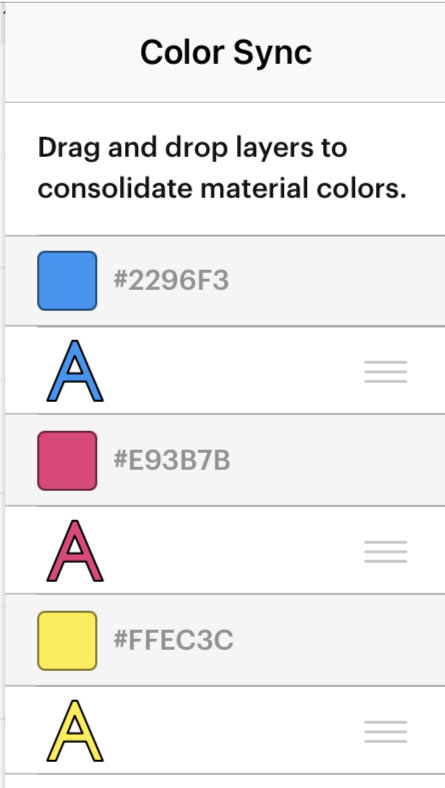
Every color on your canvas area represents a different material color. If your design has multiple shades of yellows or blues, are you sure you need them?
If you only need one shade of yellow, like this example. Just tap and drag the tone you want to get rid of and drop it on the one you want to keep.
Learn how colors work in Cricut Design Space
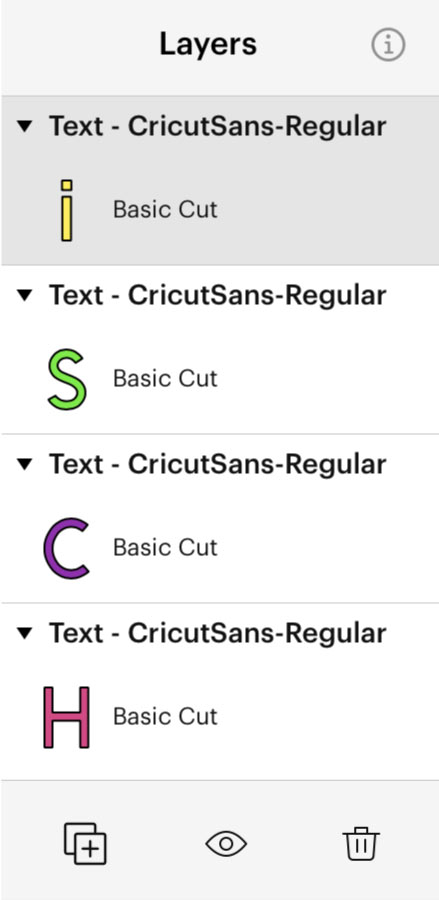
i. Layers
When you tap the layers icon, a panel will slide open on the right. From here, you can see the operation of each layer.
Note: As far as I tested, for Android users, the layers panel will pop open and has to be closed when wanting to use other tools.
To set you up for success, and before I explain to you what every icon is all about on the Layers Panel, let me introduce what a layer is.
Layers represent every single element or design that is on the canvas area.
Think of it like clothing; when you get dressed, you have multiple layers that make up your outfit; depending on the day or time of year, your outfit can be simple or complex.
So, for a freezing day, your layers would be underwear, pants, shirt, jacket, socks, boots, gloves, etc. You would only have one layer for a day at the pool, a Swim Suit!
The same happens with a design; depending on the project’s complexity, you’ll have different types of layers that’ll make up your entire project.
For example, let’s pretend that you are designing a Christmas Card.
What would this card have?
Maybe a text that says Merry Christmas, a tree, the card itself, perhaps an envelope as well?
The point is that all the tiny designs and elements that are part of that project are layers.
Some layers can be modified; However, other layers, like JPEG and PNG images, can’t because of the file’s nature or the layer itself.
For instance, a text layer can be converted into other types of layers, but you’ll lose the ability to edit that text.
You will learn more about what you can or can’t do with layers as you go.
I hope that gave you a good idea of what a layer is! Now let’s learn what every icon is for on this right panel.
Visibility, Duplicate and Delete
These three options are located at the end of the layers panel, and depending on the layers you select, you can duplicate, hide, or delete.
Duplicate
This option will duplicate any selected layers or designs on the layers panel or canvas area.
Layer Visibility
The little eye at the end of the layers panel represents the visibility of a design on the canvas.
When you are unsure whether an element looks good on the canvas area, tap on the little eye instead of deleting it to hide that design.
Note: When you hide an element, the eye will have a cross mark.
Delete
This option will delete any selected elements on the canvas area or layers panel.
j & k. Undo – Redo
Sometimes while we work, we make mistakes. These little buttons are a great way to correct them.
Tap “Undo” when you create something you don’t like or make a mistake. Tap “Redo” when you accidentally delete something you didn’t want to delete or modify.
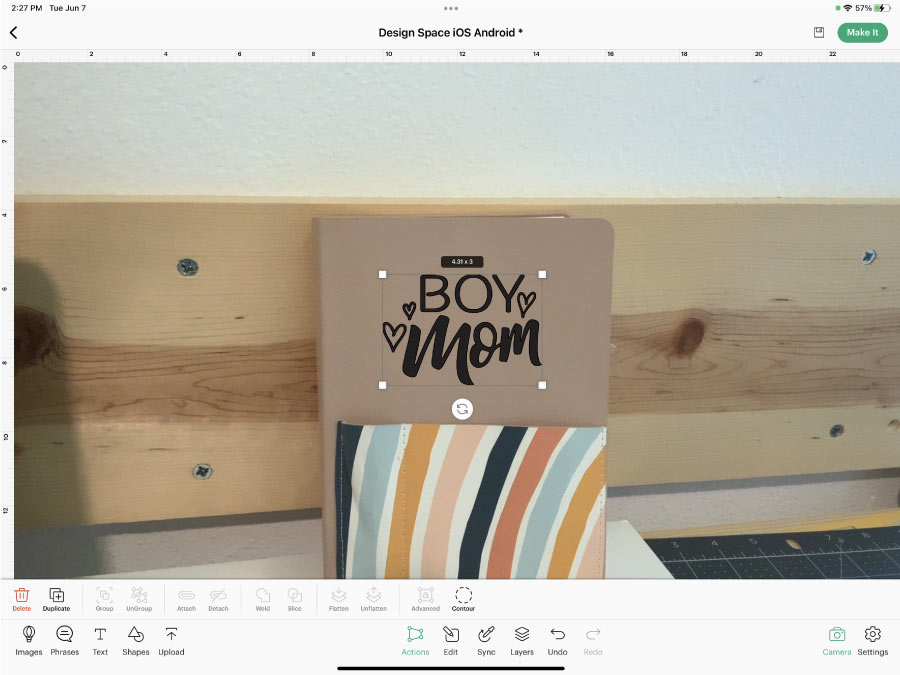
l. Camera
When you tap the “Camera” icon, you can see what your camera displays. NO, you can’t take a photo or use it for your design; this is mainly a visual aid.
For instance, if you are cutting a vinyl decal for a notebook, you can overlay it over the real thing before cutting it!
m. Settings
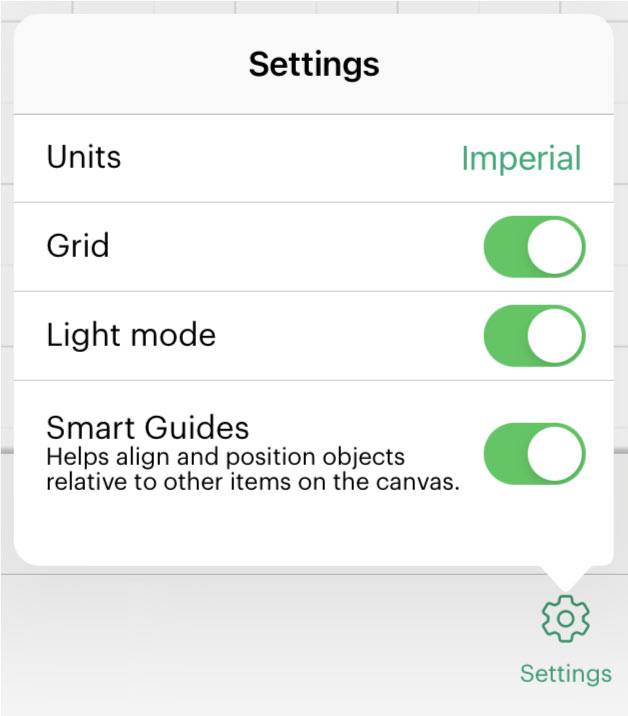
We are on the last icon! Can you believe it?
When you tap on “Settings,” you can choose whether you want to use metric or imperial units.
Also, you can turn it off if you prefer to work with a clean canvas – no grid whatsoever.
There’s also an option that allows you to work on a dark canvas. Although I always work on “Light mode.”
Last but not least, you have the Smart Guides setting; I leave them on all the time because they help you position and align new objects with those you already have on the canvas area.
Congratulations!
If you made it this far, you are no longer a beginner. Now, you know how to navigate and use your Cricut from your phone or iPad!
Share it!
Do you know it takes me over 25 hours to complete a single Cricut article? I know it’s wild, but I want to make sure you understand everything!
I would appreciate your support on Instagram , Pinterest , and YouTube as I try to grow my audience and continue producing great content!


Catalina, I discovered you on Pinterest and haven’t looked back although I still have a long way to go before mastering the Cricut Maker, your tutorials are very clear. Thank you so much for your time and patience I appreciate your work.
Thank you so much for this informative tutorial! I’m working on iPad Pro and when I’m on canvas and have already made my project I can’t figure out how to get a new blank page to start a new project. When I hit the + it just brings me back to my current or last project. Can you help me?
Check my how to open and edit projects in Design Space. I cover how to start a fresh project.
I need help! I have been designing on design space for awhile now so I am pretty familiar with some things. I have been creating on my iPad Pro in the design space app but for some reason, I do not have all the options available when trying to edit images. I cannot slice objects. It does not light up to even select. I’m so frustrated. My app is updated as well as my iPad. Any idea on how to get this to work?
Have you checked my slice tutorial?
Thank you so much for explaining everything! I have a question- I am working out of my ipad and I’m not finding where to find my saved projects. I know they are saved because I can access them from my desktop. Any idea why nothing shows up in the ipad, or where I need to look?
Thank you!!!
Check out my how to open and save projects in Design Space
I am new to the Cricuting world and I have made a few projects so far and am learning to navigate my way around design space however today I wanted to make a project using text but everything changed when I pressed the text box the font list not come onto the screen as it did before and the icons around the text box have disappeared and instead there are little white squares I eventually found the fonts by pressing the edit button but then when I started to type a word some of the letters jumped to the next line I don’t know how to rectify this can you please help
It must’ve been a glitch. Is this still happening to you?
Thank you so much for all your hard work to explain this! I did something to my design app and I don’t know what or how to undo it. For some reason when I enter in text I can only fit a few letters in a line. The rest of them start to stack underneath. So instead of saying Stephanie my project read “ Ste” with “pha” below and “now” below on the next line. I don’t know how to fix it and it wasn’t like this before.
Have you tried changing the font size? You can also type the text and increase the bounding box.
When I save my projects to on this ipad I get an explanation mark instead of the photo. Do you know why this happens? Also can you combine more than one project from my projects on my ipad.
I don’t know why that’s happening. No, you can’t combine projects because there’s not a copy/paste button. :/
Working with a certain pattern which downloads from iPad to canvas with out of proportion components and a huge grid of 8 inch squares. Can I readjust he grid? The main pattern is so tiny on the screen. Doesn’t happen on the desktop
You can zoom in with your fingers.
Can you change cut lines to score lines on an ipad? If yes how?
Yes, you can! Select the cut line and change the operation to “Score.”
Thank you so much for this tutorial the curtain finally lifted from design space. I truly appreciate all your time invested in this article.
I only have an iPad and can’t work out how to add offsets. I love your tutorials, very helpful.
Inserting texts into selected design does not seem to keep the same fonts, does this not work for customising downloaded designs?
The offset tool is on the “Edit” menu on the Cricut App.
This was the best article and info I have found. Thank you!
Do you know if the margins are different when using an iphone vs a desktop? I am trying to print a sheet of labels and I understand that the measurement restraints are 6.75 by 9.25, but it’s leaving like an inch and a half of unused sticker paper when I’m using my iphone but when I used a friends desktop there was only about 1/4 to 1/2 inch unused. Trying to get as many labels on one page as I can. Thank you in advance for your help.
Jessica
They should be the same!
Hello! I loved your tutorial and I feel like I can do this!!! I do have an issue I’m hoping you can help with. I download files from Etsy into the cloud then when I move them into the design space somehow I’m getting a duplicate of the image I’m bringing into cricut. Do you know what I’m doing wrong?
It may be the file itself. Not Design Space.
i am new i have a cricut maker 3 i am trying to get the cursive text letters to connect and its next to impossible on an ipad. what is the trick? we don’t have arrow buttons like you do on a desk top
the “Only kerning fonts” option is on desktop only. If you want to join fonts you need to ungroup and connect each layer manually then weld.
Hello, I have a question. Do you know how to change the background color of DS on the iPad? Im trying to make die cut stickers but I can’t see the outer white part w sticker because it blends into the background.
There’s no way to do it from the phone.
@Catalina, you can change it to “dark mode”, the back turns black instead of white.
Hi. How do you find the projects that you save on your iPad in design space. I have saved projects and I can’t find them. Some I have saved to the cloud and others my iPad and I real Have no clue how to find them, so I have to recreate in design space all over again. If you can help I would appreciate it. Thanks Arlishia
The info is in this tutorial.
I am a beginner at using my Cricut. I will mainly be using it in my scrapbook layouts. Sometimes the background paper on the page is not what I want to show through the image. I downloaded an image that has multiple layers. I want to cut a layer that is the complete project with no details in the center so that I can assemble the image on top of it and any open area will be the color of the blank layer on the back. I can’t figure out how to do this. Can you help? Thanks
PS – I am learning a lot from your tutorials!
I am glad you’re learning! Check out my how-to slice, and how to contour in Design Space tutorials.
Thank you for the most helpful tutorial I have found.
I have designed my project and ready to go in “make it” but then I get a popup that says select an accessory – with several blank lines and a cancel button. I have tried several time and I am “stuck” Thanks for the help.
Try reconnecting your machine via Bluetooth. Sometimes it gets disconnected.
Your apps. Explain iPad better than some YouTube I have watched, those lady’s just talk without saying anything. I was more confused after watching them. Thank you. Do you have more apps. To tell you to step by step on iron-on vinyl and vinyl, I catch on something’s, but I don’t really understand layers. Hope you can help. Thank you.
Hi! You’re welcome. I do have an awesome tutorial on iron-on vs adhesive vinyl.
My alignment icon doesn’t appear when I try to align my project. I draw the square around the words and pics and go to edit. And the alignment is way to the left and doesn’t appear on screen to use it
make sure you’re selecting all the layers you want to align. It will be grey out if nothing is selected.
So so helpful thank you
you are a cricut angel to us beginners
That’s so sweet! Thank you 🙂
This seems to be a great tutorial except this is what popped up when i was searching to find out how to adjust the cutting pressure and there are no instructions on that particular problem. Hopefully I can find it elsewhere but I’m going to bookmark this for reference.
You have to do that from where you choose your materials.
So helpful
This is all so helpful, thank you. I need more help, on my iPhone and my iPad I don’t have the drop down menu and can’t find my saved projects. Do I need to be a paying member?
Check out my Open and Save Projects in Cricut Design Space tutorial.
Thank you for this very helpful tutorial. I only use my iphone/ipad and I can’t seem to be able to change texts in free ‘make it now’ projects even if I choose ‘customize’. What am I missing?
Thanks.
Sometimes the text is not really a text but a shape or image, therefore you can customize it. You would need to delete that text and type in your customization.
Are templates (specifically T-shirt) available on the app?
Templates are only available on Desktop/Laptops.
Cricut is saying that you can only Print and Cut using a Windows desktop or MC OS. But in this article, I want to confirm, you can send your print and cut file from your design space app using your ipad to your connected printer then put it back to cricut for cutting, is that correct?
You can send your design from your phone or iPad to your printer and then cut.
I can’t find the answer to this question anywhere….I’d like to be able to copy text from, say, the Iphone notes app and paste into the text box on the cricut app instead of typing.
You can do this. Copy your text from the notes, go to the design space app and select the text icon, then select the font you want to choose, then tap on the text box to make the “Paste” option appear.
I had an old Cricut and just recently upgraded to Explorer Air 2. I’ve done some basic cutting with it but still have a lot to learn. Your instructions are very helpful. I’m looking forward to using it more, while referring to your instructions. THANK YOU!!!
You’re very welcome! I am glad I am able to help!
First off, thank you so much for your help. I have uploaded an image into design space on my iPad. I want to cut several areas. First layer is black. Second layer is red and I need a small portion off the bottom and to cut two holes out of that. I cannot get it to give me functions to cut this correctly. I’m sure it’s me being I am just beginning to try and learn my cricut maker. Thank you in advance for your help. I am feeling so frustrated
Check out my how-to slice tutorial. I think you’ll find the answer there.
What does it mean when it says “this project has images that cannot be sent to mat. To resolve,select ok and adjust affected layers.” And how do I make it stop doing that or fix it so I can. I’m trying to make iron ons and stickers.
Check out the size of your project. You can see if a layer is too big when a small warning triangle appears on the layers panel.
I’m brand new and your instructions have been saving my life! I was wondering when I upload a new image, sometimes it won’t let me separate the different parts of the image. Does that mean I uploaded the wrong type of image? Or why won’t it let me click on conture?
Thanks!
You can’t manipulate an image that is JPEG or PNG. For you to be able to move things around you need an SVG file. I hope this makes sense 🙂
I downloaded fonts on my iPad and uploaded them to the Cricut Design app. I also have the app on my phone. When I went to work on the app in my phone the new fonts were not there. How can I get the Fonts on my phone? I was hoping once there are in the uploaded to the design app I could access them on any device,
You need to install the on your phone too. Fonts are installed per device, even if you share all your iCloud files, etc.
Am working from a iPadPro.
I have created a four part silk screen stencil from art found inside Access. I want to share it with a fellow member.
I pressed the share space option and am told to save to Cloud first, but there are no instructions or buttons to choose. I’m stuck…
Thank you for helping me, Anita
Read my Open, Save & Edit projects in Design Space! I hope it helps 🙂
How can I make a project with multiple mats?
Yes, you can!
Hi I created a design on my cell phone and saved to cloud. When I tried to retrieve saved project on my iPad I don’t see those 3 lines next to my name on home screen that drops down the menu and shows projects. I even checked on my phone and I don’t have those 3 bars either. I tried to restart both apps and even tried uninstalling and reinstalling an still nothing. Can you help me please.
I have a tutorial that covers how to retrieve your projects from your Ipad.
I am a newbie. I am using design space on the iPad. I am trying to cut my image larger than 8 .25” and the machine won’t let me. I have a 12 x 12 mat. I do have an image that is layered. When I go to make it is says project incompatible. I think it has something to do with wanting me to print to my home printer first. Is there a way to turn this off? I guess what I am trying to figure out is how to cut something bigger than 8.25”. Thanks.
Yes! Select each element or all of them and change the fill from “Print” to “None”.
When I change the print to no fill (only other option on iPad Pro) my image does not display. Also, I am not able to select the size of the image I am wanting to cut. It only allows me to print and then cut but at a very small size (greeting card size). How can I specific that I wish to use the 12 x 24 mat and have the image larger?
You can’t print then cut on that big of a paper. Check out my Print then Cut tutorial for more tips!
Hi there! New to design space and I’m getting frustrated. Here is the problem, I downLoaded some fonts, no problem. I accessed them and used the, on design space, no problem. Figured out how to move the script letters closer ( grouping, layering, and flattening) no problem. So now as I size my project for 11” wide, it tells me “project Incompatible” and resolve select OK and adjust different layers. This is where I’m just lost. Also there is a orange triangle on the layers icon. Please help.
If you are flattening for Print then Cut the más size of your project is 9.25 by 6.75.
Also instead of grouping letters, I would weld them so they are in the same layer.
I hope that helps 🙂
I saw a design of a project I like in cricut design. It has names on it, when I downloaded it onto the canvas, it will not let me edit the names. I’m a new cricut user and when I click on it for a text box, it sometimes comes up but will not change. Even when I hit customize, it is still the designers names’. I hope that makes sense!
If you’re looking at the projects that members share they might’ve welded the text so you can’t edit it. If it’s an image, you can’t really change the text.
I can’t use all the tabs at the bottom. On the edit tab, The group, ungroups, and the weld doesn’t highlight for me to hit
They will only highlight if you select something on the canvas.
I have an image that I purchased. It is a SVG. I unzipped it and got it ready to cut. When I look at the material, it says that it is a poster. I have an iPhone 11 Pro. For some reason, it will not let me change the material. When, I cut it out, it looked normal. I weeded it and when I tried to pull it up to put it on a shirt, the clear portion pulled out of the design. All that was left was the design with the clear portion under it. I need to change the material so it shows vinyl transfer. The material area on my phone is grayed out and will not let me change it. What am I doing wrong? I have made projects before and it let me change the material.
Did you tap on “finish project”? Sometimes the app it’s a little glitchy and won’t take new suggestions.
I uploaded a design that I bought and it spreads the design across the mat instead of keeping the design as is when I go to cut. What do I do to keep the design together?
You need to attach everything. Here’s the tutorial.
Hi, I am trying to make a logo for a business to cut into htv for company shirts. I bought an image and uploaded it to design space and I had to erase all the parts I didn’t want. But I can’t erase into all of the nooks and crannies of the image so it wont cut out the image, only where I have it erased. Does that make sense? Anyways I am very confused as to how I can get an uploaded image to get cut exactly around the image for vinyl. Also it is set to print and cut and the linetype is greyed out so I cannot change it back to just cut. Please help!
you need to upload the image a cut image, not print then cut. Check out my Print then Cut tutorial where I cover this.
Can I access my saved projects from my desktop on my iphone?
Yes, you can. Check out this tutorial.
Dear Catalina,
I was able to find my project that I created on my desktop in the iCloud section of my iPad . When I chose the project and hit customize it does not appear on the mat. It is easier for me to design on desktop but I am looking to move my Cricut to a craft room and need to stay portable with the iPad.
Thanks! Joan
Hi Joan, sometimes this can happen if you’re trying to use a project that it’s only supported on desktop. For instance, if you curved text you can’t open it on your phone. In other occasions, a project can take a while to open because is really big. I hope this helps.
Help! I am a very new Cricut user. I am making face masks using a pattern designed by a hospital. Because the pattern needs to be precise, I created it in the Design Space on my desktop. The file was saved. I then paired my iPad with the Cricut. The problem is that I don’t know how to retrieve the pattern that I created on my desktop pc from Design Space. Thank you.
Check out my How to Open, Save & Edit project in Design Space. I have the information there.
What does it mean if you get a message saying, cut sensor marks on the print could not be detected?
It means your Cricut cant read those black marks. Maybe you’re using very dark or busy papers?
Hi, thank you for this tutorial, so helpful!
I am having difficulty saving my text on the canvas. I select save as, chose on ipad it downloads but I can’t find it. I also tried saving to icloud. I have saved to icloud before but it was an svg file. What am I doing wrong?
Hi Linda, check out my save, open and edit projects tutorial.
Hi,
I just recently got a cricut air, and I have design space on my IPad, and wanted to put it on my computer, but for some reason it is not taking the password on my IPad. Do I need to separate passwords for each device?
You don’t need two different passwords. Try resetting your password?
When working off of my iPhone, I go thru all steps click make it, click continue a screen comes up “select and assessory” and there is nothing to choice from.
What am I doing wrong.
Make sure your machine is ON before you send your project to be cut, and also check the Bluetooth connection between your phone and your machine.
Hi there!
I have been having an issue when it comes to the “make” process. After setting everything up correctly, I click the “make” button in the bottom right corner and this pop up comes up that says “chose an accessory” but there is nothing there. I am so confused, I’ve used my circuit before when printing on vinyl with no issues but now it is giving me SO much trouble. HELP?!
Hi Hali! This just happened to me! Is it from your iPhone/iPad? To avoid this. Make sure that your machine is already connected to your phone via Bluetooth. And have the machine turn-on before you tap on “Make it.” Let me know if that solves the issue.
I am having same issue I tried doing the above directions, still nothing.
Please call customer service. You can try to cancel the cut, close the app, turn on your machine and connect it via Bluetooth (or verify) before sending your project to cut.
Hello, My Cricut Explorer 2 is connected to my IPad. When I try to upload an image that I would like to cut my image appears along with a blank black box next to it. What am I doing wrong? Thanks!
What type of image do you want to use? Is it a JPG Check out my print then cut tutorial when uploading images.
Thank you for the awesome tutorial, so helpful! Feliz Navidad!
You’re welcome!
My iPad is not allowing me to cut from snap mat. Is there anything special I need to do?
By the way, I forgot to mention that it’s asking me to pair with CricutAIR F-726??
Does that sound familiar? I have the app on my iPad.
Thank you so much 🙂
Hi Martha, yes you need to pair your machine before you start cutting your project.
How do I get the cricut to cut how I have my font positioned in design space from my iPhone? I get it positioned where I want it, hit make it, and it jumbles it all over the Matt.
You need to attach all text to any other layer you have.
How do I change my vinyl to write not cut on my phone
Cricut Pens are not really meant for vinyl. But if you want to try, change the linetype of your text to Write instead of cut. I have a Desktop tutorial for this.
Hi there- thanks I. Advance-
On my iPhone when I got to send the project to the cricut it stops me with a prompt to choose an accessory- however it’s blank. Anyone have an idea why??
Hi Angie. I’ve never run into this problem before. Try restarting the app? If it doesn’t work you can call Cricut’s customer service.
I just had the Same issue. Can you tell me what you did to make yours work.
Why can’t I get my Explore, when using IPAD to write my text in anything but big blocky letters. Doesn’t matter what font I choose it writes it in the same font.
Are you using writing style fonts? What do you mean about blocky letters? Check how my how to write and cut tutorial.
Having the same issue. If you find the solution from Cricut support, please write it in response! I’m international so I can’t call, only email which takes much longer.
If I find a solution, I’ll let you know!
I’m having trouble using my app from my phone I did everything correct n when I try to sent it to cut from my iPhone it cannot find my cutter but it says it connected to my Bluetooth what am I doing wrong
It seems you are doing things right. Did you connect your machine first? Try calling to costumer service.
I purchased a design through my Cricut design app but can not locate it anywhere. Any ideas ?
Hi Helen, you need to go to images or projects and search by ownership in the toggle menu.
I’m using a cricut with my samsung, only problem I’m having is how to turn on mirror image. I cant find it anywhere
Hi Janice try with Flip and when you send your project to cut. I will be posting a tutorial about this soon.
In your app, in the “Make it” menu, click on the mats (top left number in the corner) and click on the specific mat you want to mirror. The option to mirror will be on the mat.
I may have overlooked this, but when you have text in script and ungroup them to then move them closer together, how do you then highlight each letter to re-group? If that makes any sense!!
Hi Jennifer, you will need to select all the letters and then weld them. I have a Cricut text tutorial,How to Edit Text in Cricut Design Space Like a Pro it’s on Desktop, but you can see more about this topic there.
I still can’t find the button on my iPhone app to change my font to bold ? I see everything else but don’t see that one. Can you help me with this pls. Thanks
Hi Linda, simply add text, then select it and go to the Edit menu, and tap on Style. I hope this helps.
Hi Catalina, thank you for sharing. I have been searching for tutorials to show me how to use my iPad Pro with my Cricut Explore air 2 ,as I no longer have a computer. Yours was very helpful! I am new and I fear there is so much more to learn. Are there ways to layer screenshots, with different colors?
You are welcome Darylene! I don’t really understand your question, can you elaborate a little bit more?
I have design space app on my new iPad and when I try to startup the app it takes forever and says preparing forever before It actually starts up . Anyone else have this problem?
Hi Greg, I haven’t had this problem. They just updated the app so make sure you install the newest version. Maybe that can help? I will update this tutorial next week (hopefully)
How can I find projects I did on phone on my laptop?
Hi Kisha, if you read the comments on this section you will find the answer. I will creating a post about this soon!
I have a question. I use my iPad Pro for design space and I have noticed recently that I can not click on the “shapes” icon. This totally bums me out because I love welding and slicing simple shape to make my own designs. Did they take this away? Help!?!
Hi Tonia. I just checked on my phone and everything works just fine. Try deleting and installing the the app again.
I hope this helps
I feel you! My iPad does that too but on the app on my iPhone I can use shapes and add them in. Frustrating because I normally work on my iPad. Hoping a future update will fix this.
Hi Cassidy, I haven’t had this problem but I know some people have trouble with this. Have you tried calling Customer Service?
I just got a Cricut Air2 so I’m learning. I have it loaded on my ipad. I can’t see all the numbers on the design space. It should go from like 0, 2, 4…I can get them to show on the X axis, but not on the Y axis. The Y axis starts at 4 then 6, then 8. I’ve tried pinching it out and in and the X axis will zoom in and out…but, I can’t get the Y axis to change any at all. I have the Metric Units under Settings turned off. Does this make any sense to anybody? I am using an ipad. It’s my understanding that my vinyl sticker paper must line up with where it shows in design space so I’m trying to line it up.
Hi Wendy I just took a look; try pinching in instead of out, and then – don’t lift up pinch from your phone – move your fingers vertically.
Also when you send your project to cut, Cricut will always place the design on the left upper corner of your mat.
I hope this helps 🙂
How can I retrieve my saved projects?
Hi Vicky you can retrieve your project from the Cricut App by going to the home window and then clicking on the drop down menu called categories. On this menu you can choose from your projects on the cloud, and or projects on your phone.
I hope this helps 🙂
Thank you for that answer! I’ve been going crazy trying to find “my projects” on the iPad app!!!!
I have spent hours on youtube and Google looking for the answer, and not one of the videos mentioned it. Cricut “help” doesn’t have any help on that issue.
Thank you sooooooo much.
You’re very welcome!
So glad I found this thread! I was equally lost.
I created a design on my laptop. I went to cut and realized I never hooked up my Cricut to my new MacBook. I went to set up and realized I don’t have a USB port. SOOO I was able to pull up on the app to cut. BUT I have 10 different mats. with different colors. will this print the 1st mat or can I select the mat to cut??
Hi Rachel If your design has 10 different colors then you will have ten different mats. You can select the mats in the order you want to cut to by sliding the options and then hit continue. I hope this helps!
Great tutorial… but I have a question ?When working on a project on your laptop and you save it to the iCloud or to the other I can’t remember … anyway why can’t I see it on my iPad ? Is there not a way to see my projects on the iPad ?
Thanks
Lynn
Hi Lynn,
When you save a project from your computer you can access it from your phone or Internet as well. Make sure your device is connected to Internet though. To access it go to the App and make sure you are on the (Home section) then click where it says Categories and select the option My Projects on the Cloud.
I hope this helps!
You have no idea how long I have been trying to figure that out and how frustrated I was getting. Thank you so much for the help!
Hi Brett I am glad I was able to help. I am thinking about writing an article on this only. I get this question very often
Thanks for sharing!