Looking for a unique and thoughtful gift idea?
Earrings are perfect for any occasion, whether it’s Christmas, birthdays, Mother’s Day, or just to show someone you care.
In this tutorial, I’ll show you how to create beautiful earrings using the Cricut machine. I’ve also included over 12 SVG earring templates to simplify your crafting process. Let’s get creative and make some stunning earrings together!

Tip: This tutorial builds upon the skills I teach in every step. If you’re just starting with your machine, I suggest you read and follow each step.
This article contains tips and steps that will teach you how to make stunning earrings and help you become a better crafter. And since I don’t want you to get lost, here’s what I will cover.
- Materials for making earrings
- How to make an earring from scratch in Cricut Design Space
- Cutting Process of an earring using iron-on
- Other techniques for making earrings in Design Space
- Free SVG Earring templates.
- Pictures of more cute earrings you can make.
Are you ready?
Let’s Daydream Into Reality!
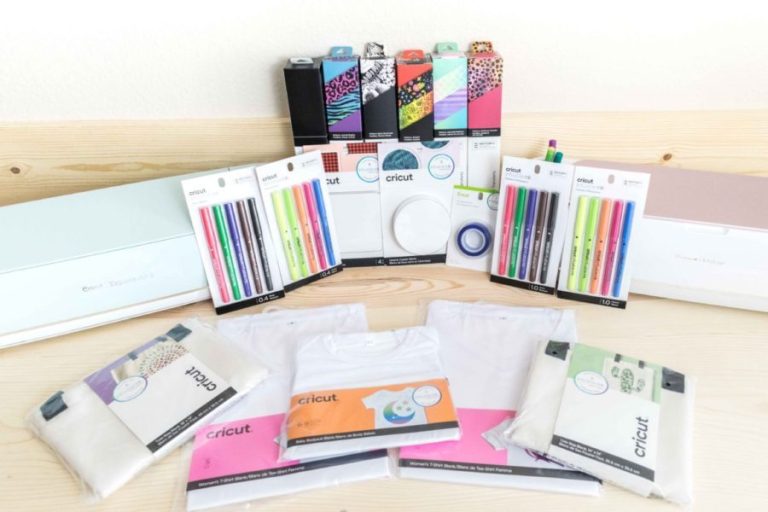
Materials for Making Earrings with Cricut
- Cricut Maker, Explore (You can also use the Joy, but this tutorial will only have instructions on cutting for the bigger machines)
- Standard Green Mat
- Fine Point Blade
- Faux Leather
- Everyday Iron-On (Optional)
- Earring kit (fish hooks, jump rings, flat pliers)
- Awl tool (if cutting heavy leather or glitter canvas)
- Jewelry Charms (optional)
- Easypress Mini or Household Iron – If using Iron-On.
- Weeder – If using Iron-On.

I recommend you buy a starter earring kit with multiple fish hooks and jump rings to connect the faux leather and form your earrings. You want a kit with different finishes like gold, silver, gold rose, bronze, etc.
There are amazing kits on amazon, and you can feel confident knowing that you have plenty of finishes to match pretty much any faux leather color and iron-on.
Some of the kits come with flat pliers. Having a pair on hand is very important because you need them to attach the fish hooks and jump rings to the faux leather earrings.


I also encourage you to buy some Jewelry charms!
They will make your earrings look adorable; there are hundreds of styles to choose from. If you want earrings to match with the charms, you’ll need to buy two packs because they usually have one-of-a-kind items per bag.
Let’s talk faux leather.
I prefer thin options. I love Cricut’s faux leather, but Amazon has many options and different finishes. You can also use very fine glitter canvas sheets to add sparkle to your earrings.
Whenever you work with faux leather and glitter canvas, you need a new mat. If your mat is heavily used, clean it first or buy a new one. Materials will move around if your mat isn’t sticky enough.
If you decide to use a very chunky glitter canvas, watch my YouTube tutorial on how to cut it properly.

Step 1 – Form Earring
Making earrings from scratch in Design Space is very easy. Although I will teach you how to make a “teardrop” shape earring, you can use the same concepts to create new designs using shapes.
Click on the “Shapes” icon on the left panel and drop a circle and a triangle on the canvas area.

Place the triangle on top of the circle and resize it to form a teardrop. When it looks like the screenshot below, select both shapes, click “Combine,” and select the “Weld” icon at the bottom of the layers panel.

The new shape will most likely have some rough spots around the area where you welded the circle and the triangle.
To smooth out those spots, select the shape and click on “Offset” on the top of the panel and make a small outline (0.05″ distance).

Once you have the new outline, delete the original teardrop. And just that easy, you have a simple teardrop earring.
Step 2 – Make Small Holes for Fish hooks
You’ll most likely want the Cricut to cut the small hole where you insert the fish hooks and jump rings.
Cricut will cut very visible small holes when you use paper-thin faux leather and very fine glitter canvas. If you use thicker faux leather like the ones you buy on Amazon, the small hole won’t cut through most of the time, but you will, at least, have an idea of where the small opening is and finish with an awl tool.
If you use chunky glitter canvas or genuine leather, skip this step and make the earring’s opening with an awl or piercing tool.

1: Resize the earring (must be done before anything else), add a circle, and resize to 0.06.”
2: Place circle where you want the jump rings and fish hook to be. Usually at the top of the earring.
3: Select the earring and small circle and click “Slice” at the bottom of the Layer’s panel.
4: Duplicate (or copy-paste) shape to have the complete set.
Do you see how simple it is?
Step 3 – Add Decoration
Let me show you how to make your earrings extra attractive by adding a simple embellishment.
With the “Slice” tool, you can trim other shapes and images to fit your earrings perfectly. For this particular design, I used a square.
Look at the following screenshot to see a step-by-step.

1: Start with two earrings, add a square, unlock its proportions from the top menu, and resize it to make a rectangle.
2: Make two extra copies, align them like the screenshot above, and click “Weld” inside the “Combine” menu at the bottom of the layer’s panel.
3: Select the teardrop earring and rectangles and click “Slice.”
4: From the new pieces, pick the one that fits the inside of the earring (delete the other ones) and place it on the untouched copy.
5: Change colors and duplicate the earring and the decoration. If you want your earrings to mirror each other, select one of the copies and click on “Flip,” then select the option “Flip Horizontal.”
When you’re happy with your design and ready to cut it, click “Make” in the window’s upper-right corner.
Tip: Iron-on decoration on your earrings will allow you to personalize your earrings even further. For instance, if you’re going to a Christmas celebration, you can transfer a small tree, reindeer, or ornament to your earrings.
Step 4 – Cutting and Assemble Earrings
This pair of earrings consists of faux leather and everyday iron-on.
The mat preview will show the order of what material your Cricut will cut, and, as far as I know, and I’ve been with Cricut, this order is random.
For the decoration, make sure that you turn “Mirror” on if you’re using iron-on or heat-transfer vinyl.

If everything looks good, go ahead and click on “Continue.”
If you have a machine with a smart set dial, move the smart set dial to “Custom” and select material from Design Space for both materials.
First, let’s cut the faux leather. Select the material, and set the pressure to “More.” These settings will work for most faux leather materials and fine glitter canvas sheets.

Place faux leather on the mat, making sure it’s well adhered to it. I usually use a brayer to secure materials to the mat. And it’s one of my favorite tools ever.
Load the mat to the machine and press the flashing go button to start the cut.
SUPER-ULTRA-MEGA TIP: Before you unload the mat. Lift a little corner of the faux leather or glitter canvas to see if your machine cut through it. If it did, unload. If not, secure back the material to the mat (without pressing unload) and tap Cricut’s logo button to repeat the cut.
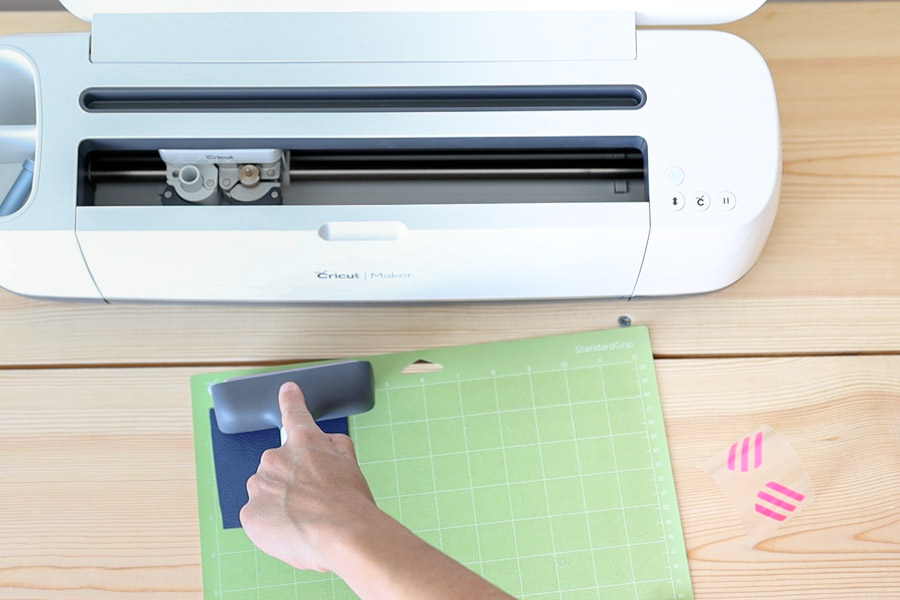


When you unload the mat, bend it and remove the mat from the material instead of the material from the mat.
Return to Design Space and change the base material to “Everyday Iron-On.” I always like to have “More” pressure for my cuts.
Remember you need to turn mirror-on because you are cutting from the back, not the front, when cutting heat transfer vinyl. Therefore if you don’t, “Mirror,” your image will look backwards once you transfer it.

Whenever you cut iron-on, you must place your material pretty/shiny face down on the mat. Use the brayer or scraper to secure vinyl on the mat.
Related: Read my How to Work with Iron-On guide.


Load to the machine and tap the flashing go button.
Unload mat, remove iron-on from it, and use a weeder to remove the negative cuts.
Step 5 – Assemble Earrings
It’s time to put the earrings together.
First we need to transfer iron-on to faux leather, I used my EP Mini, but you can also use you household iron.
According to Cricut’s heat guide, when you use the EP Mini with everyday iron-on and faux leather, these are the steps you need to take:
- Preheat Cricut EasyPress Mini, low setting
- Place faux leather on the pressing mat (you can also use a towel).
- Preheat faux leather for 5 s
- Place iron-on material face down, liner side up
- Secure with tape, avoiding image area
- Press while moving with light pressure at a low setting for 30 s
- Slowly remove the liner while cool
If using a regular iron, you can use the same principles; I would set the temperature to 3/4 of the heat your iron can take. And use heat-resistant tape to secure your design.


Hold the earring with one of your hands, and with the flat pliers, pick up a jump ring and place it through the opening of the earring.
Before closing the jump ring, add a fish hook, ensuring that the hook will (naturally) face your ear-piercing hole when you pick up the earring. Close the jump ring with the flat pliers and repeat the process for the second earring.
What do you think?

Don’t they look beautiful?
More Ideas for Making Earrings with your Cricut
At this point, you should know how to make the basic earring shape, with a small opening for the fish hook and jump ring.
You also know how to cut and assemble other earrings.
My plan for the rest of this article is to encourage you to explore more ideas, using different shapes and combinations of materials.
We will use the Design Space tools we used at the beginning of this tutorial (Slice, Weld, Flip), so I won’t cover where they are located because I don’t want to sound super repetitive.
Idea #1 – Using Charms for Earrings
You can hang small charms on your earrings.

Step 1: Add two circles, a small (0.06″ for some jump rings) and a bigger one to have a big opening for the charm to move around.
Step 2: Slice big circle.
Step 3: Slice small circle.
After you cut your earrings, you can assemble them like I show you in the pics down below!


There are jewelry charms for every theme: Christmas, winter, hearts, pets, mermaids, you name it. Charms are a beautiful way to personalize your earrings for any occasion.
Idea #2 – Using Images and Shapes
You can find images you would like to use on your earrings!
You can use other shapes or your own images. You want solid images with no intricate cuts.
I used a heart for this tutorial and searched for mermaid images in Cricut’s library. The code for the image is for the screenshot below.

For the mermaid earring, I welded the tale to the earring. Don’t forget to flip your earring if you want them to mirror each other when you wear them.

For the heart earring, I sliced another small circle so I could use jump rings to connect the heart and the shape.
Don’t they look pretty?


You can use the same materials for the heart or a different one!
Idea #3 – Double Sided Earrings
If you want your earrings to look pretty on both sides, duplicate the initial design. Make sure to mirror or flip if making earrings like the one down below so both sides match when you glue them.
I used fabric-tac for gluing faux leather and glitter canvas. Don’t use kids glue; it’s not meant to be used for professional-looking projects.

I love how they look.
These are the perks of having a Cricut!


Can you imagines cutting such intricate cuts with scissors?
Idea #4 – Using Foil Transfer Kit to Make Earrings
Using the foil transfer kit, you can add foil decorations to your earrings.
I don’t have a tutorial on using this tool yet, but it’s on my priority list. In the meantime, you can check out some YouTube videos.

They look so pretty!

Idea #5 – Using Different Shapes
Teardrop earrings are adorable, but why limit ourselves to only one shape?
Use stars, hearts, diamonds, and other shapes to make earrings! You can use the tips you’ve learned throughout this article.

Here’s another way to add a different small opening for the fish hooks!

Step 1: Resize your earring and add two circles (0.33″ and 0.06″).
Step 2: Place the big circle where you want the jump ring and fish hooks, select it with the heart, and click “Weld” inside “Combine.”
Step 3: Center the small circle on the added space and slice it against the heart.
Step 4: Duplicate and flip horizontally if you want your earrings to mirror each other when you wear them.
Do you need more inspiration?
Let’s make some earrings using my free SVG files!
Free SVG Earring Templates
As I promised, here are the templates for your earrings.
The thumbnails show both earrings, but the file contains one copy only. I did this on purpose because, most likely, you will edit the template to your likes and copy-paste the earring to complete the pair.
To download the file(s), you need to be on a desktop or laptop and click on the button to trigger a download file on your PC. However, I’ve noticed that I can also download them from my iPhone.
Depending on your browser settings, your PC sometimes asks where to save the file, although most files will be in your download folder.
If the image opens in a new window (this may happen because of your browser settings), right-click on it, select the option “Save Image As,” and choose where you want to save the file.
SVG files look like web page files when you download them.
These earring templates don’t have the small openings for the fish hooks either because it’s essential to size your earring first, then add the small hole. Plus, if you’re using very thick materials like chunky glitter canvas and genuine leather, cutting very intricate cuts is not recommended as they can harm your blade.





Oh!
Just so you know, I also have a library full of free SVG files and Printables for all my subscribers, a.k.a. Daydreamers. You can see a preview right here or get access by filling out this form.
Making Earrings from Templates
First, download the files you want to use, then open Design Space and go to “Upload.” Click on “Upload Image” and follow the prompts.
When you finish uploading, the file will be available under “Recent Uploads.”

Of all the other examples we covered before, the opening was on a single-layered earring. However, this earring has three different layers.
If you want to make the openings, all holes must be 100% aligned. So, we must avoid touching things on the canvas because we can accidentally move them. First, resize your earring, add the 0.06″ circle for the opening, and place it on top.
We need to slice three times, but everything will be done from the Layers Panel

From the layers panel, select the yellow layer and circle (pressing shift at all times) and click on “Slice.”
New layers will appear, and the arrangement of the earring will change, too. Don’t touch or move anything. Again, repeat the same steps with the pink and green layers.
When you move the earring’s layers, every opening is 100% aligned!
Duplicate the earring to complete the pair and cut it using the steps I explained in this tutorial.

For this earring, I glued each layer with fabric-tac, but you don’t have to. I also had to use the awl tool because the faux leather I used was a little thicker and Cricut had a hard time making a 100% clean cut.
I love the fine glitter canvas sheets I used for these earrings.


Look at those charms!
I honestly feel like a princess wearing these earrings. Although, I can’t wear them right now because my baby girl will try to pull them, and ouch!


Here’s another pair of earrings I made from the templates. So shiny and wintery-like!

Look that butterfly charm!


The red, blue, and white glitter materials make the perfect earring to wear on a forth of July.
Don’t you think?
More and more ideas!


This is the last one from the templates I made!

Which one is your favorite?
Let me know in the comments down below!

Share it
Do you know it takes me over 25 hours to complete a single Cricut article? I know it’s wild, but I want to make sure you understand everything!
I would appreciate your support on Instagram , Pinterest , and YouTube as I try to grow my audience and continue producing great content!






I have tried and tried to download the free 12 SVG earring templates without success. How do I download the files please.
They are in the article, read the instructions 🙂
How do I Download the Free Cricut SVG Earrings Templates I’m All New at This
There are instructions in the articles!
Thank you , these a re amazing and will have to make some for myself xxx
Thanks
Thank you, you are a darling. Love them all.
THANK YOU FOR PUTTING YOUR TIME INTO THIS GREAT SITE! VERY HELPFUL AND FULL OF GOOD INFORMATION
You’re very welcome 🙂
How do you reinforce the holes for the findings? I find that a little tug will cause the hole to rip through.
Ensure there’s enough space in between. Also, if your material is very thick, it may be better to do it manually.
These are beautiful. Thank you! Love the charms!
Catalina
Thank you again for this tutorial. Beautiful earrings! Where did you buy your leather or faux leather material?
On Amazon. Nothing fancy!
Your tutorials are just awesome! Thank you for taking the time to do this and for sharing your expertise.
Hi there! Thanks so much for sharing these gorgeous earrings! I’m curious to know why you say that you need to be on a PC or laptop to download the SVG’s? I just loaded them on my iPhone without any problems at all. Thank goodness because that’s my primary way of making things. Thanks again!
That’s great! Because some iPhones don’t work, and it’s hard to give assistance to everyone on how to work different phones! I hope that makes sense 🙂
Do you have to have a Cricut to make Earrings? I would love to start learning how to make Earrings like these. I’ve been buying some kinda like those. And it’s time to start making my own. And possibly start selling Some.
You don’t have to but it helps. If you go on Amazon and look for earring kits with templates you’ll find stencils that will help you make some!
Thank you so much! This was everything I was looking for to make earrings and was so easy to follow!
Great tutorial. I learned so much from you!!
Great tutorial! I want to make a pair of earrings out of faux leather that has a design on it. Is there a way to center things so that the part of the earring that is cut out has the design? An example would be the Dallas Cowboys star. If I want to make sure I get a bigger star centered on the earring how would I do this? Thanks
Select the earring and the logo, then click on the “Align” tool and center horizontally.
How do you keep the leather flat?
I use a brayer. Regular leather is very tricky and I don’t have a tutorial for it yet.
Hi there! Thank you for this post! I have a lot of people make a request for “double-sided” earrings. Meaning they want the design on both sides in case the earrings flip. How would you suggest going about this?
I did a couple of double-sided ones. Look at the one with the mermaid tails.
Hello,
thank you for your instructions but I’m having a issue with welding and I was hoping you can help me, I made the tear drop earing that was east I did all the other steps but when it came to welding it wasn’t working out for me, I was trying to weld field hockey sticks on the earing and it turns all the same color but I’m unable to see it, it doesn’t come out like the mermaid tail you did, I was hoping you can steer me in the right direction and tell me what I’m doing wrong. thanks i would really appreciate it.
thank you,
Michele Buckley
If the hockey stick had details with other colors it makes sense that it’s not showing properly. Does the entire earring gets filled?
I loved the detailed step by step thank you I read it over and over and ready to try it thank you so much.
I will share with other’s your blog.
I have so many charms and love the idea to add to the earrings and I know to mirror mirror.
You’re very welcome, I am happy you liked the tutorial 🙂