Looking for a fun and festive activity to keep the kids entertained this holiday season?
This Build a Santa Craft for Kids is the perfect solution! With my FREE template, you can create an adorable Santa figure with just a few simple supplies.

The template comes in full-color and black-and-white versions, making it easy for kids to either color their own Santa or assemble a pre-colored one.
With the help of a parent or a teacher, this craft is perfect for preschoolers, kindergarteners, and elementary-aged kids.

Ready to make an adorable Santa?
Related: Paper Plate Santa Craft!
Tools & Materials
- Printer
- Template (download at the end of the article; you don’t need to subscribe!)
- Glue
- Scissors
- White cardstock
- Black marker (optional)
- Cotton balls (optional)
- Red, skin color paper (optional)
- Gold glitter glue (optional)

If you don’t have cotton balls, you can still make this craft using just the template, and it will turn out just as great.
Step 1 – Print Santa Template
There’s a full-color template and black and white for coloring. For a longer activity, you can color, and for a lightning-fast craft, the colored version is best.
If you don’t feel like using that much ink, you can always print the black-and-white version and trace the big parts of the craft (body, hat, head) on red, black, or skin-colored paper.
I decided to use the colored version!

Step 2 – Cut Santa Template
Some pieces, like the eyes, ears, and cheeks, are a little hard to cut. I like to include everything on my templates, so you don’t need extra supplies; however, it may be more practical to draw the eyes with a black marker.

Ready to build a Santa?

Step 3 – Glue Project
I decided to make the Santa step-by-step tutorial using cotton balls. Feel free to omit that step if you don’t have any or just don’t want to use them.


- Glue cotton balls on the white parts of the hat and also on the beard.
- You can glue the mouth on top of the cotton balls or on the cardstock and glue the cotton balls around (I prefer the second option as it looks more natural).

- Glue eyes, cheeks, and nose.
- Start working on Santa’s body by gluing the belt towards the bottom of the oval.
- Glue Santa’s face to the body, making sure you leave enough space for the buttons.
Note: The nose is not very visible when using cotton balls.


- Glue arms and legs.
- If you have some gold glitter glue on hand, you can add some bling to your Santa!


Just like that, your Santa is all complete!
Doesn’t it look adorable?
Santa Without Cotton Balls
If you don’t feel like spending a lot of cotton balls, here’s a picture of the craft using only the template!
It’s hard to pick a favorite. But I think I prefer the craft without cotton balls. I can see the cheeks, nose, and all the details better.


Don’t you think?
Download Template!
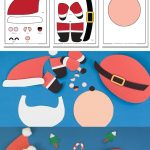
As I mentioned, here’s the “Build a Santa” template for your craft! Click the image to open the PDF in a new window or the yellow button to trigger a download on your phone or computer.


Oh!
Just so you know, I also have a library full of free SVG files and Printables for all my subscribers, a.k.a. Daydreamers. You can see a preview right here or get access by filling out this form.

Paper Build a Craft For Kids | Free Template!
Get ready for a fun and easy Christmas craft where kids can build a Santa using paper! This DIY activity is perfect for all ages, from preschool to elementary.
The free printable template guides you through the steps, and adding cotton balls makes Santa look extra special. It is ideal for holiday crafting sessions and for keeping kids engaged during the winter season.
Materials
- Template
- White cardstock
- Black marker (optional)
- Cotton balls (optional)
- Red, skin color paper (optional)
- Gold glitter glue (optional)
Tools
- Printer
- Scissors
- Glue
Instructions
- Download the template in color or for coloring.
- Print out the version of the template you want to use.
- Cut template. Some pieces, like the eyes, ears, and cheeks, are a little hard to cut, so you may want to help your child or use a black marker.
- Glue cotton balls on the white parts of the hat and also on the beard.
- You can glue the mouth on top of the cotton balls or on the cardstock and glue cotton balls around.
- Glue eyes, cheeks, and nose.
- Start working on Santa’s body by gluing the belt towards the bottom of the oval body.
- Glue Santa’s face to the body, making sure you leave enough space for the buttons.
- Glue arms and legs.
- If you have some gold glue glitter on hand, you can add some bling to your Santa!
You May Like These…
I hope you enjoyed crafting these Christmas ornaments with your little people. If you enjoyed that activity, you would love the following.
- Paper Plate Christmas Tree Craft
- Fall Paper Plate Craft
- Paper Plate Snow Globes with five different scenes!
- Paper Plate Baby Chick Craft
- Turkey Headband Craft
Happy Crafting!




Love it!
fun
Wow!
Love it
Yay!