Who doesn’t love a bouquet of flowers, especially one made with love and little hands?
This Paper Flower Bouquet Craft is the perfect mix of creativity and beauty, making it a fun activity for kids of all ages.
Whether it’s a heartfelt gift for Mother’s Day, a sweet surprise for Valentine’s Day, or just a fun spring afternoon craft, this project has you covered!

The best part?
It comes in two versions—one ready-to-go in lovely colors and another as a blank canvas for kids to color in themselves.
Kids can also practice decision-making by choosing different flowers and decorating their bouquets with their favorite crafting materials.

So grab your scissors, glue, and a little imagination, and create a bouquet that lasts forever (and doesn’t need watering)!
Tip: If you’re a teacher, you can print and cut multiple copies, bring them to the classroom, and have a little flower workshop with your students using other fun crafting materials.
Tools & Materials
- Printer
- Template (download at the end of the article; you don’t need to subscribe!)
- Glue
- Scissors
- White cardstock
- Colored cardstock for flower wrap
- Colors (optional)
- Scoring tool (optional)

You can print the flower wrap in different colors to make the craft extra vibrant. I suggest you print your flowers first, then contrast them with the colors you have.
Step 1 – Flower Bouquet Template
You’ll find a section with the templates at the end of the tutorial. As I mentioned, there’s a pre-colored version and a coloring version. Print the colored version for a faster and easier craft, and choose the coloring version for a more extended activity.
Before you print the template, take a look at the pages. I included three different bouquet arrangements. You don’t need to print them all!
The third option includes arranged flowers ready to glue on the flower wrap. Print this option for super-speedy crafting.

Step 2 – Cut Template
Cut all the floral arrangements you prefer. You may not use all stems or leaves.
Tip: You’ll likely need to help your child cut small, intricate decorations, such as the long leaves and some flowers.

Step 3 – Assemble Flower Wrap
If you have a scoring tool, use it on the dotted lines for easier folding. However, if you don’t have a scoring tool, use the lines as a reference to fold the flower wrap.
Also, choose your favorite sentiment to close the wrap:
- Happy Valentine’s Day
- Happy Birthday
- Happy Mother’s Day
- Happy Father’s Day
- Yay!
- Congrats!
- Other (with different illustrations)


Now, everything is ready to go!
Step 2 – Glue
For this step-by-step tutorial, I printed the flower wrap in purple cardstock and decided to assemble option 1.
Important tip: You don’t need to glue all the petals and leaves together; you’ll want to be able to overlap and fold the petals to add a 3D pop-up effect.
The gluing order matters!

First, start with the long leaves.
Then, glue the flowers. You can glue the stem or leave it behind.
Tip: Before you commit to gluing, play with the placement of the flowers, stems, and leaves to see how you prefer to glue them.


Remember not to glue the petals!
Glue the small leaves under some of the petals.

Close and secure the bouquet with your favorite sentiment.
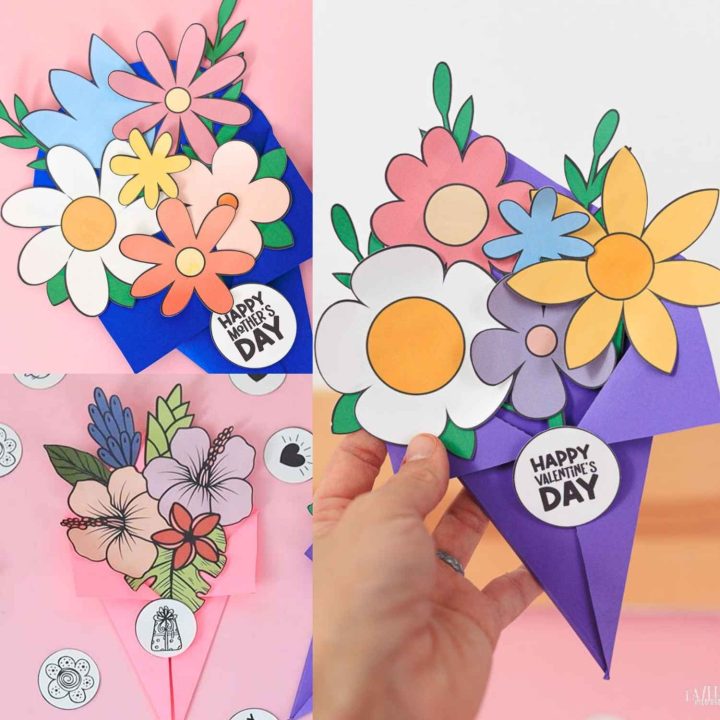
Just like that, you have a beautiful flower bouquet!

More Bouquet Ideas!
You can mix and match some of the flowers as well!
Whenever possible, I like to give you different crafting choices. This allows you to include your child in the decision-making process.
Look at these two other bouquets I made.


Which one is your favorite?
Download Template!
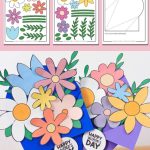
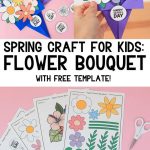
As I mentioned, here’s the free flower bouquet template for your craft! Click the image to open the PDF in a new window or the yellow button to trigger a download on your phone or computer.


Oh!
Just so you know, I also have a library full of free SVG files and Printables for all my subscribers, a.k.a. Daydreamers. You can see a preview right here or get access by filling out this form.
Paper Flower Bouquet Craft | Free Template
Looking for an easy and fun craft for kids? This free printable paper flower bouquet template is the perfect activity! Kids can color their flowers or use the pre-colored option to create a beautiful bouquet.
Materials
- Template (download at the end of the article; you don't need to subscribe!)
- Glue
- White cardstock
- Colored cardstock for flower wrap
- Colors (optional)
Tools
- Printer
- Scissors
- Glue
- Scoring tool (optional)
Instructions
- Download the template in color or for coloring.
- Print and cut the flower wrap in your favorite color.
- Cut the bouquet arrangement you liked the best, along with your favorite sentiment.
- Assemble the flower wrap by folding it over the dotted lines. (For easier and crispier folds, use the scoring tool.)
- First, start with the long leaves. Then, glue the flowers (read notes for important tips). You can glue the stem or leave it behind.
- Glue the small leaves under some of the petals.
Close and secure the bouquet with your favorite sentiment.
Notes
You don't need to glue all petals and leaves; you'll want to be able to overlap and make folds on the petals to add a 3d pop-up effect.
Before you commit to gluing, play with the placement of the flowers, stems, and leaves to see how you prefer to glue them.
You May Like These…
I hope you enjoyed crafting these adorable flower bouquets with your little people. If you enjoyed that activity, you would love the following.
- Free Valentine’s Day Dot Marker PDF Pages
- Happy Birthday Coloring Pages
- Paper Plate Baby Chick Craft | Free PDF Template!
- Build a Salad Craft Free PDF Template
- Cute Fish Tank/Aquarium Craft for Kids | Free PDF Template!
- Coloring Mother’s Day Bookmarks Free Printable
Happy Crafting!



Love