Are you looking for a creative and fun craft that your kids will absolutely love?
This Paper Plate Chocolate Tray (or Box) Craft is the perfect activity to keep little hands busy while letting them make something very special. Whether it be Mother’s Day, Valentine’s Day, a birthday, or even teacher appreciation, this craft doubles as a thoughtful homemade gift that’s just as sweet as it looks!
From preschoolers to older kids, this craft is simple enough for little ones yet enjoyable for older children. This a fun way to spend an afternoon teaching your kids about thoughtfulness and creativity.

This project also offers a fun and easy way for little ones to develop their fine motor skills as they cut, paint, and assemble the chocolate tray. Whether they’re learning to use scissors for the first time or getting exposed to painting techniques, this activity provides an enjoyable opportunity for creative expression and skill-building.

So grab your craft supplies, download the free template, and let’s get started on this fun and unique chocolate tray craft. It’s bound to be a hit for any special occasion!
Related: Paper Plate Hot Chocolate Craft
Tools & Materials
- Printer
- Template (download at the end of the article; you don’t need to subscribe!)
- Glue
- 9-inch paper plate
- Scissors
- White cardstock
- Brown
- Paintbrush
- Colors, markers (optional)
- Adhesive foam dots (optional)

Super tip: If you don’t have paper plates, cut an 8-9-inch circle with white cardstock.
Step 1 – Print Candy & Chocolate Treats
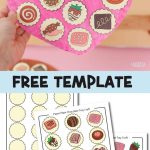
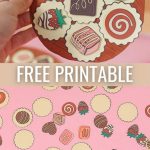
You’ll find a section with the templates at the end of the tutorial. There is a pre-colored version and a coloring version. Print the colored version for an easier and faster craft, and choose the coloring version for a longer activity.
If your children’s focus span is short, you can also print the page where treats are already on liners.

Step 2 – Paint
Always start by painting first, as it takes longer to dry. Your children will probably want to glue as soon as they finish cutting.
Tip: The plate doesn’t have to be brown; chocolate trays can be any color you or your child wants them to be!

Once you paint the plate, set it aside to dry.
Step 3 – Cut Template
Cut all the pieces you want to use!

Step 4 – Glue
Let’s assemble our scrumptious chocolate tray or box (aerial perspective)!
First, start gluing the liners; about nine will fit on the outside and about four on the inside.
I don’t know how often you craft with your little ones, but if you love crafting, I recommend you get double-sided foam dots. They are super cheap, but they add a 3D pop effect to all your crafts that regular glue can’t achieve.


Kids love using them because they add extra beauty and instill a love for crafting. When crafting with children three and younger, always ensure you’re supervising.
I used them foam dots to glue most of the candy.
Your delicious chocolate tray is ready to be served! I wish I could eat one of those yummy treats!

More Assemble Ideas!
As I was about to assemble the pink paper plate that had already been painted, I had a great idea: How about making it into a heart-shaped tray or box of chocolates?
It’s so easy, fold the plate (don’t make a visible crease) just enough to trace the shape of half a heart, then cut through it, and voila, you have a new shape for the craft!


Don’t they look fabulous?

You can make a smaller tray, too!
I made an extra small chocolate tray!
Cut the center of the paper plate and glue the liners and candy!

Easy, right?

Download Template!
As I mentioned, here’s the Paper Plate Chocolate Tray Craft template for your craft! Click the image to open the PDF in a new window or the yellow button to trigger a download on your phone or computer.


Oh!
Just so you know, I also have a library full of free SVG files and Printables for all my subscribers, a.k.a. Daydreamers. You can see a preview right here or get access by filling out this form.

Paper Plate Chocolate Tray (Box) Craft For Kids | Free Template!
Need a crafty and easy gift idea?
Let kids make creative trays with all the different chocolate and candy options! It is a perfect project for Mother's Day, Valentine's Day, or occasions where homemade gifts are loved.
Materials
- Template
- 9-inch paper plate
- White cardstock
- Brown
- Colors, markers (optional)
- Foam Dots (optional)
Tools
- Printer
- Scissors
- Glue
- Paint brush
Instructions
- Download the template in color or for coloring.
- Print out the version of the template you want to use.
- Paint the paper plate brown or other color you'd like the tray/box to be.
- Cut the treats you want to use; cut the candy placed on the liners for easier crafting.
- Start by gluing the liners on the paper plate, followed by all the chocolate treats.
- You can use adhesive foam dots to add a 3d pop-up effect.
You May Like These…
I hope you enjoyed crafting these fun candy trays with your little people. If you enjoyed that activity, you would love the following.
- I Spy Valentine’s Day
- Paper Flower Bouquet Craft
- Valentine’s Day Coloring Pages
- Dot Marker Valentine’s Day Pages
Happy Crafting!


so cute for kids!
I am glad you like it! 🙂
Good