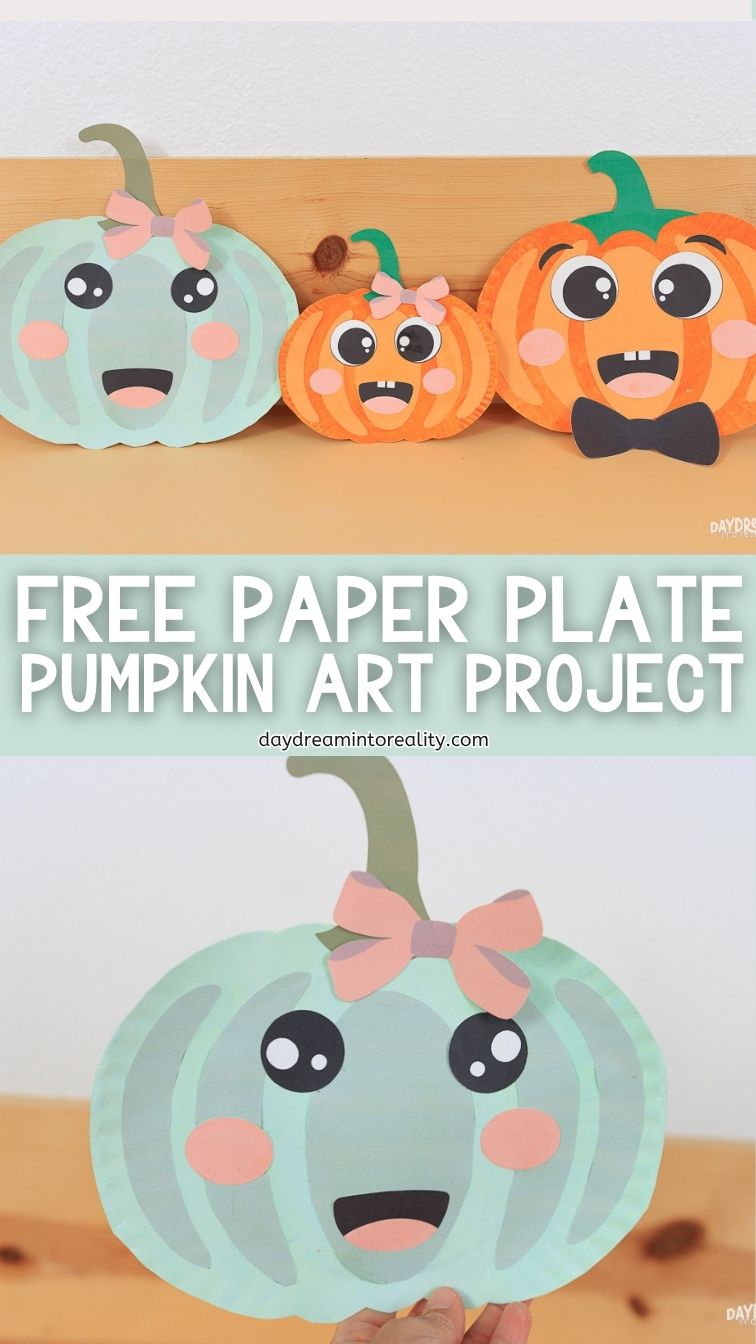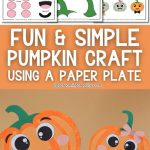
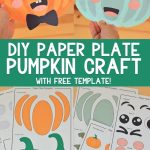
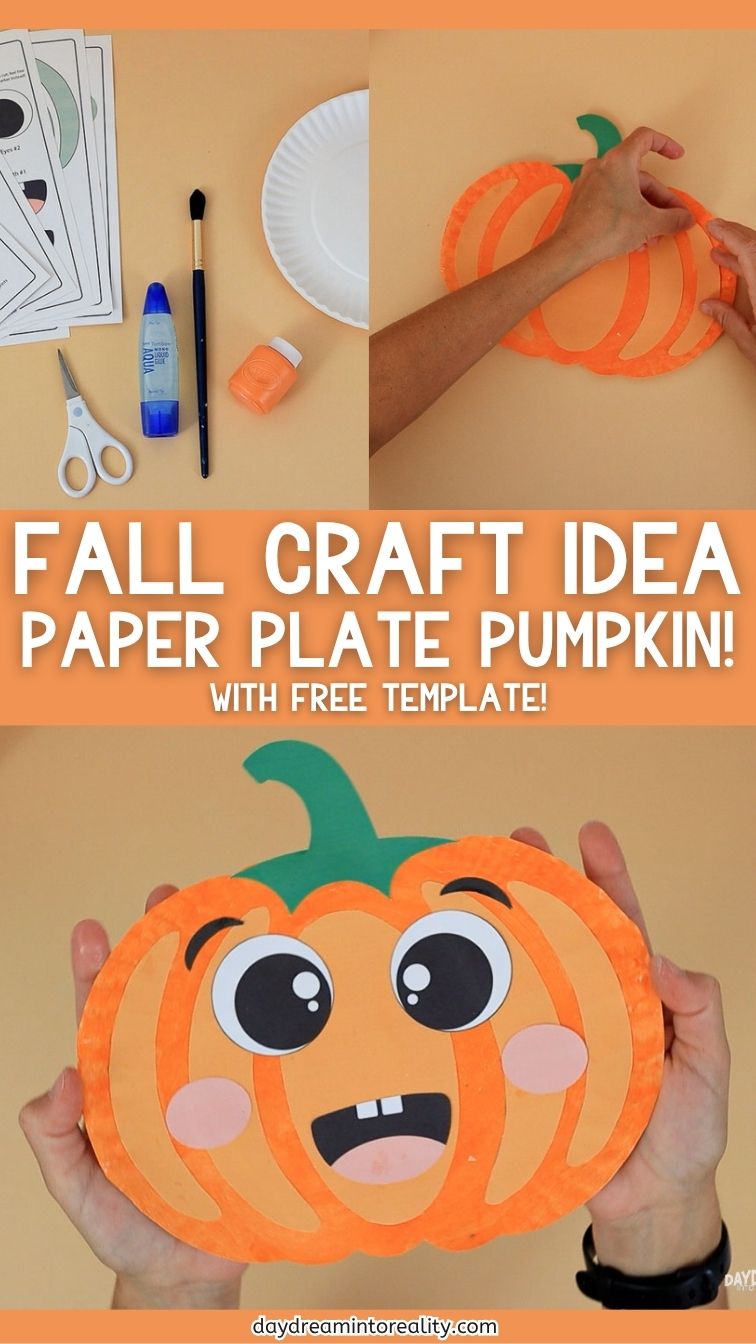
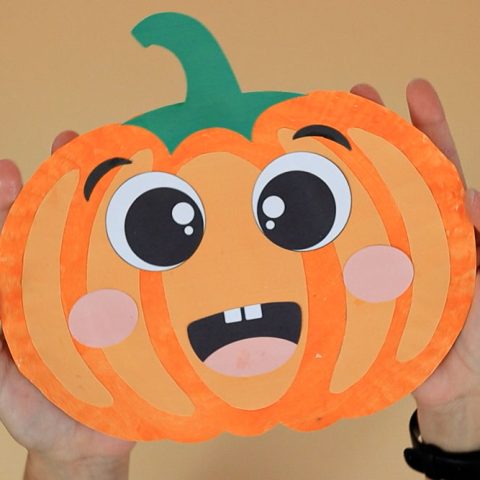
Looking for a simple and fun fall craft your kids will love? This Paper Plate Pumpkin Craft is just the thing!
Whether you’re working with preschoolers, kindergarteners, or early elementary kiddos, this activity is easy to prep and super engaging, with just a handful of materials and a free printable template (no sign-up required!).
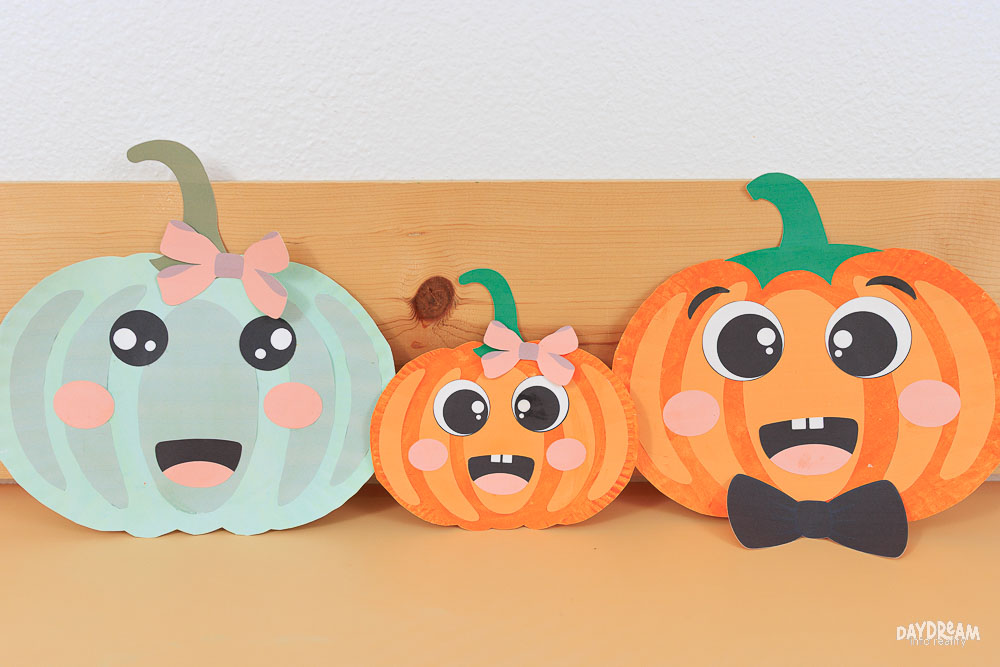
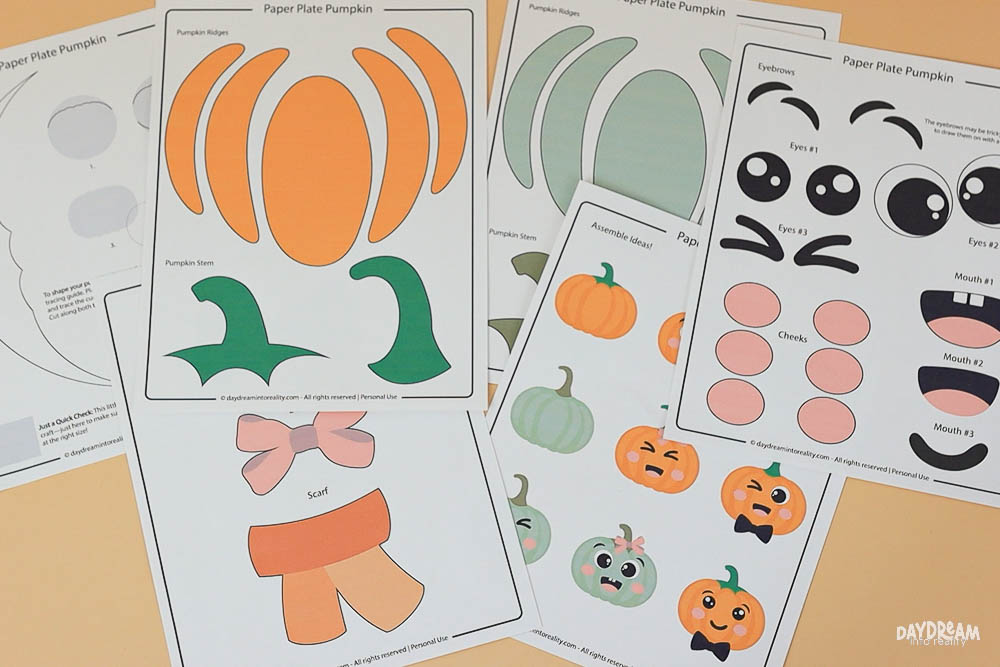
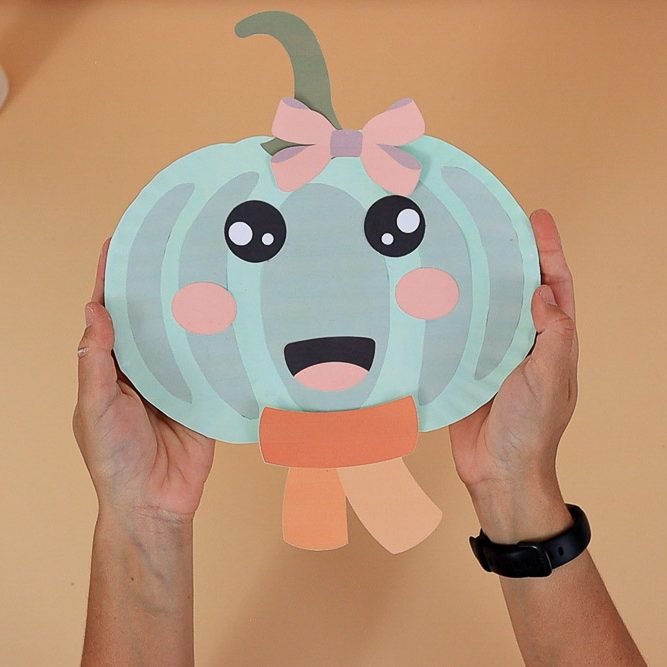
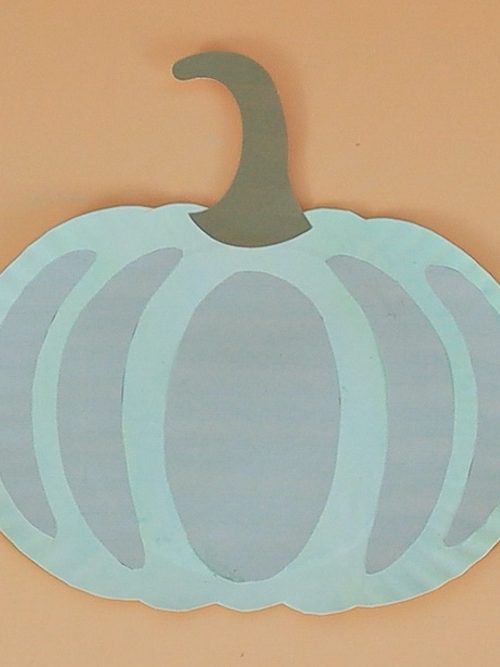
And while the template was made for a classic orange pumpkin, I couldn’t resist adding a sage green version — because modern pumpkins deserve a moment too.
Related: Paper Plate Acorn Craft
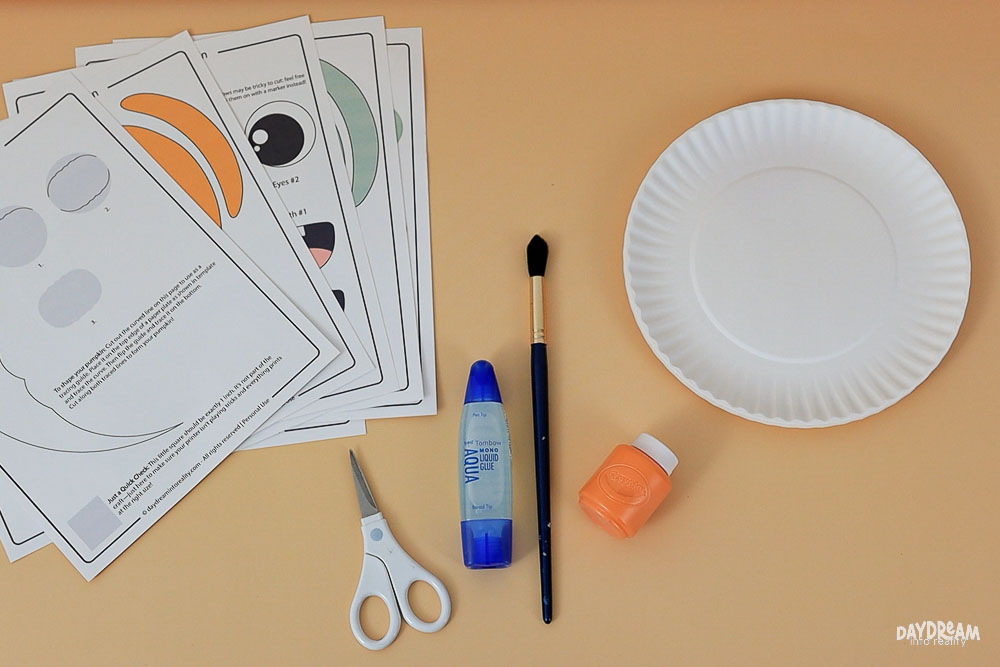
Tools & Materials
- Printer
- Template (download at the end of the article; you don’t need to subscribe!)
- 9-inch paper plate
- Scissors
- White cardstock
- Orange paint
- Optional (for sage green pumpkin): white, green, and brown paint
- Glue
- Markers, crayons, or colored pencils (optional)
Super Tip: No paper plate? No problem! Just cut a 9-inch circle from cardstock and you’re good to go.
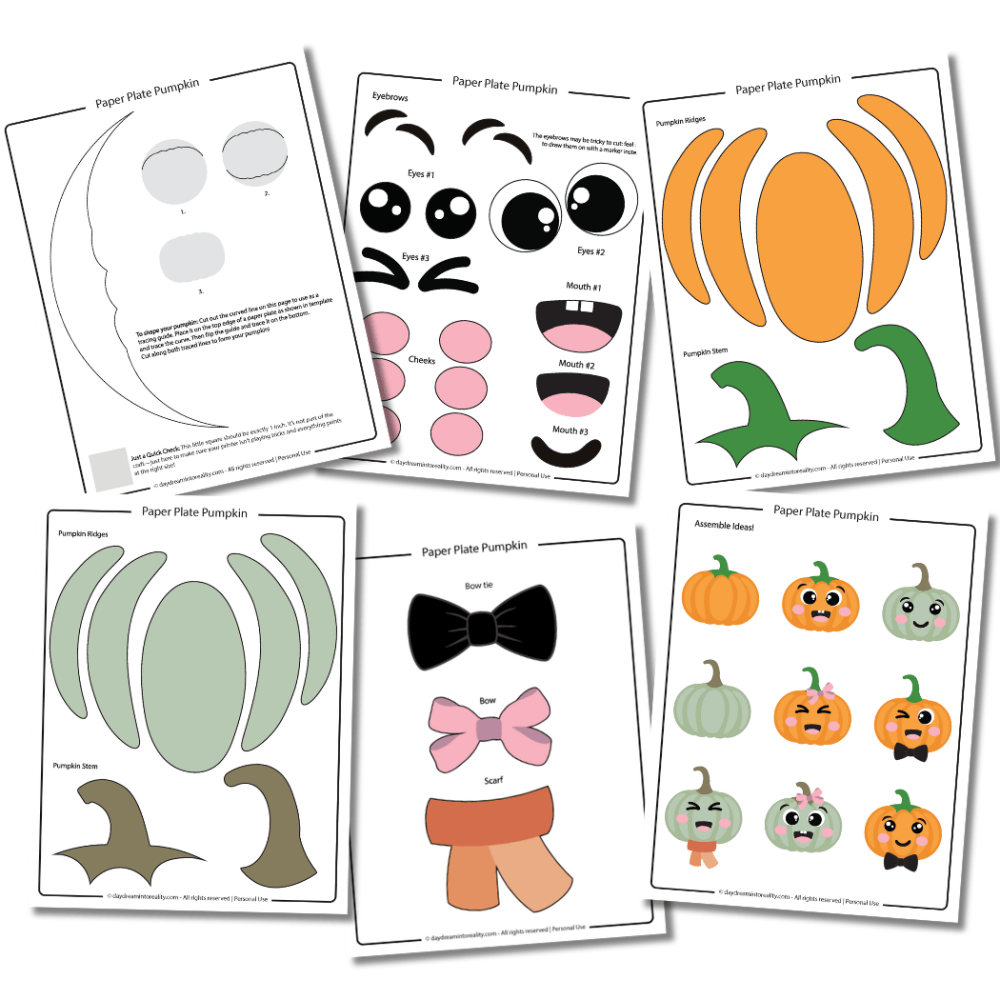
Step 1 – Print Pumpkin Template
First, scroll to the end of this tutorial and download the template that works best for you.
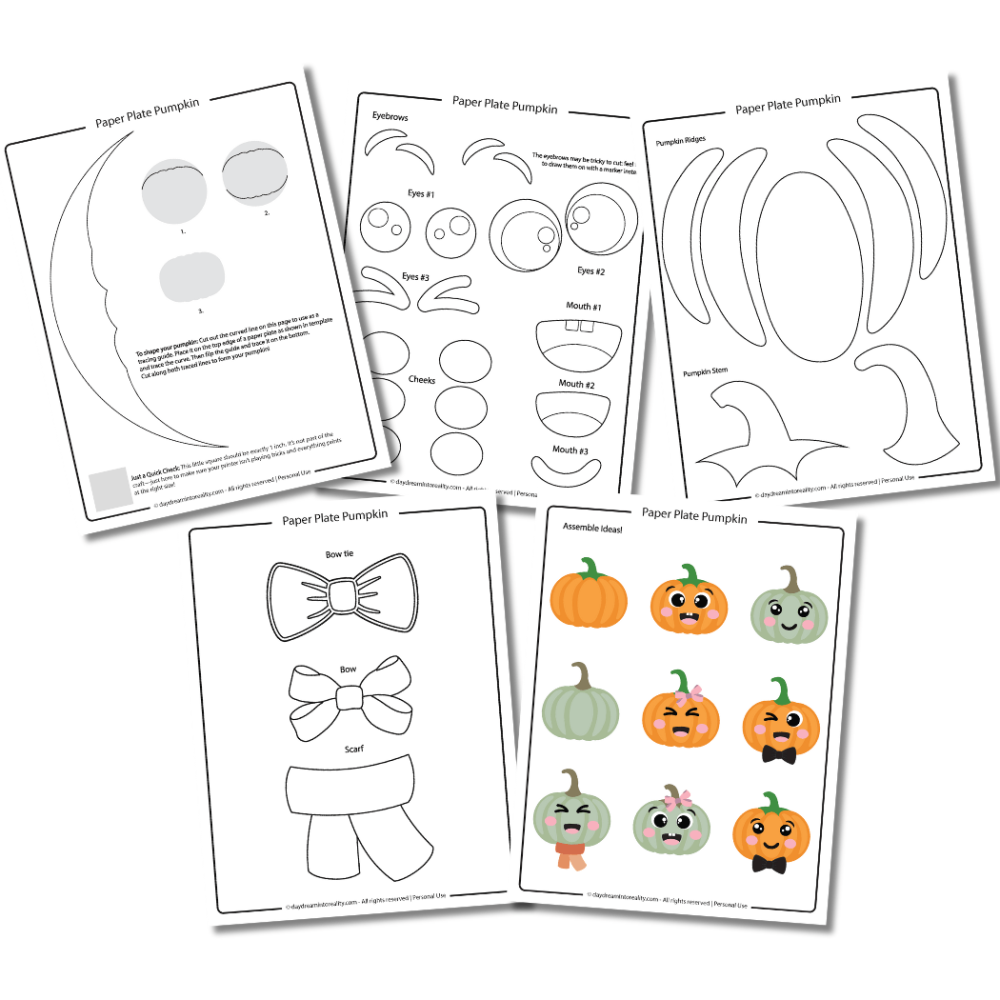
Want to save time? Print the colored version.
Looking for a longer activity or something more hands-on? Choose the coloring version and let your child decorate the pieces before cutting.
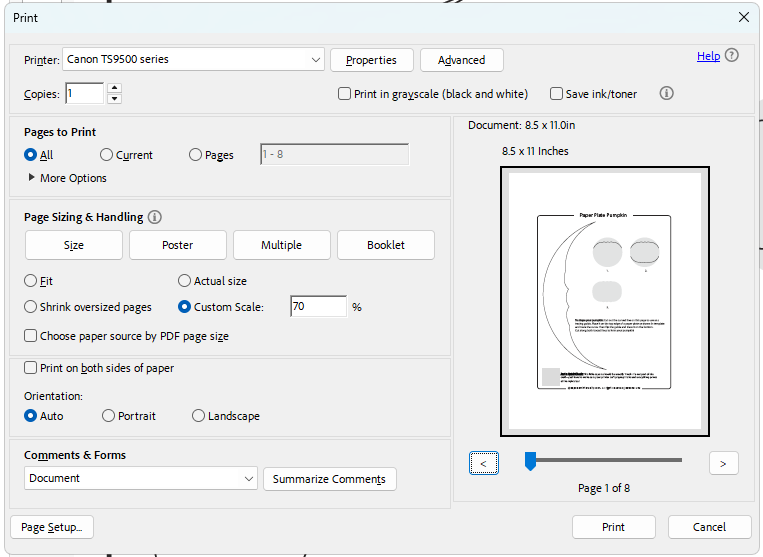
Important: Print at 100% or “Actual Size.” Use the square below to make sure your printer settings are correct. It should measure 1 inch by 1 inch when printed. This ensures everything fits a standard 9-inch paper plate.
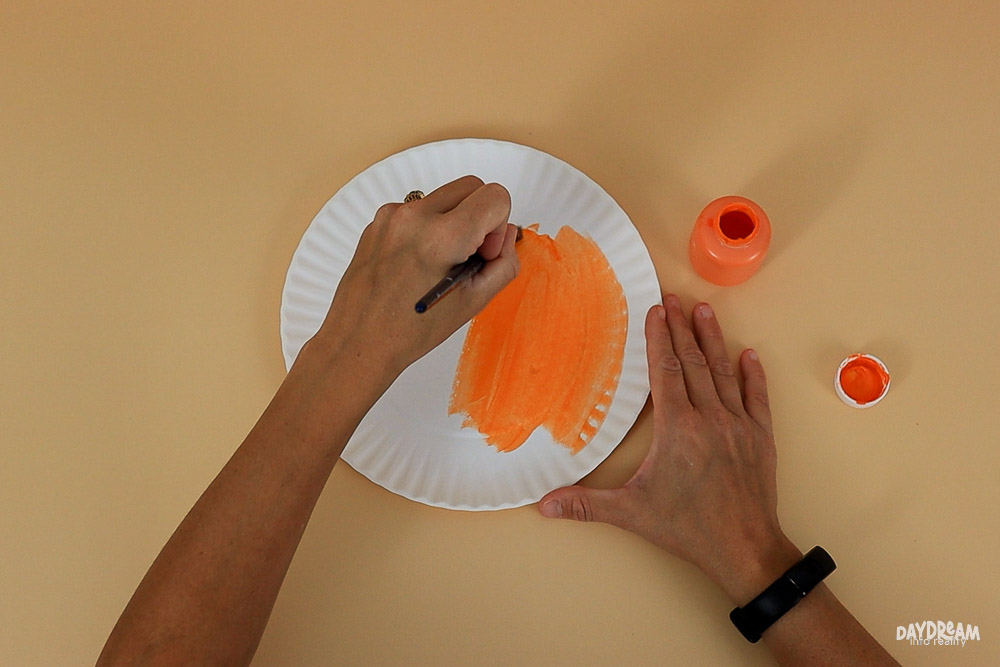
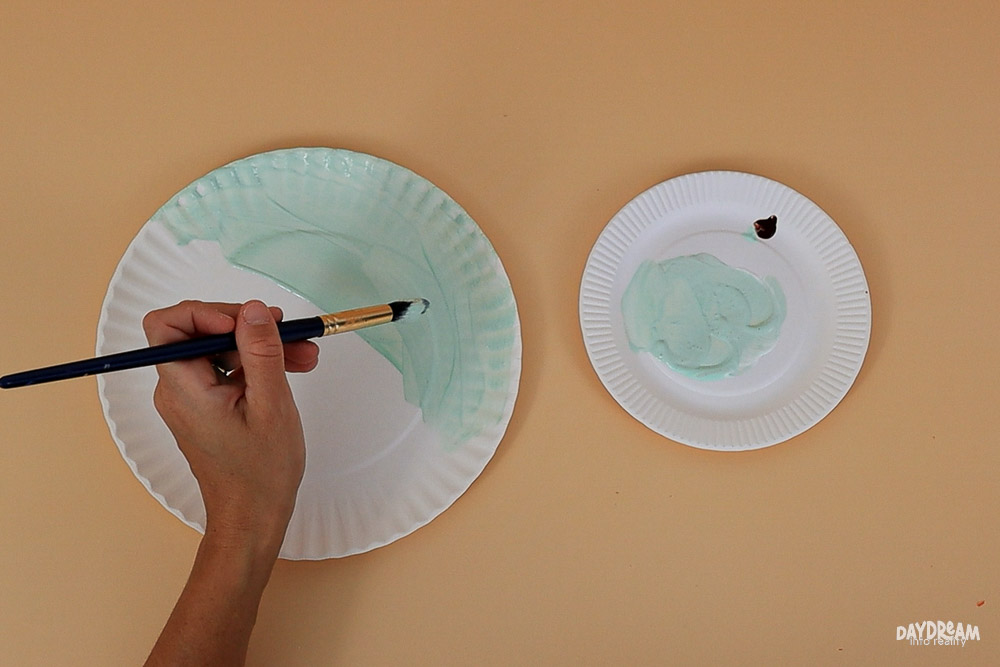
Step 2 – Paint the Plate
Before you cut anything, let’s paint the paper plate — that way it’ll be dry and ready when you need it.
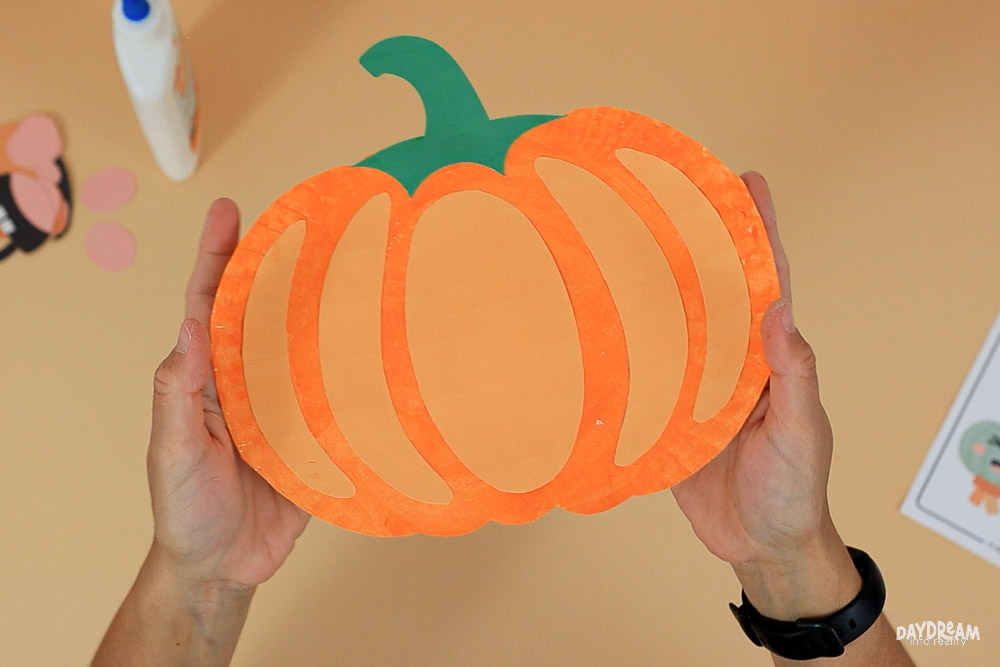
- For a classic pumpkin, paint the plate orange.
- Want a modern twist? Try sage green!
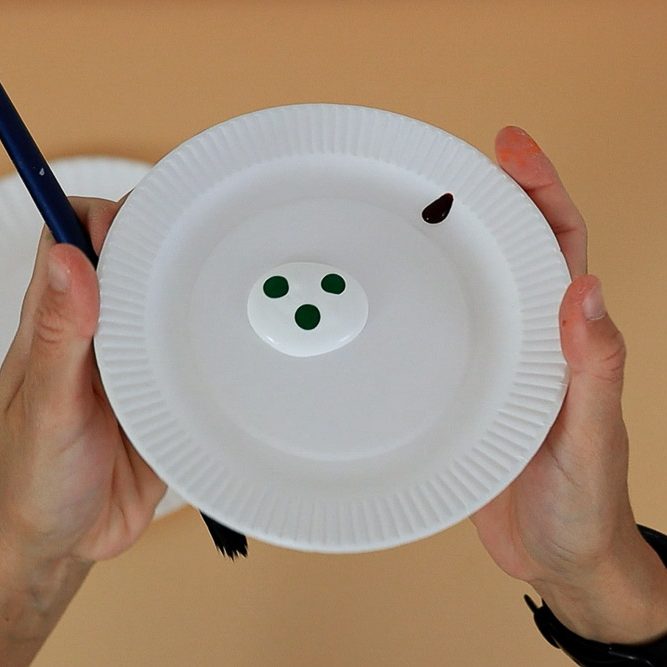
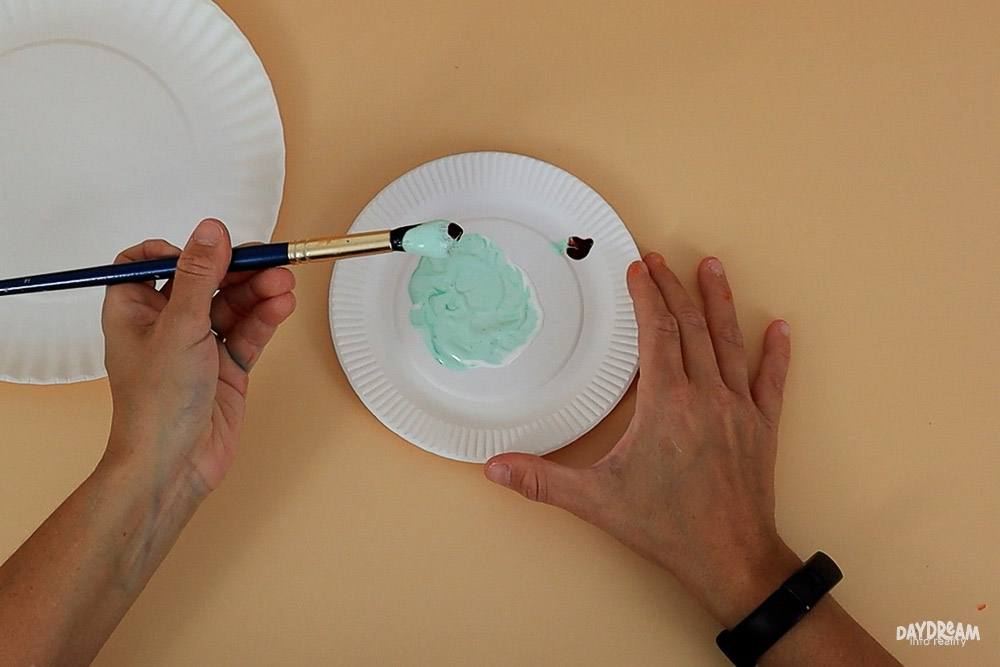
Here’s how I mixed the sage green:
- 1 tablespoon of white paint
- 3–4 drops of green
- 1 tiny drop of brown on the side
Start by mixing white and green. Then, using your brush, gently tap into the brown and blend — a tiny bit goes a long way. This gives you that beautiful, muted, earthy tone that’s everywhere this fall.
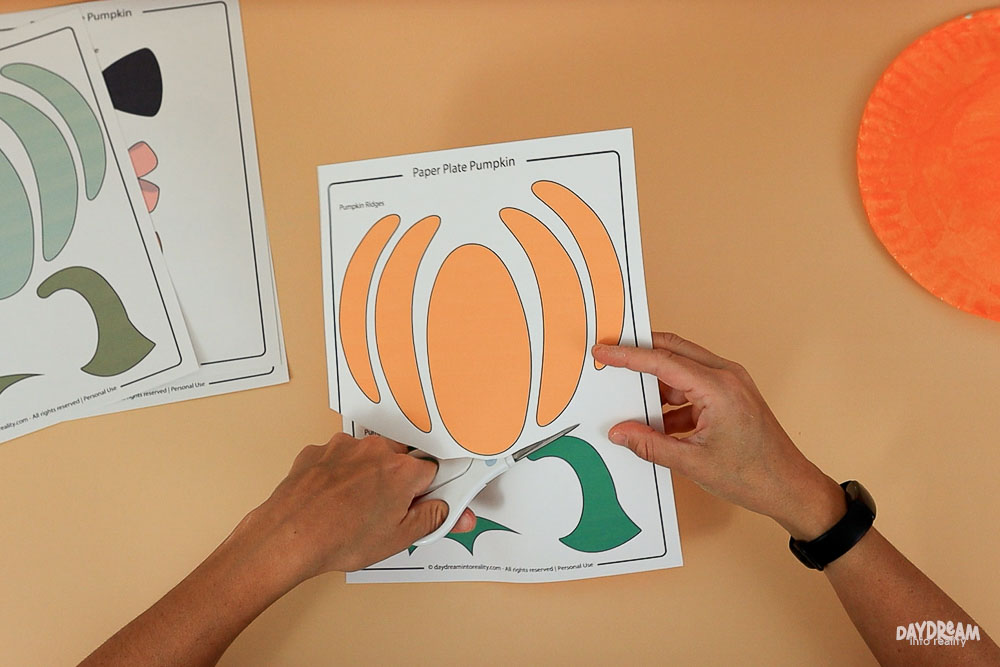
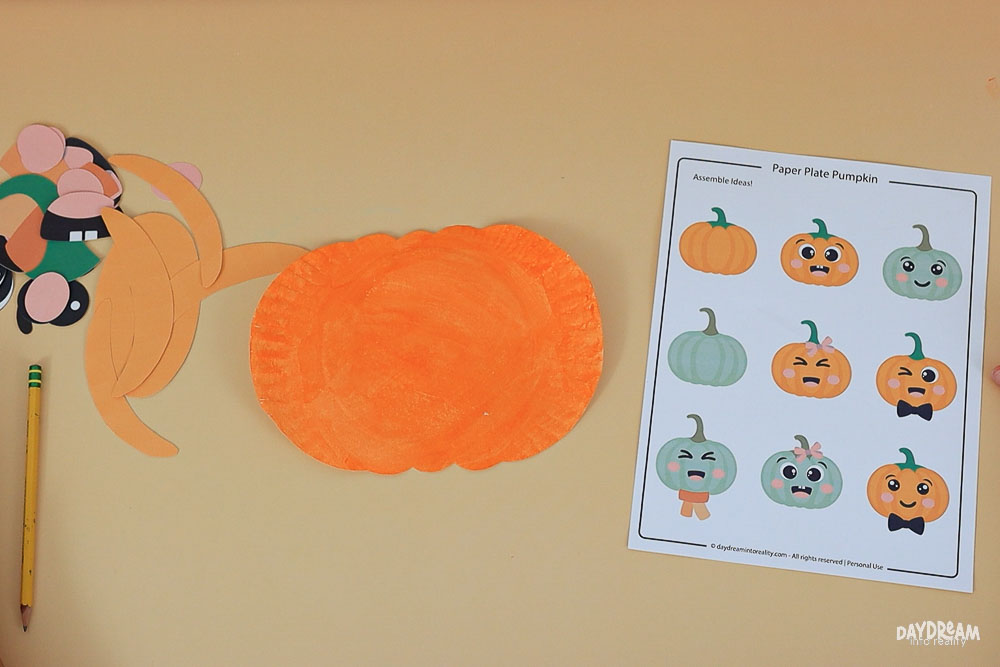
Step 3 – Cut Template
While your plate is drying, it’s time to cut the pumpkin face pieces from the template.
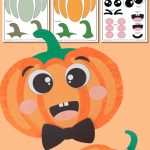
There are a few different eye and mouth styles to choose from. You’ll also see optional accessories like eyebrows, a hair bow, a bow tie, and even a scarf!
Note: The eyebrows are a bit tricky for little hands — feel free to skip them, help your child, or use a black marker to draw them on later.
Step 4 – Trace the Pumpkin Shape
Here’s a neat little trick:
Take your pumpkin cutout and place it on the back side of the painted paper plate. Trace the top curve, then flip the cutout and trace the bottom. This helps you get that pumpkiny oval shape without overthinking it.
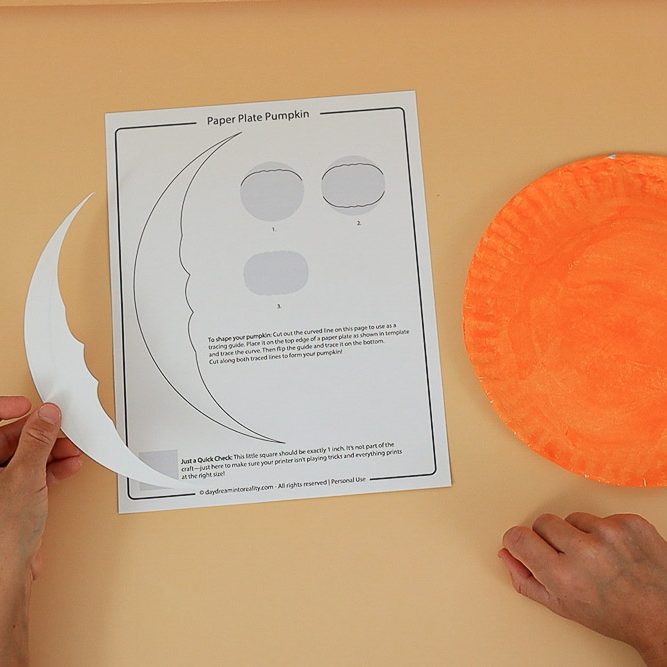
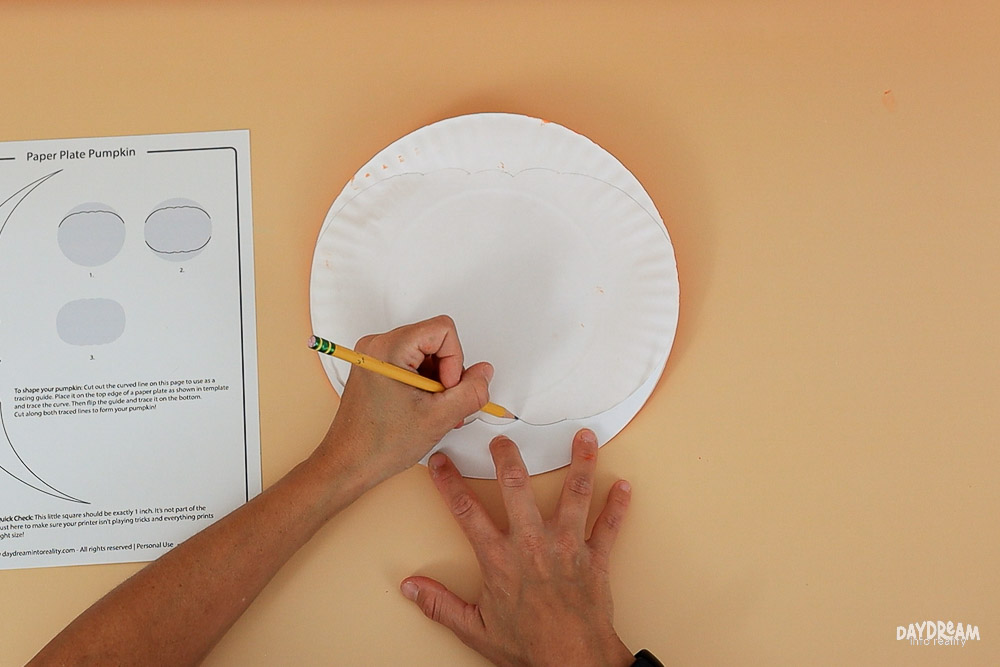
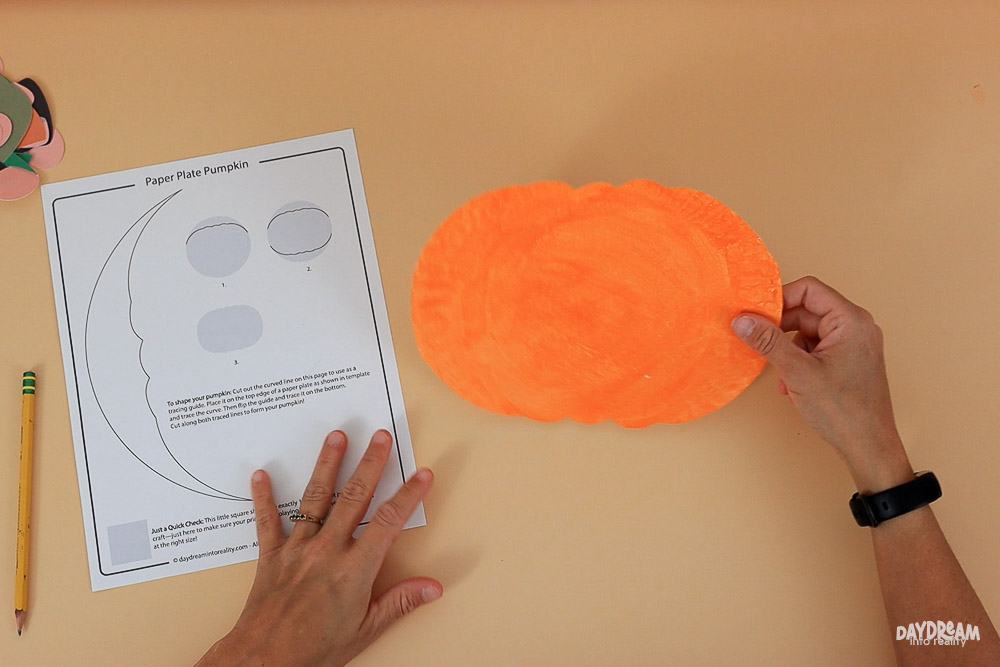
I recommend tracing after painting — the plate is flatter and easier to work with that way. Then cut along the lines you traced.
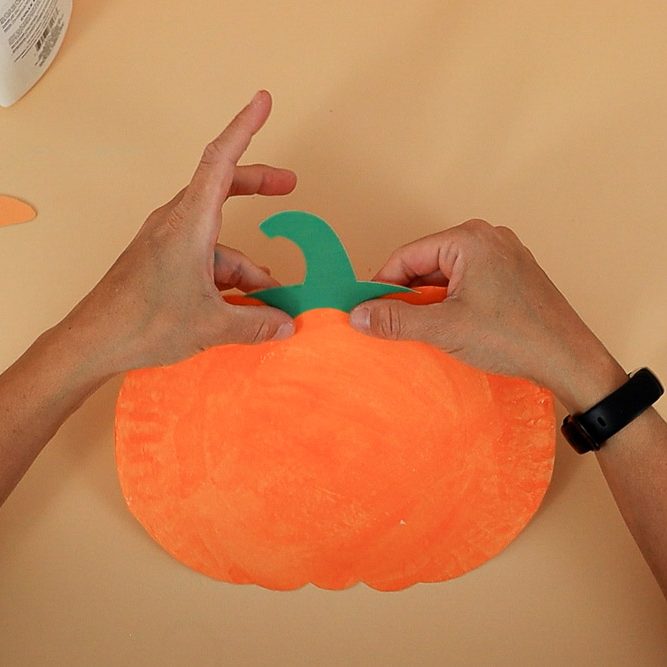
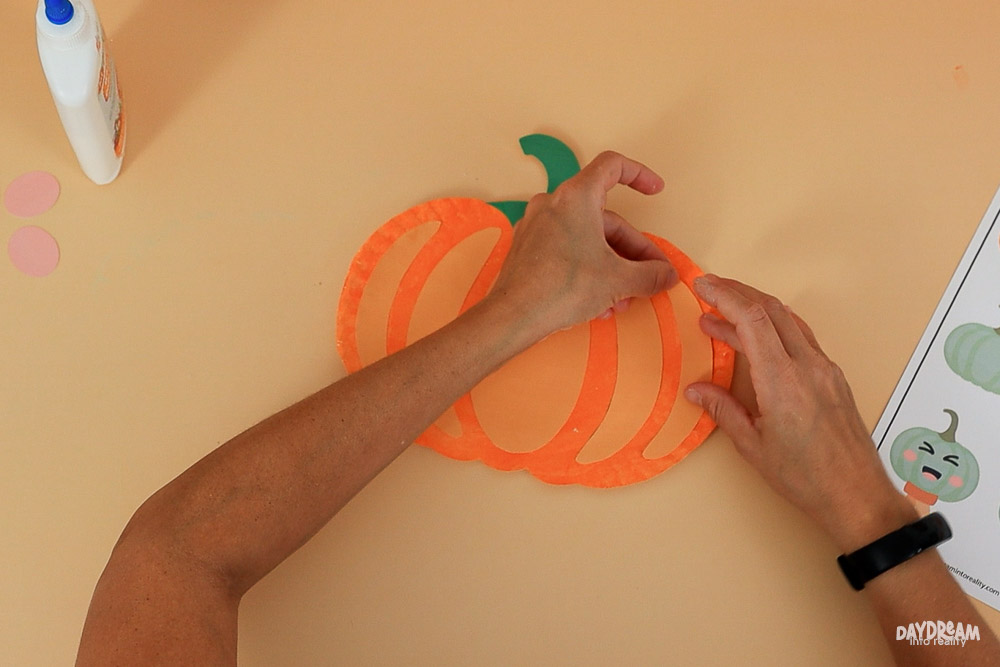
Step 5 – Assemble and Glue
Let the fun begin!
Not sure where to glue the pieces of your pumpkin? Here are some fun assembly ideas to help your child pick a favorite style!
Let them explore different expressions, add a bow or scarf, or even try a sage green pumpkin for a modern twist. It’s all about making it their own!
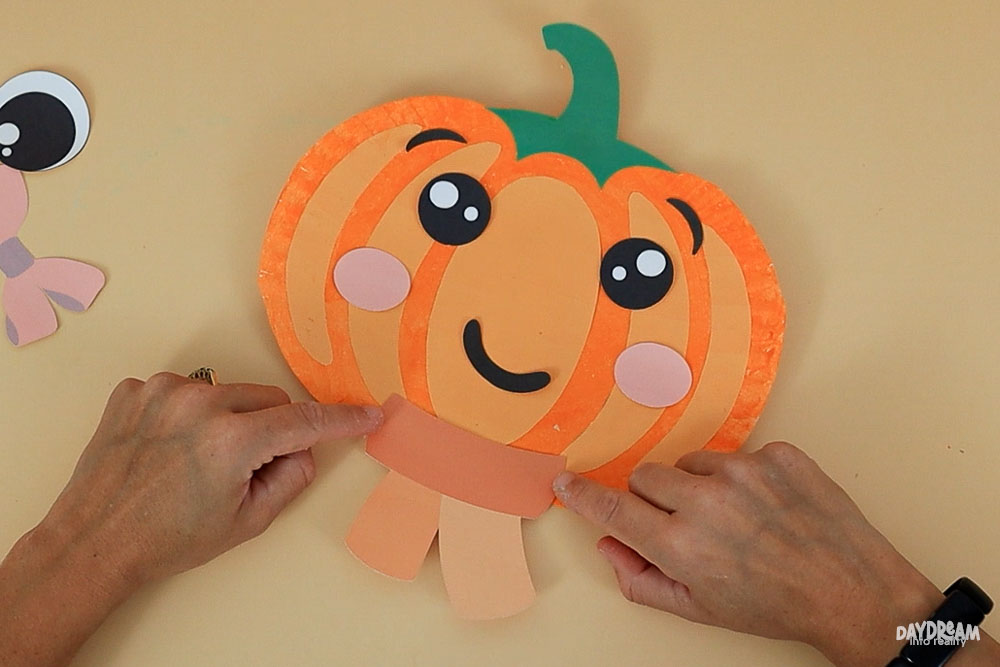
- Glue the stem to the top of the plate
- Then the pumpkin ridges.
- The eyes, mouth, and cheeks (for that extra cute factor)
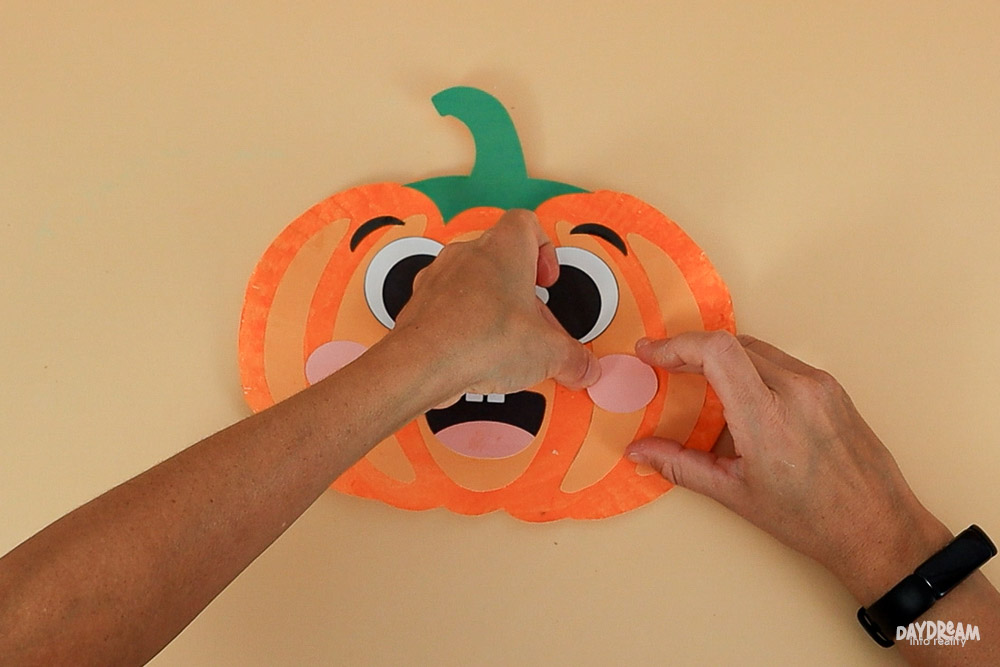
- Glue on the cheeks for that extra cute factor
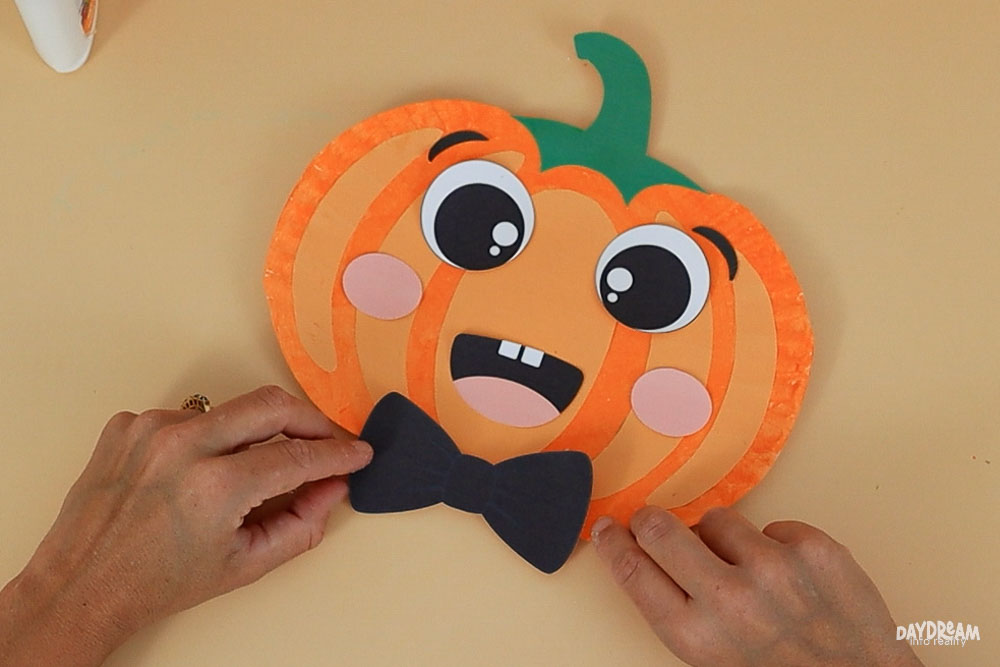
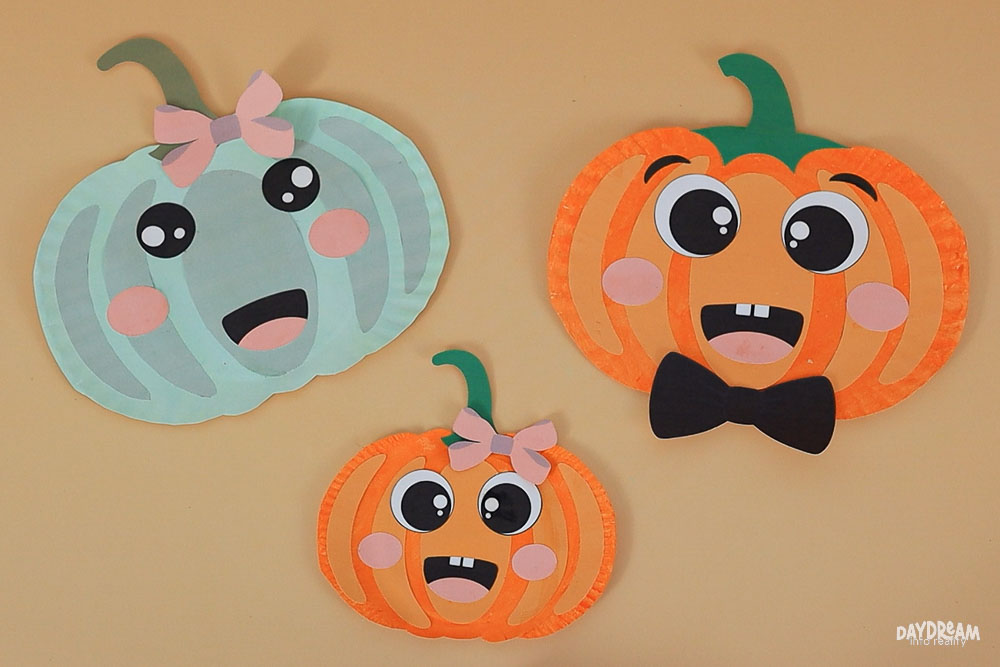
- Add any extras — a bow tie under the face or a hair bow on top!
I picked the bow tie!
More Paper Plate Pumpkin Ideas
There are so many ways to make this pumpkin craft your own! Here’s a little peek at how different versions can look:
- Add a hair bow to give your pumpkin a cute and playful vibe
- Go classic with a bow tie under the chin — perfect for a pumpkin “gentleman”
- Try the sage green pumpkin for a modern, farmhouse-style twist

Or you can even have a simple pumpkin with no face!
Bonus: Make a Mini Pumpkin!
Want to make a baby pumpkin too? I made a mini version using a 6-inch paper plate, and it turned out adorable. (It’s a little harder to cut, but older kids may prefer this option!)
Just print the template at 70% scale and follow the same steps.
Download Template!
Click the yellow button below to download the PDF directly, or click the image to open it in a new tab and print straight from your browser.
No sign-up, no fuss — click, print, and craft!
Oh!
Just so you know, I also have a library full of free SVG files and Printables for all my subscribers, a.k.a. Daydreamers. You can see a preview right here or get access by filling out this form.
Paper Plate Pumpkin Craft For Kids | Free Template!
Make this adorable paper plate pumpkin craft with your kids! Just paint, cut, and glue using the free printable template. Perfect for the fall season!
Materials
- Printable pumpkin template (download at the end of the post)
- 9-inch paper plate (Optional 6-in paper plate)
- White cardstock
- Orange paint
- Optional for sage green pumpkin: white, green, and brown paint
- Markers or crayons (if using coloring version)
Tools
- Scissors
- Glue
- Paintbrush
- Printer
- Optional: small paint palette or bowl for mixing
Instructions
- Download and print the template: Scroll to the end of this post to grab the free template. Choose either the full-color version or the coloring version.
- Paint the paper plate: Paint the front of the paper plate orange. For a sage green pumpkin, mix 1 tbsp white paint with 3–4 drops of green and a tiny touch of brown. Let it dry completely.
- Cut out the template pieces: Choose your favorite facial pieces (eyes, mouth, cheeks), and cut them out. There are also optional pieces like eyebrows, hair bow, and bow tie.
- Trace the pumpkin shape: Flip the paper plate over and trace the top and bottom of the pumpkin cutout onto the back of the plate. Cut along the lines to shape your pumpkin.
- Assemble your pumpkin: Glue the stem at the top, then add the eyes, mouth, and cheeks. Add a bow tie or hair bow to give your pumpkin some personality!
- Optional: Make a mini pumpkin: Use a 6-inch paper plate and print the template at 70% scale to create a smaller version of the craft.
Notes
*The eyebrows are a little tricky to cut; you may want to use a black marker instead.
You May Like These…
I hope you and your kids enjoy making this paper plate pumpkin! It’s such a simple craft, but also a great chance to slow down and connect.
While you’re crafting, try asking questions like, “Why do you think pumpkins are everywhere in the fall?” or “What color would your perfect pumpkin be?” Small moments like that turn a quick project into something more memorable.
Also, if you enjoyed that activity, I’m sure you would also love some of the following.
- 30+ Amazingly Fun Fall Crafts & Activities For Kids
- Related: Paper Plate Turkey Craft
- Fall Paper Plate Tree Craft for Kids
- Turkey Headband Craft
- Paper Plate Scarecrow Craft For Kids
Happy Crafting!