Hello Daydreamers!
Today, you will be learning something very simple but handy; we will cover writing and cutting with your Cricut machine in one single step.
I will have instructions for Maker, Explore, and Joy machines. However, for this tutorial, I used the Cricut Maker.
If you are a beginner still figuring out Cricut’s software, I recommend this comprehensive and easy Design Space tutorial.
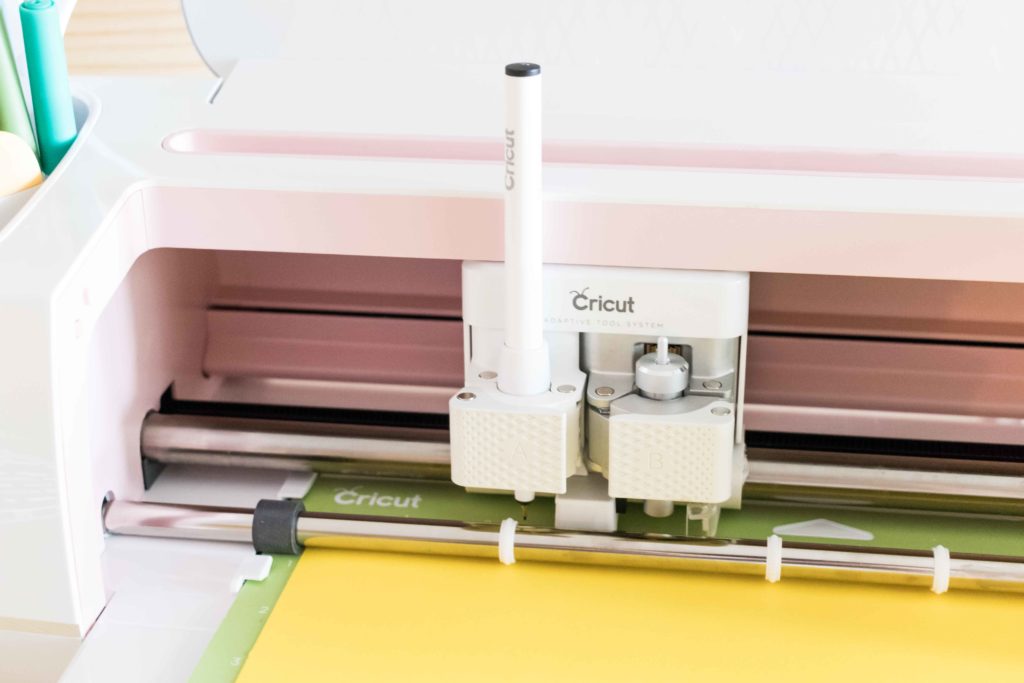
Today I just want to focus on answering this question, I don’t know about you, but sometimes I just need an answer, not a whole project.
Are you ready?
Let’s Daydream Into Reality!
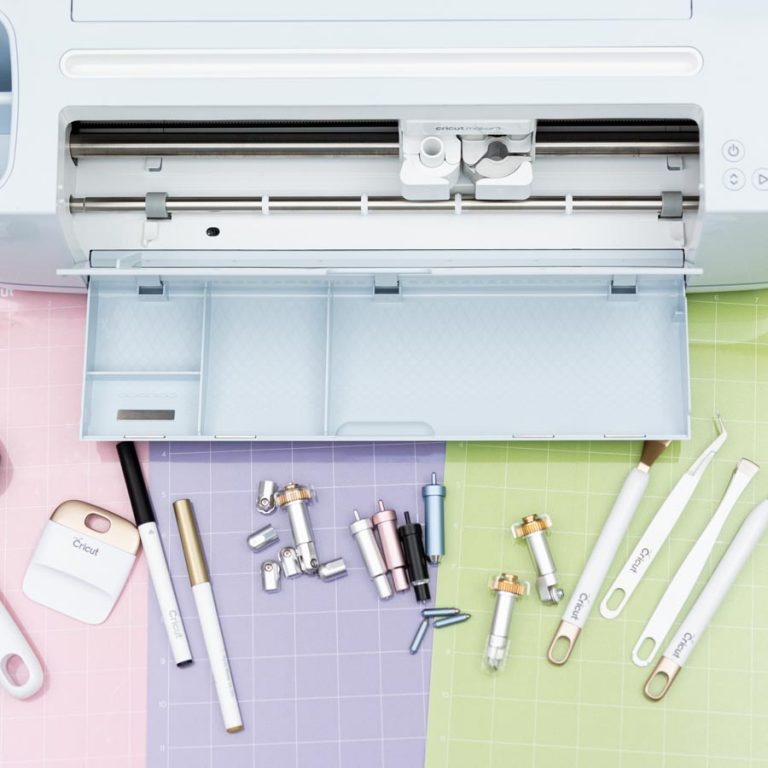
Materials – Accessories
For this tutorial, you will need:
- Cricut machine
- Cricut pen
- Fine Point Blade*
- Cardstock
*When using thin materials like copy paper, cardstock, etc., you’ll need the fine point blade. However, if your material is thicker, you may need another type of blade-like the deep point or knife blade.
Check out my Cricut blade guide if you need more information about blades.
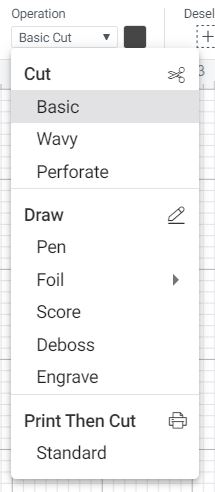
How to Set your Machine to Draw and Cut in Cricut Design Space
To understand how to write and cut your machine, you need to know what is “Operation” in the Cricut world.
“Operation” is the way you tell your machine what action to perform; there are three different operations (Cut, Draw, Print then Cut), and some of them are divided into additional options that translate into separate tools you can install on your machine to perform an action.
Next to “Operation,” there’s a little color box that allows you to change colors in Design Space. Some operations will show a filled color box, others will show a stroke, and other operations will not allow you to change colors.
Depending on the machine you own, the operations you can perform with your device will vary.
For this tutorial, I will show you all the operations from the Maker’s point of view.
Different Types of Draw in Cricut Design Space
Cricut allows you to draw in five different ways:
- Pen
- Foil*
- Score**
- Deboss***
- Engrave***
* Works with all machines, but for Cricut Joy, there’s only one tip.
** Only works with Maker and Explore devices. With the Maker, you can use the scoring wheel for crispier folds. For Explore (and Maker), you can only use the scoring stylus.
*** Need Debossing and Engraving tips and only compatible with Maker machines.
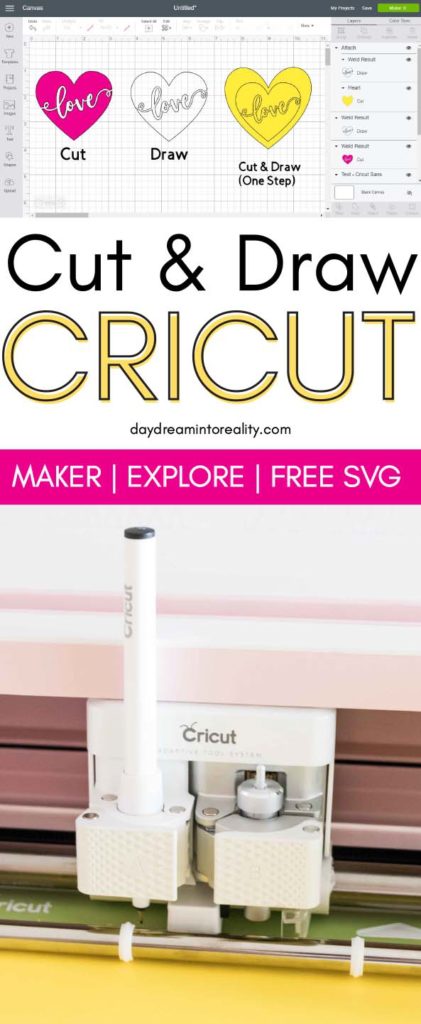
This tutorial will cover how to cut and draw using Cricut pens. Now, check out the following screenshot, and let’s have a little talk about how “Cut” and “Draw” work together.
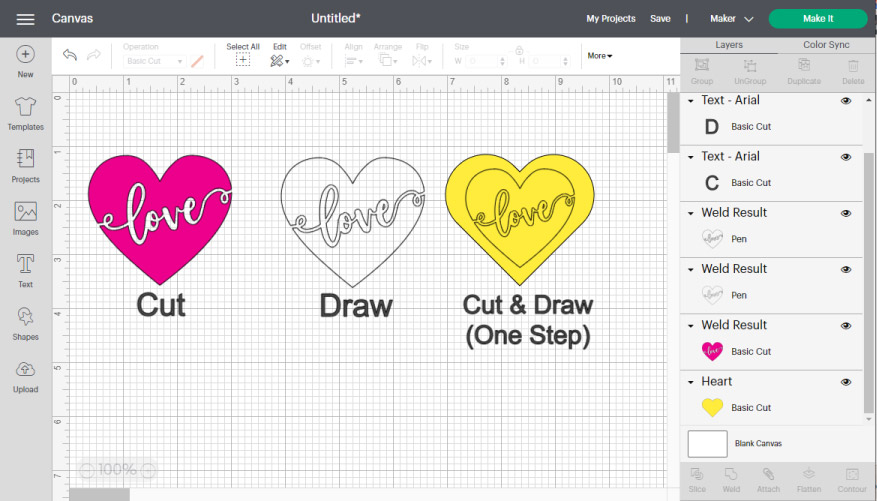
First, we have a pink heart; this element has “Basic Cut” as “Operation,” you can tell because there’s a solid color with a dark grey border.
The border represents where the blade will cut through, and the solid color represents the color or type of the material you will use in your project.
The second heart is just outlined; this is because I changed the “Operation” to “Draw – Pen” You won’t see any background color here because here you are just telling your machine to draw on whatever material that you decide to use.
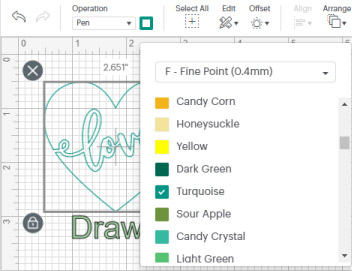
The third heart is a combination of a heart shape (you can add by clicking on shapes located on the left panel of the canvas area) and the second heart.
Here I am telling my Cricut that I want to cut a yellow heart shape, and inside of it, I want to draw a heart with the word love inside it.
IMPORTANT: If you want to “Cut” and “Draw” in one step, you need to make sure that the shape or design you are going to cut is attached to what you will write. Otherwise, your Cricut will place each element on different mats.
In other words…
Any SVG file you upload to Design Space can be drawn or cut by changing the operation. So don’t be shy and try these operations with different shapes, more complex designs.
Oh!
Just so you know, I also have a library full of free SVG files and Printables for all my subscribers, a.k.a. Daydreamers. You can see a preview right here or get access by filling out this form.
Now let’s see drawing works with text because it is slightly different!
Write vs Draw Text in Cricut Design Space
When using text in Design Space, you have two options:
- Change “Operation.”
- Use a Font that has a writing font style
When you change the “Operation,” your text will look outline, and this is perfect if you want to color them after you are done with your project or if this is the effect you are looking for.
However, if you want a WRITING effect, you MUST use Cricut Fonts. These fonts are specifically designed for this purpose. Here’s the problem: they usually cost money; you can either buy them individually or come with Cricut Access.
However, there’s a bright light at the end of the tunnel!
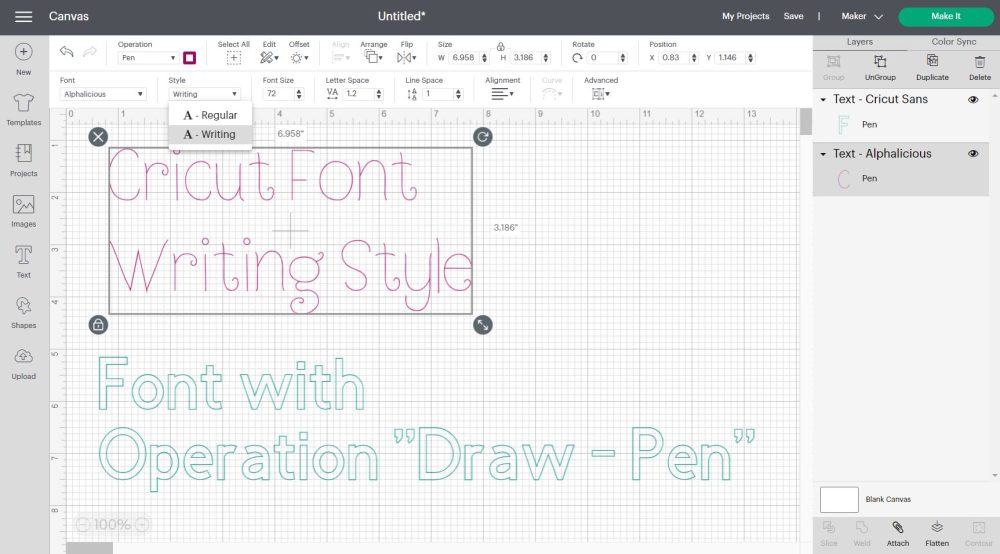
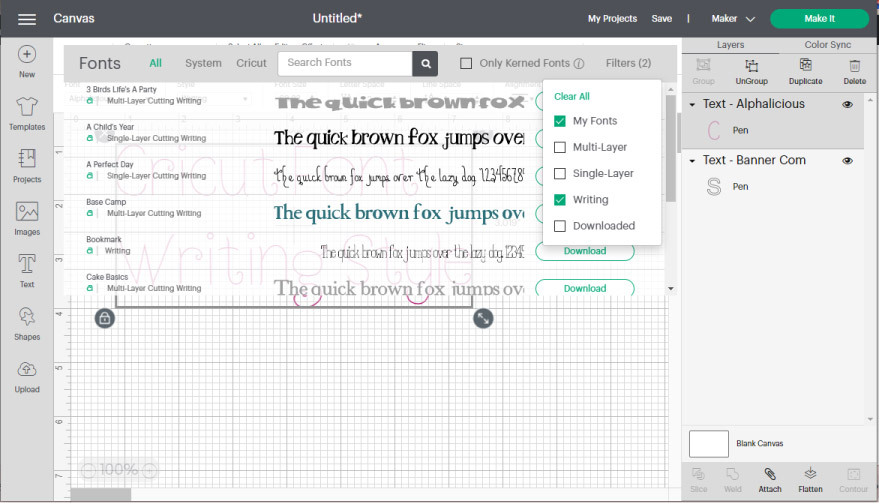
I noticed that they give you a couple of fonts for free with your machine. To find them, select your text, then click “Font” and filter them by selecting “My Fonts”+ “Writing.”
If you are interested in learning more about text and becoming a pro at editing text in Design Space, make sure to read this outstanding tutorial I put together.
If you don’t want to pay for writing fonts, I have a helpful article that will help you find fonts to recreate “Writing fonts” for Cricut.
Make it
Let’s go back to our third yellow heart and see what instructions you need to follow with each machine.
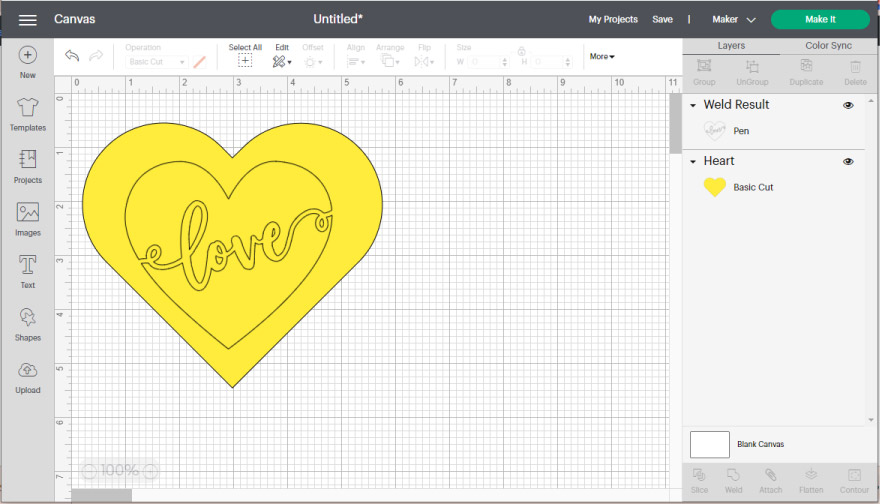
Make sure that both elements are attached. Otherwise, they will be placed on different mats. To do this, select both designs and then click on the “Attach” icon located at the bottom of the layers panel.
Click on “Make it” in the upper right corner of the canvas.
Newer machines will ask you how to load your materials to your machine. Select “On Mat.” If you have a Cricut Joy, remember that your projects must be small.
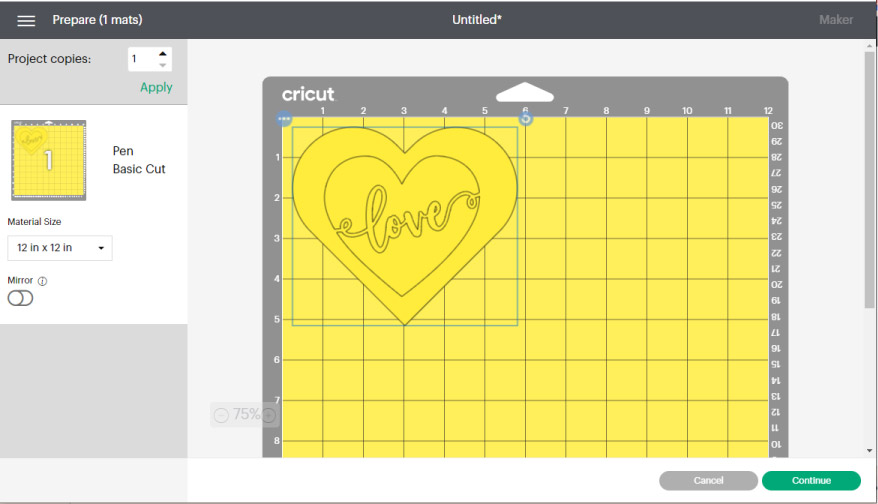
Click on “Continue” to select materials.
Cutting and Writing Maker, Explore and Joy
If you have a machine with a “Smart Set Dial,” move it to “Custom” so you can follow along.
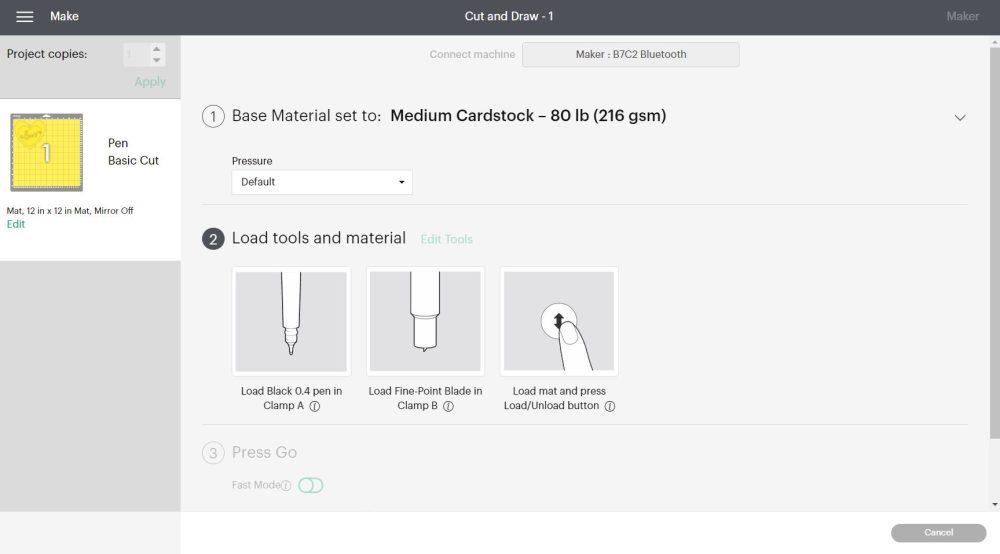
- Set your base material, for me it was “Medium Cardstock.”
- Install the tools Cricut shows. Pens always go on “Clamp A” and bladed go on “Clamp B”
- Press the flashing go button to start the cut.
If you have a Cricut Joy, Design Space will have you install the pen first. Once the drawing is complete, you’ll be prompted to install the fine point blade.
Type of Projects you Can use Cut and Draw
These two features – Cutting and Drawing – are fantastic, and you can use them in a wide variety of projects. Seriously, the sky and your creativity are the limits.
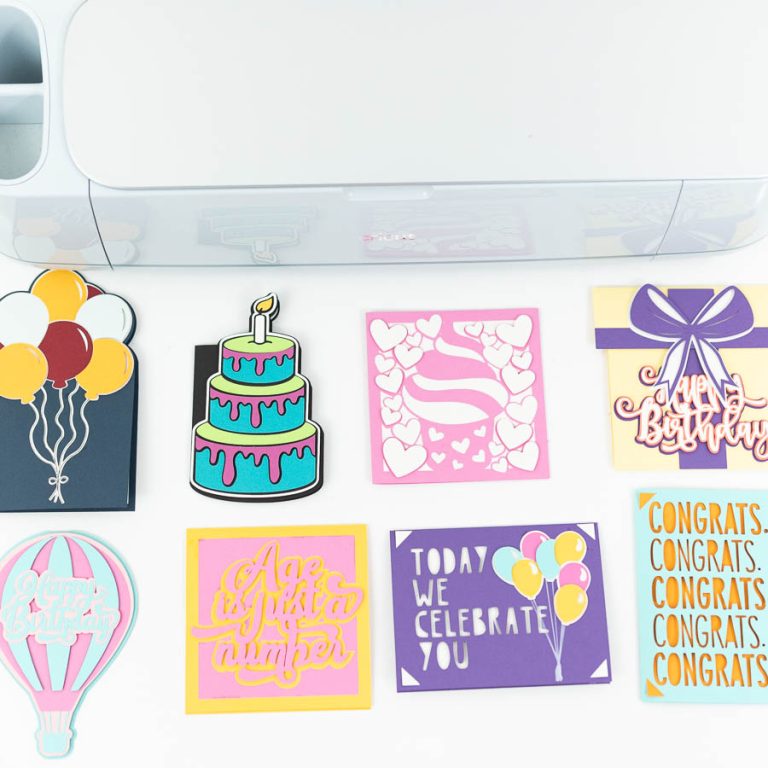
- Greeting Cards
- Coloring Pages
- Gift Tags
- Planner Stickers
Something I like about the drawing and writing settings is the handmade vibe you get when you finish a project.
Was this information useful?



I have attached my score line to a circle
I used a writing font which i than attached.
It will score
Write but won’t cut. The C flashes. If I remove the score and pen it will cut. Driving me nuts
If you have a Maker your Cricut may be telling you to change the wheel to the fine point blade. Once you change the tool, then you can tap the “C” to continue with the cut.