Hello Daydreamers!
Today, you will learn how to make gorgeous cake toppers with your Cricut for any occasion.
Not only will I teach you how to make them from scratch in Cricut Design Space, but I will also provide you with over 10+ SVG cake topper templates that will suit all your crafting needs. (Christmas, Wedding, Birthday, Valentines’ Day, etc.)
You can do this project with any Cricut machine. I used my Cricut Maker, but I have notes that will guide you if you have an Explore, Joy, Maker, Explore, or Maker 3 devices.
There are many ways to make cake toppers with your Cricut, and today I will show you a wide variety of methods that will set you up for success.
In a nutshell, these are the techniques I am going to use through this tutorial.
- Materials you need for any cake topper
- How to Make a cake topper with Fonts
- Using the Offset tool to make cake toppers
- Print then Cut cake toppers
- Making cake toppers with Cricut Images
- Make cake toppers with the Free SVG Templates I provided you with
Ideally, you will read this tutorial from the beginning because as we go, we will be implementing the concepts mentioned in the previews steps.
Note: Since all the cake toppers go through the exact cutting and assembly process, I will only cover the cutting process of the first one. (I don’t want to be repetitive)
Are you ready?
Let’s Daydream Into Reality!
Materials for Cricut Cake Toppers
Do you know what the key to making the most fantastic cake toppers is?
It’s PAPER!
Paper is something you never want to go cheap on. Especially if you are making a cake topper; because although little, this little piece will often be in the center of your party.
Here’s a list of the materials you’ll need

- Cricut Machine (Maker, Explore Family, Joy, Explore 3, Maker 3)
- Glitter Cardstock
- Colorful Cardstock for the back of the topper (optional).
- Fine Point Blade
- Cake topper sticks
- High-Quality Glue (please don’t use cheap or kids glue)
- Standard Green Mat
- Scraper (for cleaning up the mat)
- Brayer (optional, but my favorite tool in the Cricut world)
How to Make Cake Toppers with Cricut Fonts
Even for advanced Cricut users, something a little hard to understand is what will fall out after a cut and what will stick together.
When making a cake topper, you need to make sure that everything you want stays together.

We’ll be making a “Happy Birthday” cake topper with letters to teach you this concept.
Step 1 – Add and Edit Text
Click on the “Text” button located on the left panel of the Canvas and type in “happy birthday.”
Initially, your text will be Cricut Sans, but since we are working on party decoration, let’s change the font.
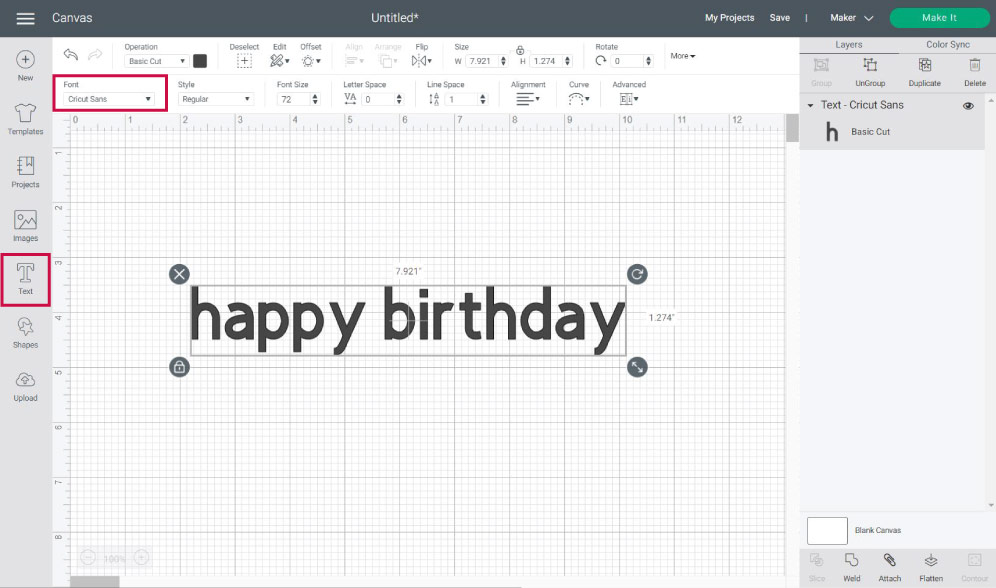
Select the text, and click on “Font,” and choose your favorite one. I picked the font “A Child’s Year” for this tutorial because it has a good (party) vibe.
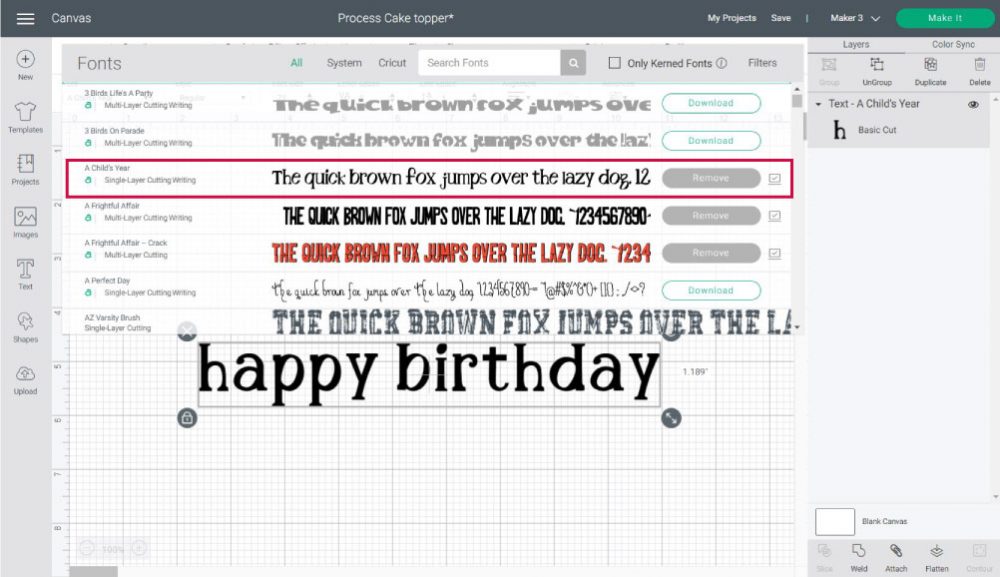
Tip: For cake toppers, I recommend you use a thick font to provide stability to your project.
Once you change your font, keep your text selected and go to the top panel on the canvas, click on “Advanced,” and choose the option “Ungroup to Letters.”
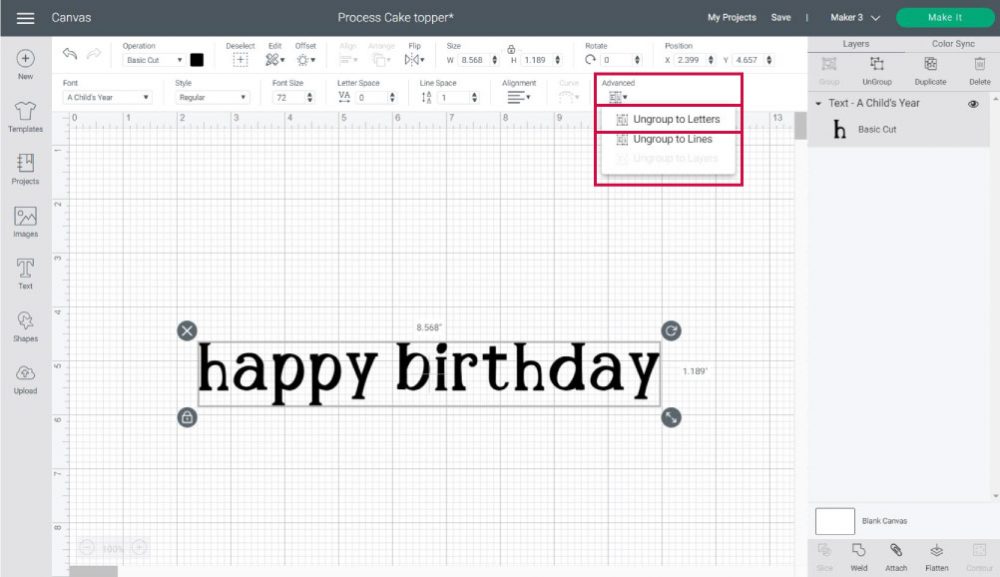
Ungrouping text to letters will allow you to edit each letter on its own.
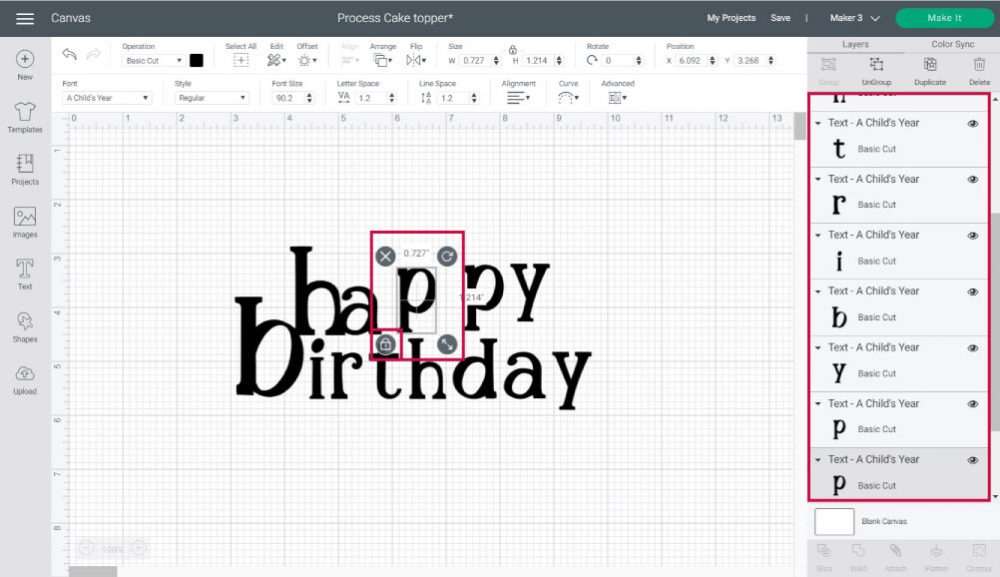
To edit each letter, select it, rotate it, increase the size, and unlock proportions from each one of the corners of the selection.
You can learn more about text and how to edit it in this handy tutorial.
Step 2 – Overlap and Weld Text
It’s time to give shape to the cake topper and to do that we need to organize all letters.
This is the most time-consuming part of the project and the most important because it will ensure that all of the letters remain together after your Cricut cuts the cake topper.
Start by overlapping all letters. I decided to have “happy” on the top and “birthday” at the bottom.
You may struggle to join all of the letters. That’s when rotating and unlocking the proportions of each letter comes in handy. If you pay attention to the screenshot down below, you’ll notice that everything looks different.
The goal here is to have everything connected.
Oh! And don’t forget the dot from the letter “i.” As you can see, I connected the dot (for the letter “i”) with the letter h.
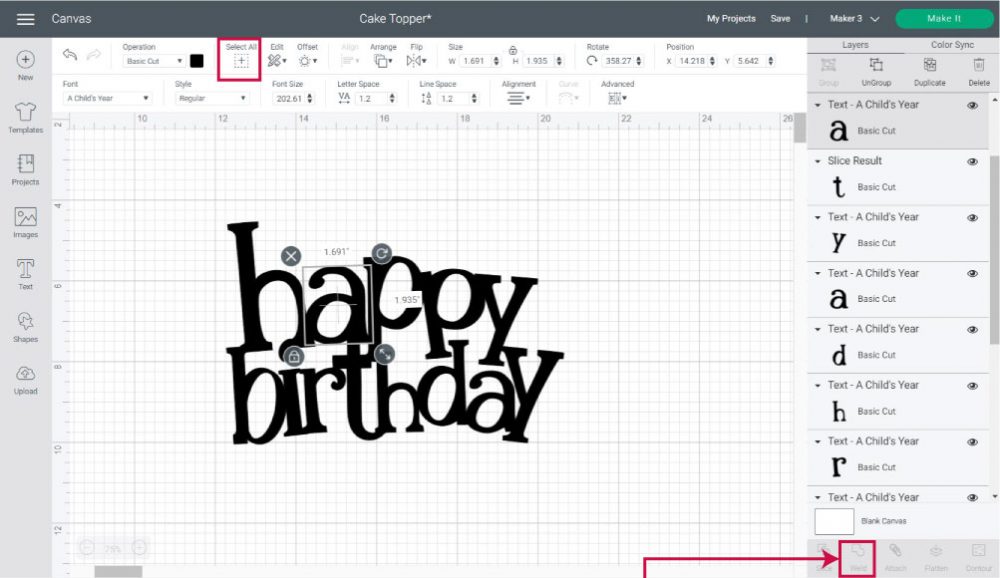
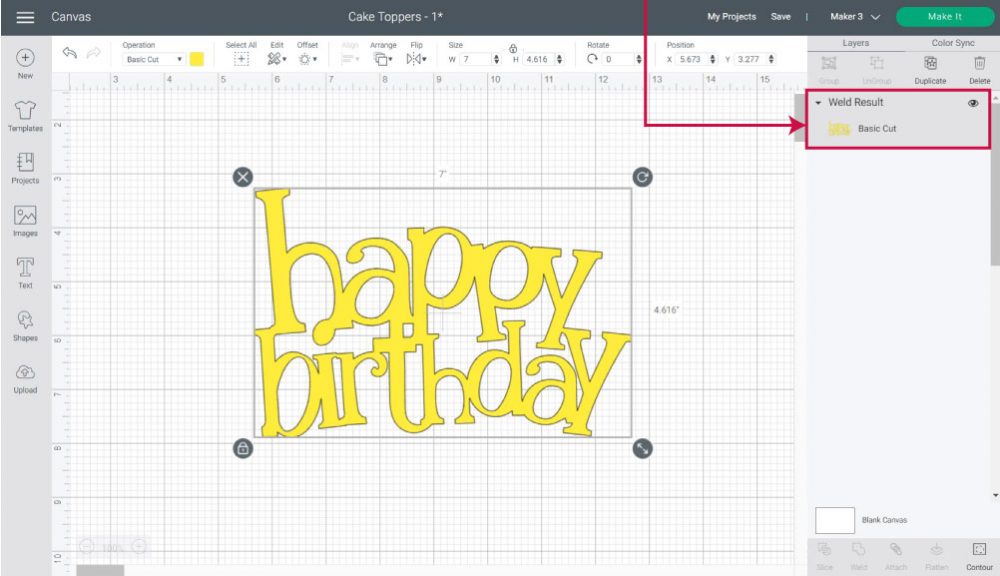
When all of your letters are overlapped, select them and click on “Weld” (located on the bottom panel) to create a single layer.
Step 3 – Copy and Flip Design
Usually, most cake toppers will have a cute paper on the front and a white plain nothing on the back.
Well…
Not today, my friend!
This thing where you have to place the cake in a particular position to hide the “dark side” will be a thing of the past.
Not only your cake topper will look more beautiful if you have another (or the same paper from the front) paper on the back, but it will also add extra sturdiness to the final project.
In other words, it’s a win-win.
To add a different color on the back of the topper, duplicate it (top of layers panel), select one of the copies, click on “Flip,” and select the option “Flip Horizontal.”
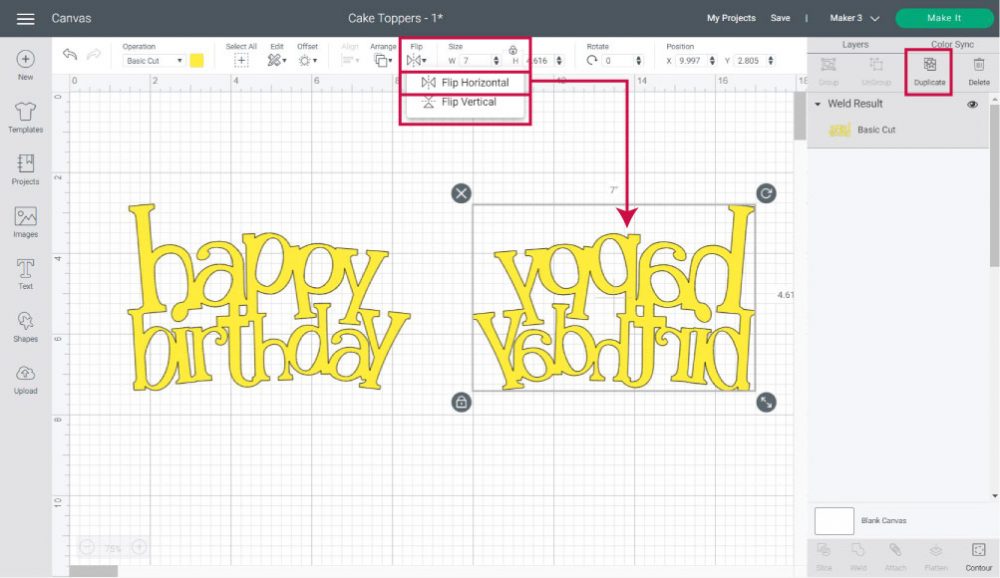
There you have it; the front and the back of the cake topper.
Step 4 – Resize, Change Color and Make it
You can change the colors of the cake topper. I decided to go with purple for the front and a rainbow-like color for the back.
Note: Change colors by clicking on the color box next to “Operation” (you need to select the layer first).
Also, and before you cut the design, check the size of your project.
If you need to increase or decrease the size of the project, make sure that the top and front of the topper measure the same.
As a reference, mine ended up being 7 X 4.6 in.
Important: For Cricut Joy, your design can’t be larger than 4.25″ x 6.25″ if using a small mat to 4.25″ x 11.75″ if using a large mat.
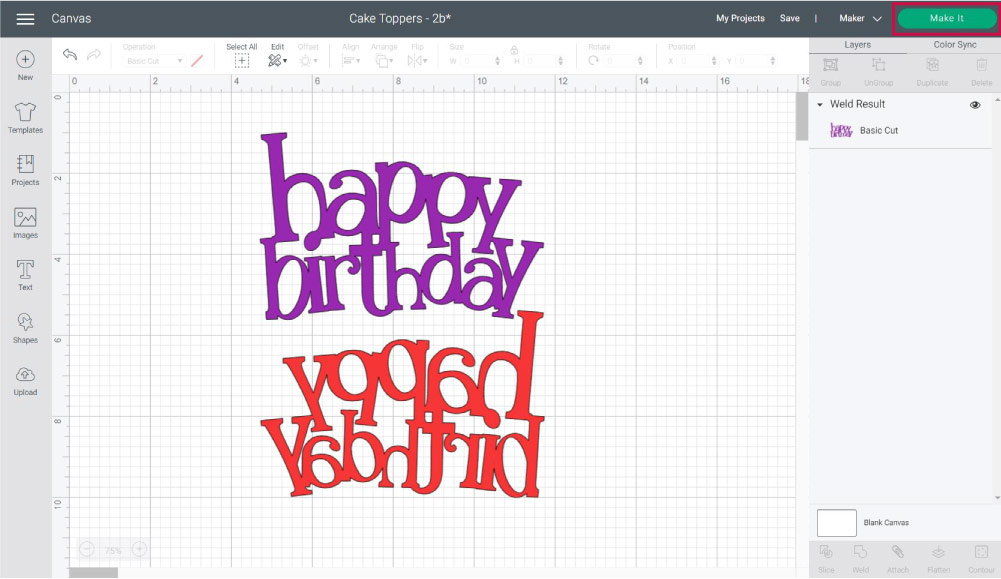
Once you are happy with your design, go ahead and click on the green “Make it” button.
Step 5 – Cutting Process
Tip: Newer machines will ask whether you want to cut on the mat or without. Select “Cut on Mat.”
When you send your project, this is the view you should have. There are two mats that represent each material. Although if you decided to have the same color for the front and back, you would only have one mat.
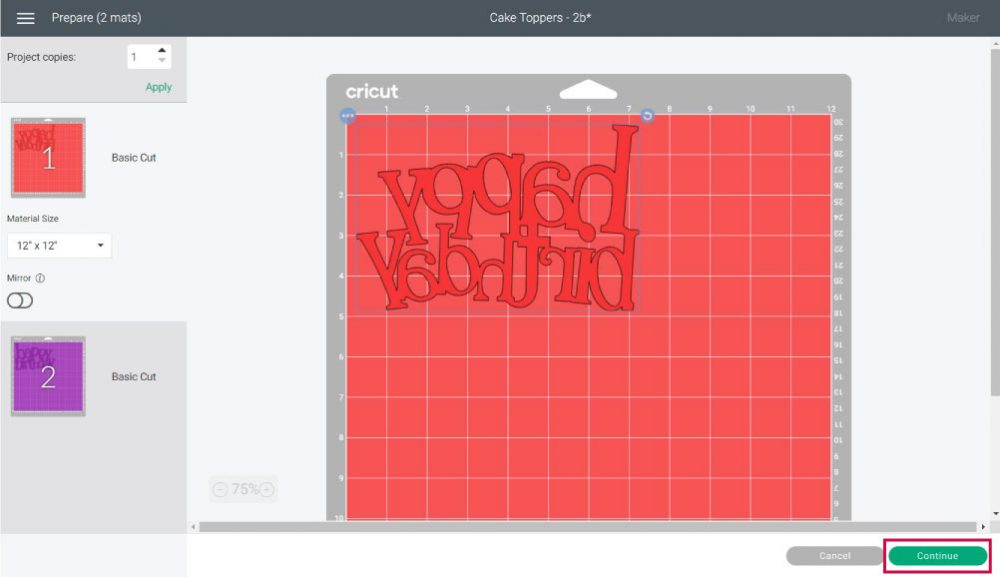
If everything looks good, click on the continue button.
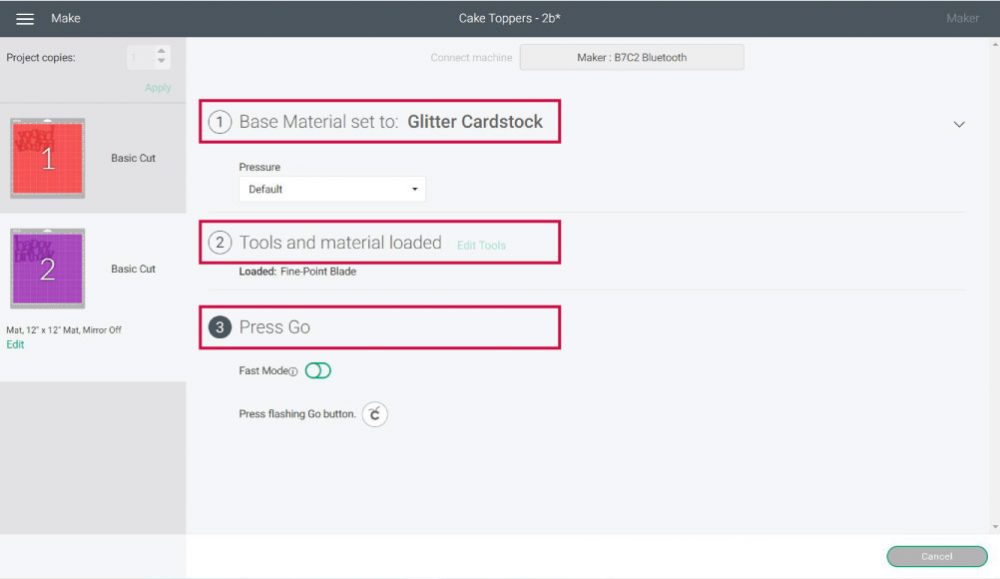
It’s time to choose your materials.
If you have a machine with a dial (Explore Family Machines), set it to custom so you can follow along on the screenshots.
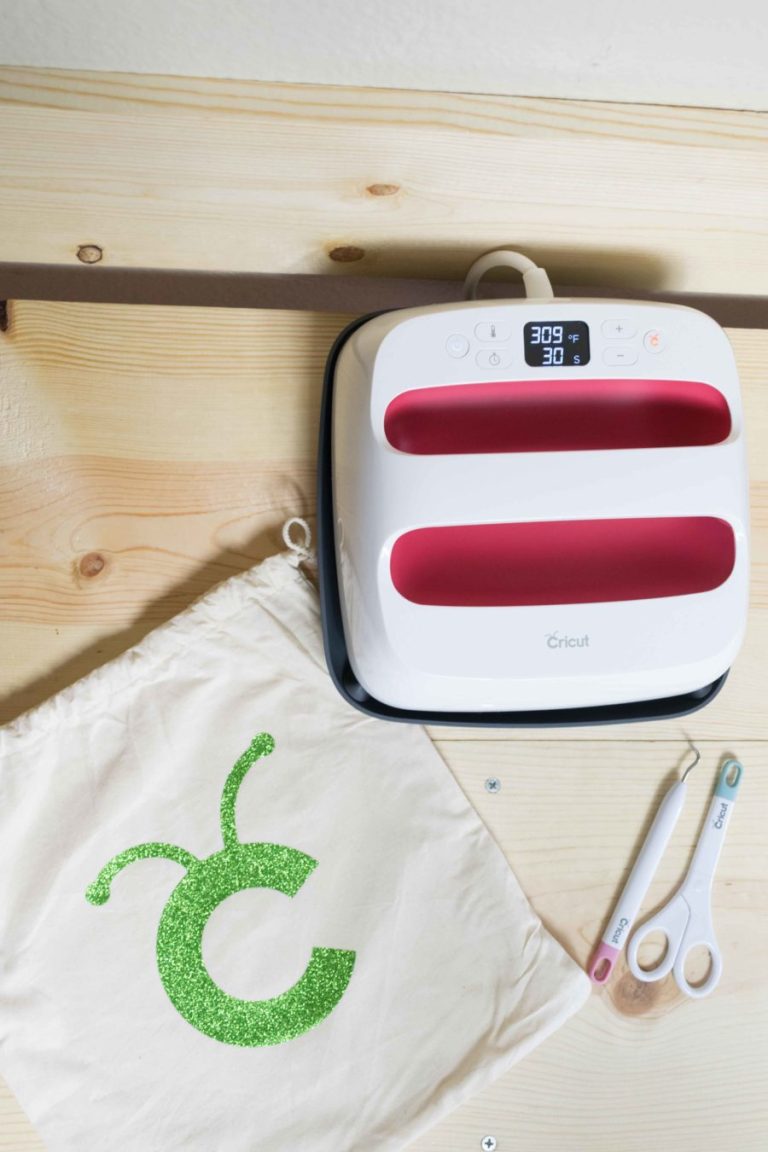
For the tools, you need to install the “Fine Point Blade” on clamp “B” and prepare your mat. Now, let’s move to some real photos so you can see what to do next.
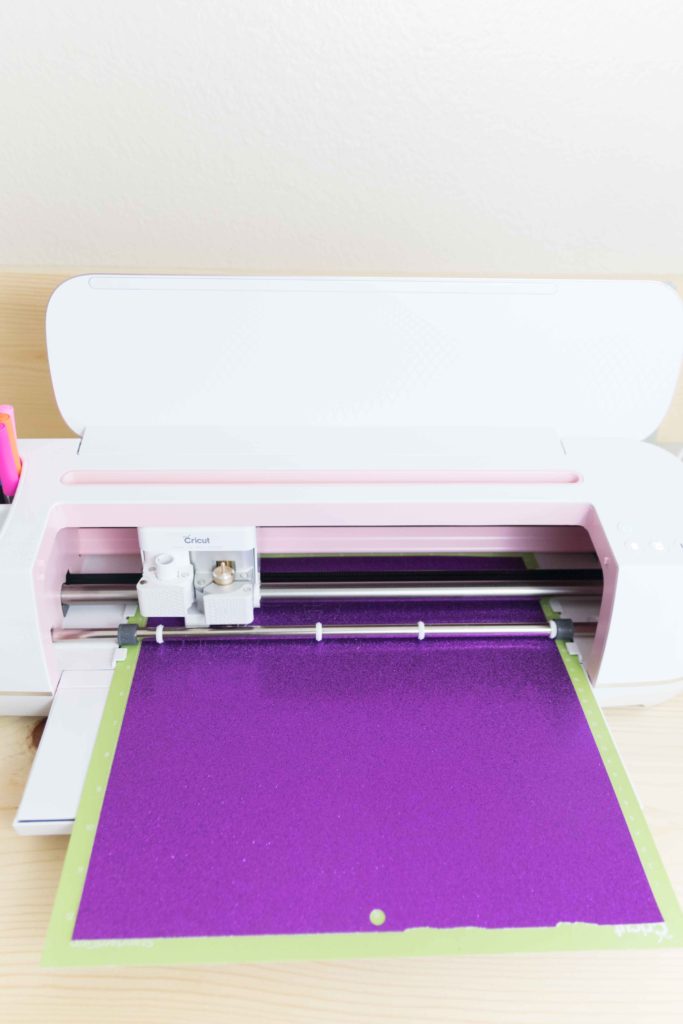
For this project, I will be using a Standard Green Mat.
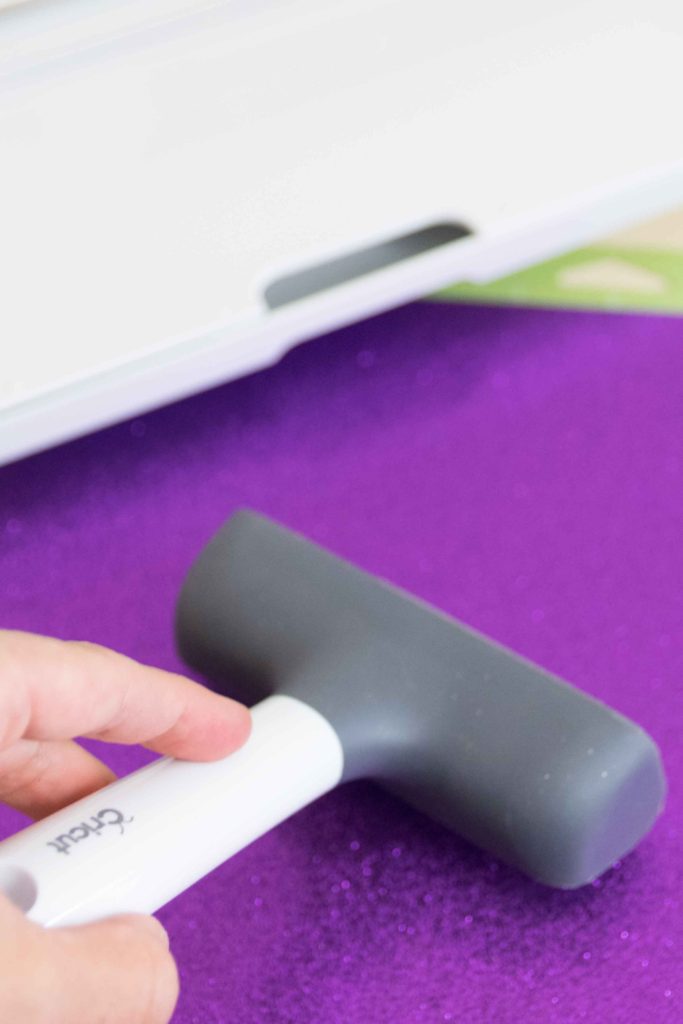
Place the cardstock on top of the mat and secure it with your hands, scraper, or with my FAVORITE TOOL in the world, the brayer!
If you don’t have one, make the little investment today
After securing the paper to the mat, load it to your Cricut and press the “Flashing Go” button to start the cut.
Yay!
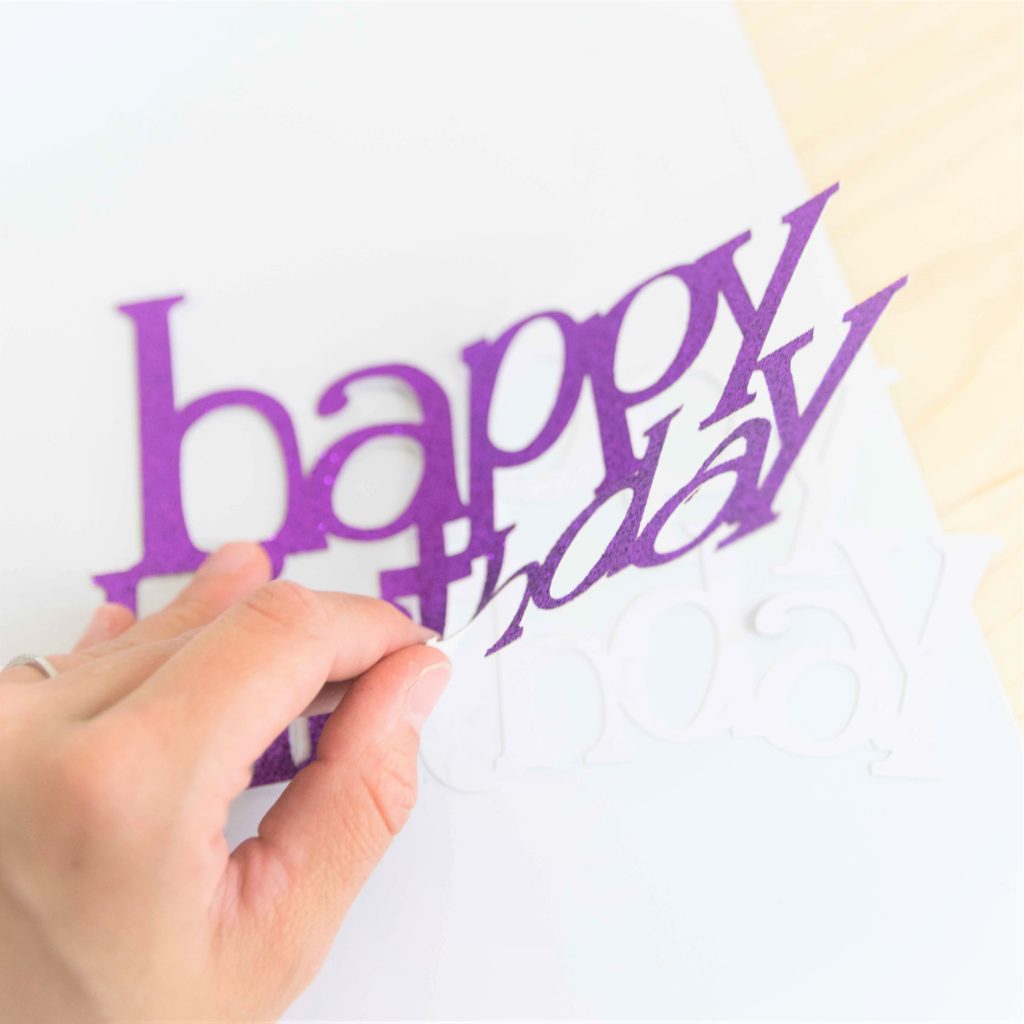
When your Cricut finishes the cut, unload the mad and remove the material from it.
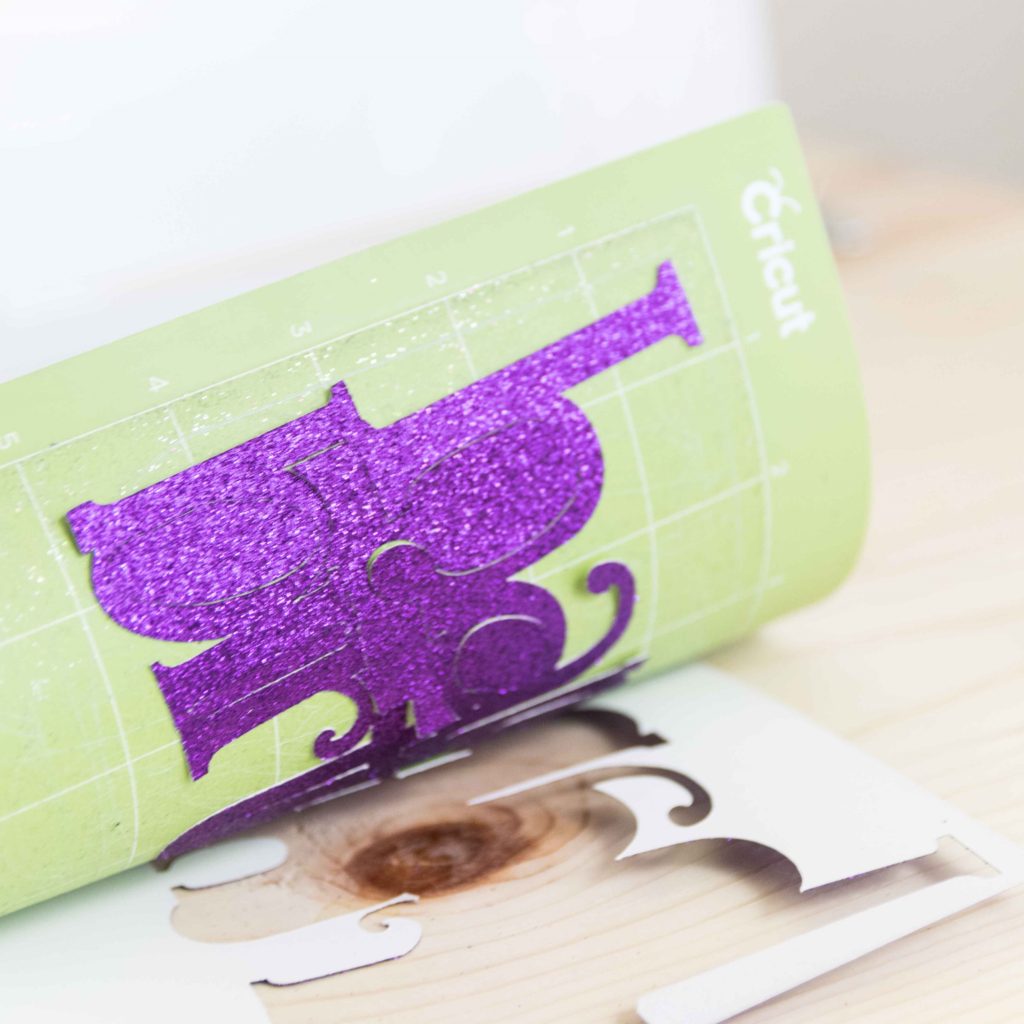
The best way to remove the cake topper is by bending the mat and letting gravity do most of the work. (Check the photo right above)
Now, clean up the mat with the scrapper and repeat the same process for the second mat.
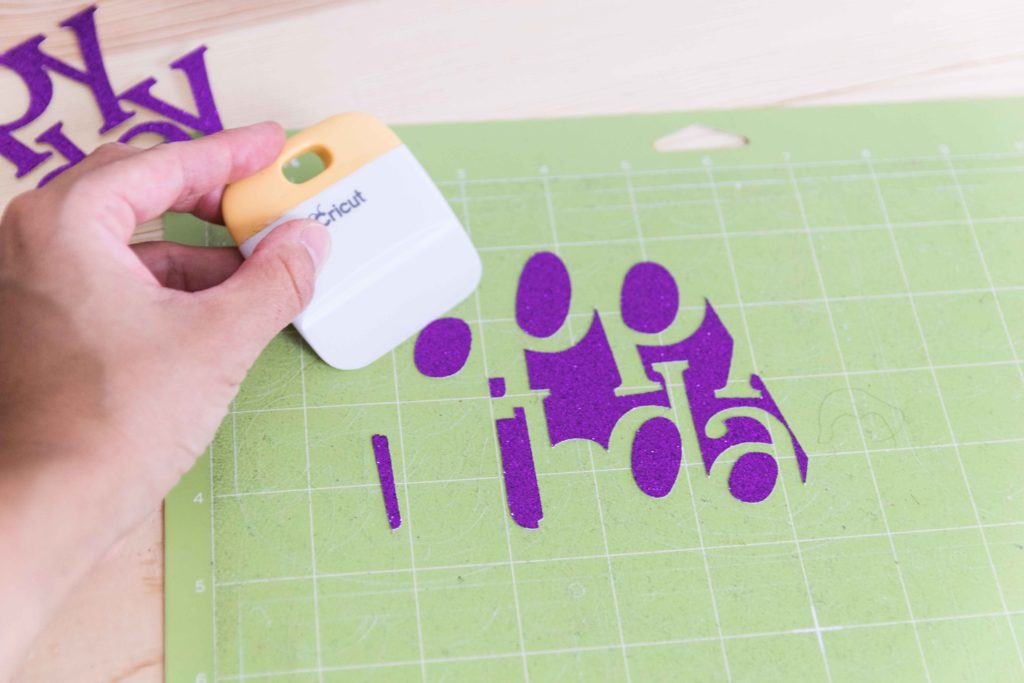
I used a different material for the second cut, so I had to change the material from Design Space again.
If you are using another material, don’t forget to make the necessary changes, like moving the Smart Set Dial (Explore family machines) or changing the material in Design Space.

Once you have both cuts, it’s time to assemble your Birthday Topper.
Stay away from kid’s glue. It’s not meant for these projects; they won’t look good because the paper gets wet and bubbly.
I love and always recommend Beacon 3-in-1 advanced glue.
You don’t need to add a whole lot of glue. A little bit goes a long way. Also, as you glue, make sure everything is aligned.
Let the topper dry for a little bit, and turn it around to glue the cake topper stick (I used lollipop sticks). The idea is to place the stick in the middle of the design; you want it where you can’t see it when you are holding it.
Further, in this article, I have some examples of where I had to use two sticks.

Doesn’t it look gorgeous?
I don’t know about you, but this post is already making me hungry for some yummy cake.
Before we continue…
From now on, I will assume you read and understood all of the concepts I just explained. If you are just getting started with your Cricut, I recommend you read before moving on (I don’t want you to get lost).
Making Cake Toppers with the Offset Tool
In Cricut Design Space, Offset is a tool that allows you to create a proportional outline inside and outside of the text, images, and shapes.
The offset tool is located on the top panel on the canvas area.
Do you remember when I said that all the layers needed to be together so they wouldn’t fall off after the cut?
Well, with the offset tool, not only can you create a stunning effect on your projects, but you can also create a placement for your letters and glue individually on the outline.
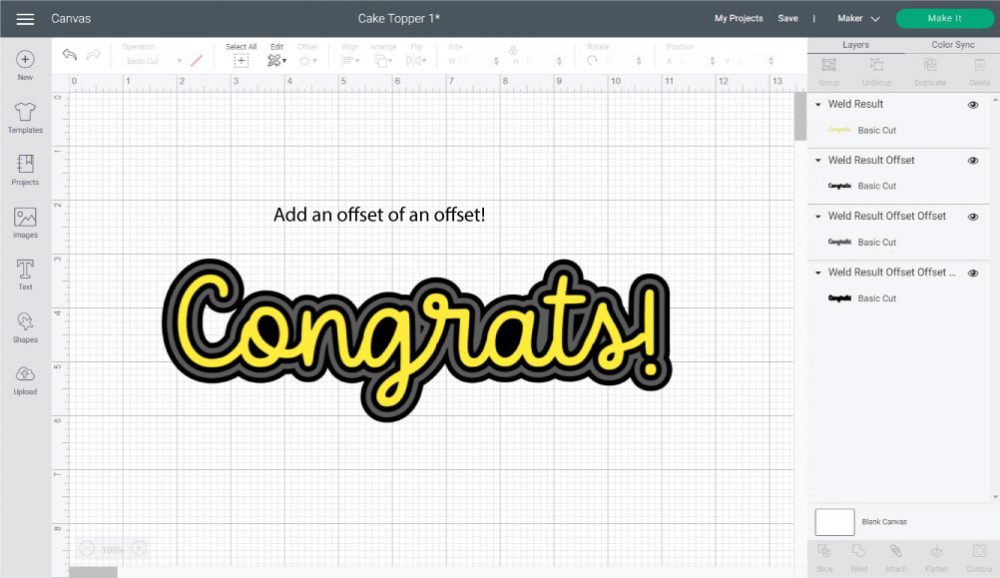
Let’s see the following screenshot and have a little chat.
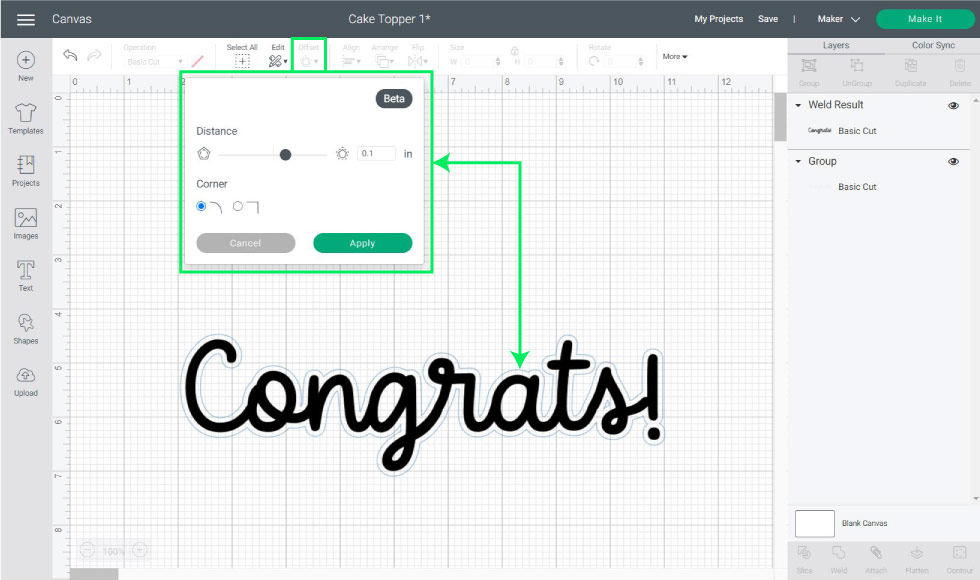
We are doing an offset on the “Congrats!” word. All letters are attached, but the dot from the exclamation point is loose. Meaning with a regular cake topper, as I explained before, that dot will be lost.
Whenever you click on the offset icon, you will see a light blue outline on the shape or text you are selecting on the canvas. For the changes to take effect, you always need to press “Apply.”
Once you press “Apply,” you can’t modify the features of the outline. If you want a bigger or smaller one, you can easily repeat the process.
Every time you set new settings, Design Space will remember the one you last used. This is very useful because you want your projects to look uniform. If you’re working with different offset distances, make sure to have a little note next to you where you take note of that because the program won’t remember it.
For this cake topper, I added three offsets. Add the first outline, and use it as a reference to add a new offset.
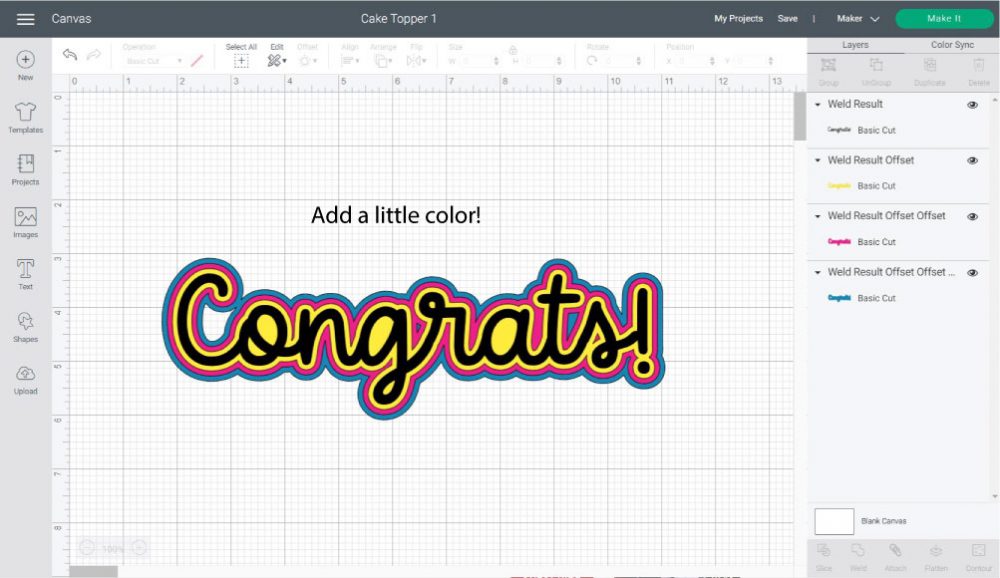
Change colors, and voila!
A beautiful design!
Check out how easy it is to glue and put together as well.

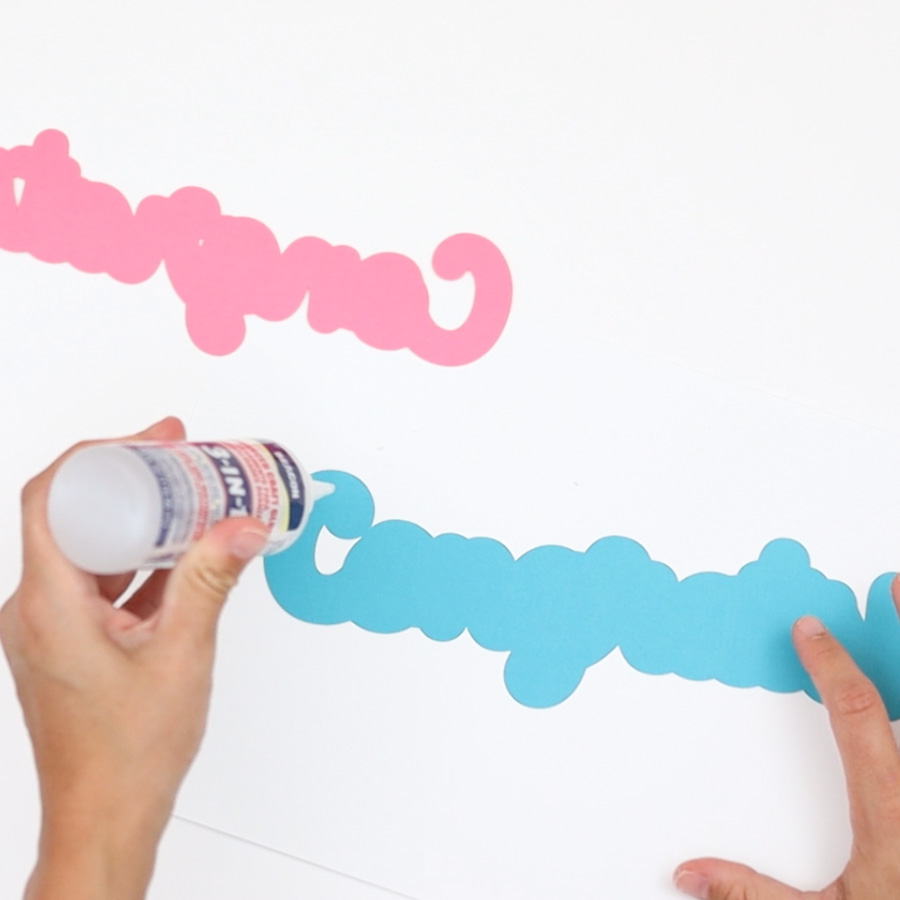

This feature (offset tool) will bring your cake toppers to a new level!
Check out my offset tutorial to learn all about this setting.
Making Cake Toppers With Print then Cut
If you’re in a rush and want a colorful and easy project, you should make cake toppers using “Print then Cut.” When using your home printer, your cake topper can’t be larger than 6.75″ x 9.25″
Note: Cricut Joy doesn’t support Print then Cut.
For this cake topper, I also decided to use the offset tool to have placement for the letters because they are not all welded. If you choose to use fonts only, you have to do the same steps I mentioned at the beginning of this article.
I did six outlines.
Select everything that is part of your design and click on “Flatten” at the bottom of the layer’s panel.
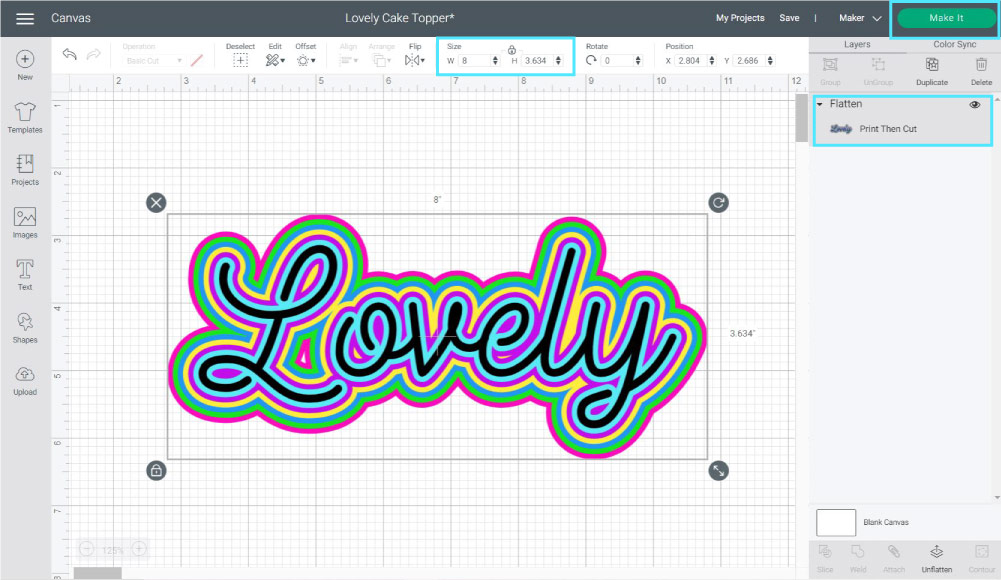
Now, your design is on a single layer and ready to go!
Click on “Make it.”
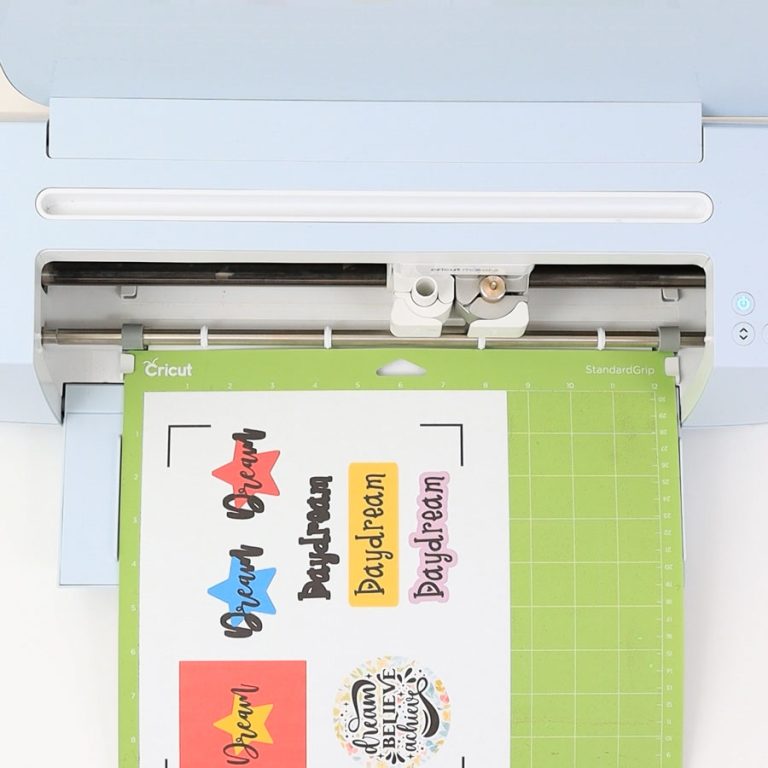
The following screenshot shows a preview of how your print should look like.
You need to make sure you place the print on your Cricut Mat the exact way you see it here.
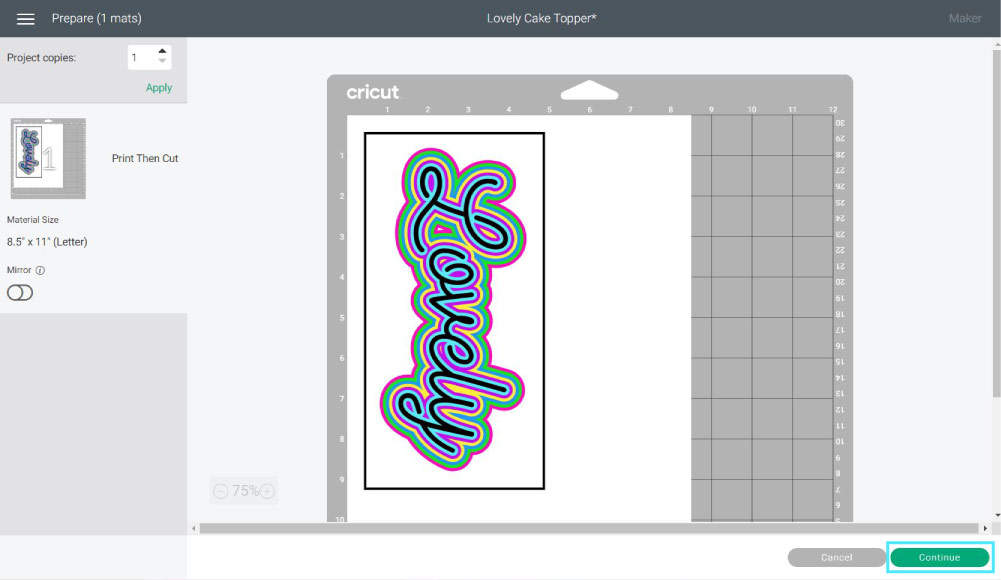
Click on “Continue.”
After leaving the mat preview, you will be given the step by step to cut your project.
The first option is “Print,” It has a button that says “Send to Printer.” Go ahead and click there.
A little window named “Print Setup” will open. From this window, you will be able to choose your printer, add extra copies to your project, turn on bleed, or use your system dialog box.

After you print, it’s time for you to choose the material you printed on. I used Medium Cardstock.
Install “Fine Point Blade,” place printed copy on the mat, load it to your Cricut and press the flashing go button to start the cut.
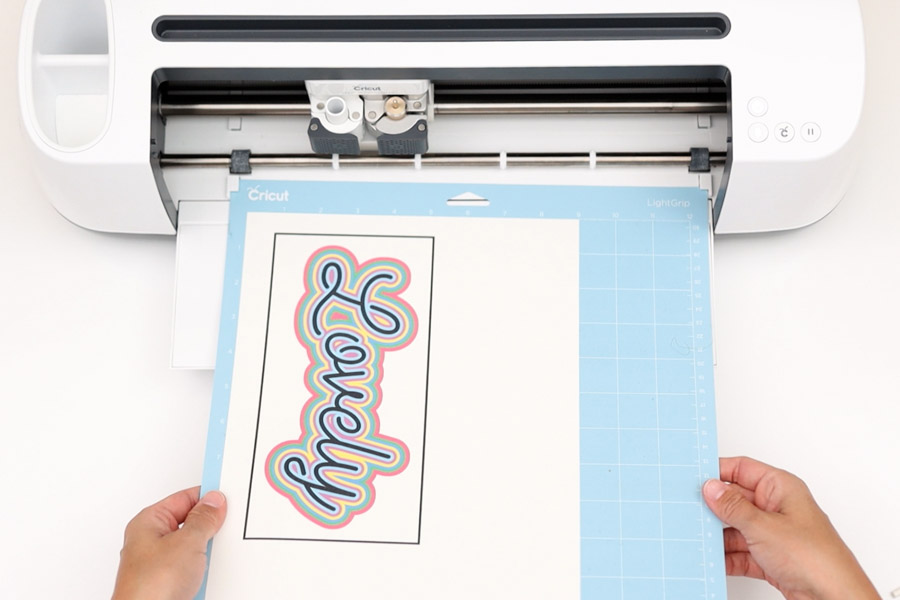
The “Print then Cut” sensor will turn on, and it will start reading the frame surrounding all of the designs that we need to cut; once it’s done reading, the Cricut will cut them all.
When Cricut Design Space tells you the Cut is done, unload your Mat, remove the cake topper from it.
This is how it looks assembled.
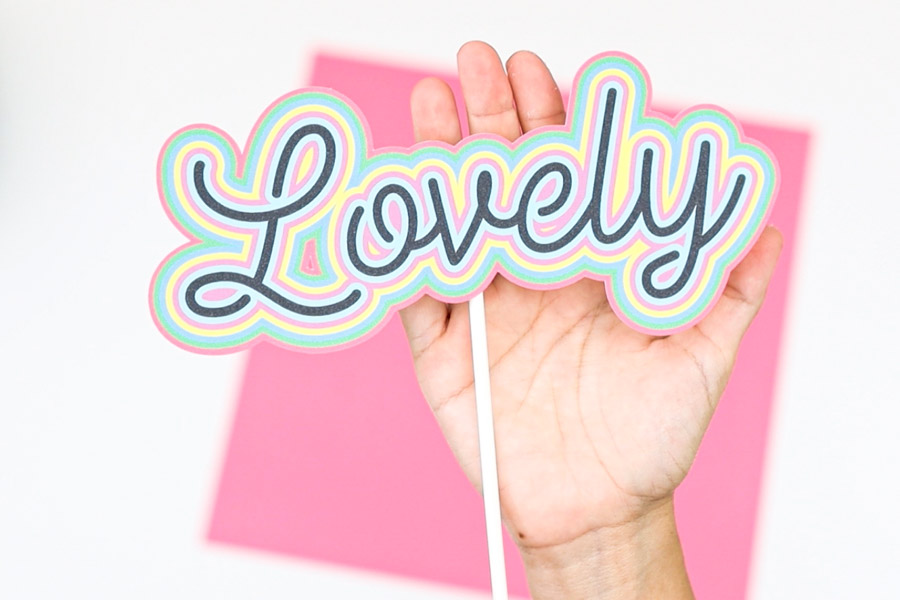
Doesn’t it look pretty?
Learn everything you need to know about Print then Cut.
Making Cake Toppers With Cricut Images
If you are looking for something quick or even more elaborate, you can use Cricut Images (located on the left panel of the canvas).
Cricut’s library is full (over 100k) of designs for any occasion, and you can filter all of them by categories, keywords, etc.
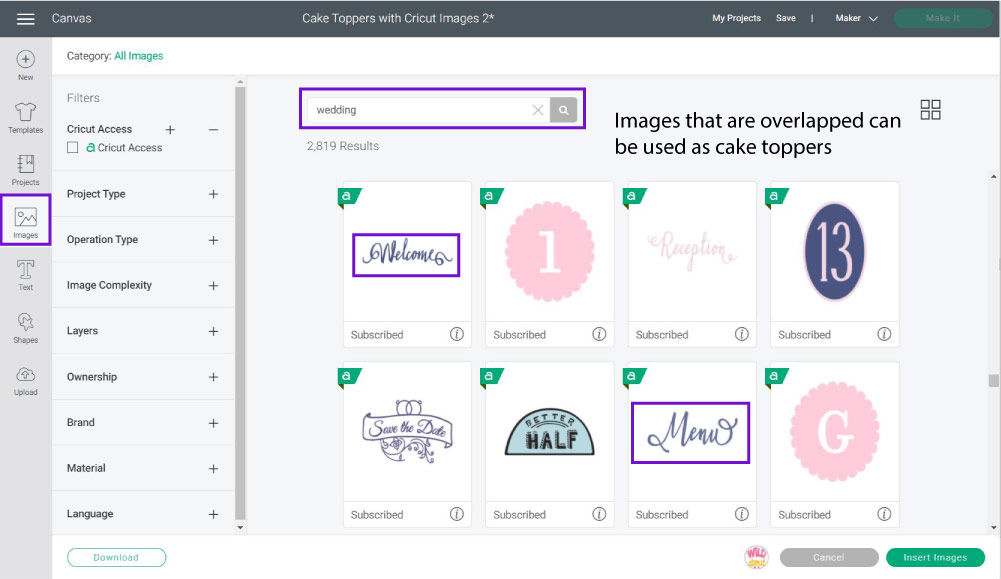
If you are looking for a particular occasion, you can type in the word that best describes it. For instance, I filtered by “wedding,” and I got a lot of options.
Here’s the thing, not all images are for cake toppers!
If you want to cut right away with minimal editing, you need to find an image where all letters look overlapped (just as we overlapped the birthday topper).
Down below, you have some examples of the cake toppers you can make.
Although the selection is extensive for you to make cake toppers, there’s going to be a time when you like an image that’s not ready!
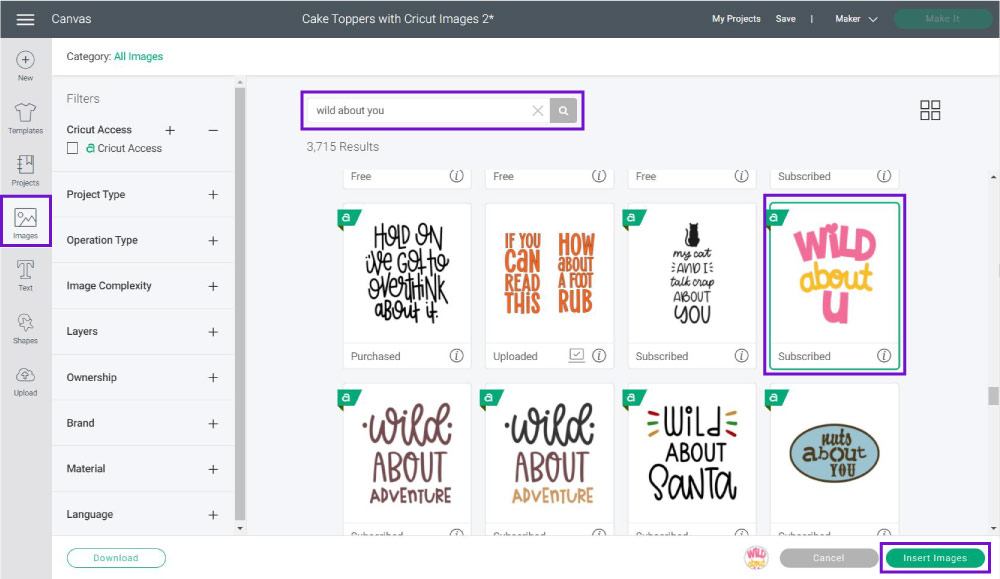
Like the image I selected on the screenshot right above. As you can see, everything is separated.
Don’t despair though, if that’s what you want, let me show you how to make a simple image from design space into a cake topper.
Step 1: Insert the image into the canvas area.
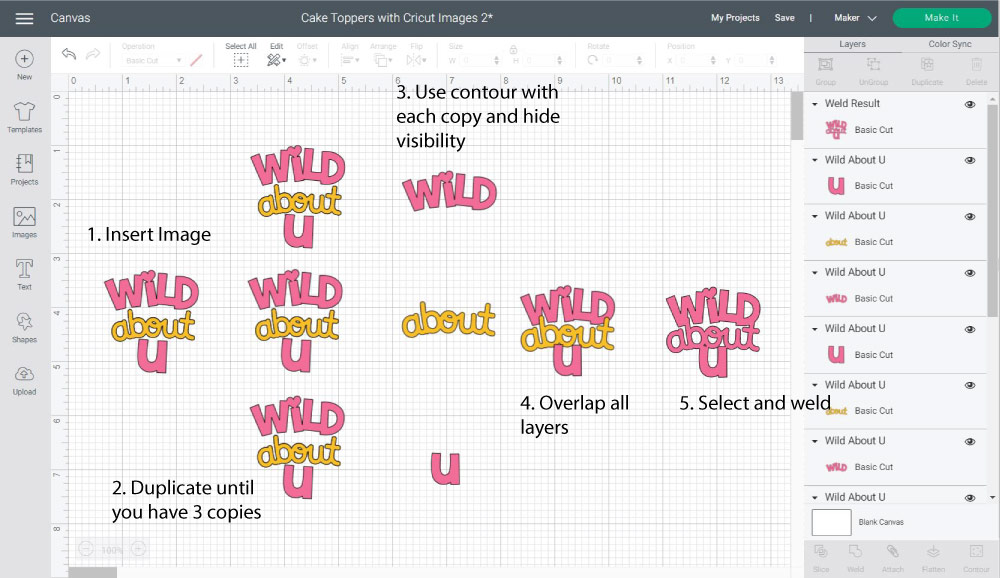
Step 2: Duplicate (copy/paste) until you have three copies. Note: if you have more lines of text or elements that are scattered, you need to have more copies.
Step 3: Use the contour tool (bottom of the Layers panel) only to show the first line of each design.
For the “about,” you don’t need to contour. You only need to delete or hide the pink layer underneath.
If you don’t know how to use contour, check out my tutorial.
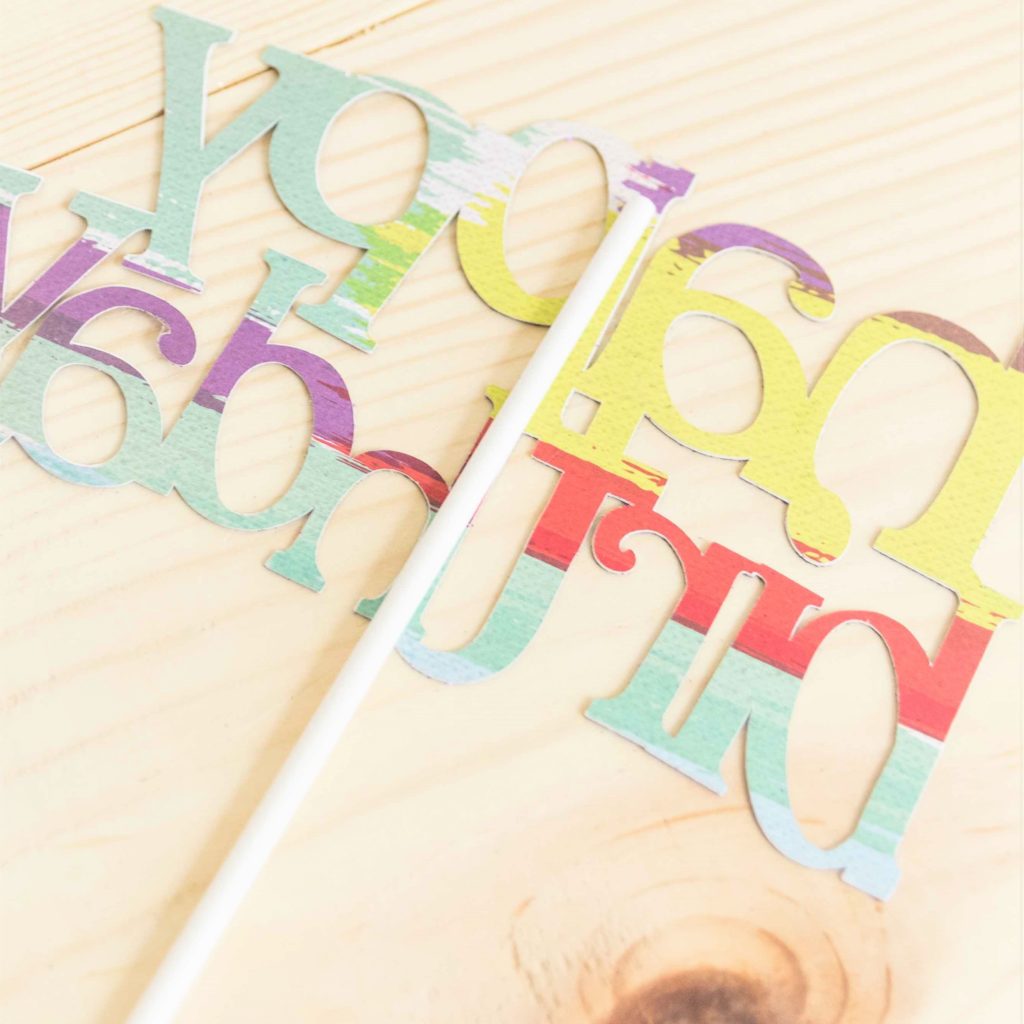
Step 4: Make the different elements into a cake topper by overlapping each line (wild, about, u).
Step 5: Select all lines and click on “Weld” to have all items in one single layer.
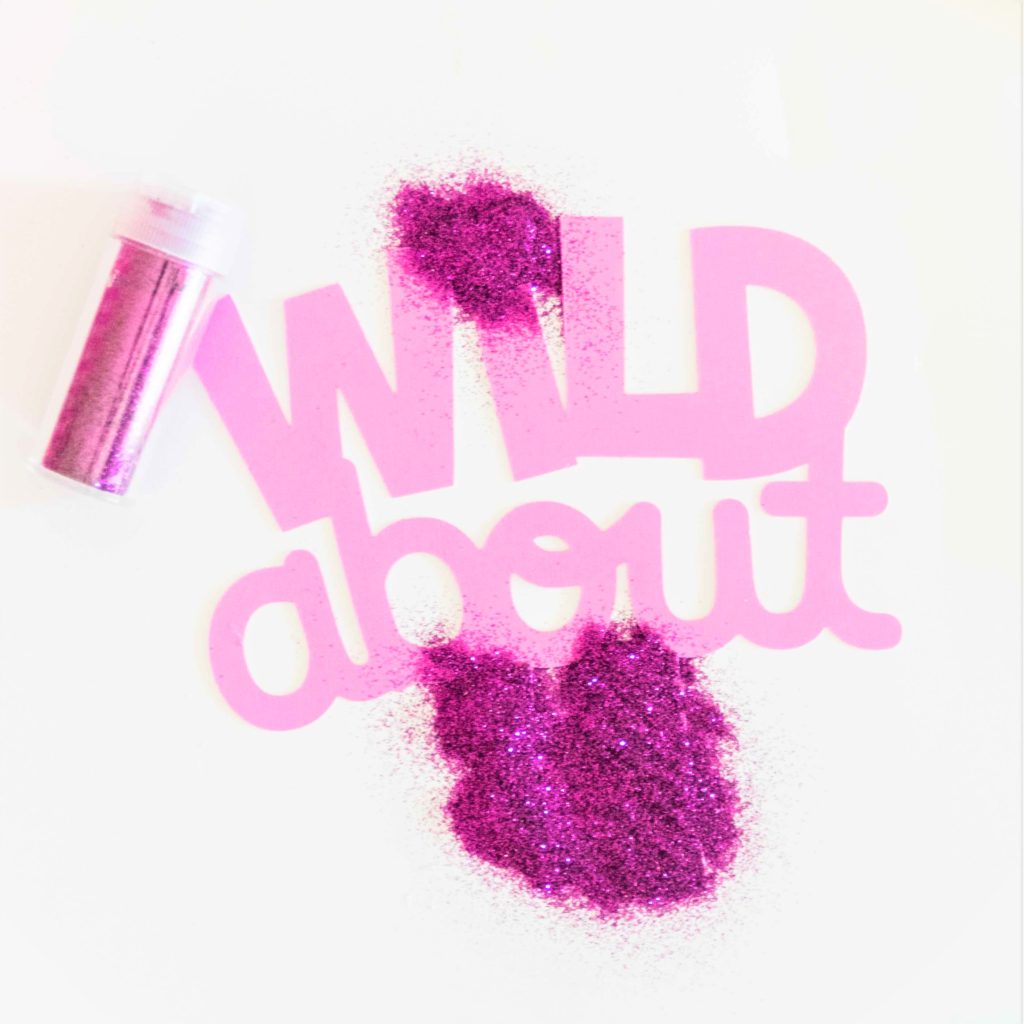
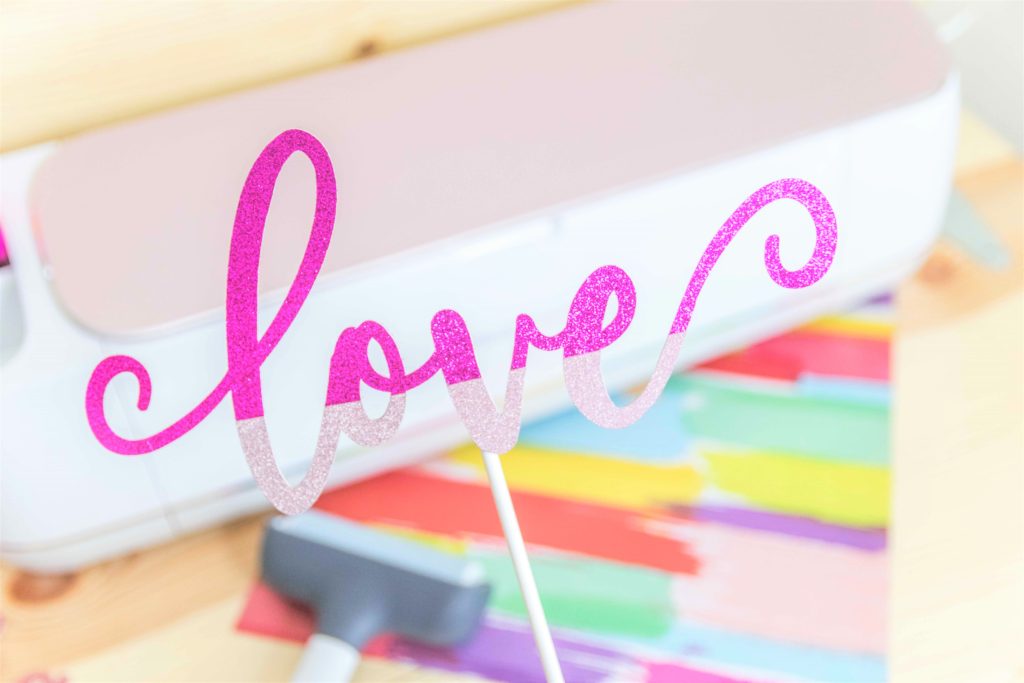
I decided to add an extra touch of creativity with glitter!
Don’t you think it makes the cake topper pop up? How cute will this topper look on a romantic Valentine’s date?
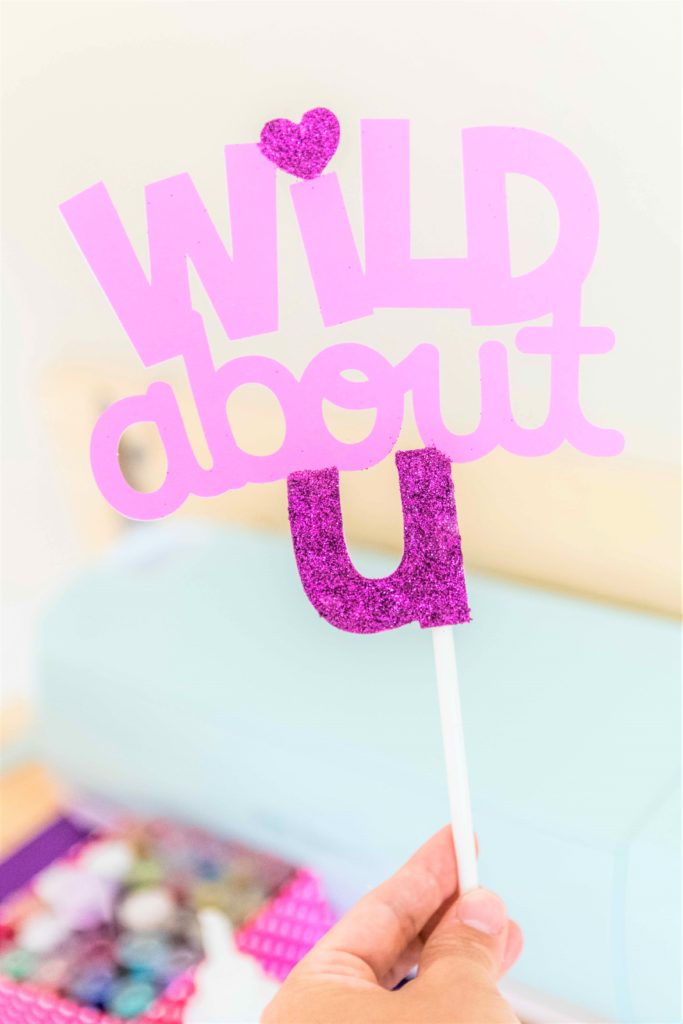
I use a patterned paper for the back. Next time, I would pick something else, but it looks ten times better than a boring white background.
Free SVG Cake Toppers
Here are the free SVG cake toppers templates that you can use for any of your personal projects.
Please don’t share them on social media like Facebook groups or the “Public” option in Cricut Design Space. If you want to share them with someone, why not share this link to access them as well?
To download the file(s), you need to be on a desktop or laptop and click on the button to trigger a download file on your PC. However, I’ve noticed that I can also download them from my iPhone.
Depending on your browser settings, your PC sometimes asks where to save the file, although most files will be in your download folder.
If the image opens in a new window (this may happen because of your browser settings), right-click on it, select the option “Save Image As,” and choose where you want to save the file.
SVG files look like web page files when you download them.
Oh!
Just so you know, I also have a library full of free SVG files and Printables for all my subscribers, a.k.a. Daydreamers. You can see a preview right here or get access by filling out this form.


Making Cake Toppers with Uploaded SVG files
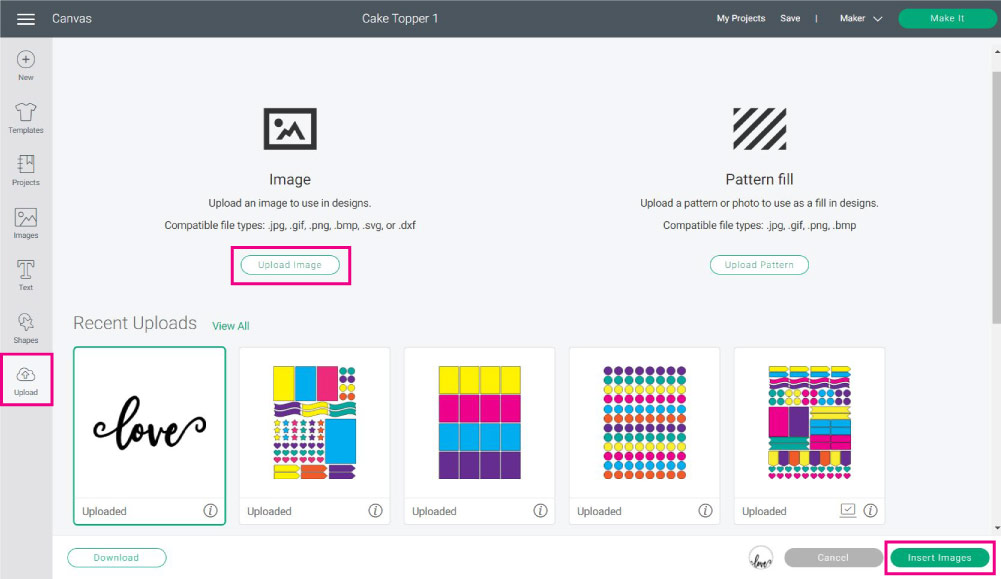
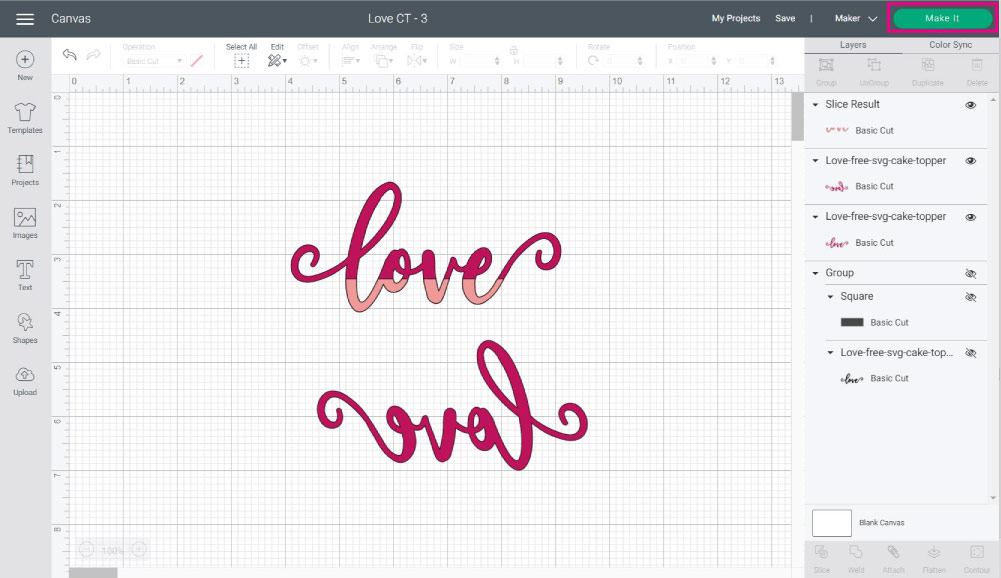
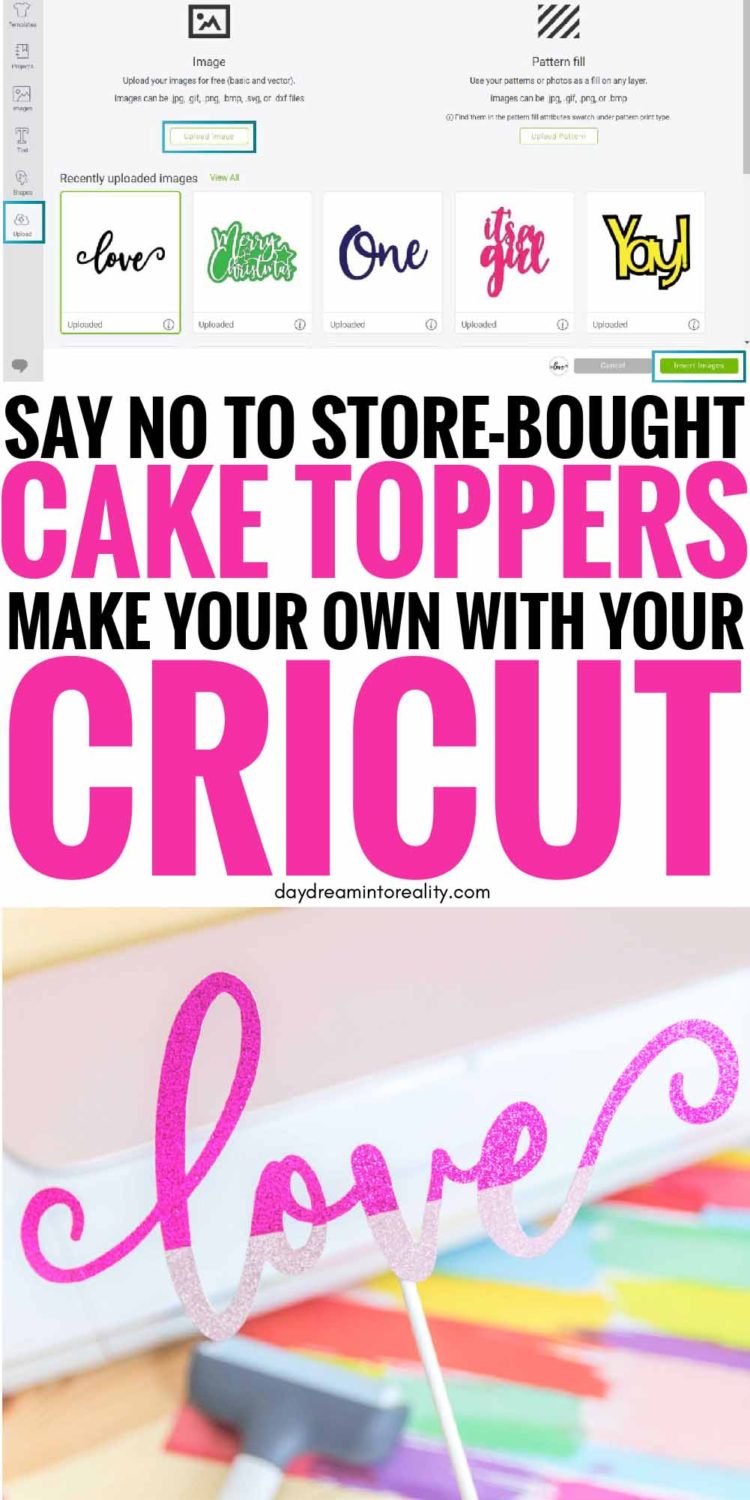
After saving the “Love” file to your computer, log in to Design Space and when you are on the canvas, go to the Upload option (located on the left panel) and click on “Upload Images.”
Follow the prompts that Design Space brings up, and once your image is saved, you can see it in Recently uploaded images; select it and click on “Insert Images.”
Duplicate the image, and flip horizontally one of the copies for the back of the topper.
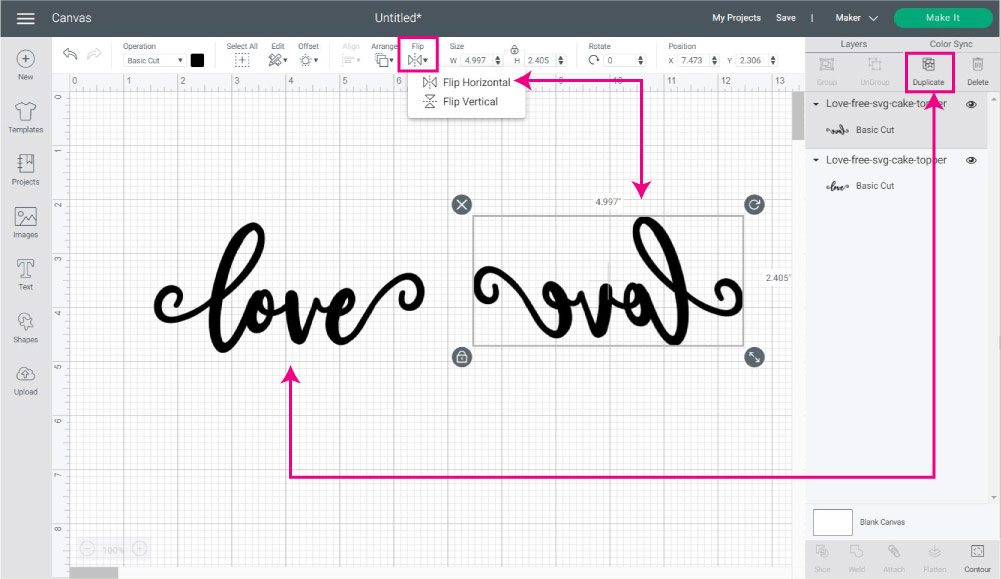
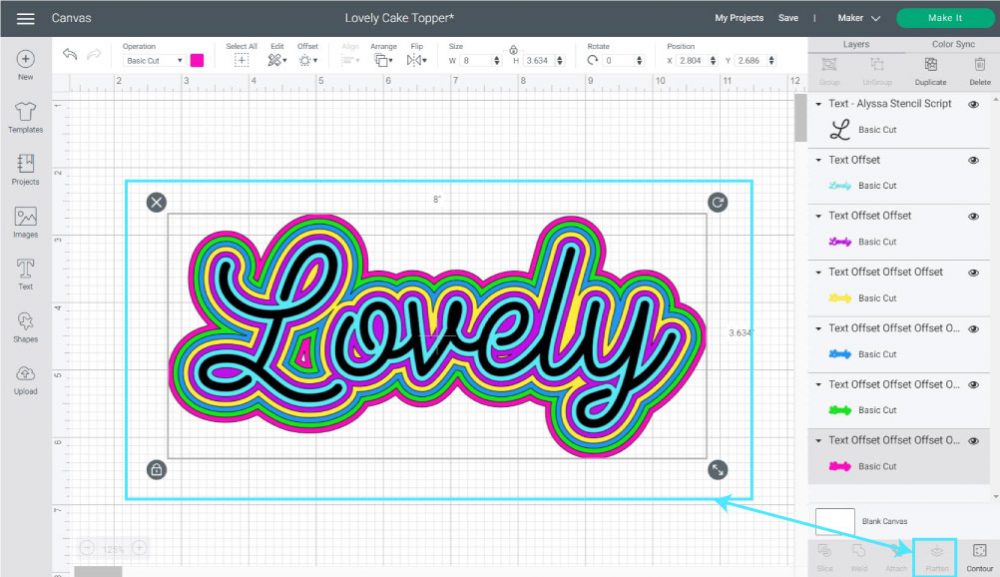
For this cake topper, I want to teach you how to add a beautiful embellishment effect.
Duplicate the front of the topper again, add a square to the canvas (shapes are located on the left panel), and unlock the proportions to form a rectangle.
Have the rectangle cover the lower part of the word love like I show you in the screenshot below
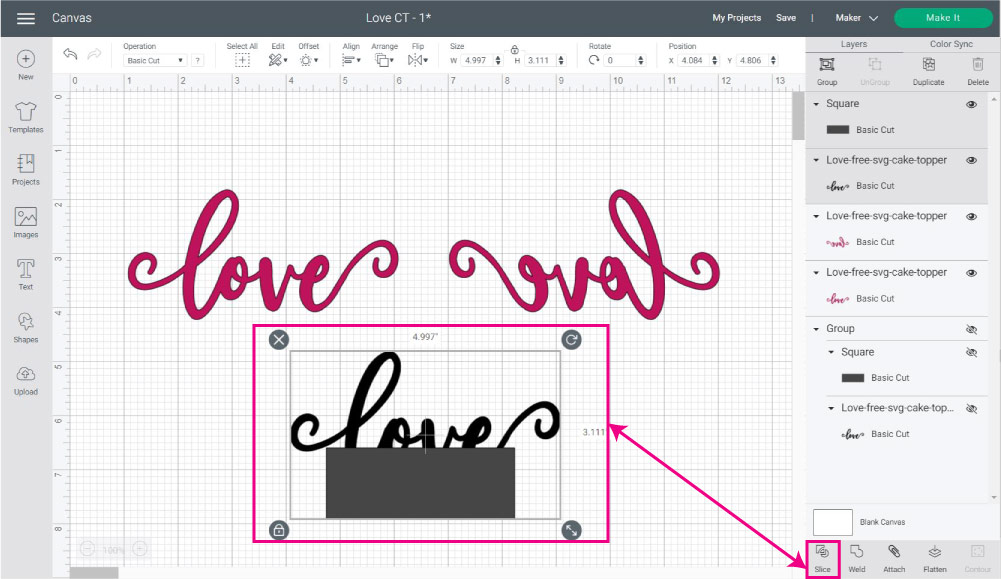
After placing the rectangle on the half-bottom of the word, select it along with the word and click on “Slice.”
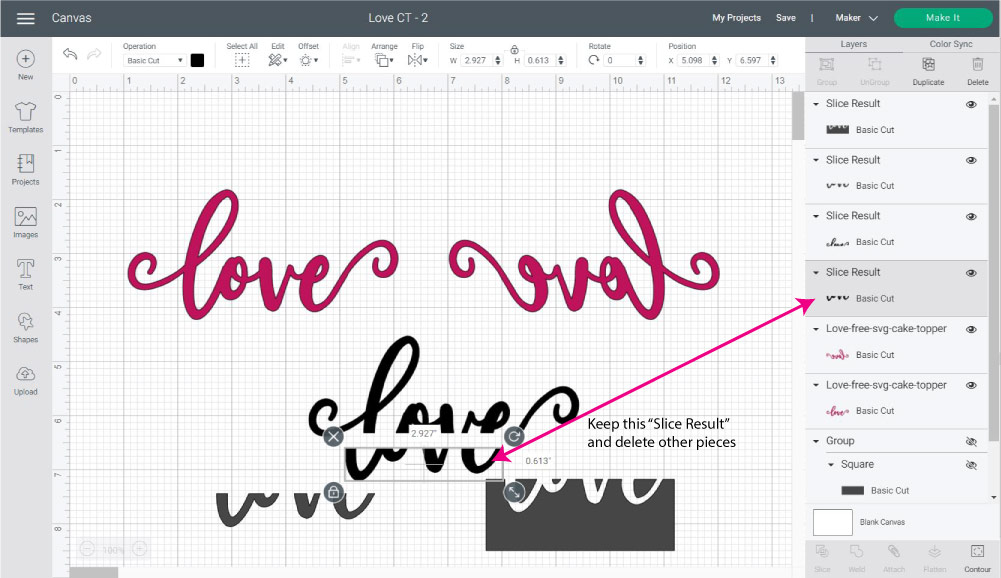
Move all the “Slice Result” pieces, keep one of the “lower” cuts, and delete the rest.
Change the colors before you send the project to cut. I went with bright and dark pink.
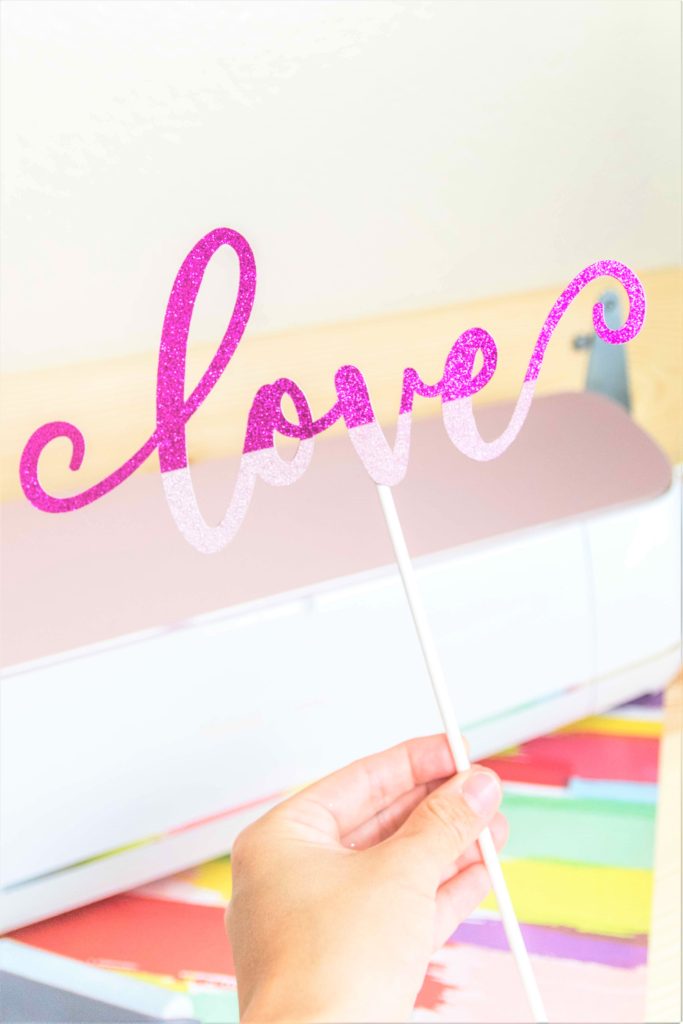
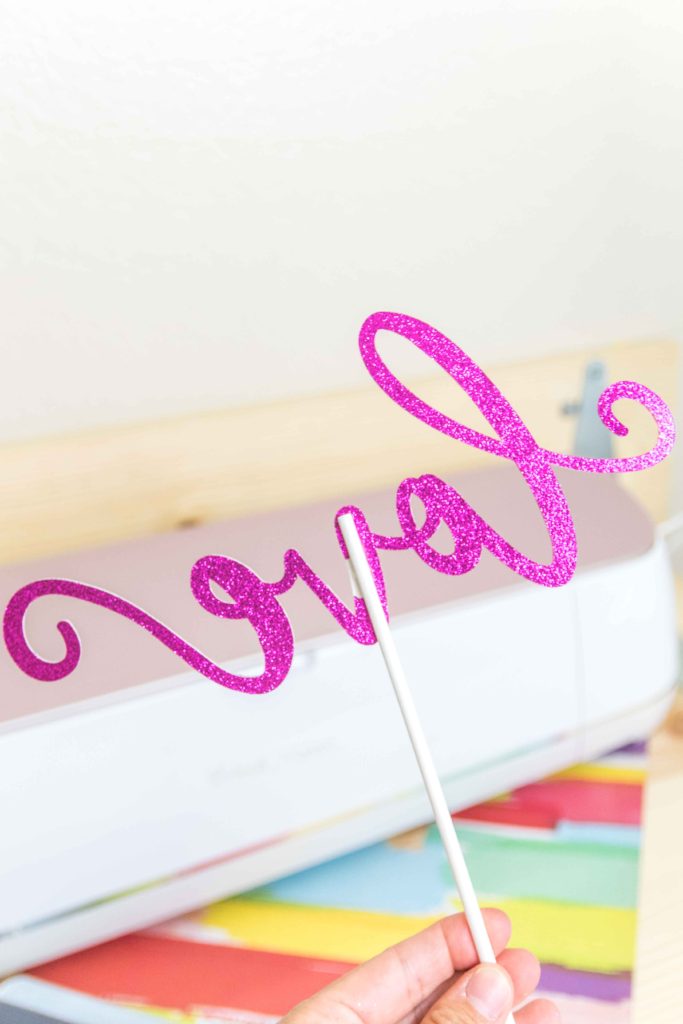
Look how the extra decoration looks when we place it on top of the front of the topper.
When you are happy with the colors and size, click on “Make it.”
Fast forward…
Look how elegant and refined this Love Cake Topper looks.
More Cake Topper Ideas to Make with your Cricut
Look at all these other possibilities you have when making Cake Toppers with your Cricut.
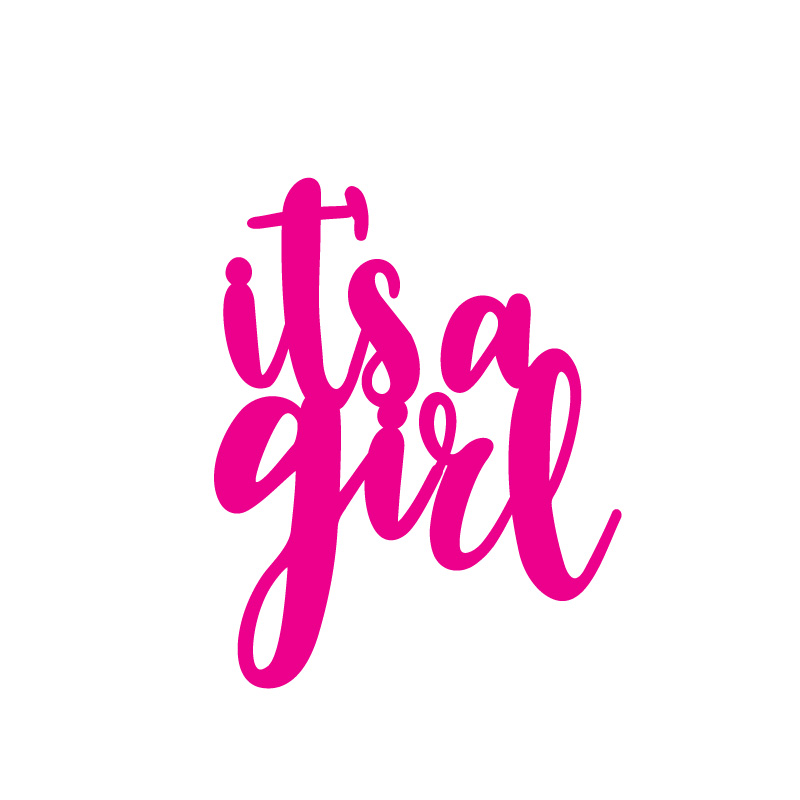
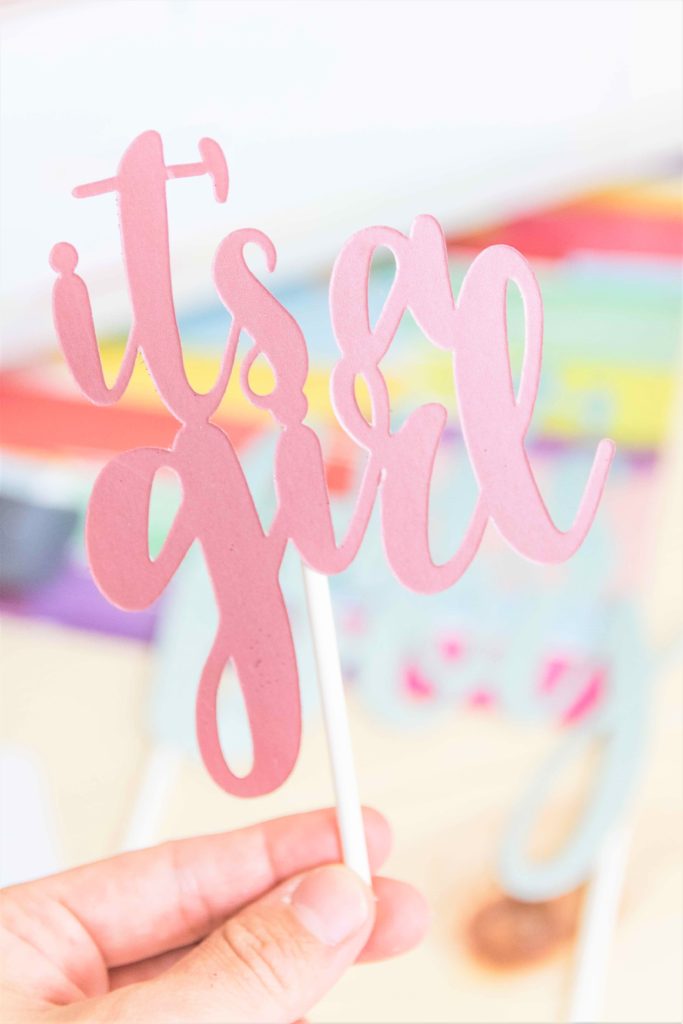
Are you planning a baby shower? Look qt this “It’s a Girl” Topper.
Tip: Strong and double-sided materials like Metallic Posterboard are also excellent for this type of project. (you don’t need to make a backside cut)

Look at the “It’s a Boy” topper. To give good stability to the topper, I had to use two sticks.
Isn’t it adorable?

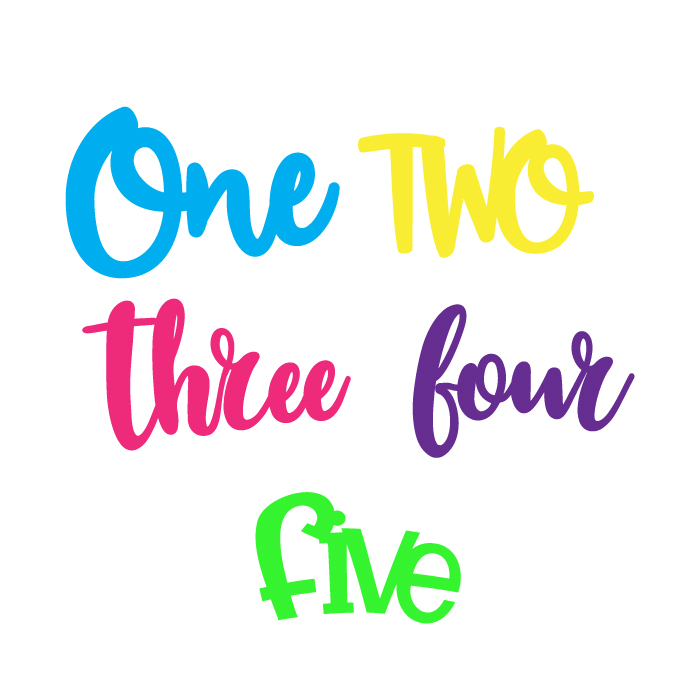
For birthdays you can also use the age of the birthday (girl or boy) like this “One Cake Topper.”
It’s simple but also elegant.

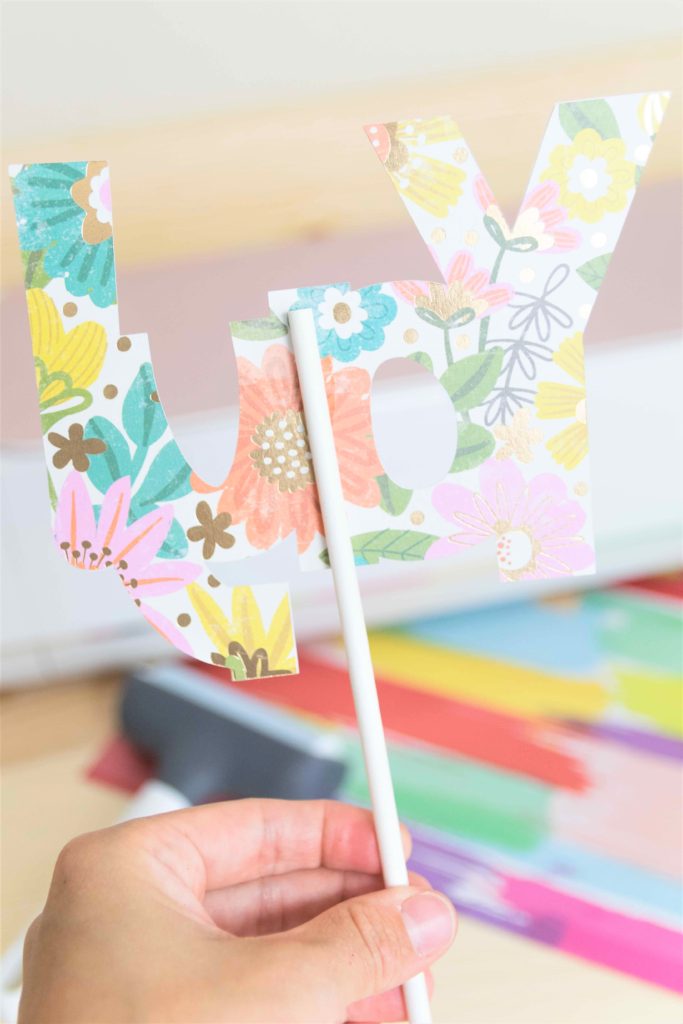
Check out how the paper you choose for your projects can make a difference!
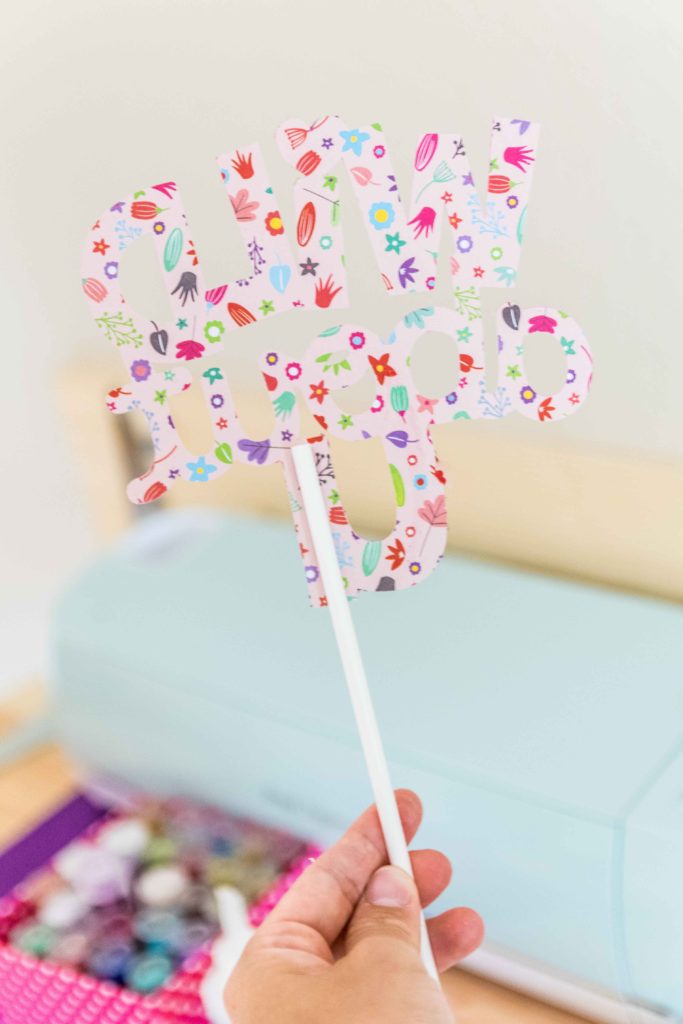
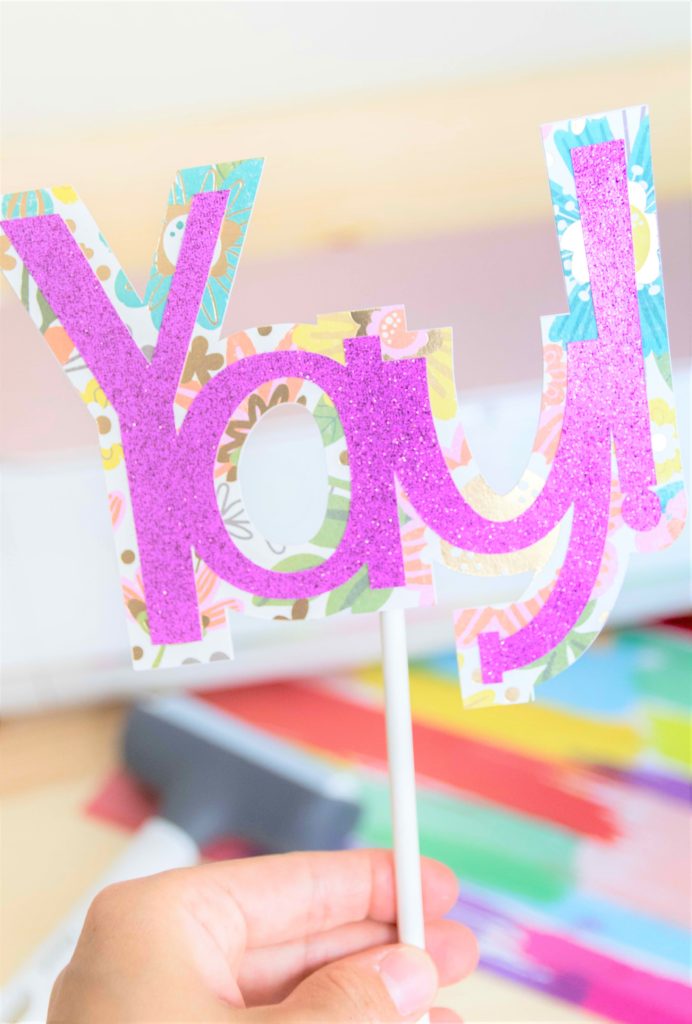
I think this ‘Yay!” topper would look great on a luau cake!
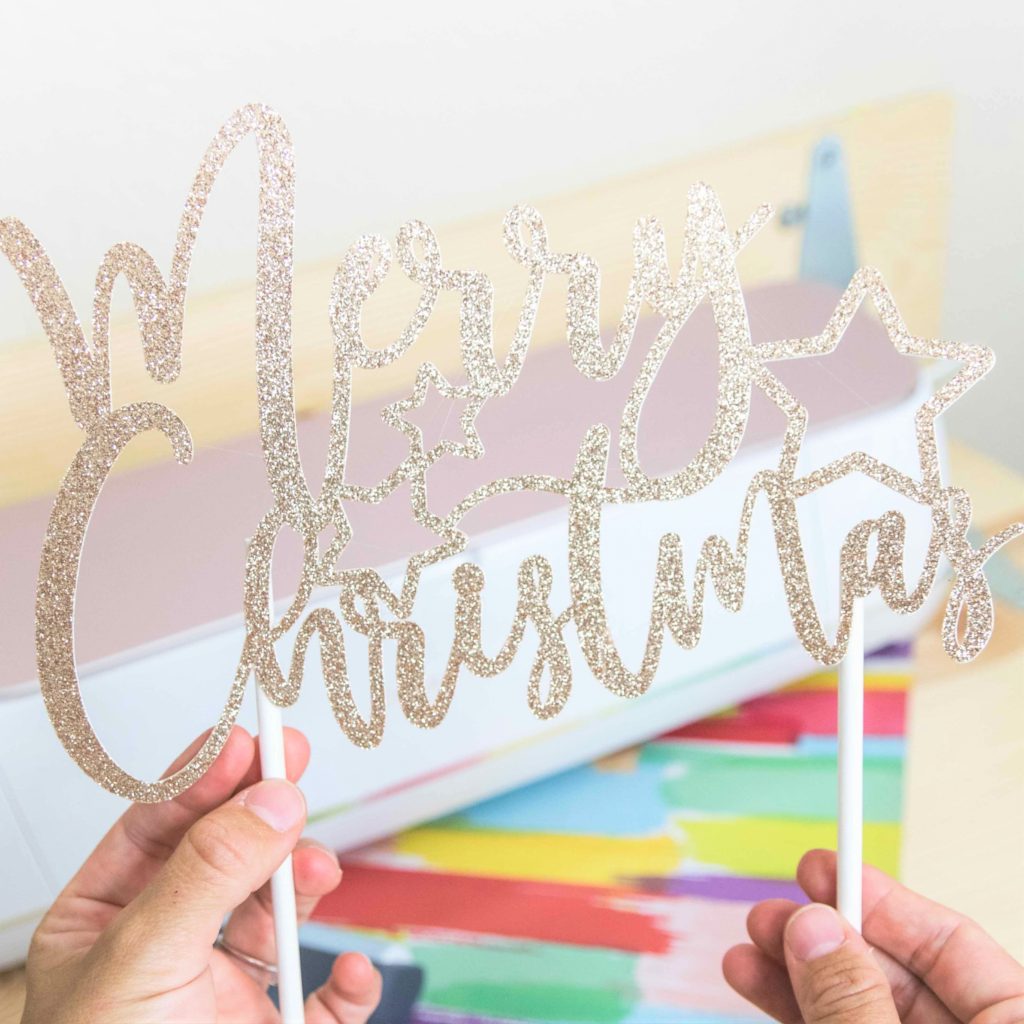
Let’s not forget about Christmas!
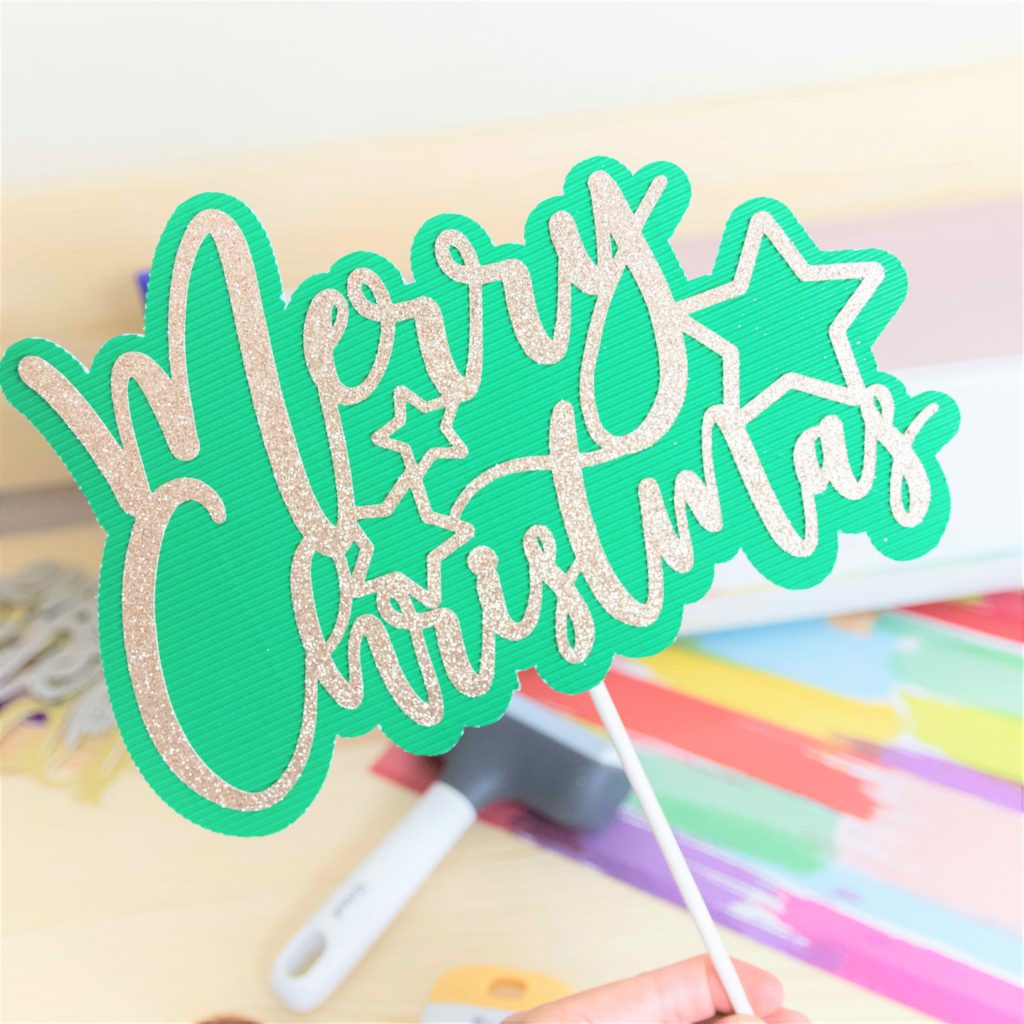
Look how I used some of the SVG Files I provided you with to create two different styles. But you can also achieve this look using the offset tool.
BEAU – TI – FUL
The first “Merry Christmas Topper” has a background made with Green Corrugated Paper, and the second topper is made of glitter cardstock only.
Last but not least!
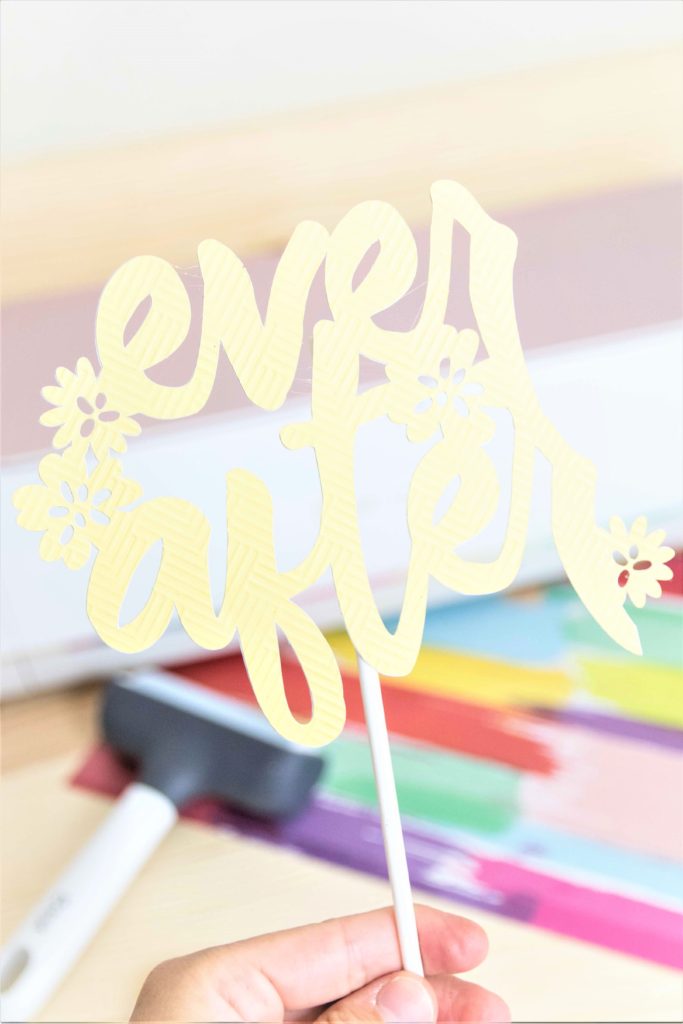
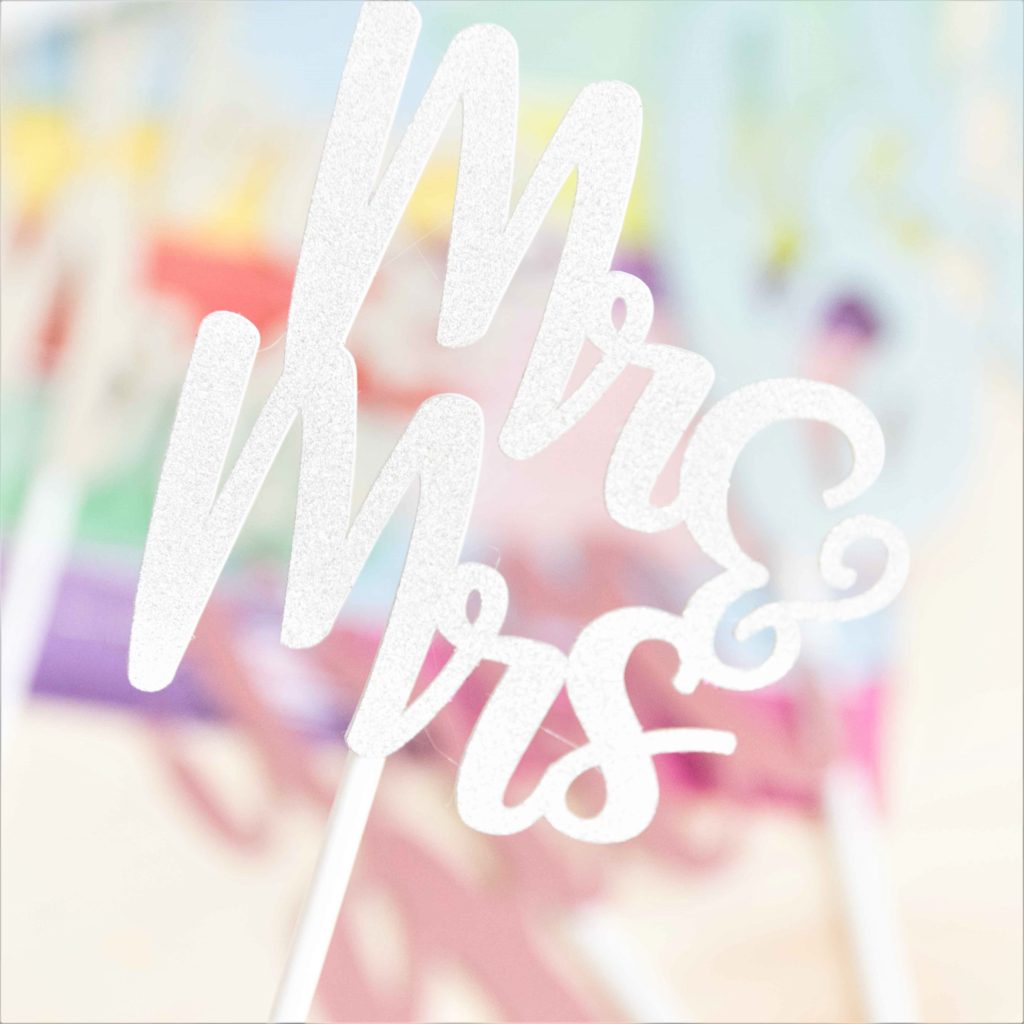
If you are getting married or helping a friend with her wedding, make sure you use your Cricut to make a Wedding Cake Topper!
The “Ever After” topper is in Cricut Design Space under the code #M10842C2. The “Mr & Mrs. Cake Topper” is available to download on this post (in the Free SVG Files section).
Aren’t they all super cute?
Sharing is Caring
Did you like these Cake Toppers?
I hope you feel encouraged to make the most beautiful toppers for your parties and gatherings.
Do you know it takes me over 25 hours to complete a single Cricut article? I know it’s wild, but I want to make sure you understand everything!
I would appreciate your support on Instagram , Pinterest , and YouTube as I try to grow my audience and continue producing great content!


I am brand spankin’ new to Cicut and these tutorials are amazing! Thanks so much!
I’m so pleased I came across your tutorial. I have been wondering how these work to see if they were worth getting so I can create my own cake toppers. I will be sure to save this page so I can use it when I buy one. Thank you.
Sounds great!
Thank you sooooo much for this tutorial. I was struggling to figure out how to “offset” 40th for our anniversary party. I had no idea what it was called until I stumbled across your site/instructions. I was able to make them and they are beautiful!!!
Hello. What is best reasonable price cricut for making cake toppers of all kinds?
Well if you want to do all kinds of cake toppers including wooden ones a Cricut Maker may be the best option.
Hi,
Please please recommend the bed card stock as mines just keeps Ripping when printing… and it’s driving me mad….. thank you soooooo much im defo going to love using fir free svg files thank youuuuu xxx
If your mat isn’t sticky enough any brand of cardstock will get dragged and damaged.
Hi! I was looking into buying a cake topper on etsy and then decided I’d try to make it myself since I have a cricut that I barely ever use. It seemed easy enough but there were still steps I couldn’t quite get right to create it and your tutorial was exactly what I needed. Thank you so much for making this article! Its a life saver!
Love your SVG’s. Thank you so much. Your English is perfect, my husband was from Peru. Congratulations!
Hi Thankyou for your demonstration l have a joy, how do l join the letters l just cannot work it out! If you can help me l would be grateful x
you first need to ungroup, organize them, and then weld them all. The step-by-step is on the tutorial.