Hello Daydreamers!
In today’s tutorial, you’re going to learn how to make and address beautiful envelopes with your Cricut Maker or Explorer.
You will learn how to make super cute envelopes, and I will also provide you with 10+ Free SVG envelope templates for your personal projects.
All these templates are so beautiful (insert happy dance) and I can’t wait for you to download and play with them all!
Ideally, you will read this tutorial from the beginning because, as we go, we will be implementing the concepts mentioned in the previews steps.
In a nutshell, these are the topics I will be covering in this tutorial.
- Materials for Cricut envelopes
- Steps for cutting envelopes in Cricut Design Space
- Addressing Envelopes with your Cricut
- Using Cricut Pens
- With sticker paper
- With iron-on
- Free SVG templates (download the rest of envelopes)
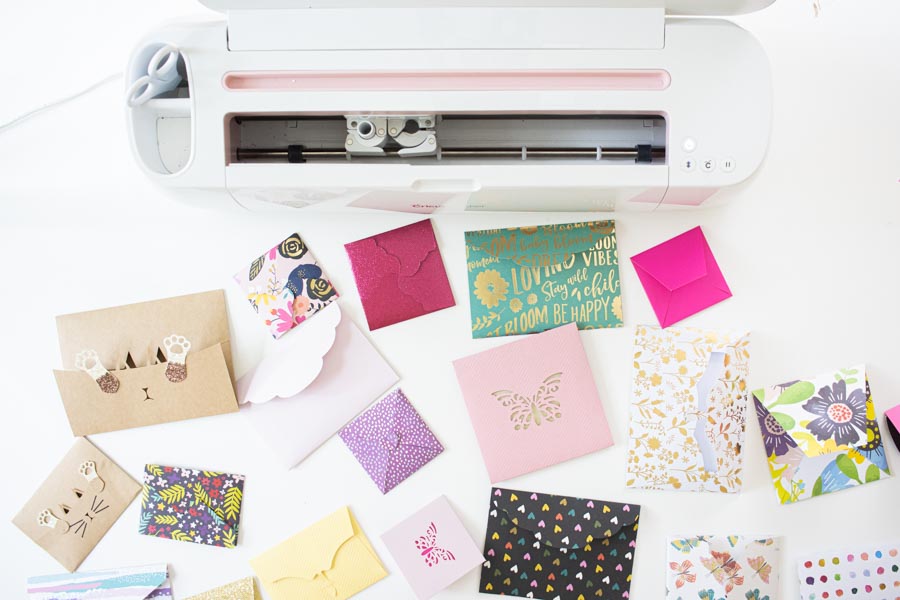
- Photos of some of the envelopes you can make
Are you ready?
Let’s Daydream Into Reality!
Materials for Cricut Envelopes
The materials for this project are quite simple, but I always like to emphasize that the final look will depend on the quality of the materials you use.
I recommend using high-quality paper and glue if you want professional-looking envelopes and not a kindergarten project.
High-quality paper can be expensive, but you can get good deals at Michael’s. I
For the Envelopes
- Fine Point Blade
- Green Mat (you can also use a new blue mat)
- Scoring Wheel or Stylus (if you have an Explore you can only use the stylus).
- Cricut Maker/Explorer
- Paper
- High-quality glue
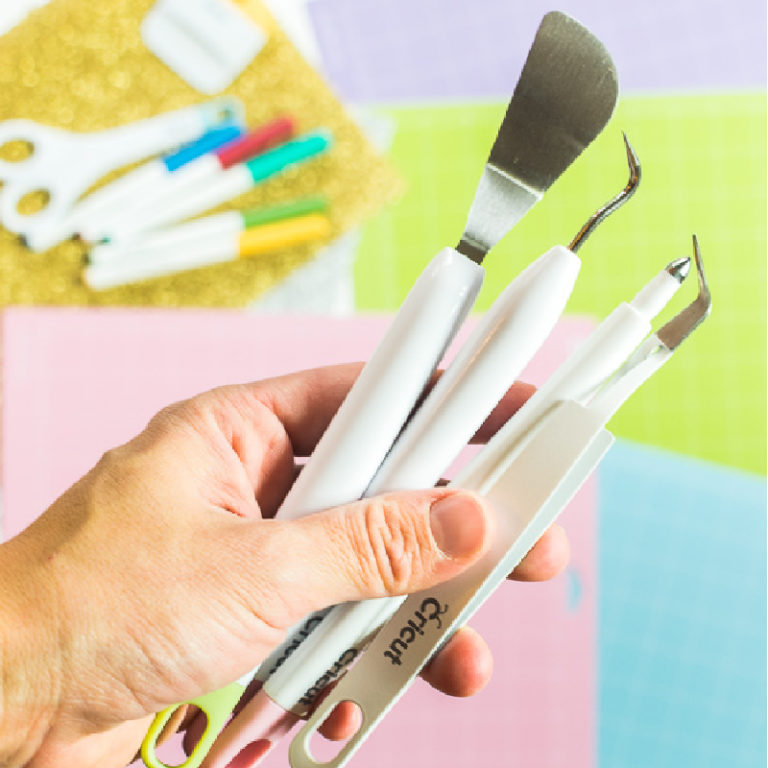
For Addressing
There are three methods I will teach you, and you’ll need these extra tools/materials.
- Cricut Pens
- Sticker Paper and Printer
- Iron-On, iron (or EasyPress mini).
Click on the button down below to follow along.
The rest of the Free SVG templates are all in this article at the end of the step by step cutting and addressing process.
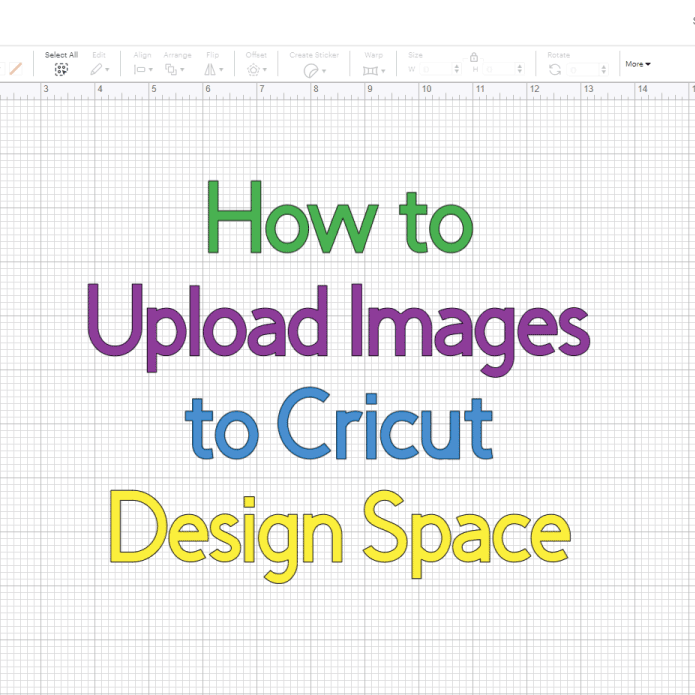
Making Envelopes in Cricut Design Space
First, we need to upload the practice file.
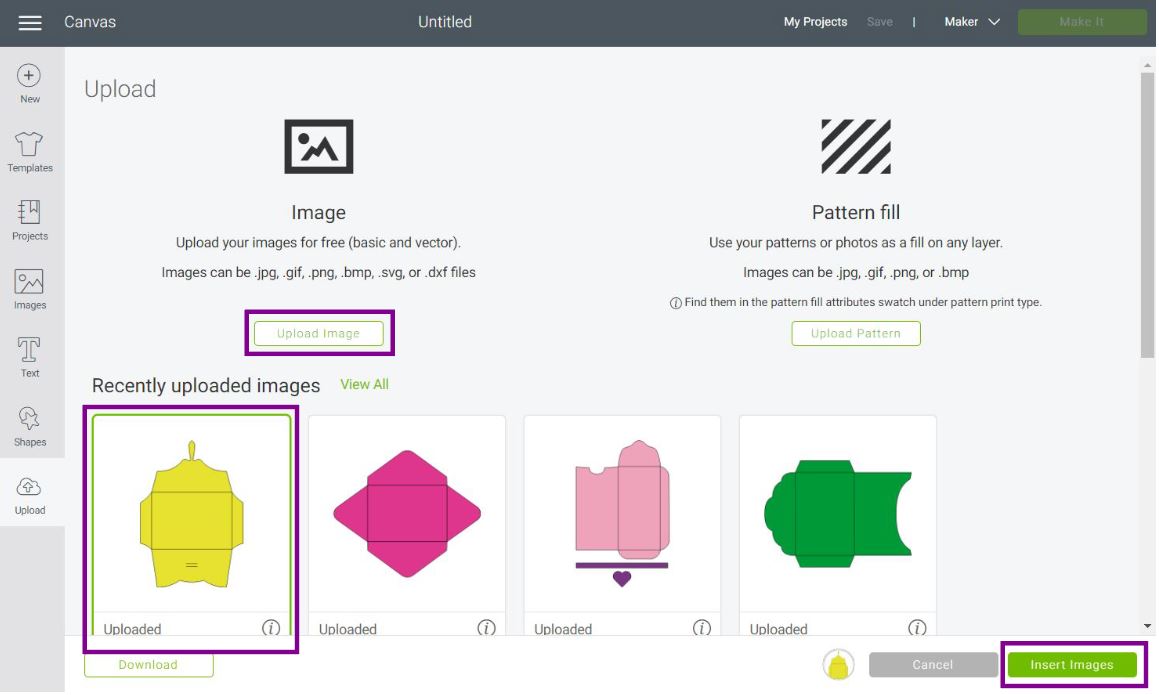
Go to the canvas area in Design Space and click on the “Upload” button on the left panel of the canvas. Select “Upload Image” and follow the prompts to upload the template.
Once you upload the file, select it from “Recently uploaded images” and insert it to the canvas.
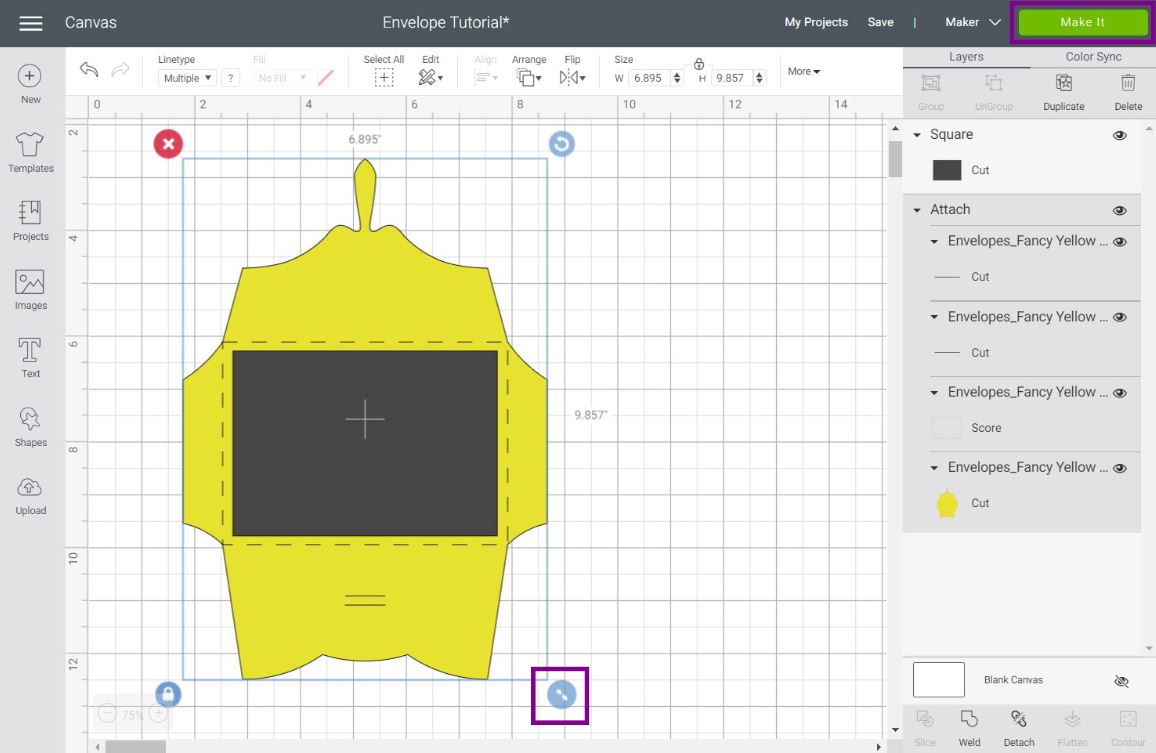
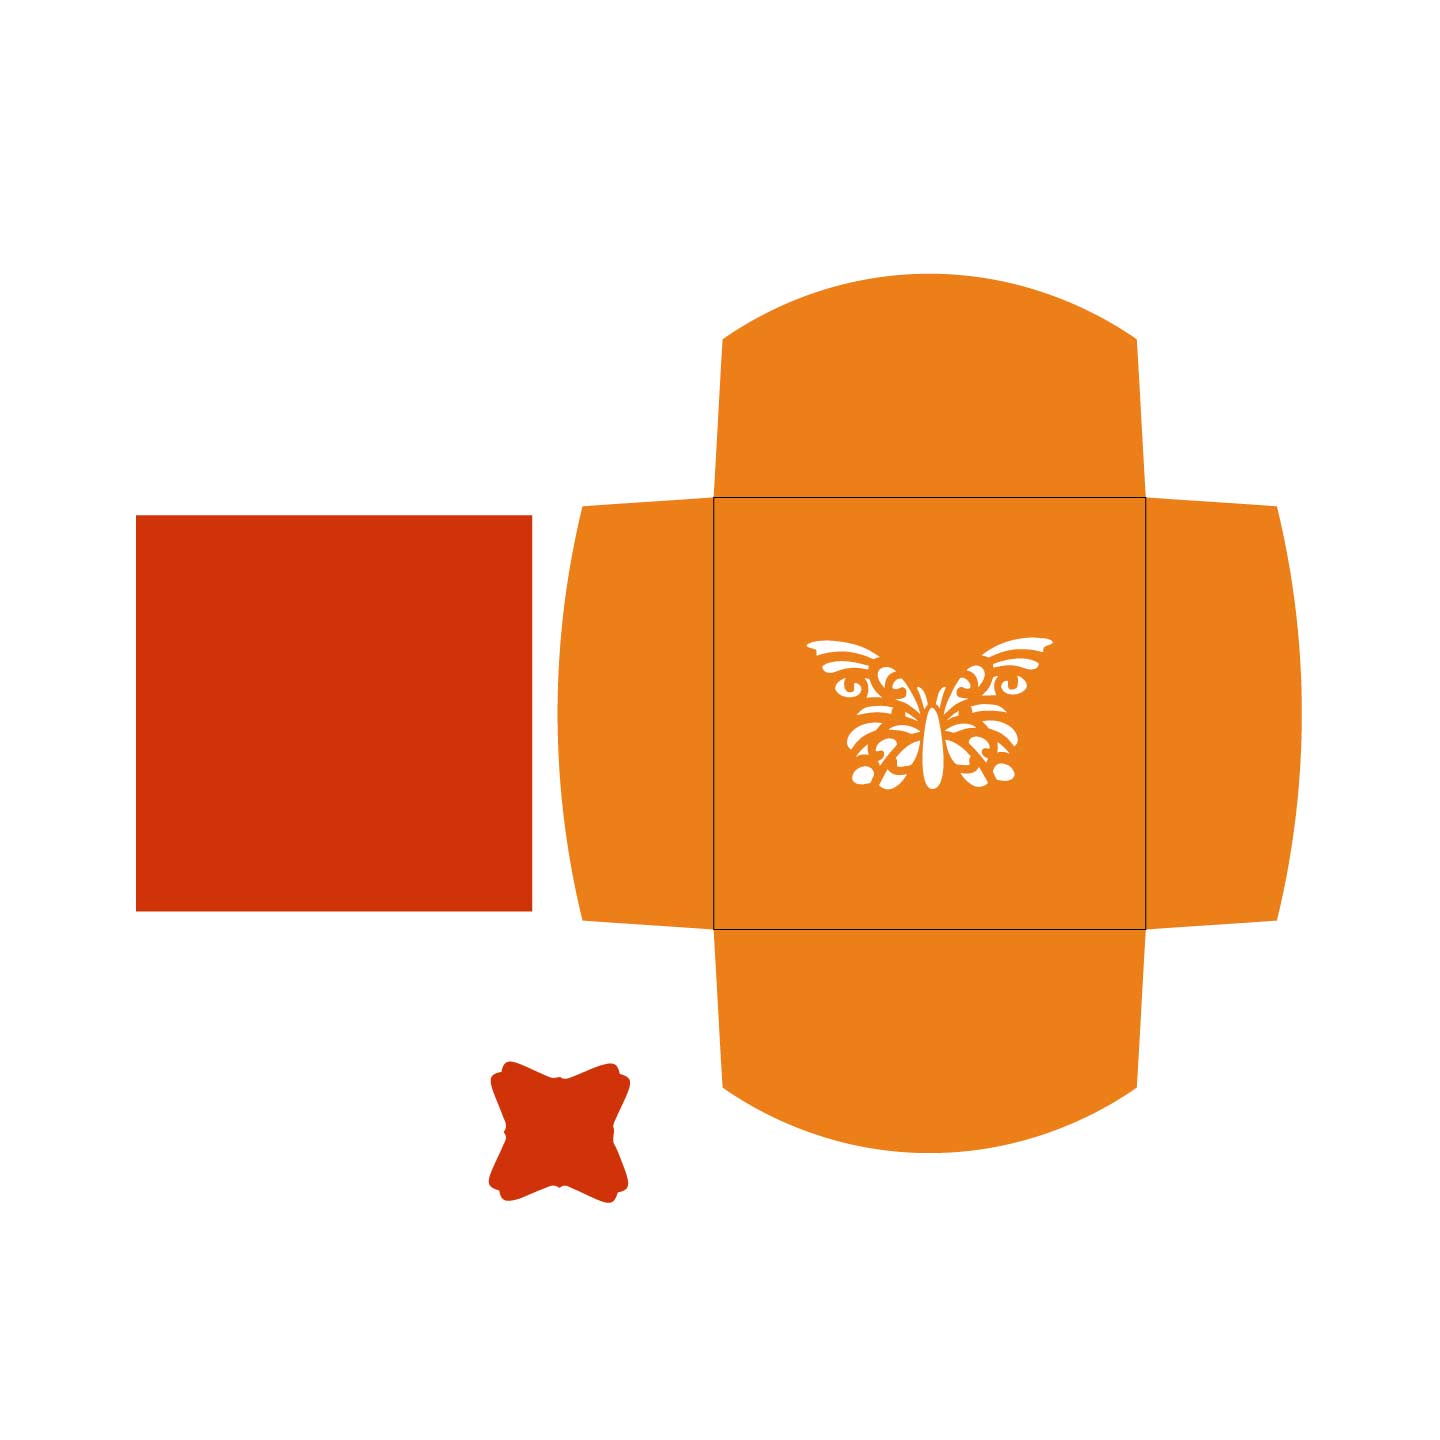
If you look on the layers panel of the envelope, you will see all the layers that are part of the design.
You’ll find:
- Two cut lines to close the envelope.
- Square that goes where you need folds
- The envelope
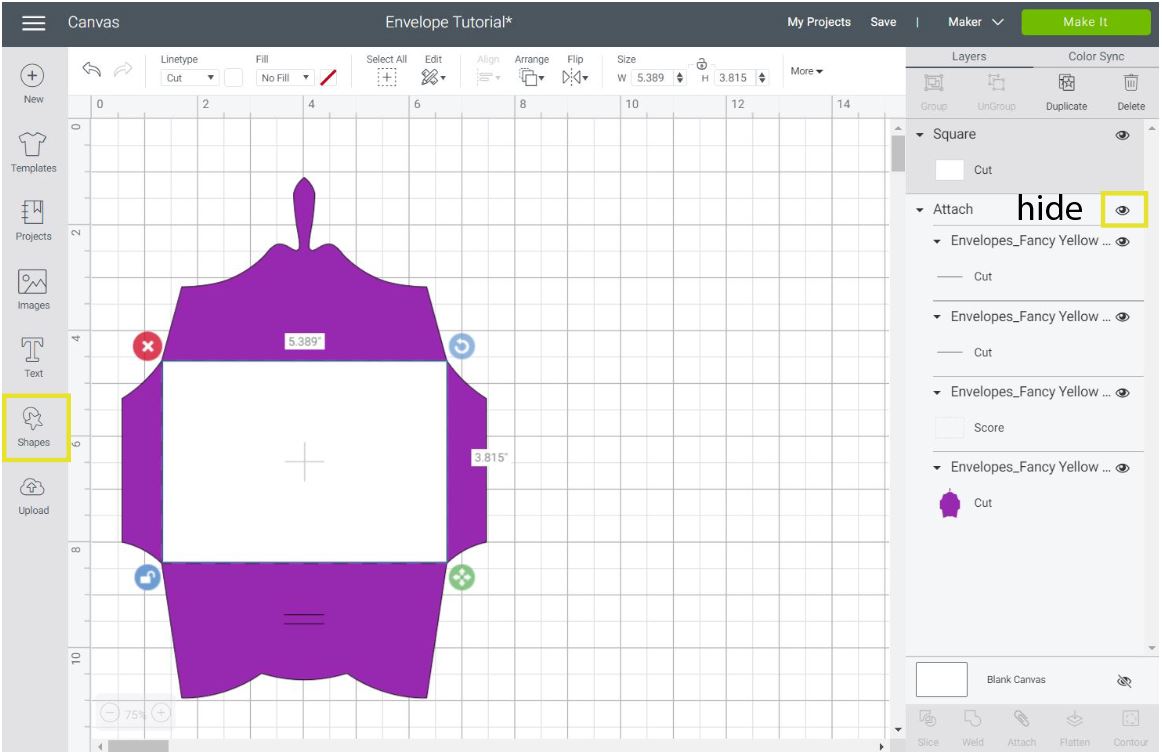
To edit the envelope, first “Ungroup” the layers. Then select the square and change the “Linetype” to “Score” to tell your machine you need to use either the scoring wheel or the scoring stylus.
The cut lines need to be left with “Cut” as “Linetype.
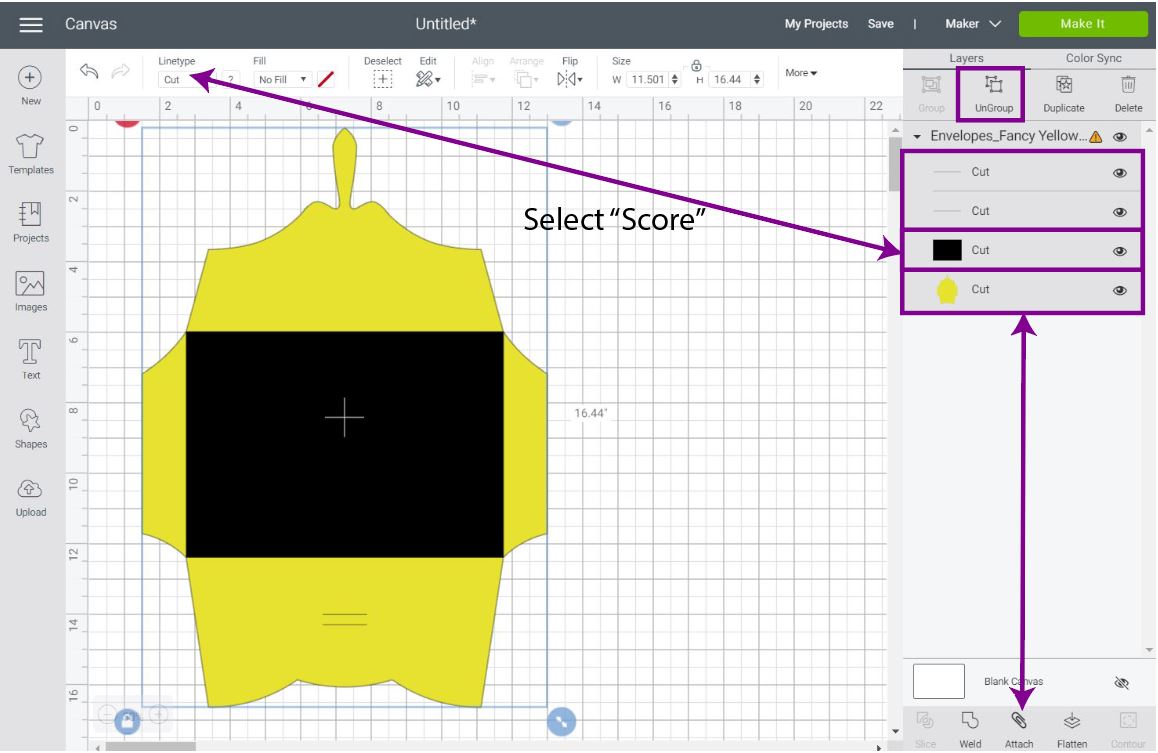
Last but not least, select all layers and click “Attach” at the bottom of the Layers panel.
Attaching is very important; if you don’t do it when you click on “Make it,” your project will be all over the place.
Resize Envelope in Design Space
The easiest way to resize an envelope in Cricut Design Space is by creating a “card template.”
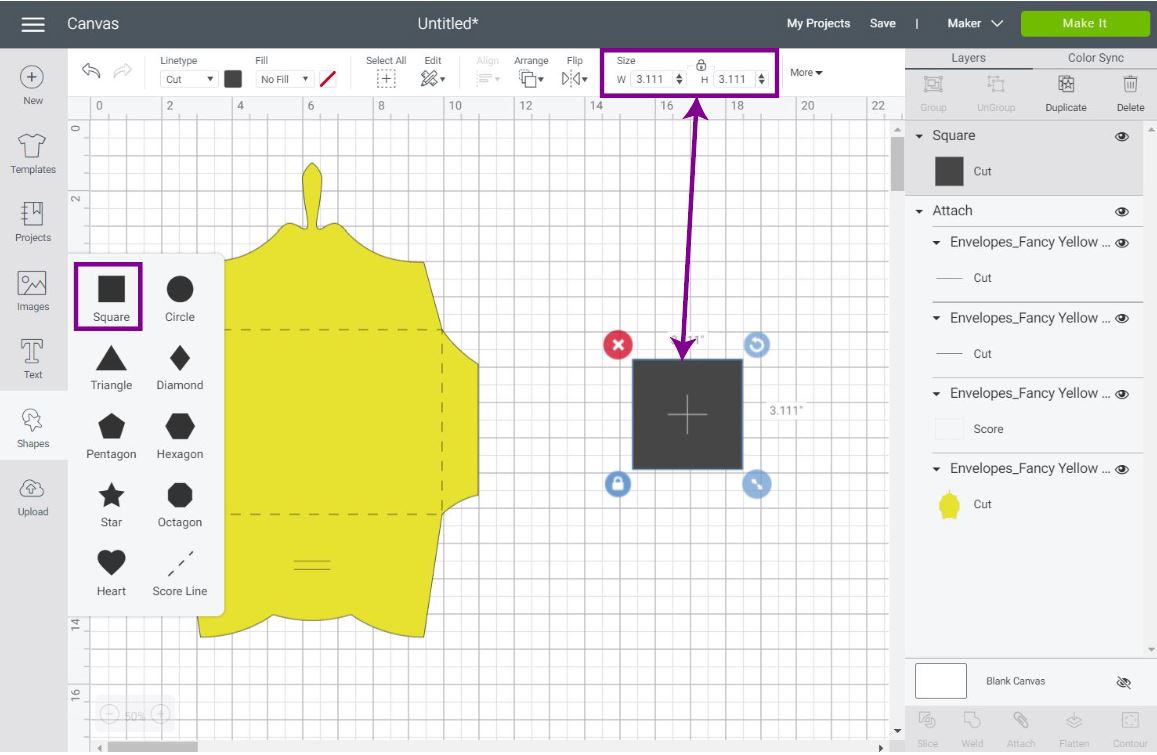
The card template is an “imaginary” shape sized according to your card size. Click on Shapes (left panel of the canvas) and select a square.
When the square appears in the designing area, select it, and change the size on the top panel area.
Most likely, you’ll need to click on the little lock to unlock the square’s proportions. The size of the card I wanted to use was 5″ x 3.5″.
Keep in mind that to make envelopes, you will need, in many cases, big sheets of paper.
In my experience, the most beautiful papers come in 12″ x 12″ sheets; therefore, your envelope can’t be larger than that size.
There are also limits when sizing in Design Space, and your project can’t be larger than 11.5″ x 11.5″; if using a regular mat, or 11.5″ x 23.5″. If Design Space brings an error is usually because your project is too big.
After sizing the square, select the envelope attachment and resize it, so the score lines wrap the card template. Leave a small margin, so you don’t have to force the real card inside the envelope.
Once your envelope is sized, delete the card template and click on “Make it.”
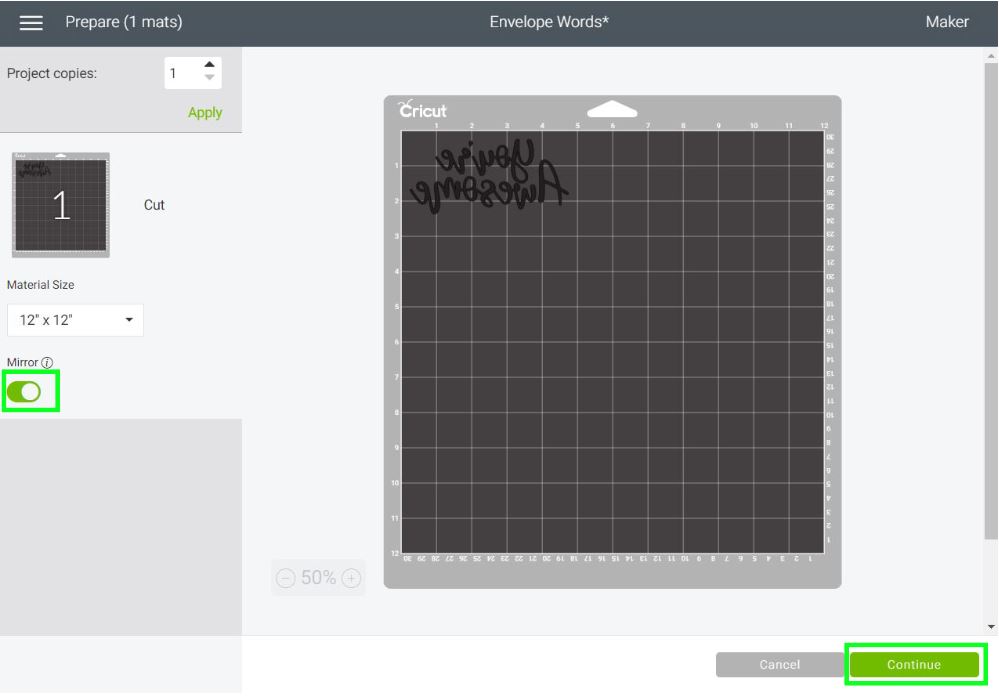
Cutting Envelope
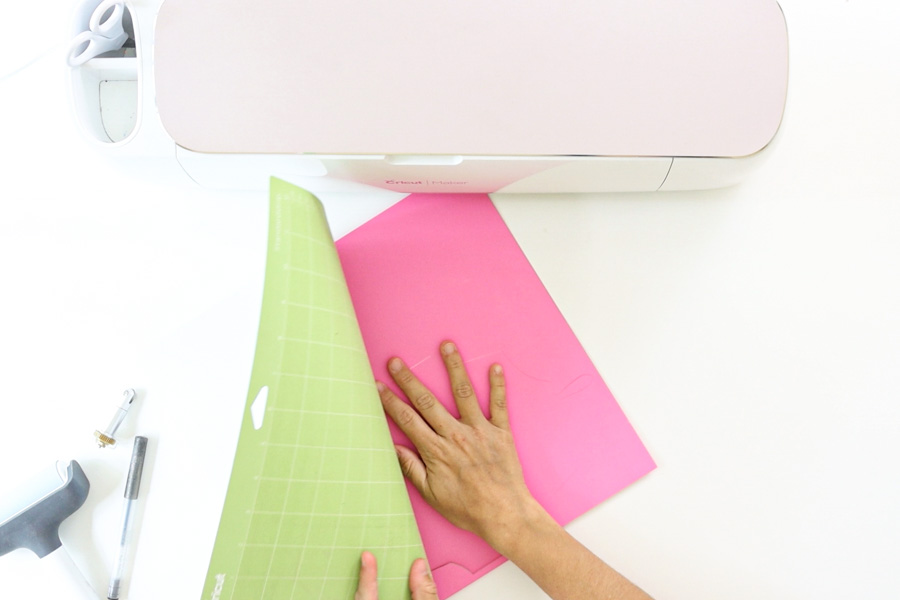
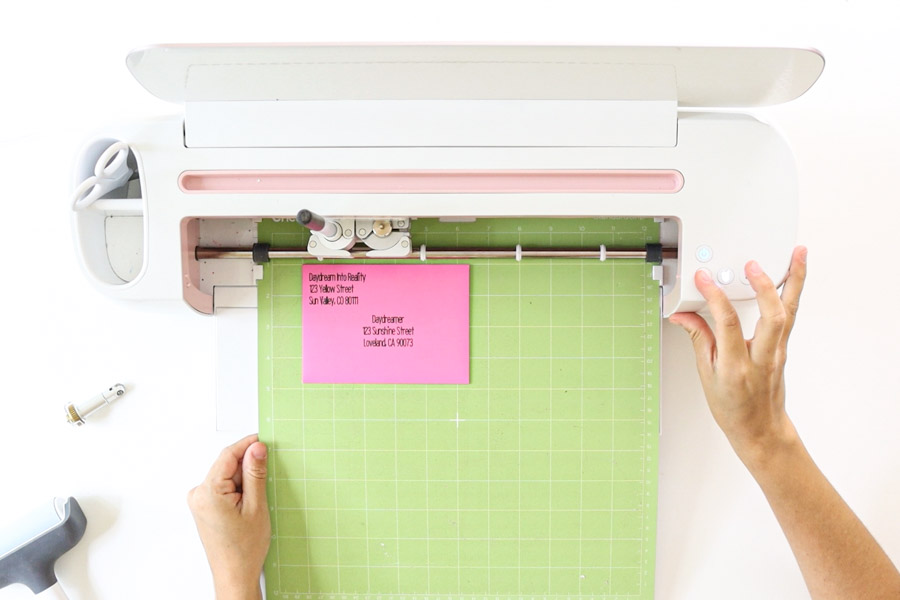
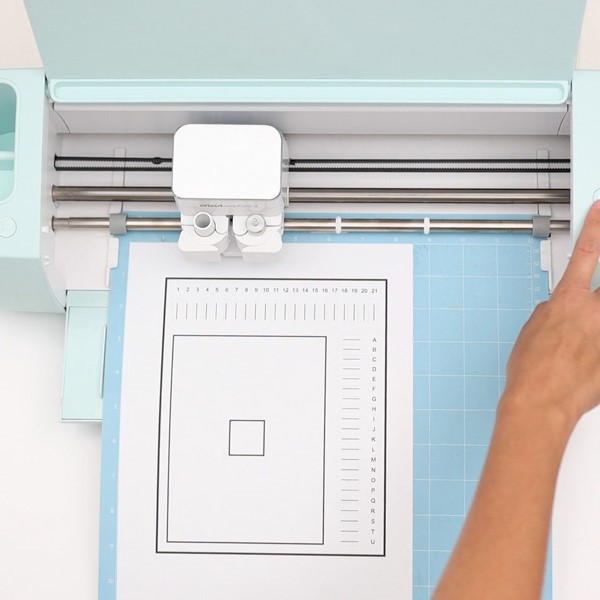
The picture down below shows where you need to place the paper.
When making envelopes, boxes, or projects where you score, you always need to place your material coated or pretty size down.
Folds need to be towards the score lines, and the only way to do this is by scoring on the back of the paper. You can learn more about scoring with Cricut in this tutorial.
For this envelope (and all the others at the end of the tutorial), you don’t need to turn on “Mirror” because everything is proportional mathematically.
As a good practice, I recommend turning on “Mirror” whenever you are placing materials pretty or coated side down.
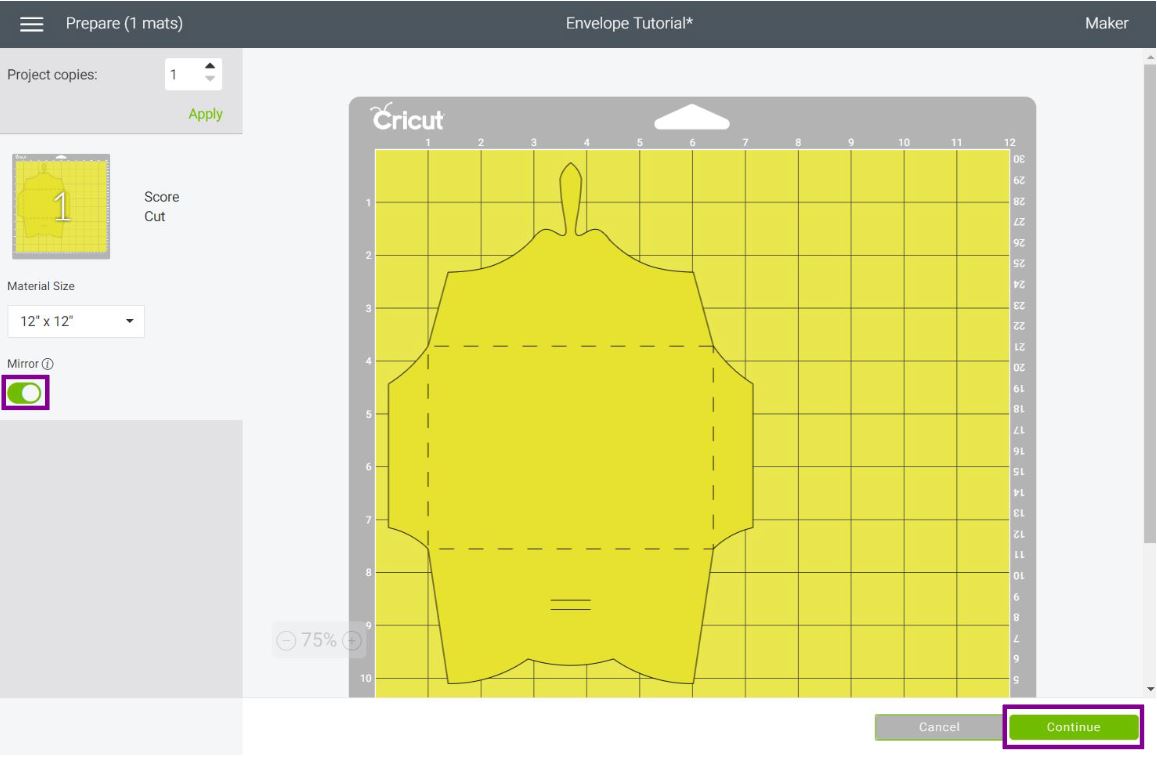
Click on “Continue.”
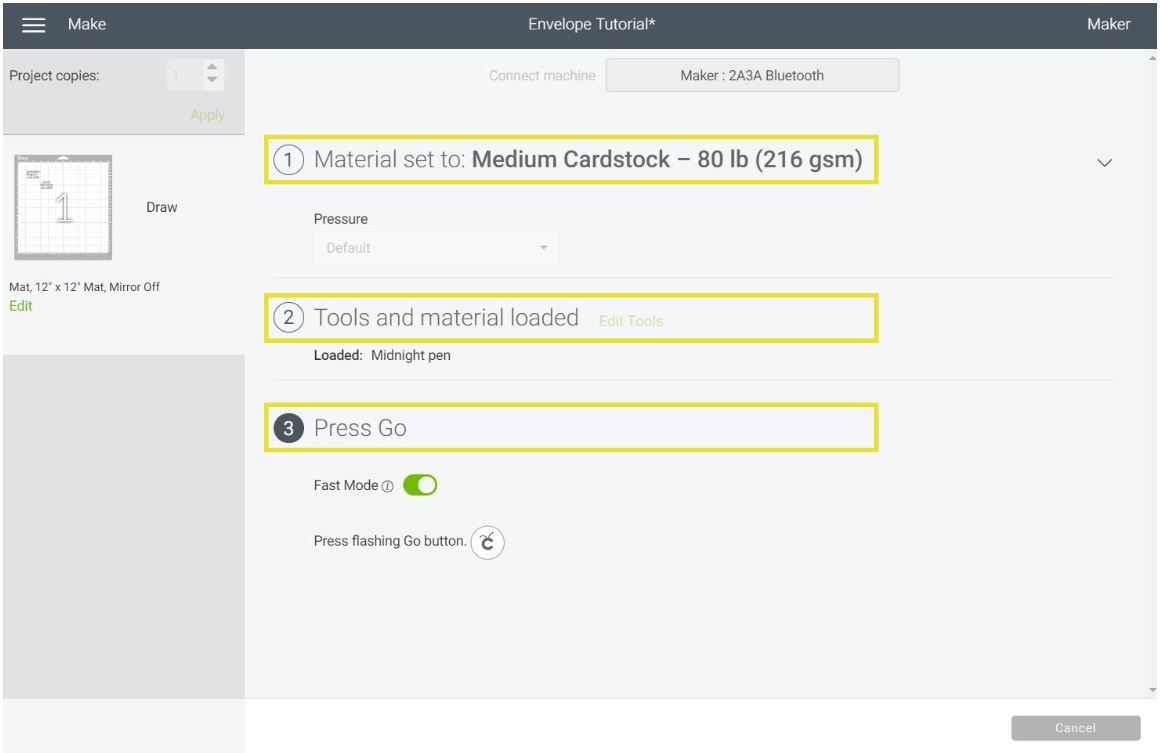
It’s time to select the materials and the tools you are going to use for your envelope. This choice is personal, but I’ve used cardstock, glitter cardstock, and sometimes, I’ve used thin patterned paper.
For this envelope, I used “Medium Cardstock.”
If you are working with a Cricut Explore machine, you will be using the Scoring Stylus for the folds. The good thing about the stylus is that you can install the Stylus and Fine Point blade simultaneously.
If you have a Cricut Maker, Design Space will select the scoring wheel for making scoring lines, if you don’t have it, click on “Edit Tools” and select “Scoring Stylus.”
Tip: Check out my Scoring Wheel vs. Scoring Stylus article.

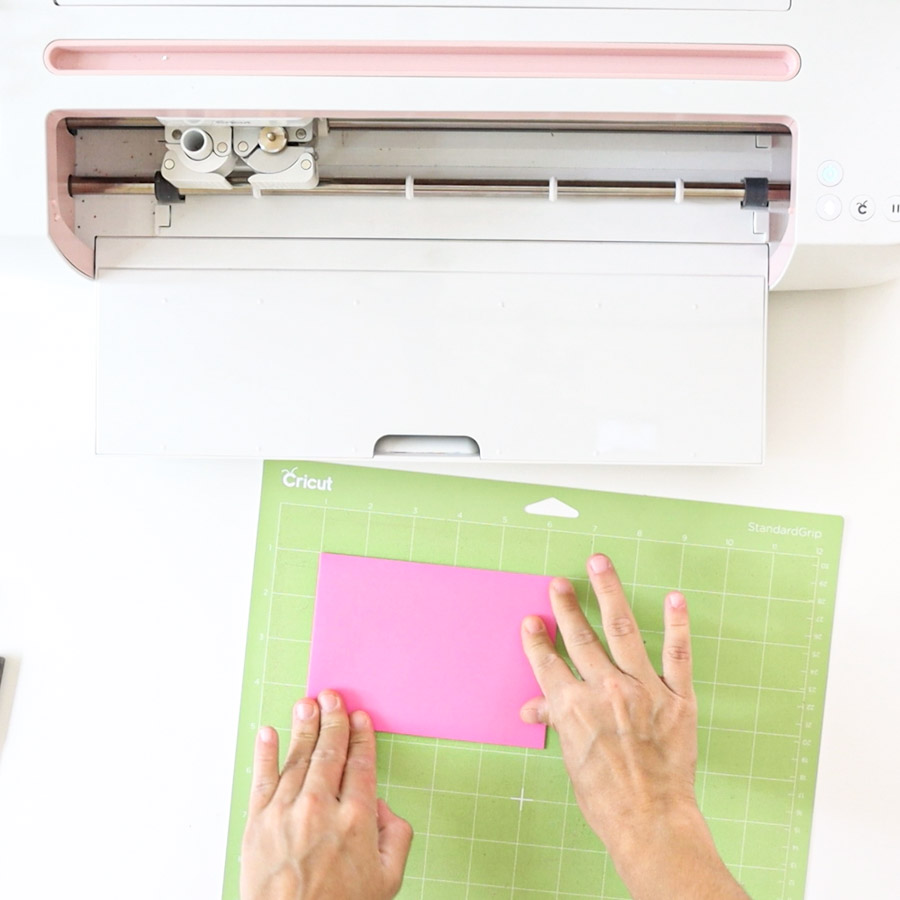
Let’s move to real photos!
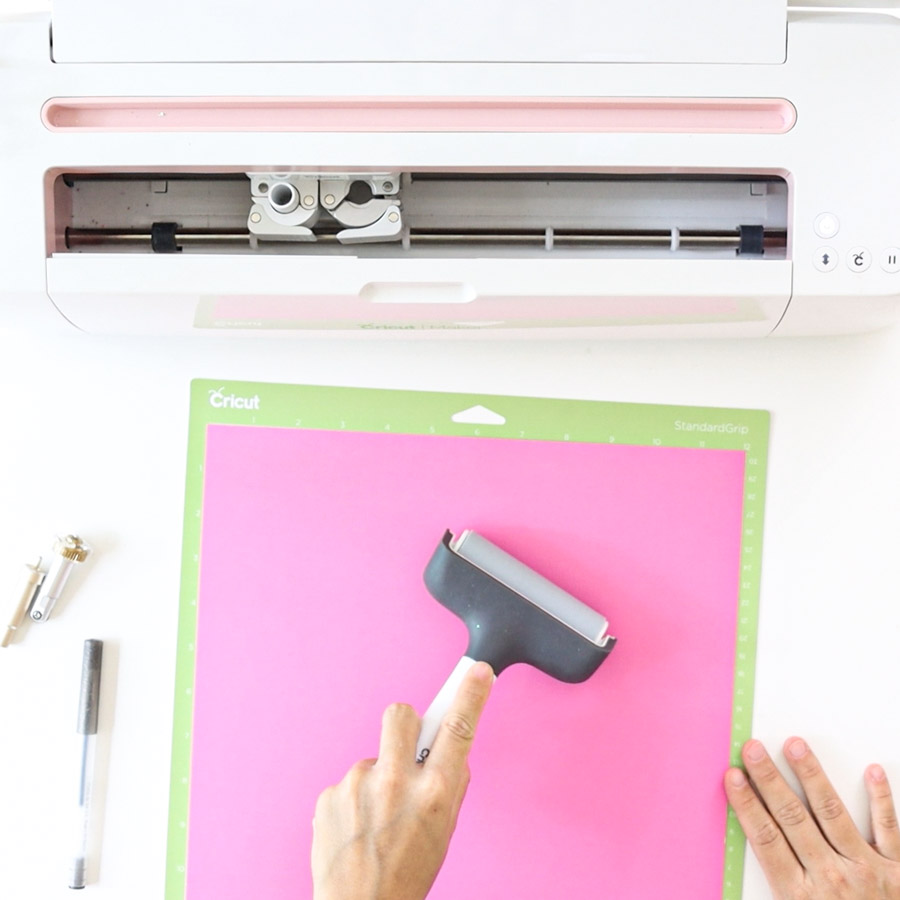

Place paper on mat coated or pretty side down. The paper I used had color on both sides, so it didn’t matter.
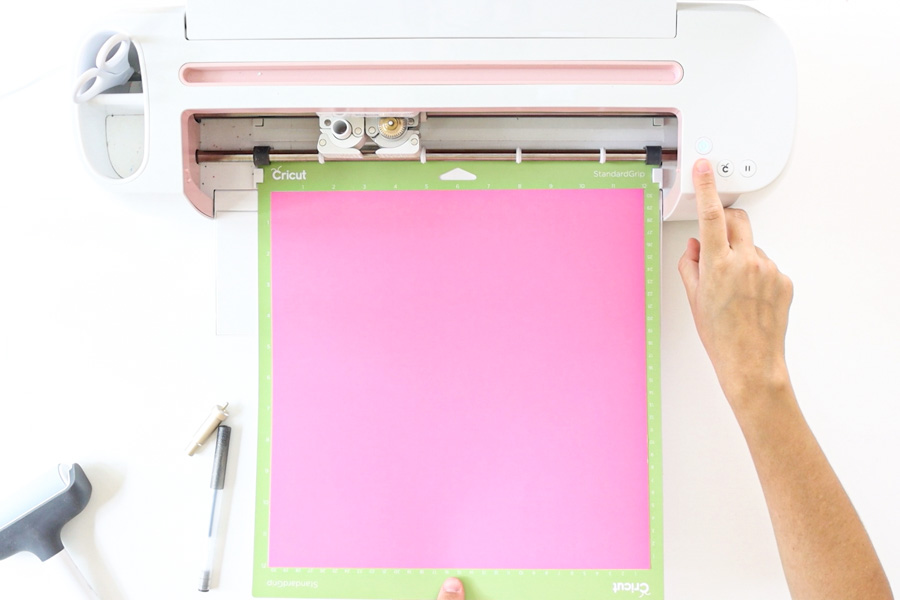
Install Scoring “Wheel/Scoring Stylus.” and Fine Point blade. Load mat to Cricut and press the flashing go button.
Note: If using the Scoring Wheel, you will need to install it first, then install the blade when your Cricut is done with the score lines.
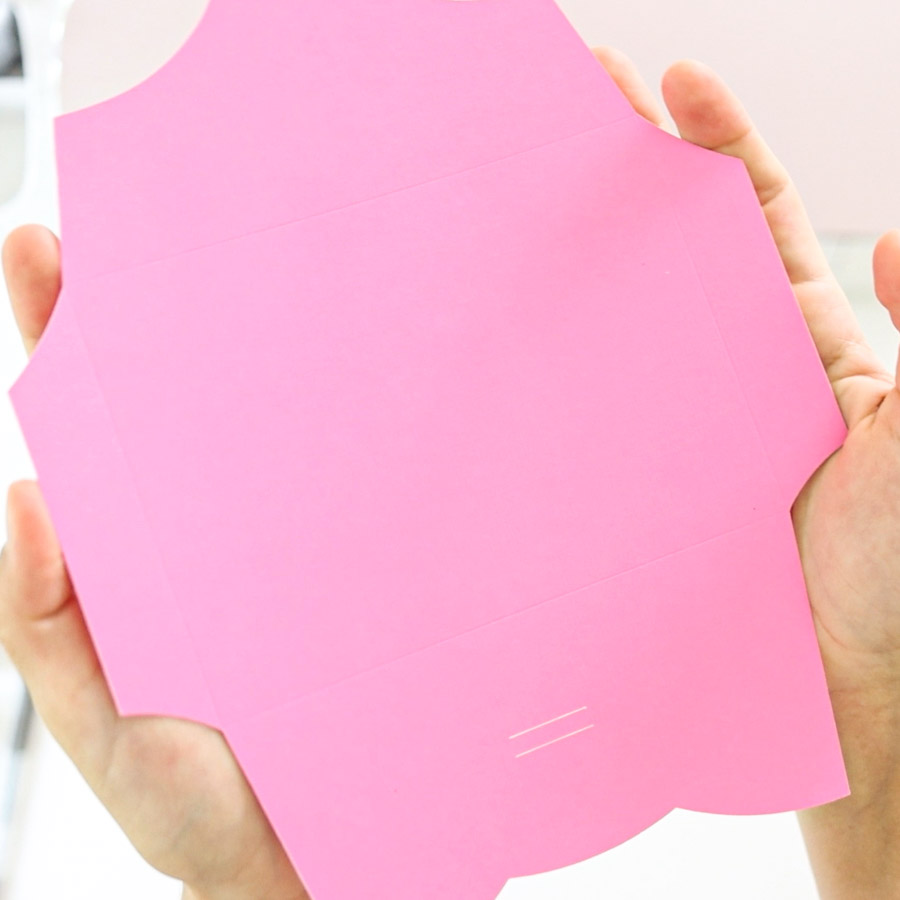
After cutting, unload the mat; I always bend the mat so gravity can help to remove the paper from the mat. It will also prevent your material from creating unwanted waves.
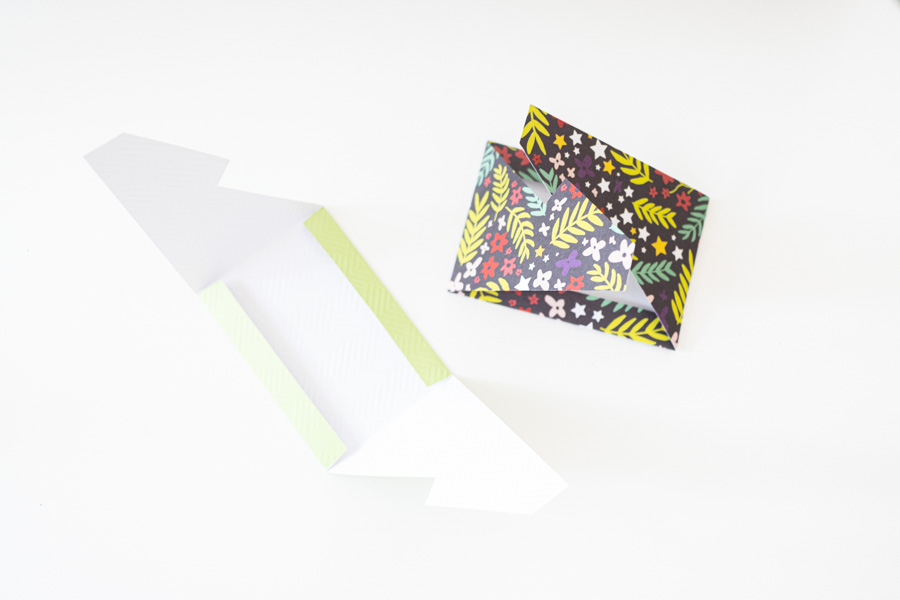
It’s time to assemble the envelope.
It’s so easy!
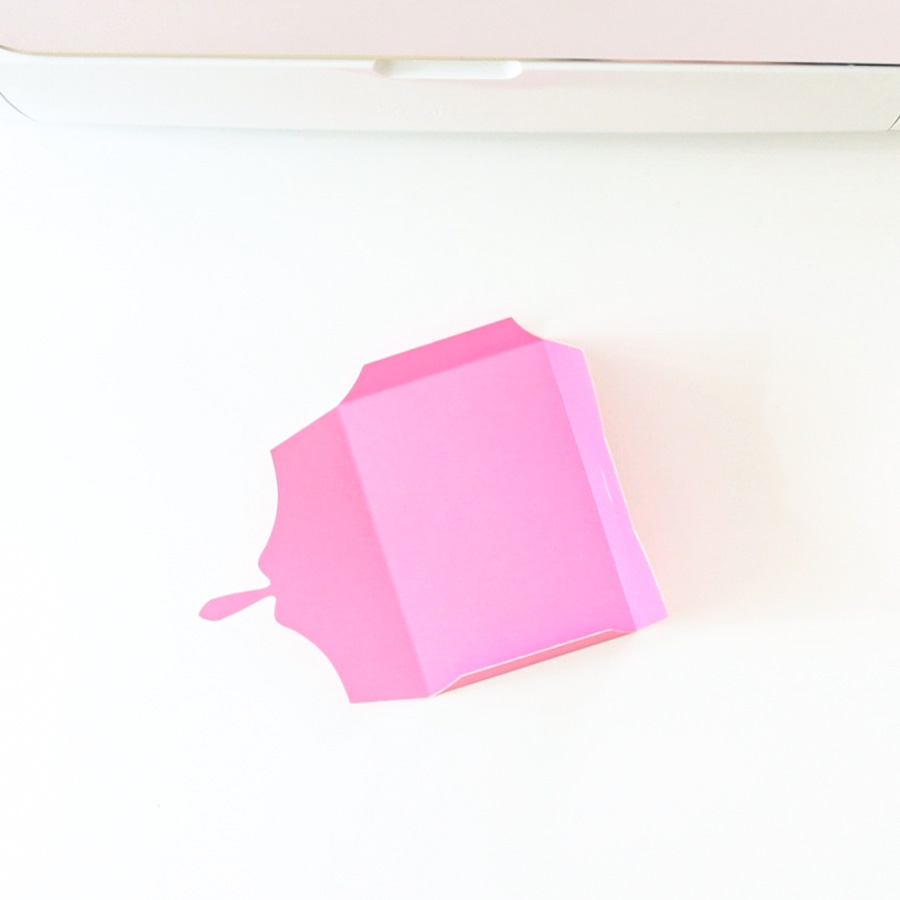
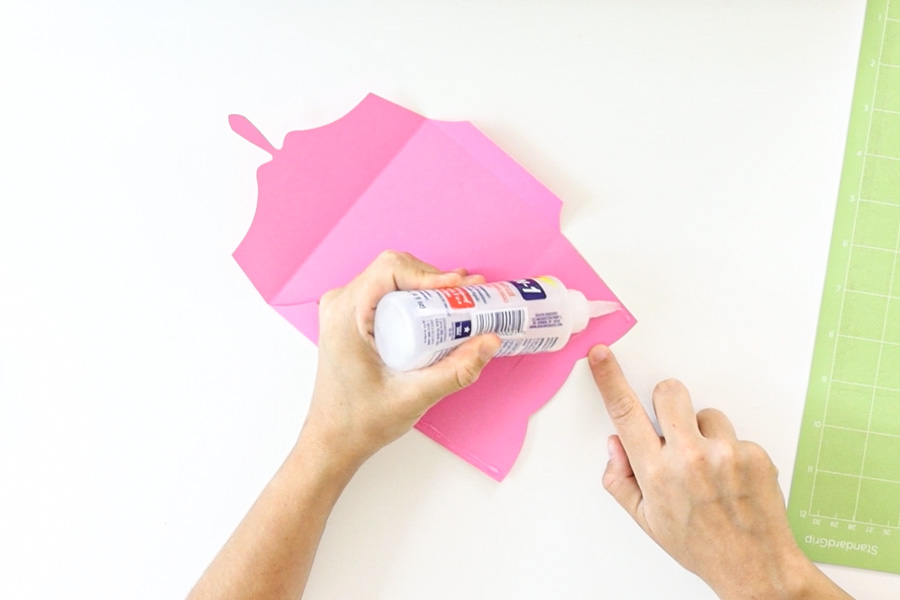
Fold towards the scoring lines and with a high-quality glue (run away from kids glue) connect the envelope.
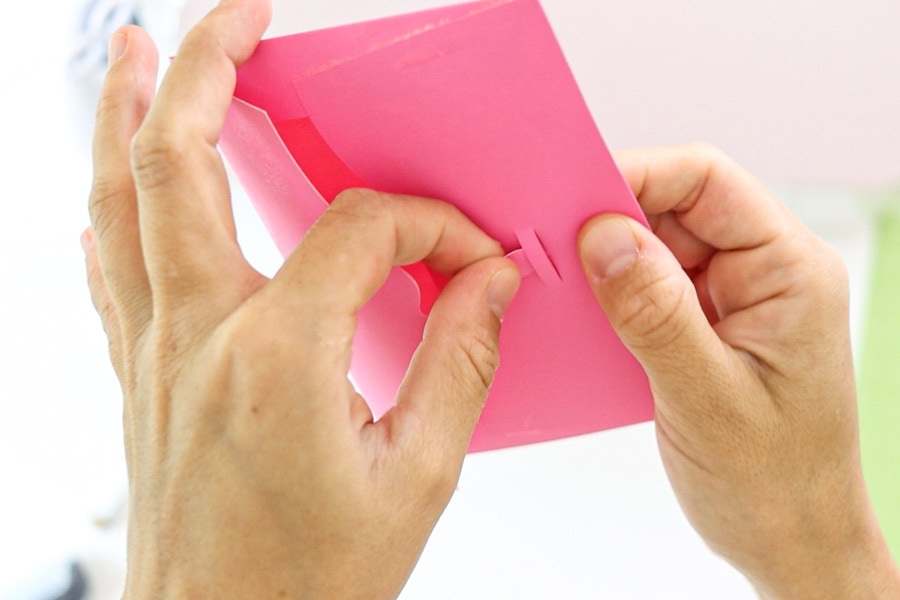
To close it, insert the little oval along with the two small cuts.
How to Address Envelopes with your Cricut
Addressing envelopes with your Cricut is very easy, and it can give your envelope a nice touch.
You can use any envelope you have on hand or any of the templates I provided you with.
There are three methods I will be covering today:
- Addressing with Cricut Pens
- Using Sticker Paper and Print then Cut
- Addressing with Iron-On (more like decorating).
Addressing Envelopes using Cricut Pens
Using Cricut Pens to address envelopes is the method you’ll find across the web.
I love Cricut Pens, but they are so slow. If I was Addressing one envelope, sure, why not. Addressing for a whole wedding, no thank you!
Although we as crafters want the best-looking projects, we also need to be practical.
To teach you this method, let’s use the envelope and concepts we used on the previews steps.
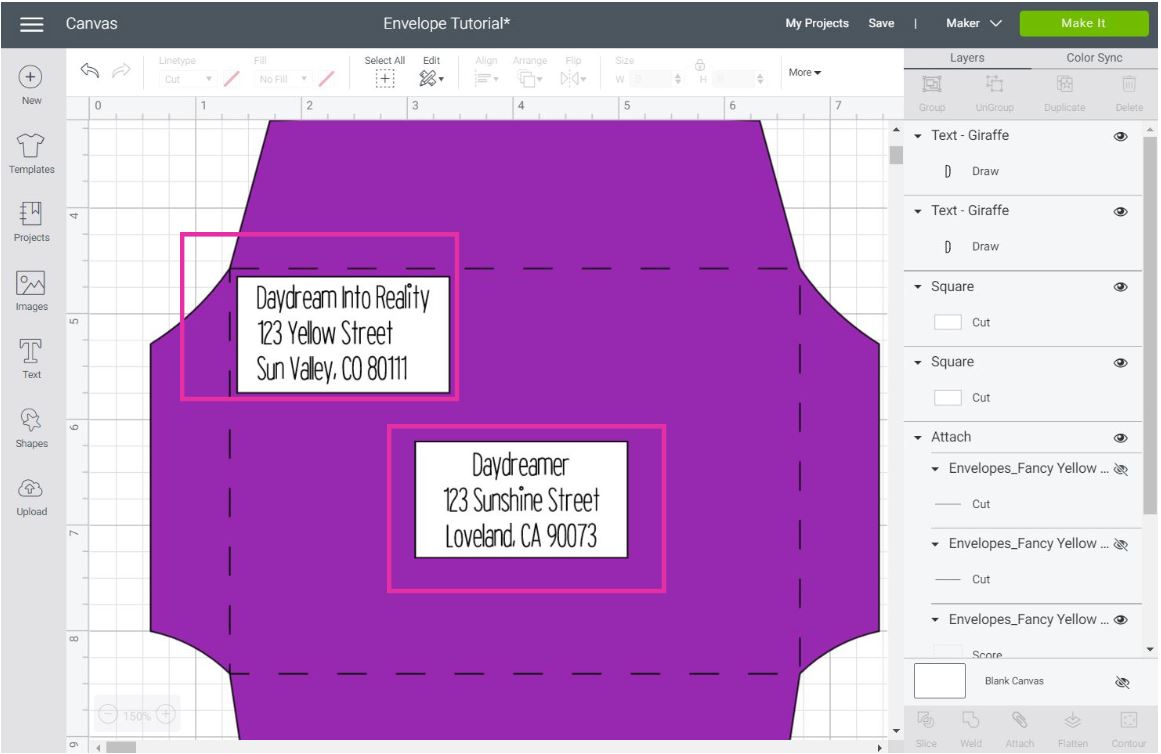
Adding an Envelope Guideline
To determine the size of letters and the distribution between the sender and recipient, you need to create a guideline.
The guideline should be the size of your envelope once it’s folded. If you have a store-bought envelope, simply make a rectangle in Design Space using the with and height of your envelope.
For envelopes that you make in Design Space, drop a rectangle, unlock its proportions and then resize it, so it fits the middle of what it’s supposed to be the backside of the envelope.
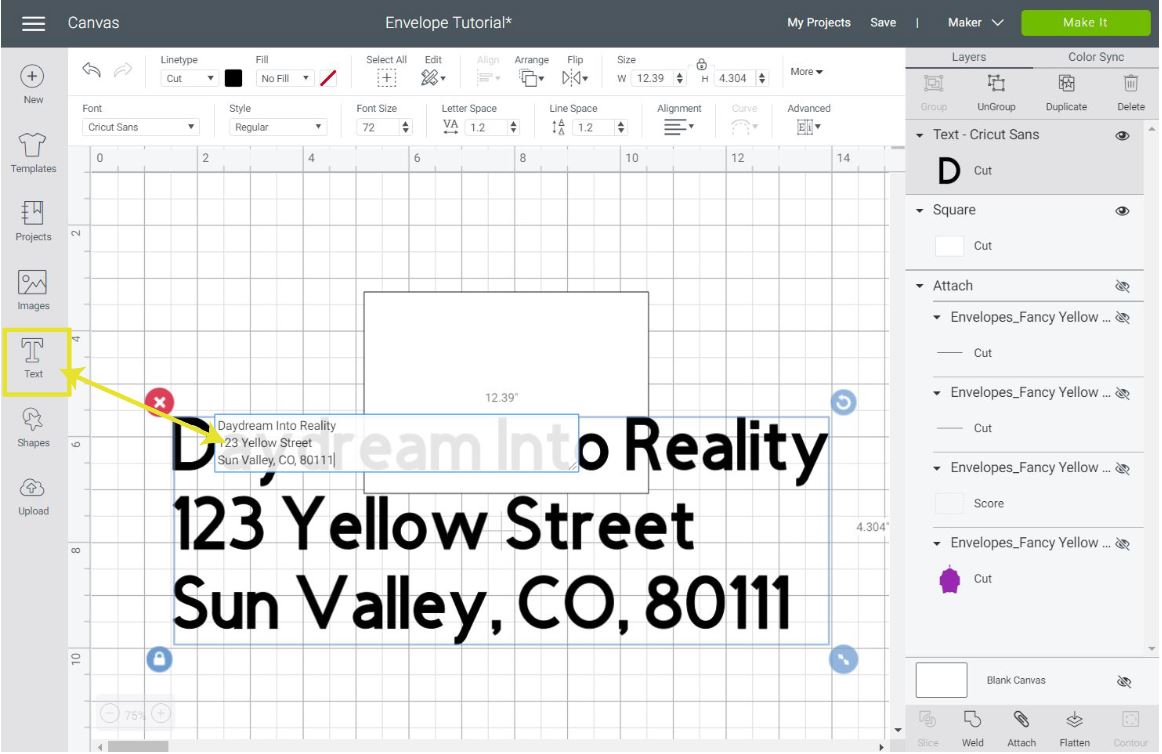
Hide the envelope so you can have a clean workspace.
Add Text
Click on the Text button (left panel on the canvas) and type it in a paragraph with the sender’s information and then another with the receiver’s address.
same number you got after resizing the sender’s info.
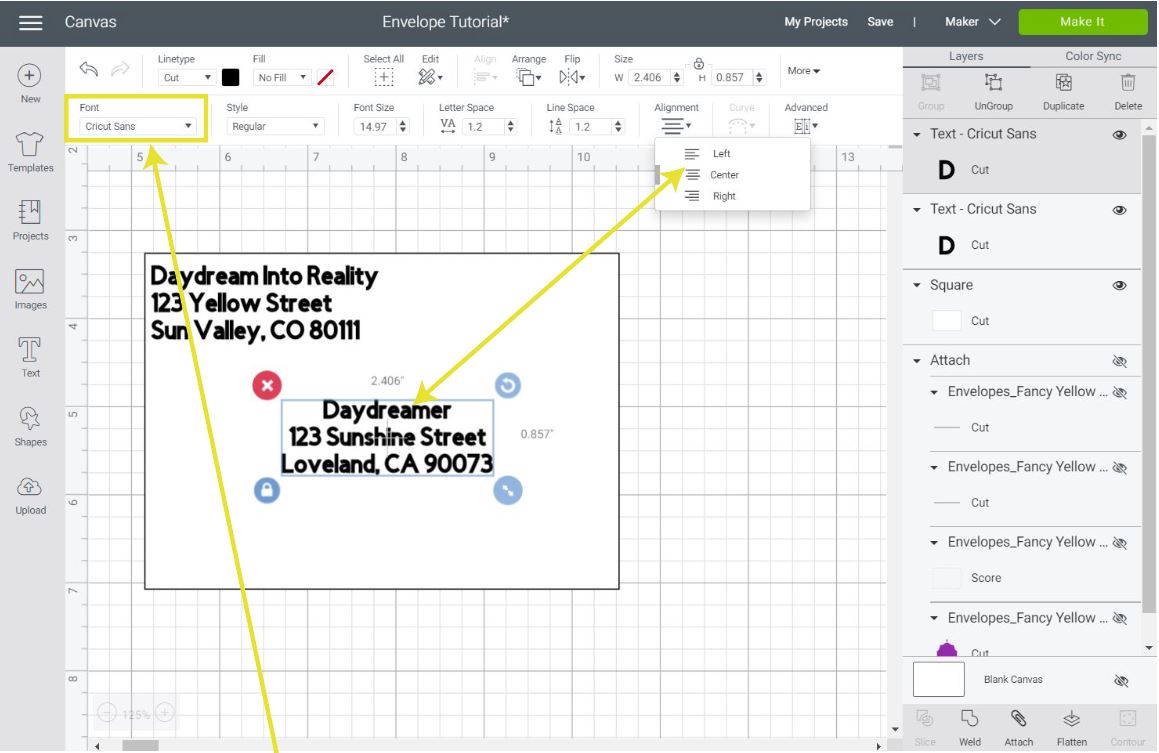
Tip: You can also center the receiver’s info by selecting the text, then click on “Alignment” and select “Center.”
Before you do anything else, you need to make sure you are using a writing font.
The font you have is set to “Cut” and we don’t want to cut, we want to write.
If you don’t have Cricut Access, this may cost. Your machine usually comes with a free writing font, but in case it doesn’t, you can always use a regular font and change the Linetype from “Cut” to “Draw.”
When drawing fonts instead of writing, you’ll have hollow letters. You can get around this using free fonts that are very thin. To see some of them, check out this Free & Paid Fonts for Cricut article I wrote.
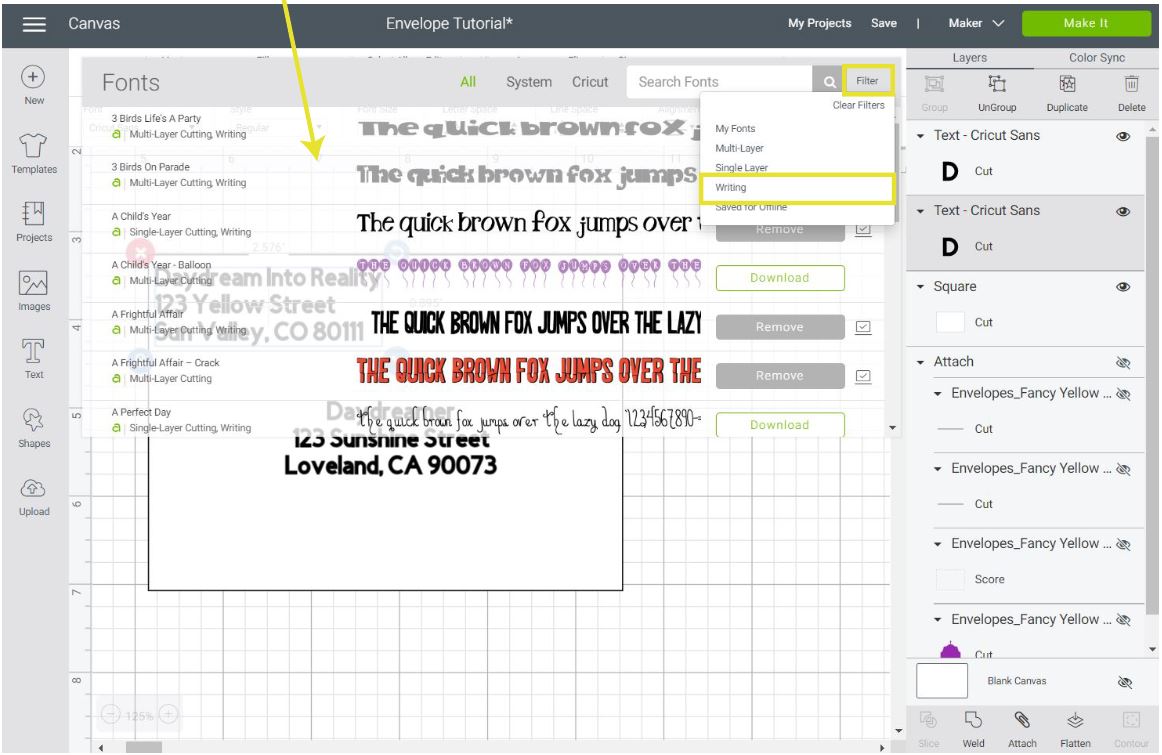
Cricut has charming writing fonts that you can use for your projects.
To change the font, select one paragraph at the time and click on “Font” (top panel).
A big window will slide open with the different types of fonts Cricut had. Click on “Filter” (upper-right corner of the window) and select writing.
I picked the font “Giraffe” for this example. You want to pick something easy to read and understand. After changing fonts, you may have to resize and organize the paragraphs using the guideline one more time.
Once size and placement are ready, delete or hide the guideline and attach both the sender’s and the receiver’s paragraphs.
For more information about fonts and Cricut pens, check out these two helpful articles I wrote:

Click on “Make it” to write!
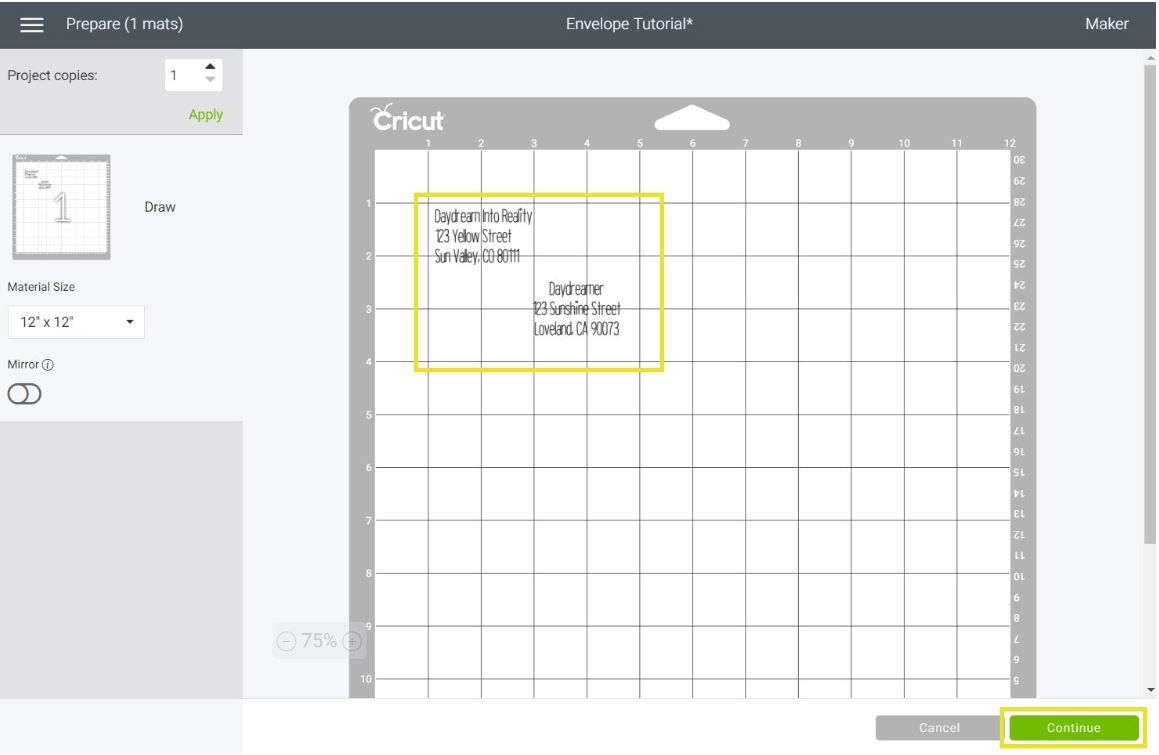
The mat preview looks a little bit different when using pens. Since we are not cutting anything, the mat color will be white.
Cricut always places things on the upper-left corner of the mat, but there’s a little caveat.
Cricut doesn’t start writing or cutting right on 0. There’s always a 0.25″ x 0.25″ added on each corner of the mat.
If you want to measure, go ahead, but if you like easy like me, visualize you are placing the envelope right at 1″ from the top and the left side of the mat and move the text to that area, leaving a small margin.
Click on continue, select the material you’re using, install the pen you want to use.
Let’s move to real photos again!
Place the envelope on the mat making sure it’s not moving. Remember where the text is located on the mat preview, that’s where you Cricut will write.
Once the pen is installed, load mat, tap on the go button, and there you have it, a beautifully addressed envelope.
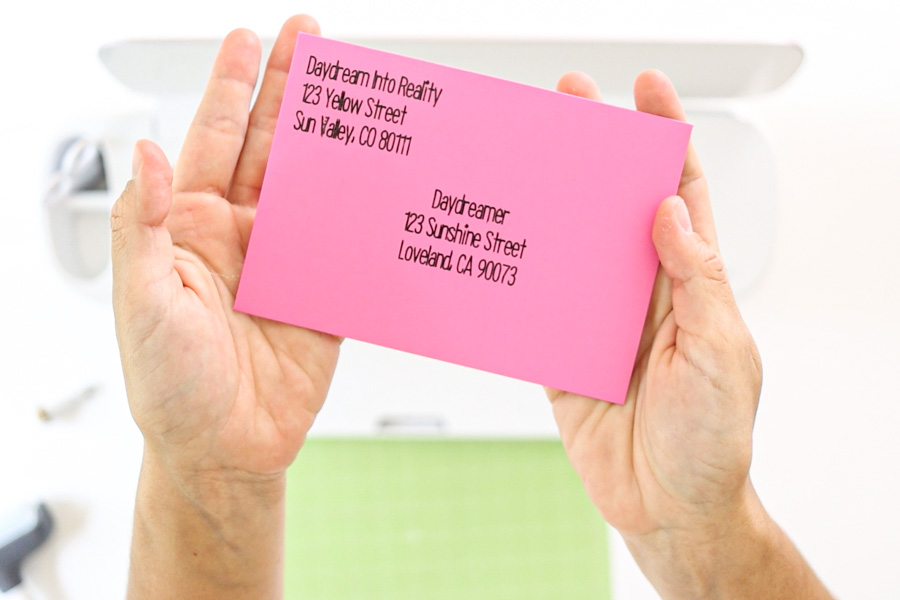
Doesn’t it look lovely?
Can you tell I love all things yellow, dreamy, and sunny?
Addressing Envelopes using Sticker and Print then Cut.
Another way to addressing envelopes is by using sticker paper, and the Print then Cut method.
If I were sending tons of invitations or Christmas cards, this is the method I would choose.
It’s fast, and it’s also pretty!
Maybe it’s not as cool as the first one, but trust me, using Cricut Pens for a single envelope will take you a long time.
Just think about it, is the person keeping or tossing the envelope?
Important: If using patterned paper, this method is essential because pens are hard to read on busy paper.
Labels for Addressing Envelopes with Sticker Paper
Making labels to address envelopes is quite easy!
At this point, you know how to add shapes and write text on the canvas.
Something cool is and that many don’t know is that you can use writing fonts if you want to give your text a handwritten style, that’s one of the main reasons people decide to use Cricut pens.
If using a physical envelope, with a ruler, visualize and measure two rectangles—one for the sender, the other one receiver. Then in Design Space, add these rectangles with text over them.
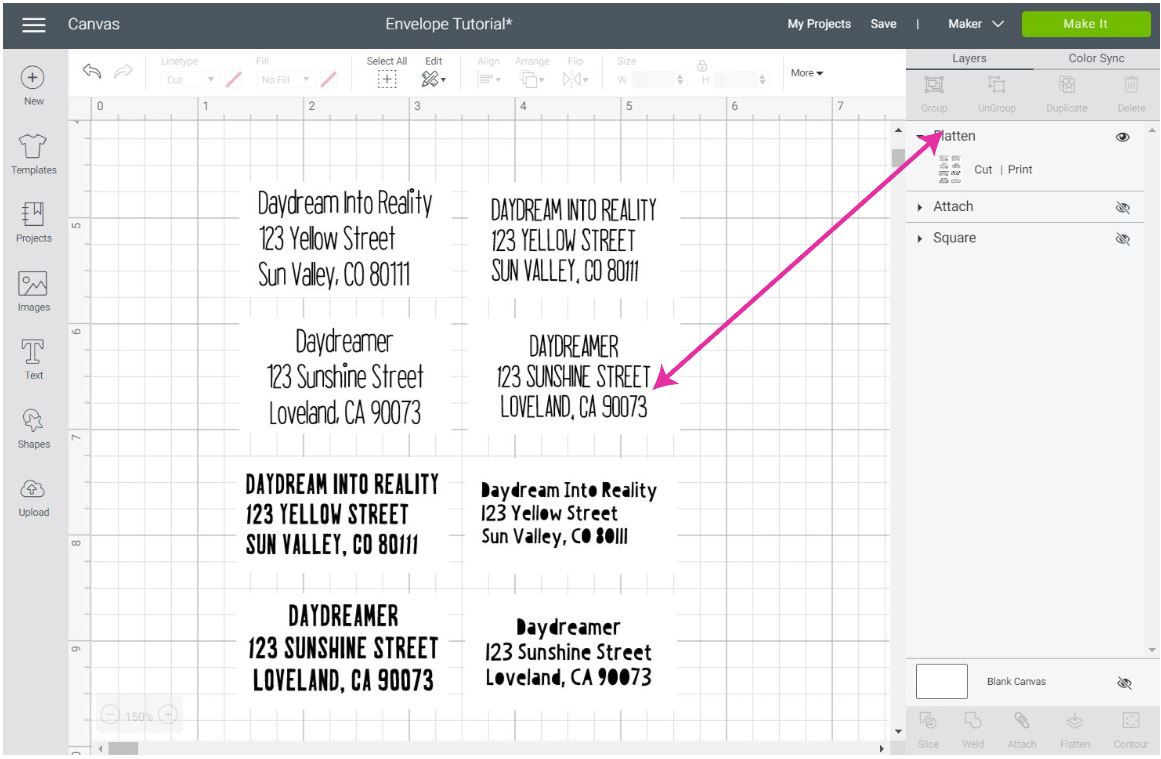
On the other hand, if you are making your envelopes in Design Space, you can directly make two rectangles (for sender and receiver) and place the text on them as I show you in the screenshot down below.
Once you measure, hide the envelope, and copy-paste the rectangles by selecting them and pressing Ctrl+C and then Ctrl+V.
Sticker paper is expensive, and you want to use it as much as you can.
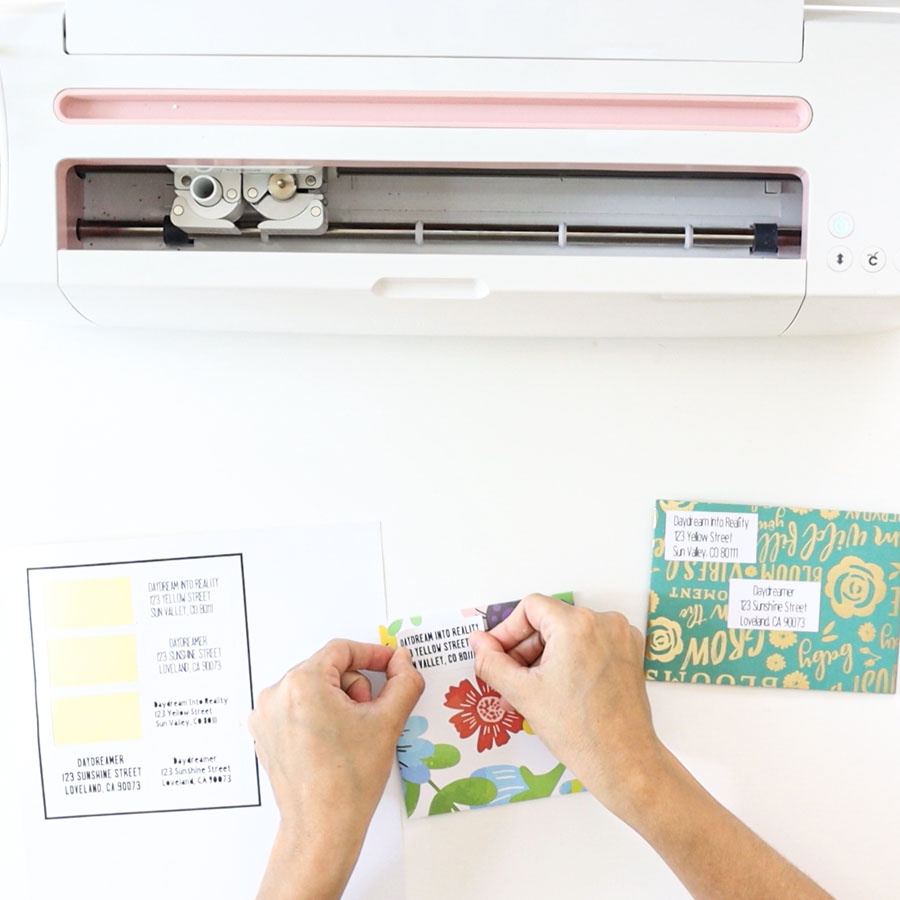
Down below, you can see I made enough labels for four envelopes, and I also changed some of the fonts. The first four rectangles have writing fonts, and the other four have regular fonts.
Important: You can make enough labels until the entire project is 9.25″ x 6.75.”
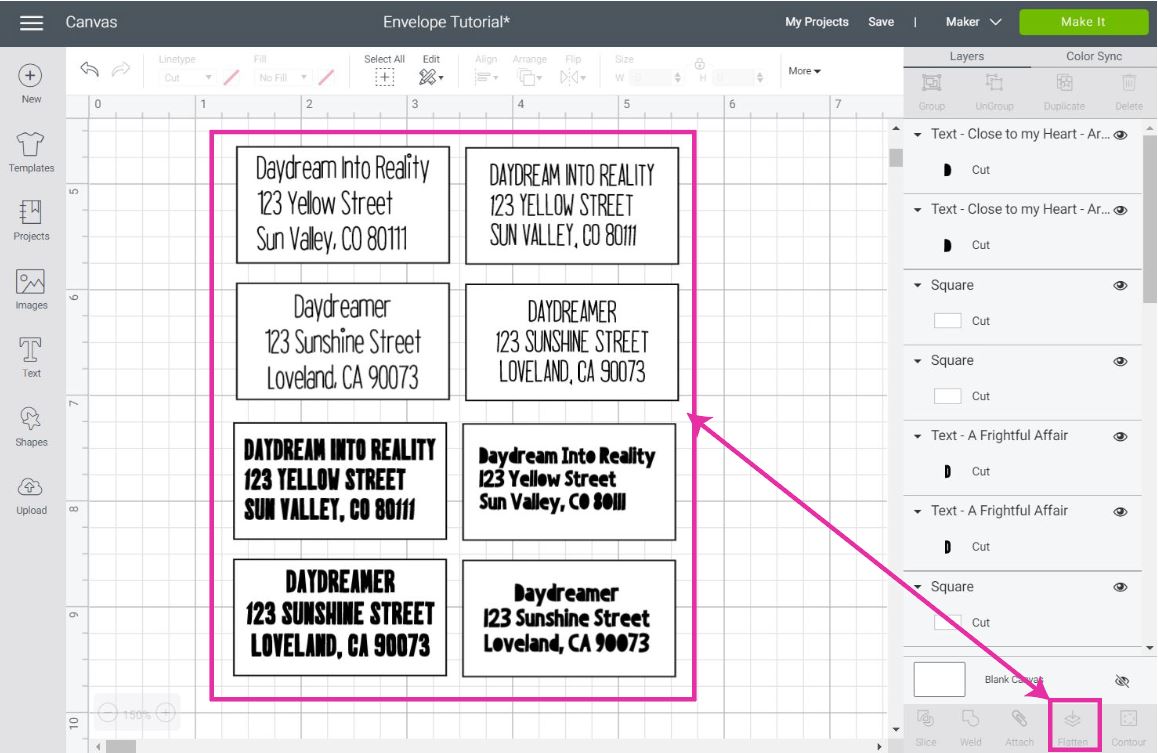
Before sending the project to print and then to cut, select all the rectangles and text and click on flatten located at the bottom of the Layers panel.
Check out how different the project looks now. The blade will go through the edges of each rectangle, and it will preserve the text inside it!
Now, click on “Make it.”
Here’s a preview of how the project will look like after you print; this is how you should also place your project on the mat.
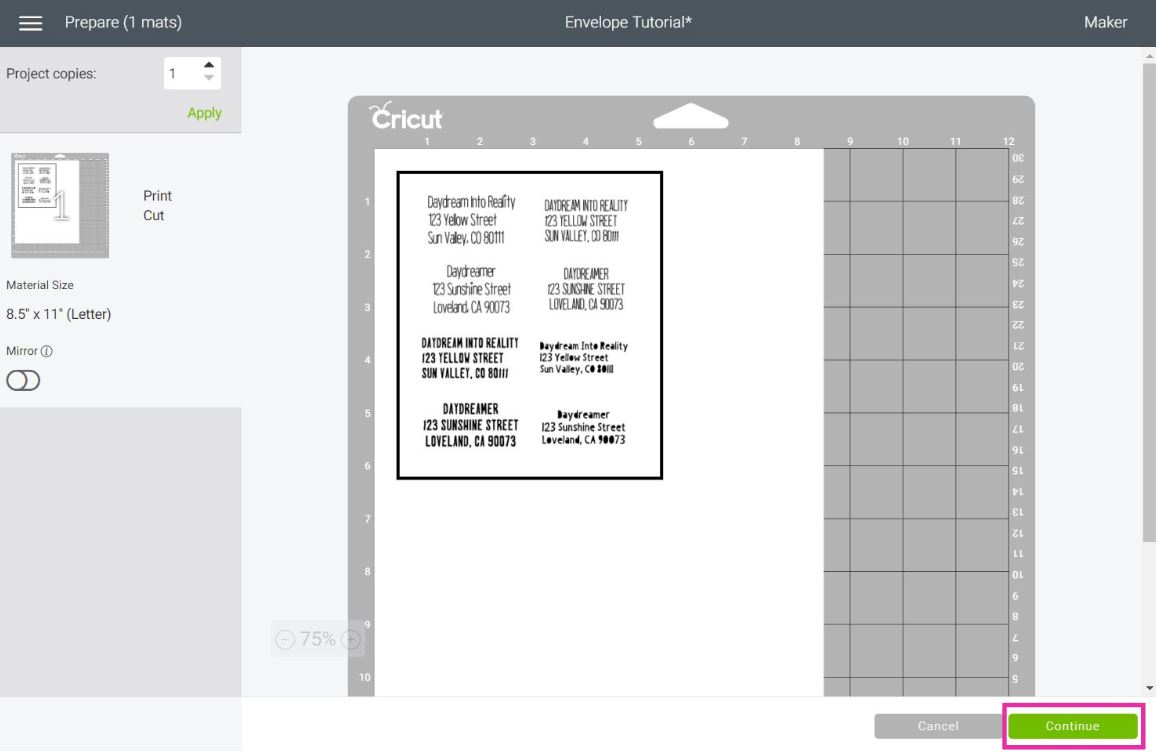
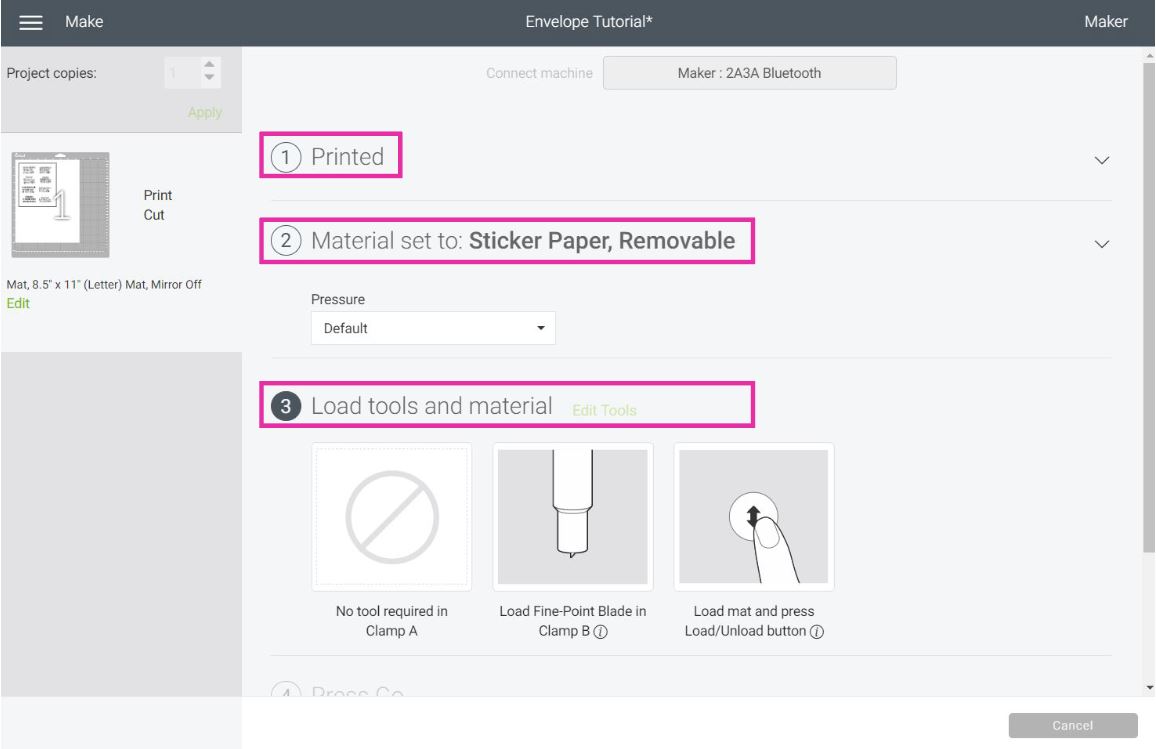
Now, send the project to your home printer by following the prompts.
I decided to use Silhouette’s sticker paper and choose “Sticker Paper, Removable.” I don’t like Cricut’s sticker paper is very thick, and it gets stuck in my printer.
If you aren’t using Cricut’s sticker paper, don’t select this material in Design Space because it will cut through the entire sticker sheet.
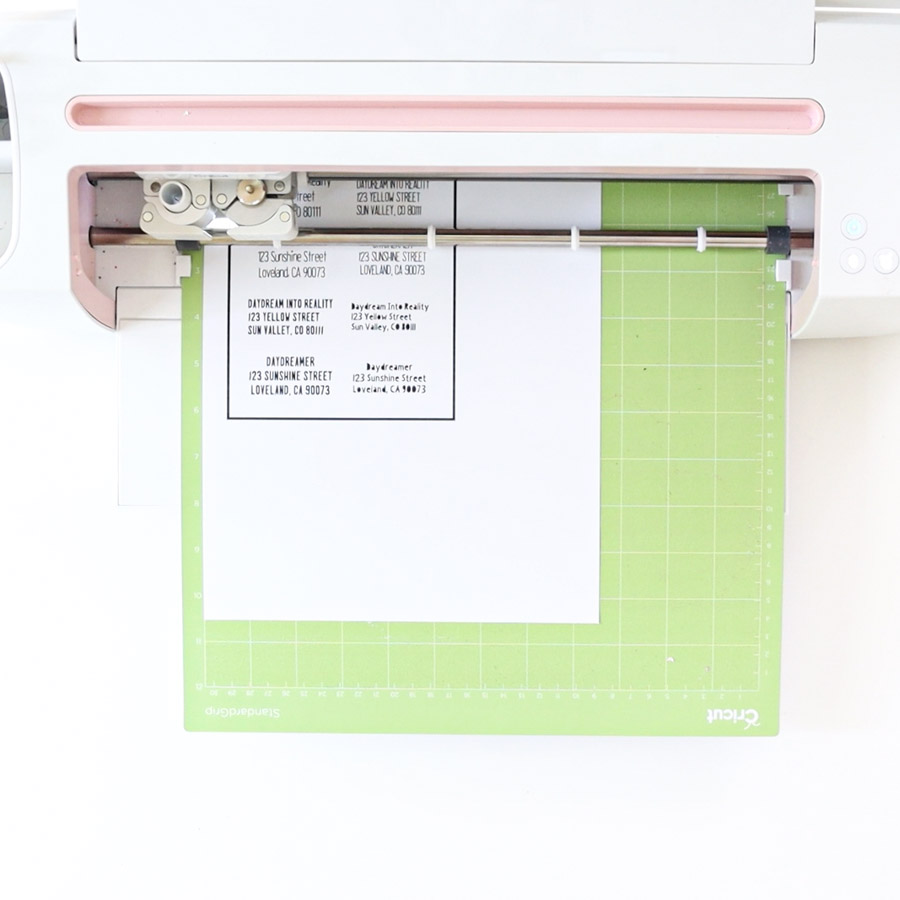
Place the printed copy on the mat, load to your Cricut, and see the magic happening before your eyes!
When Cricut is done cutting, unload mat, and place stickers on the envelope.
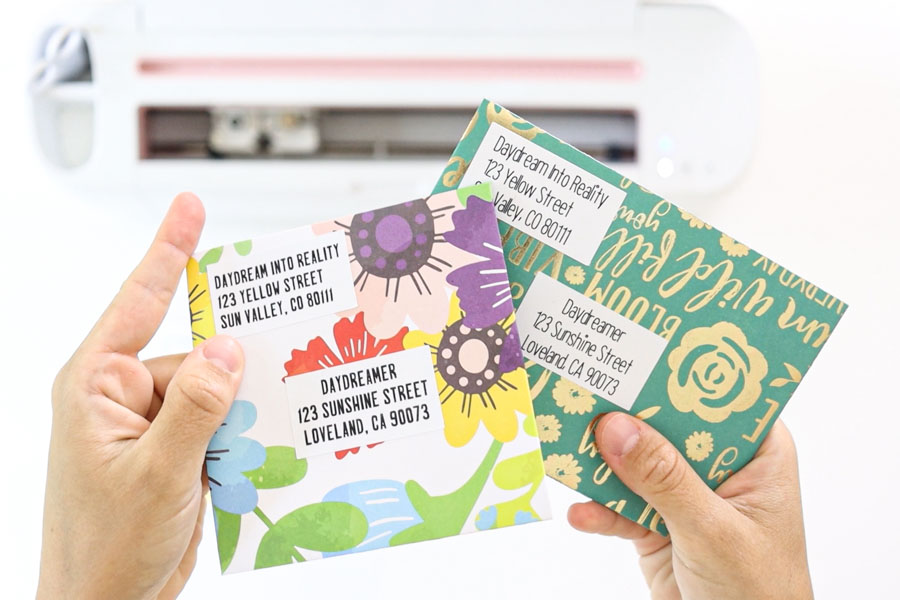
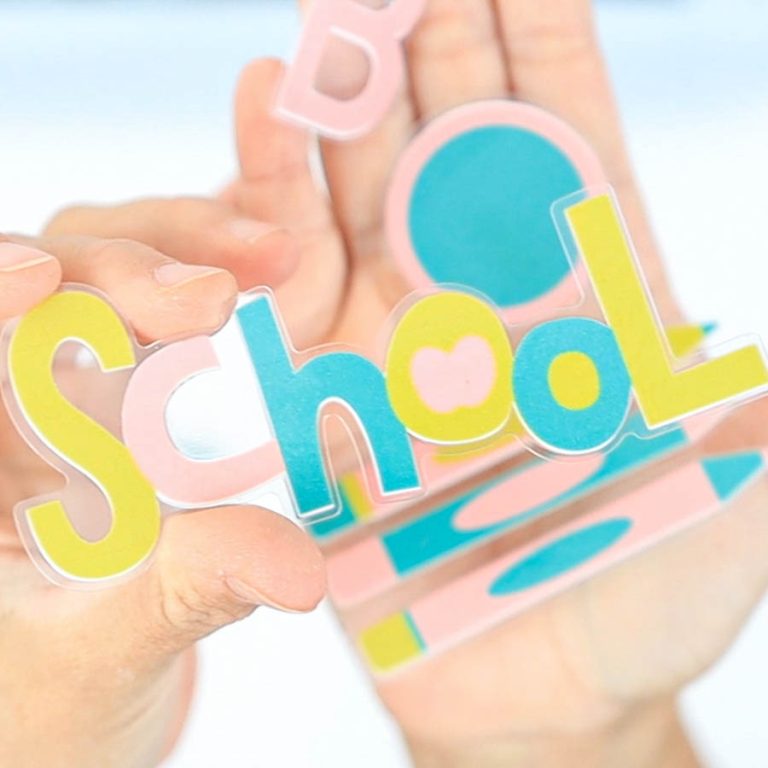
For these envelopes I used two heavy patterned papers. If I had used the pens, the text would’ve been tough to read.
I think they look fantastic, and in my opinion, It’s a better way to address envelopes than with Cricut Pens.
Don’t you think?
Addressing Envelopes using Iron-On/HTV
Many times you will be handing over envelopes personally!
Maybe it’s a birthday party, a baby shower, or just a special celebration you’re going to.
If that’s the case, you can have a little extra fun using Iron-On and address/decorate your envelopes.
If you’ve never worked with Iron-On before, I recommend you read this complete guide on Heat Transfer Vinyl; it covers everything you need to know about this material.
Download the practice file down below and upload it to Cricut Design Space.
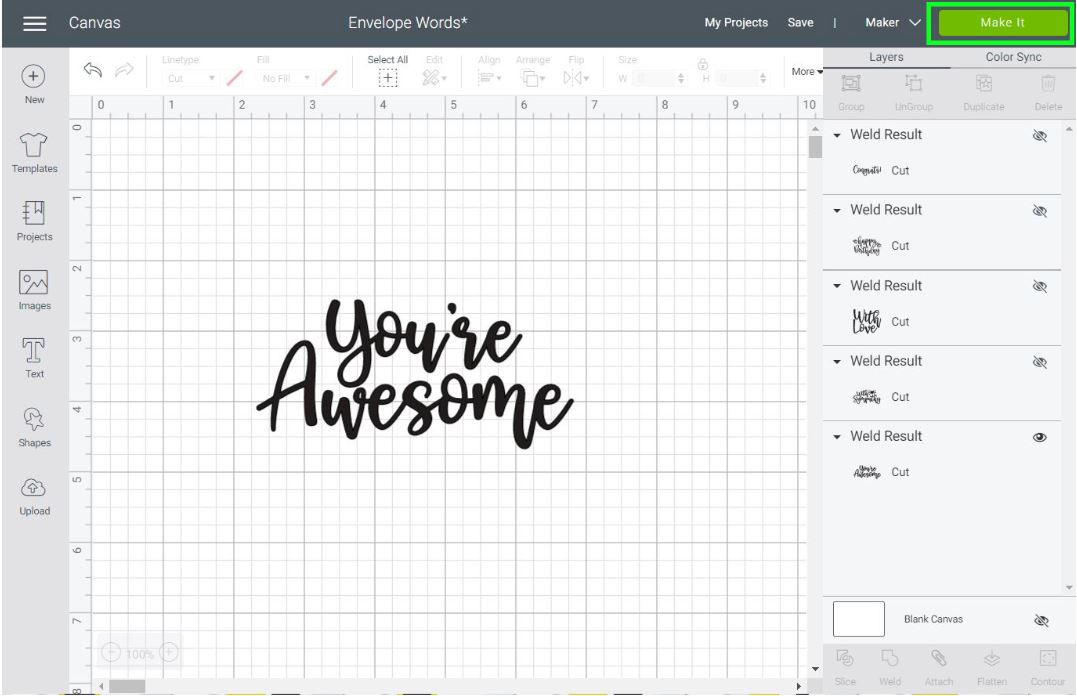
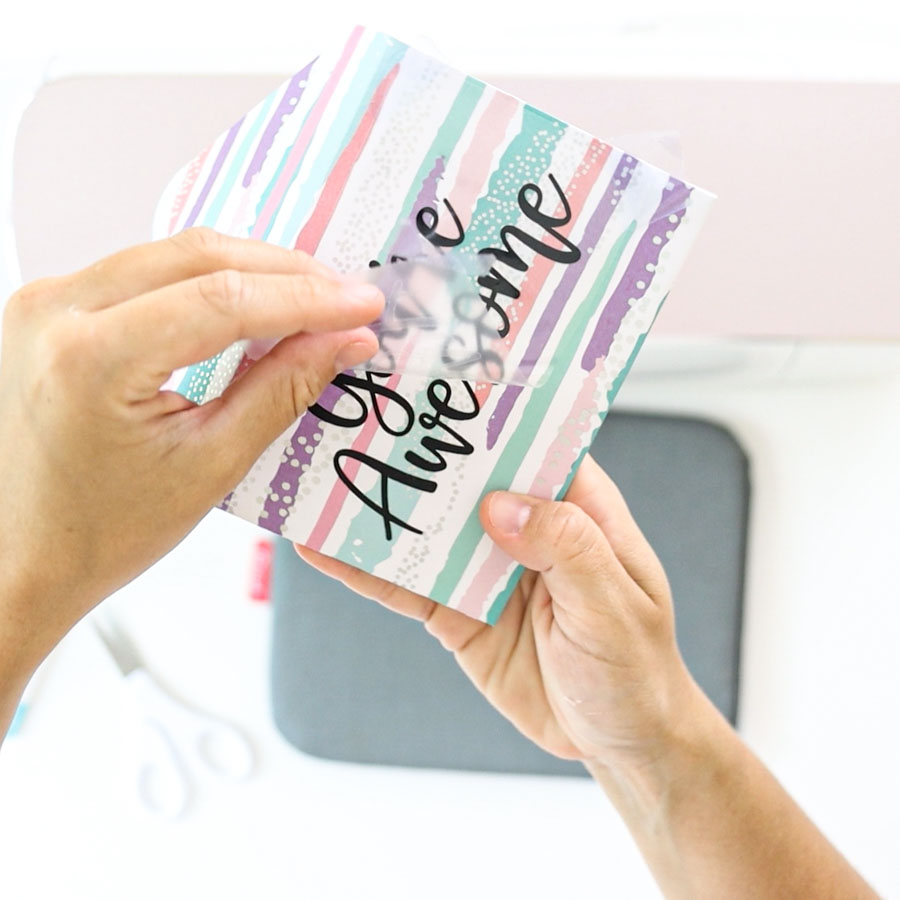
Ungroup the file, and weld each of the words/phrases, so you have a single layer per expression. You can cut all of them, but I am using the “You’re Awesome” design for this example.
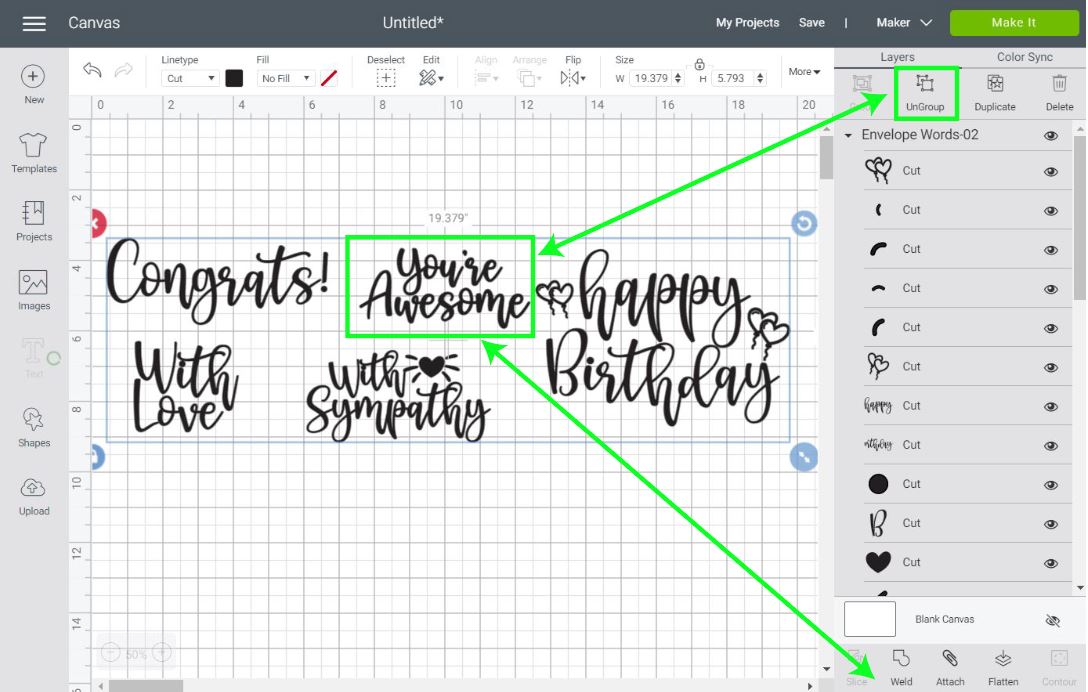
Resize it, so it fits the back of your envelope, and when you’re ready, click on make it.
When using Iron-On, you need to place your material pretty/shiny side down on the mat, making sure to turn-on “Mirror.”
For this project, I used Everyday Iron-On.
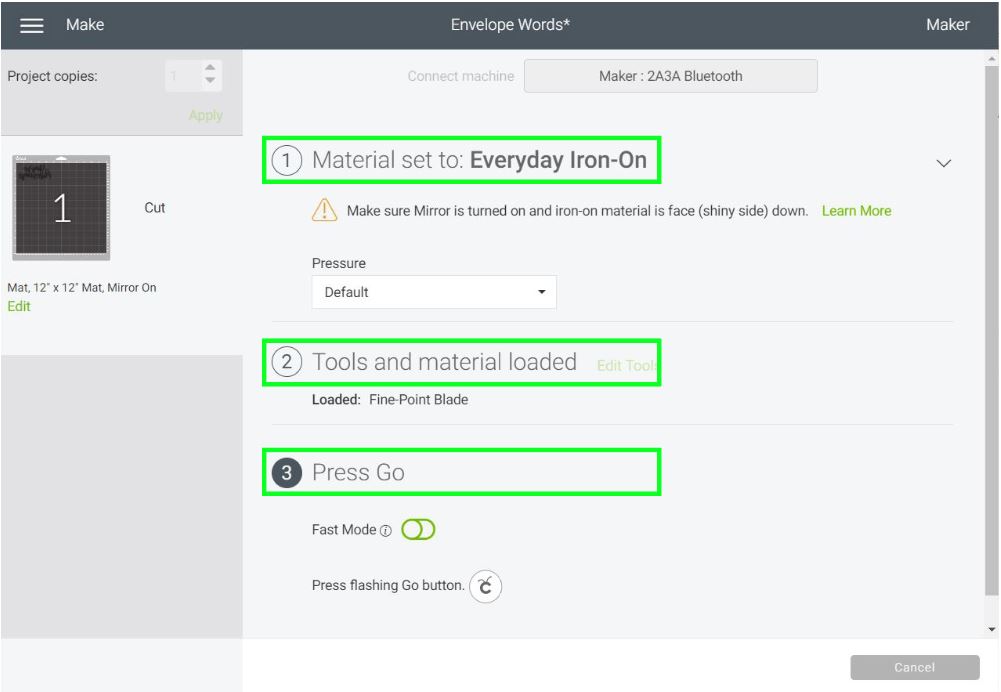
Install Fine Point blade, place Iron-On shiny side down on the mat, load it, and press the flashing go button.
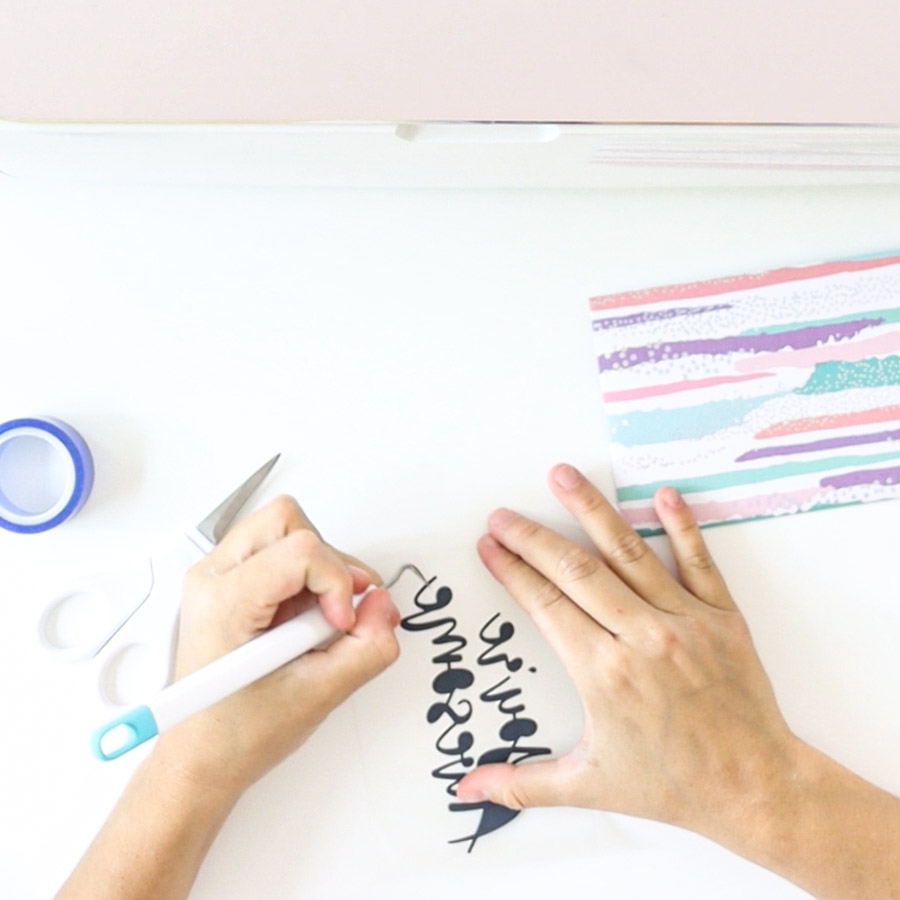
When Cricut is done cutting, remove the vinyl from the mat, and use a weeder to get rid of the negative parts of the design.


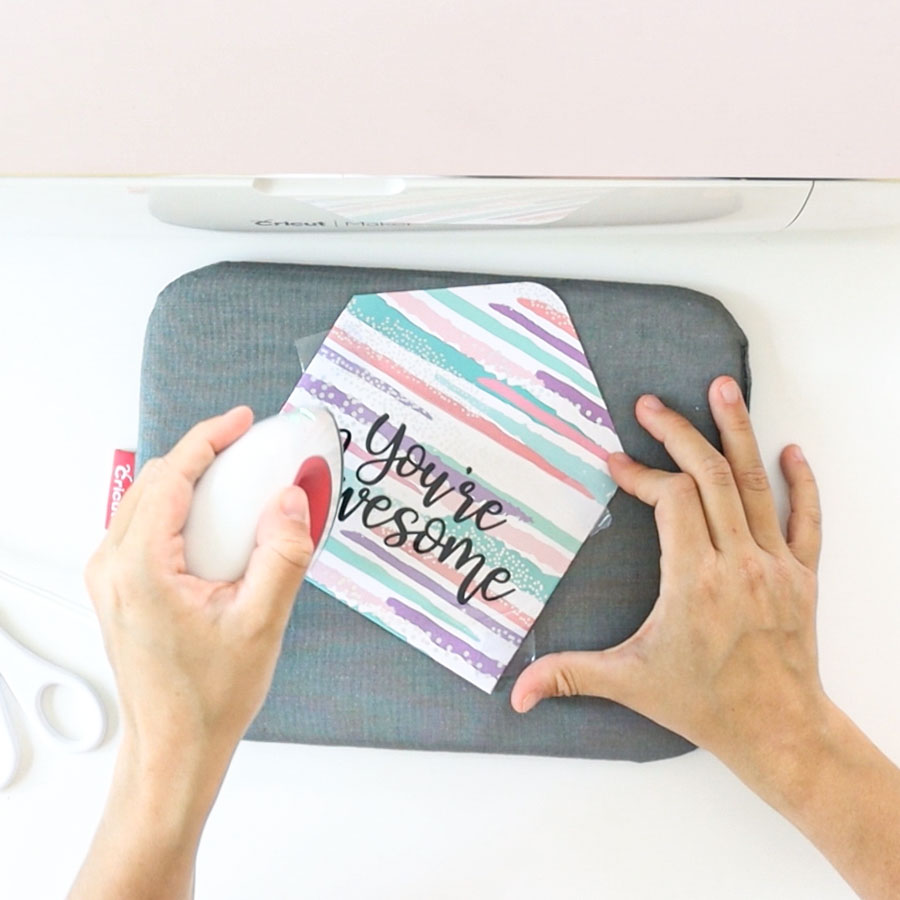
Place design on the back of your envelope. Cricut recommends you use heat transfer tape when using iron-on on paper.
I used tape in this case, but, many times, I’ve skipped this step. Once you have the right amount of experience with iron-on and paper, I think you can forgo this step.
Practice first, though!
To transfer the Iron-On, you can use a regular iron (use heat resistant tape in this case) or and EasyPress Mini.
To find the exact temperature and directions, it’s always good to go to Cricut’s Heat Guide.

According to Cricut’s Guide, the combination of materials I am using (everyday iron-on and cardstock), these are the steps to follow.
- “Place iron-on material face down, liner side up
- Secure with tape, avoiding image area
- Press while moving with light pressure at low setting for 25 s (Note: Overlap iron-on edges by 0.5 in / 1.3 cm)
- Slowly remove liner while cool”.
These settings will change if you use other types of iron-on such as foil, or, holographic, etc.
If using a regular iron, you can use the same principles; I would set the temperature to 3/4 of the heat your iron can take.
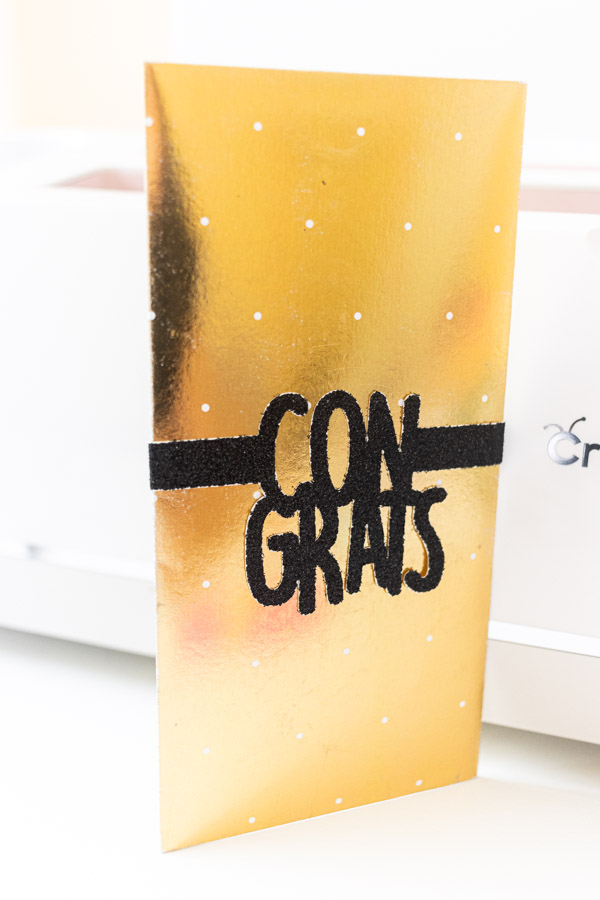
Here are the other envelopes I made!
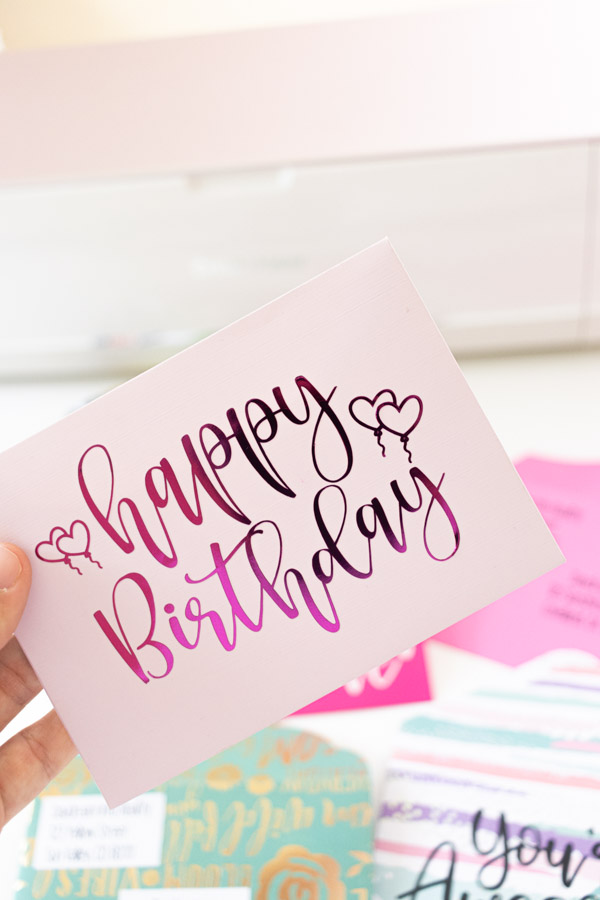

The “Happy Birthday” one I made using foil iron-on.
Doesn’t it look stunning?
Free SVG Envelope Templates
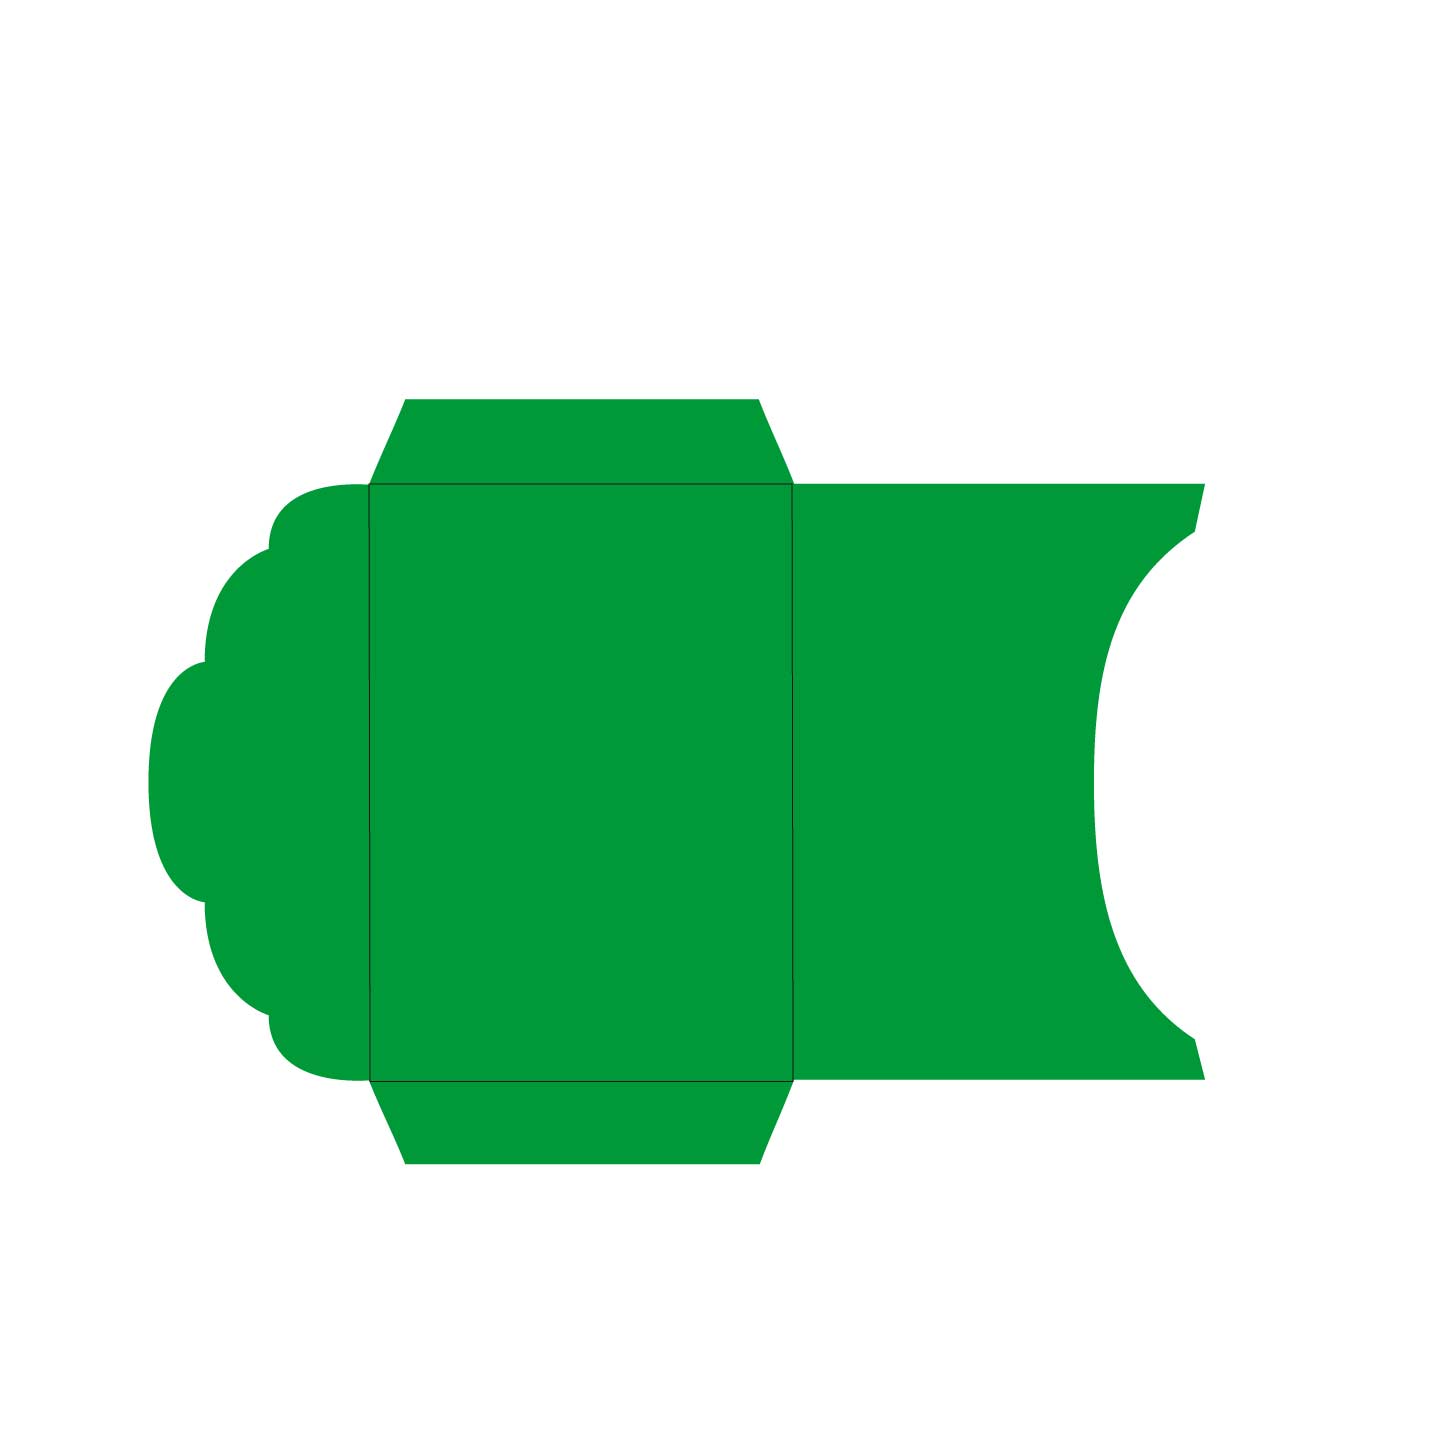
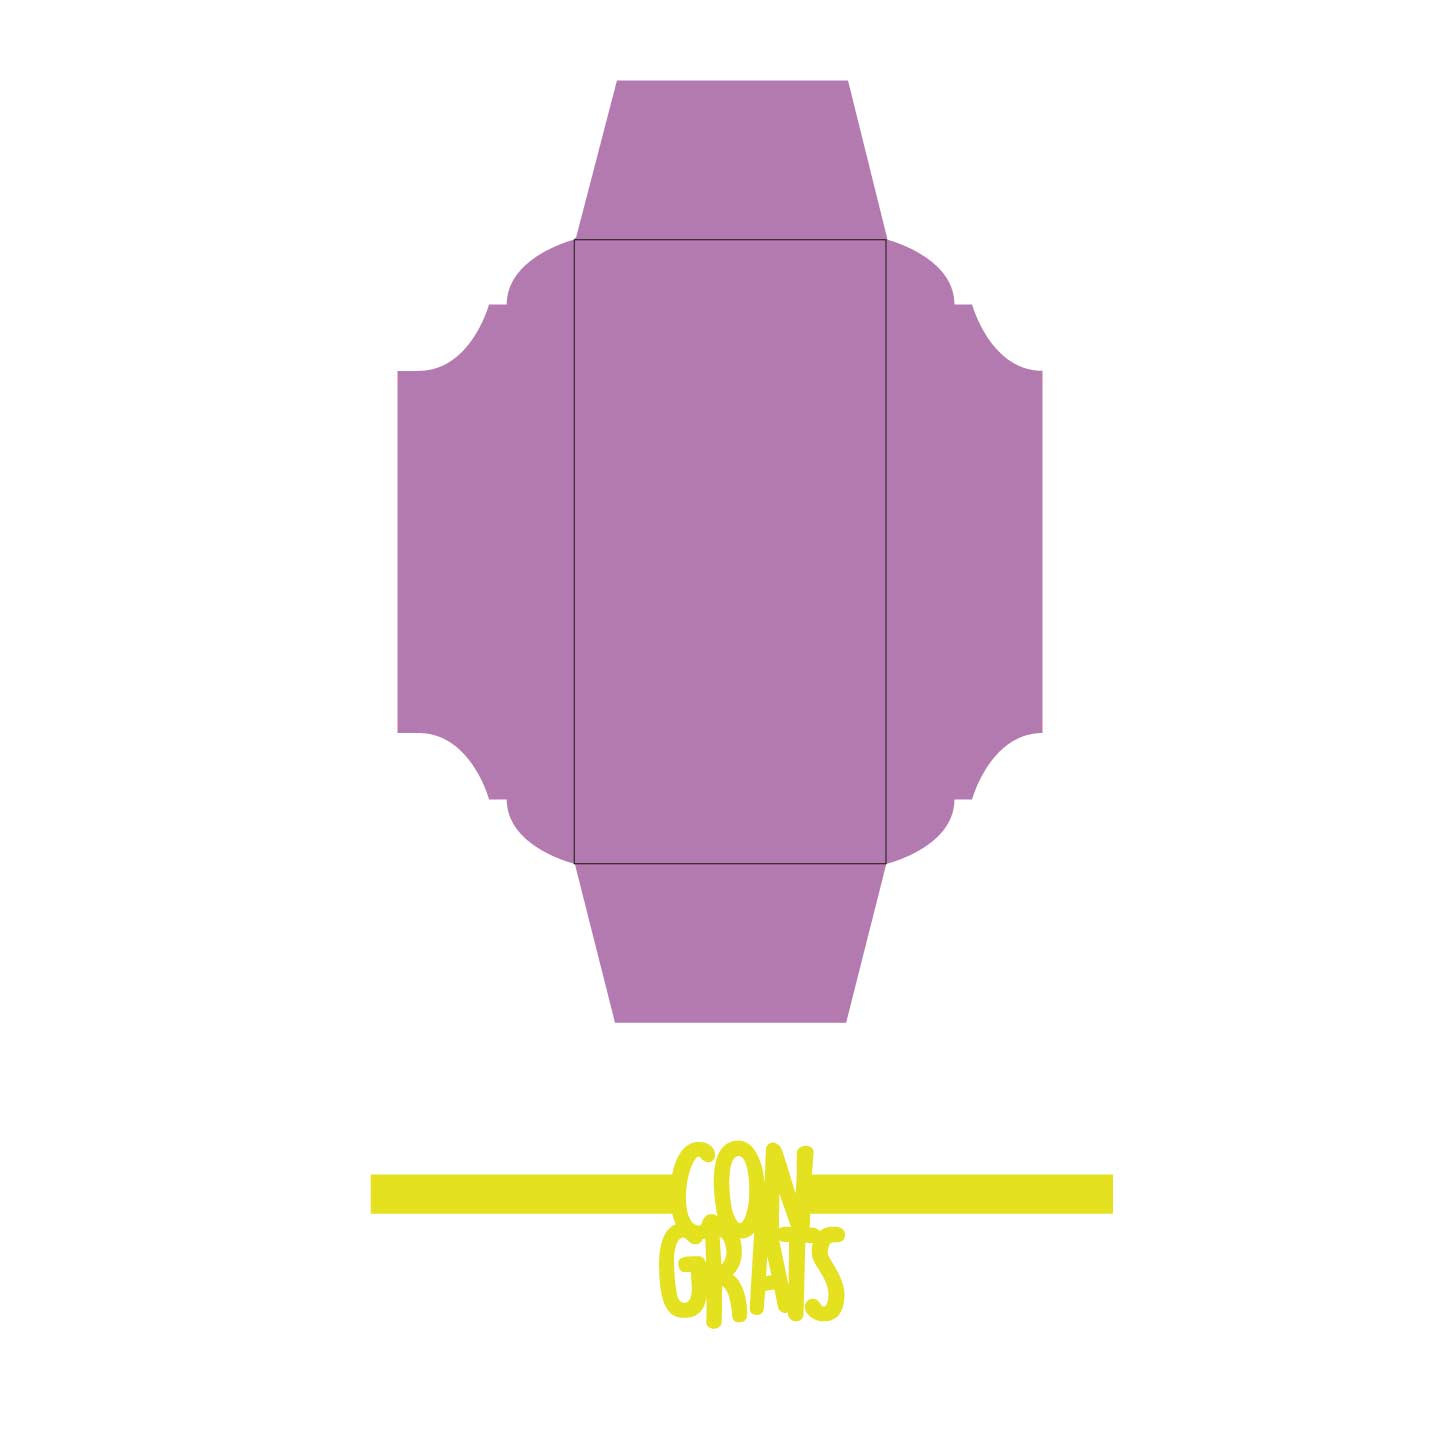
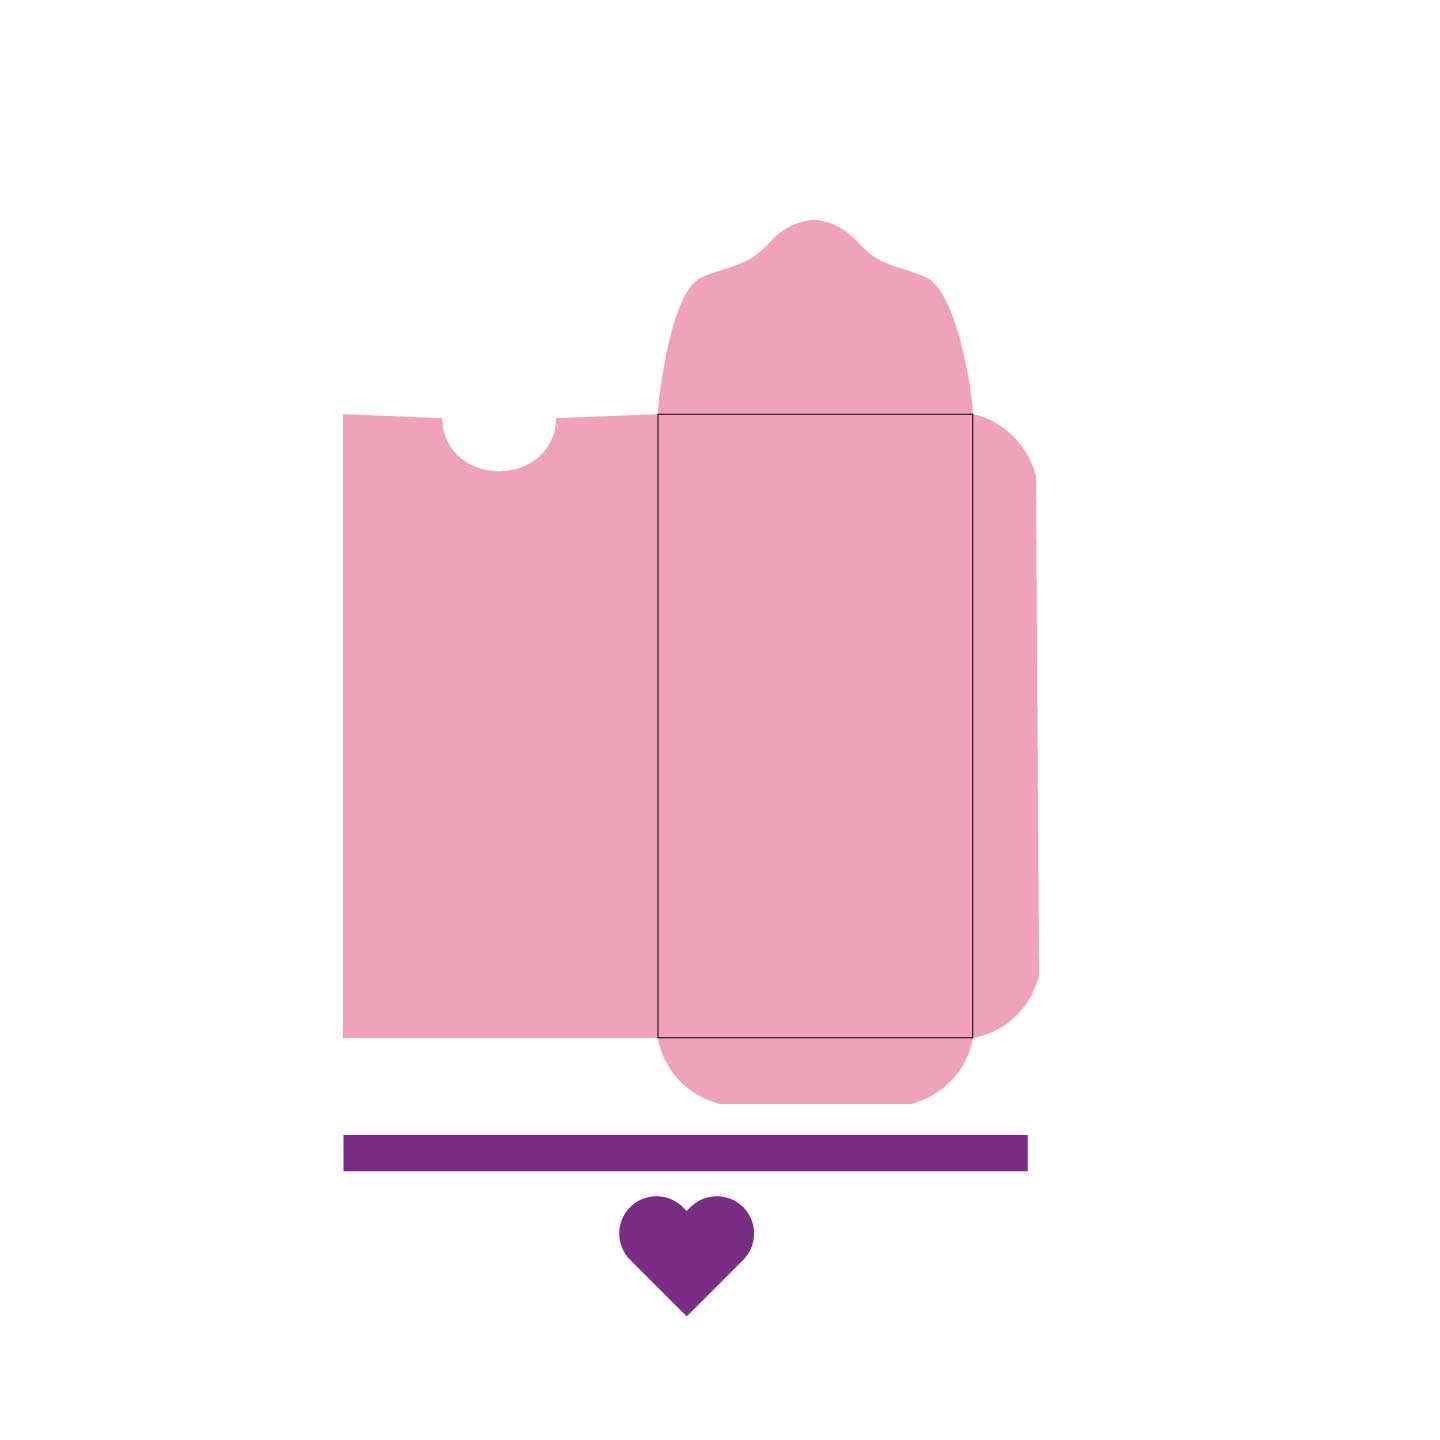
Just as I promise, here are more envelope template you can use for your personal projects.
Some of them don’t even require glue!
They are all so beautiful, simply click on the download buttons on each image. At this time, they only work when working from desktop or laptop computers.
Oh!
Just so you know, I also have a library full of free SVG files and Printables for all my subscribers, a.k.a. Daydreamers. You can see a preview right here or get access by filling out this form.


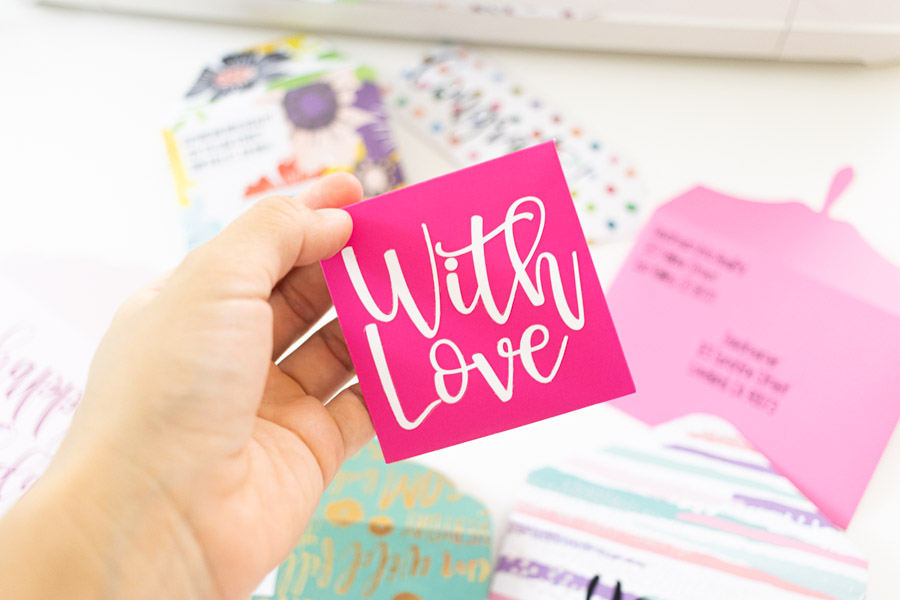
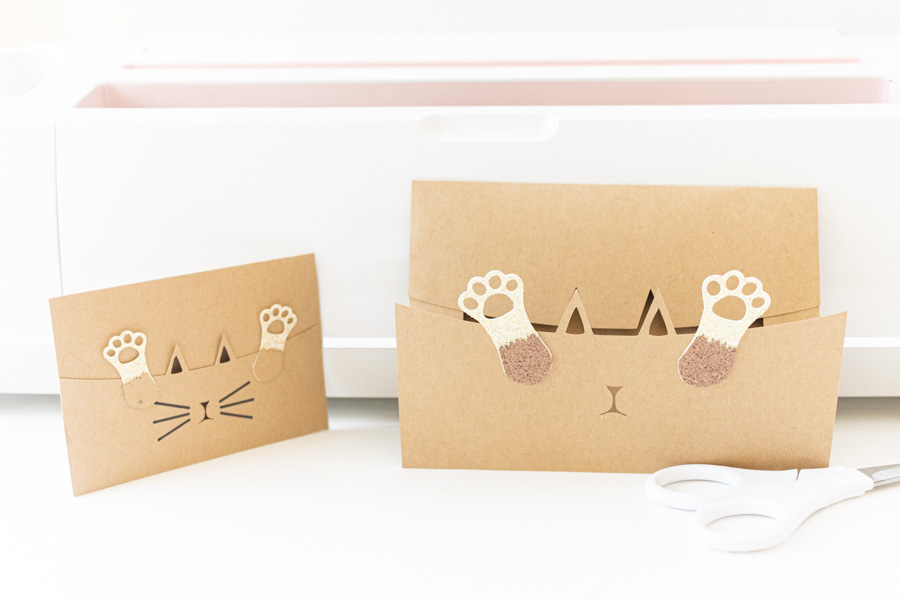
More Envelopes ideas made with Cricut
Here are more pics using the free SVG templates that I have for you in this article.
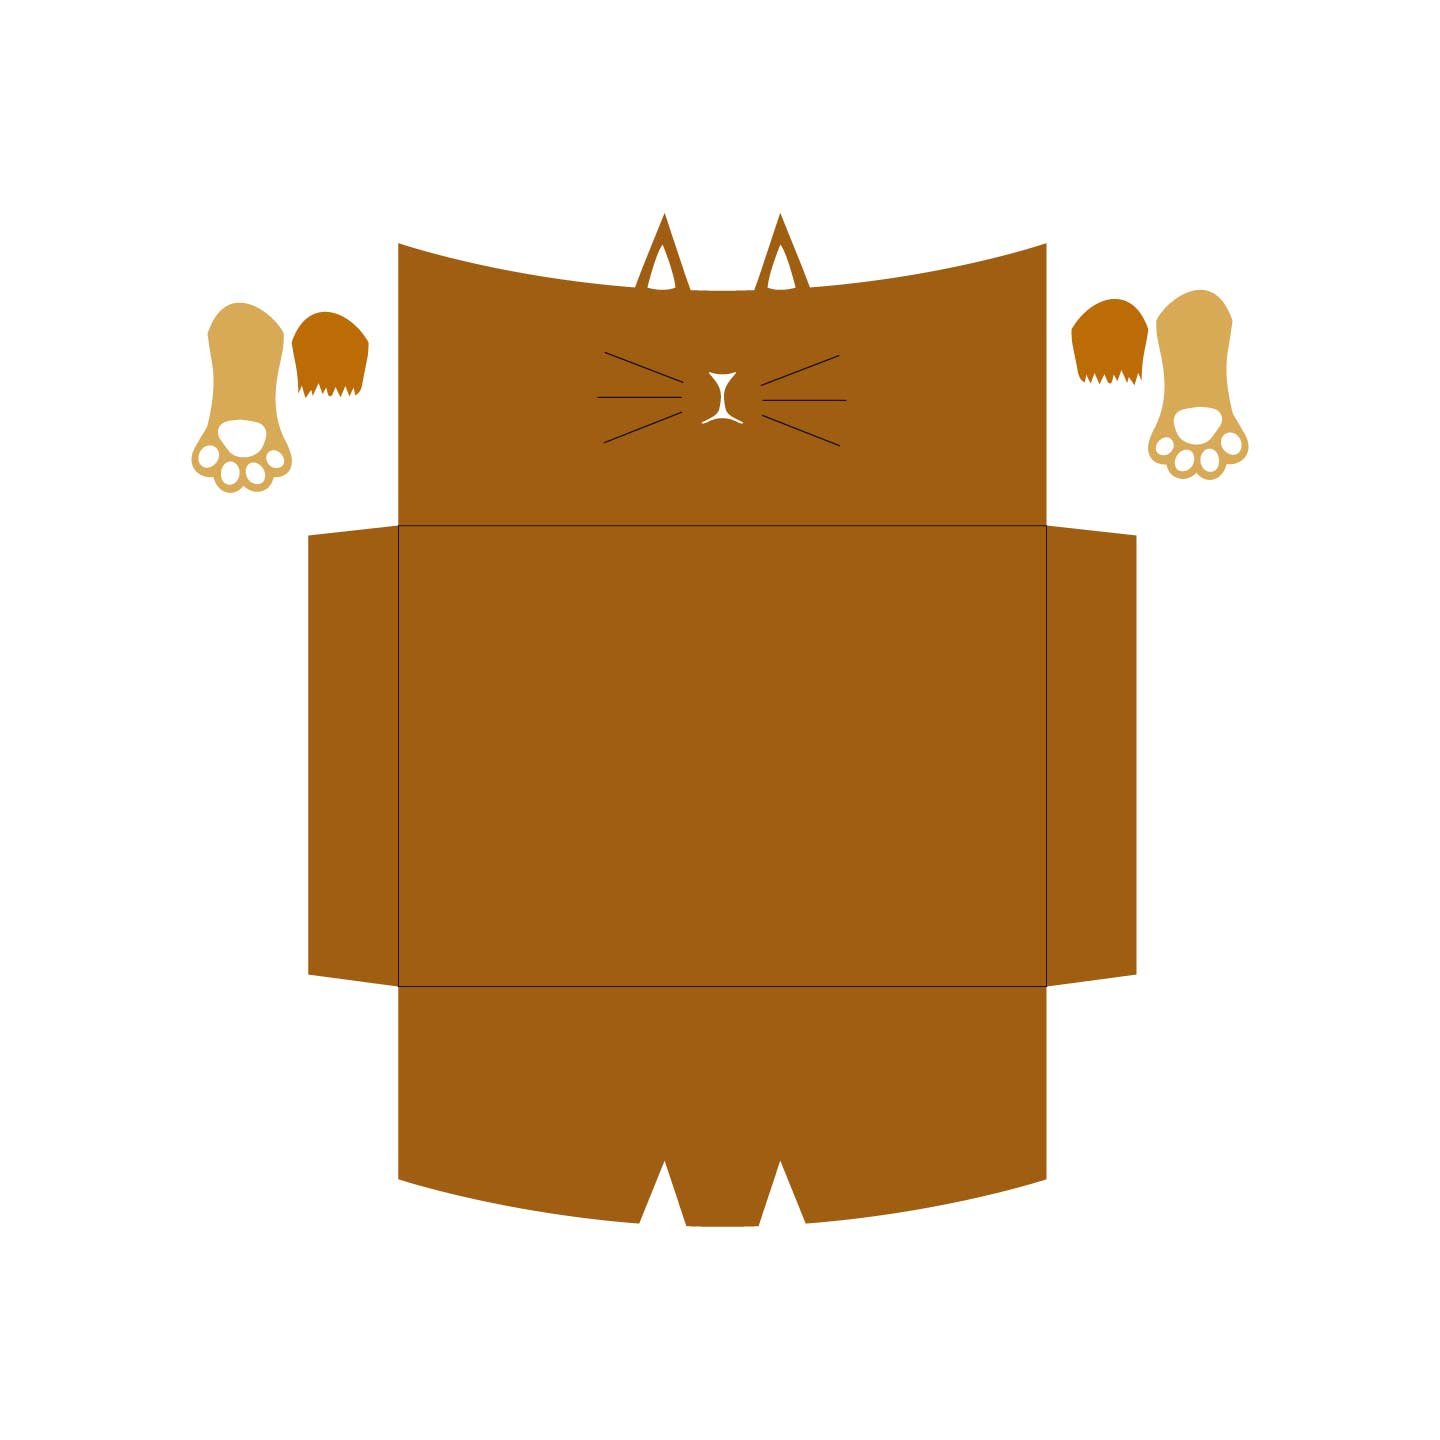
One of the cutest envelopes is the kitty one. There’s a caveat, though. I included some whiskers. If you want your Cricut to score, cut, and draw, you’ll need to break the rules.
To score, you need the paper side down, but to draw, you need it facing forward. Big decisions that only you can make!
You can also delete the whiskers, it looks just as cute, or do them with a ruler.
The sky is the limit!
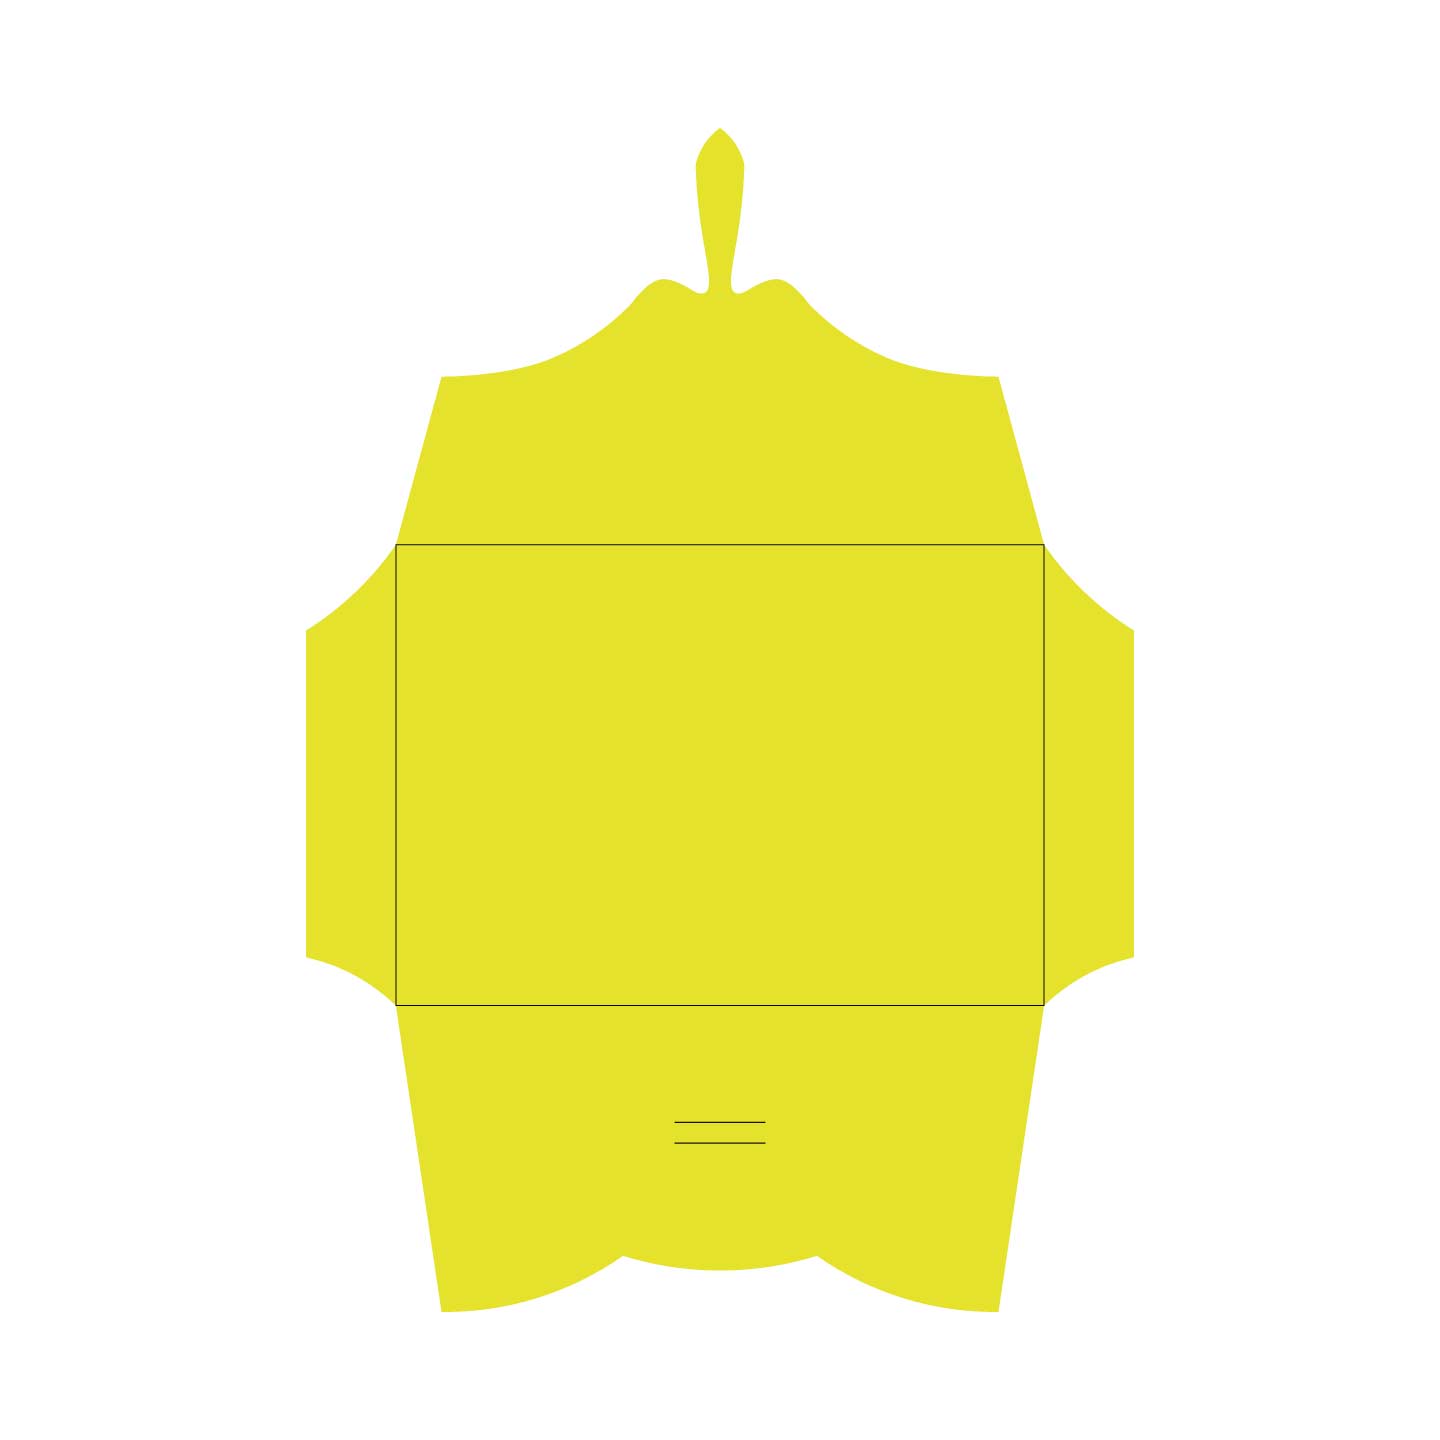
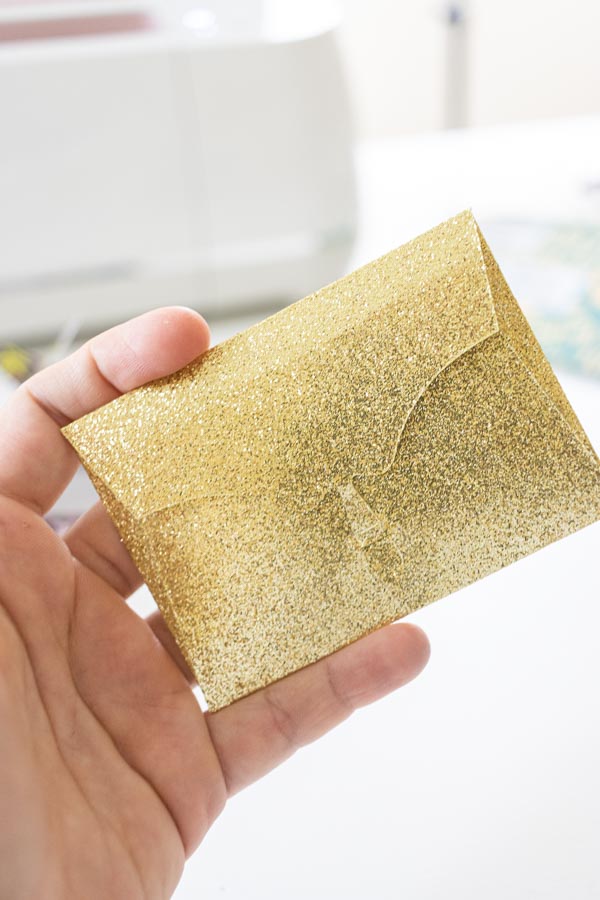
Look how using different papers you can give an envelope a different appearance.
You can use the golden one for a wedding, and the pink one for a regular birthday party.

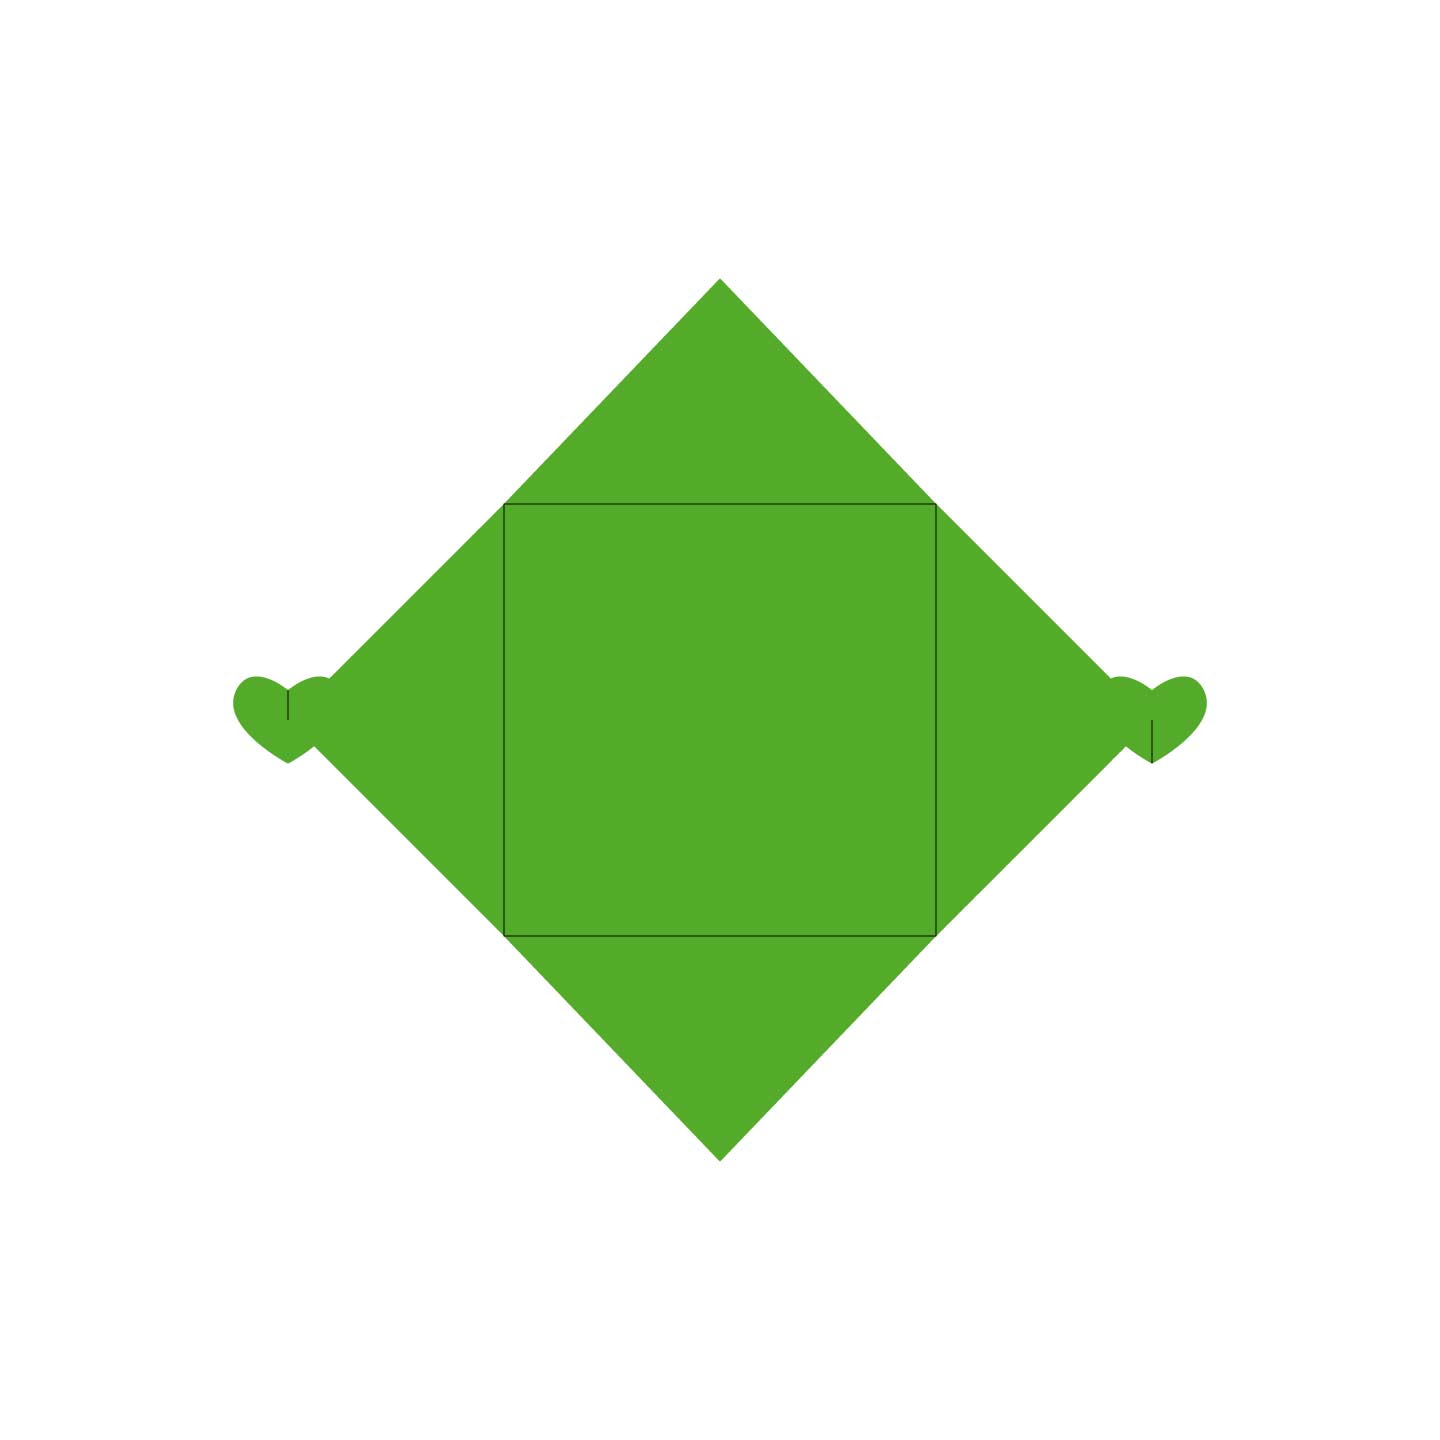
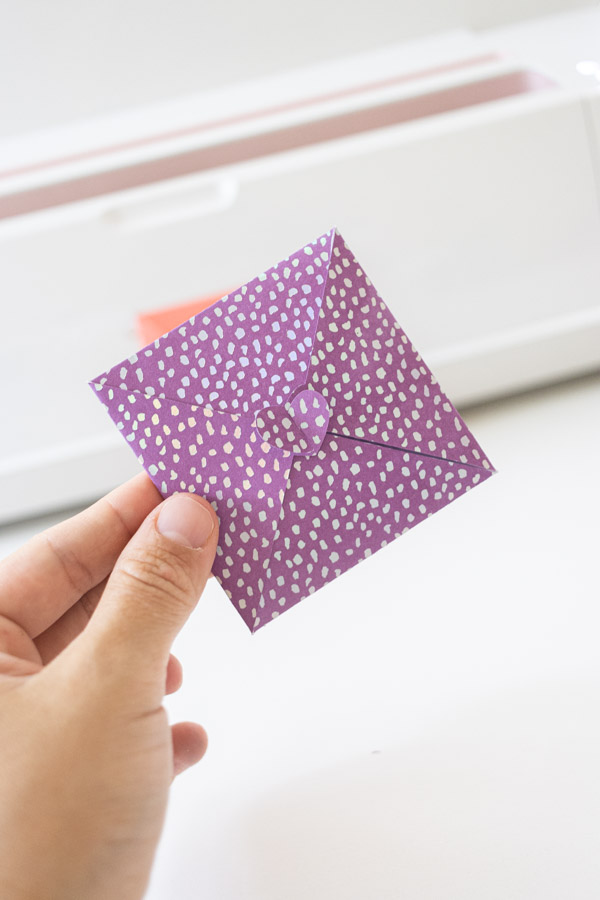
The following envelopes don’t need glue!
They don’t shut entirely flat either; they are like a super-thin box.
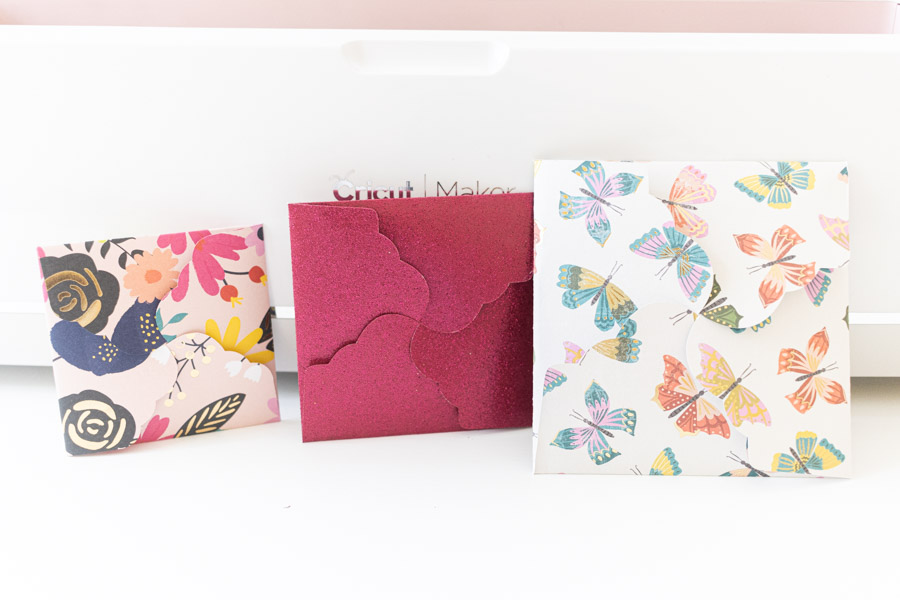
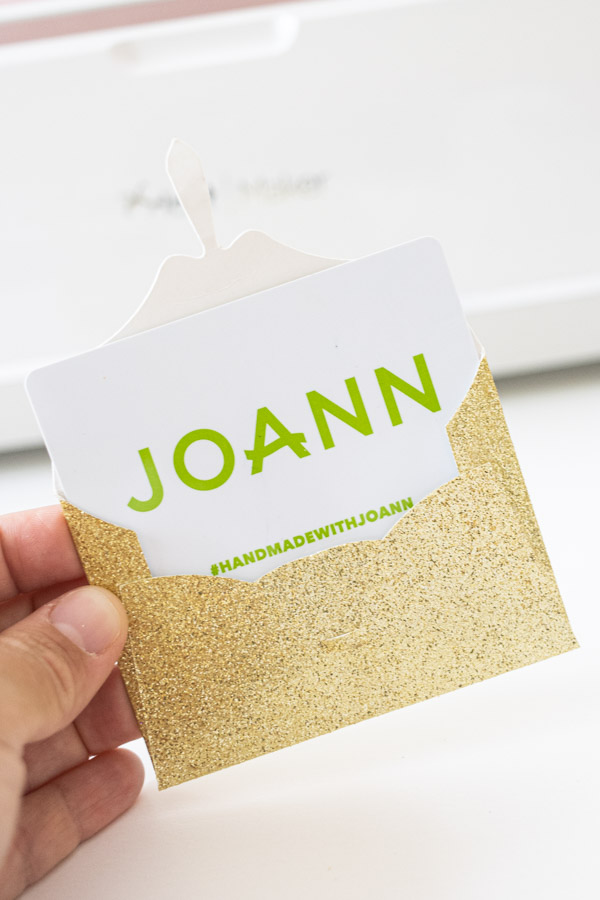
The best part about some of these envelopes is that you can use them to give some gift cards.
Aren’t they so pretty?
Look the same envelope we did on the step by step tutorial but cut to fit a gift card.
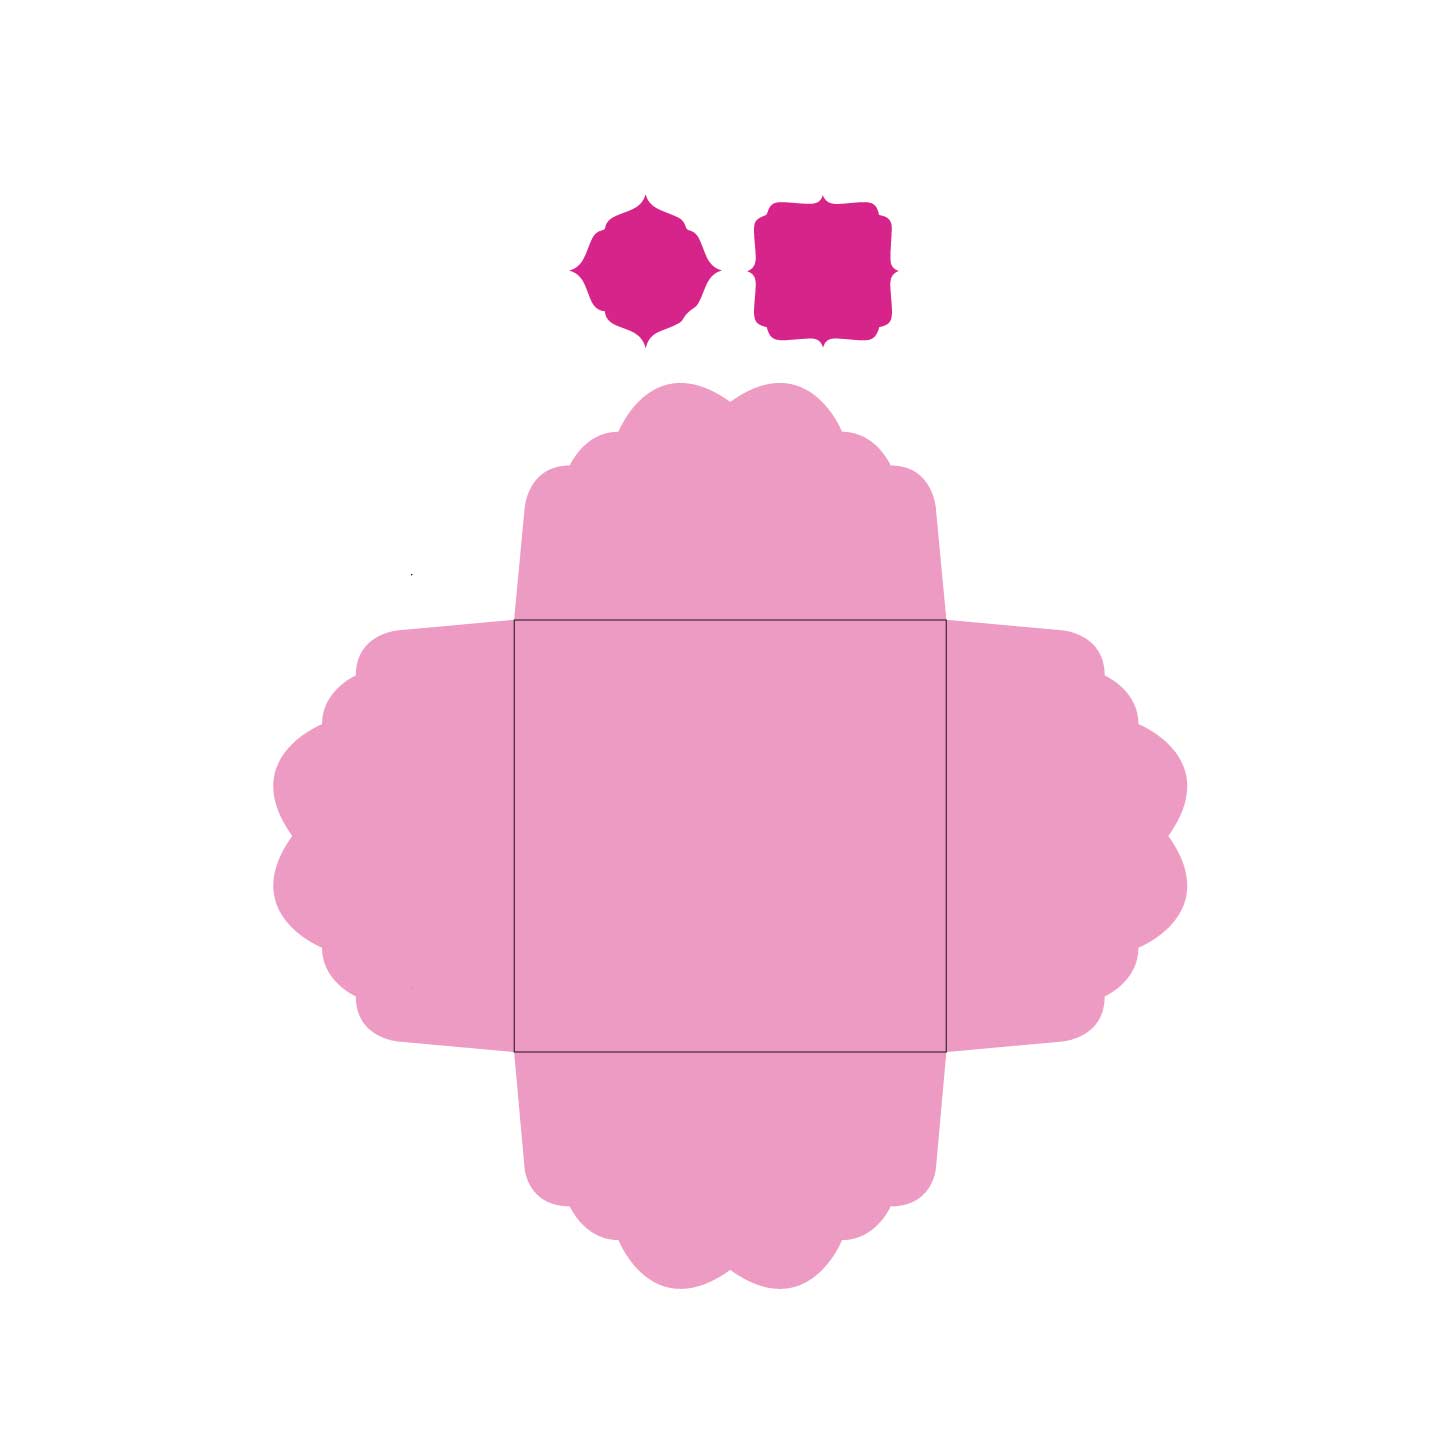
These last envelopes can be used for little notes. They don’t need glue, and they are perfect for adding inside a gift bag.
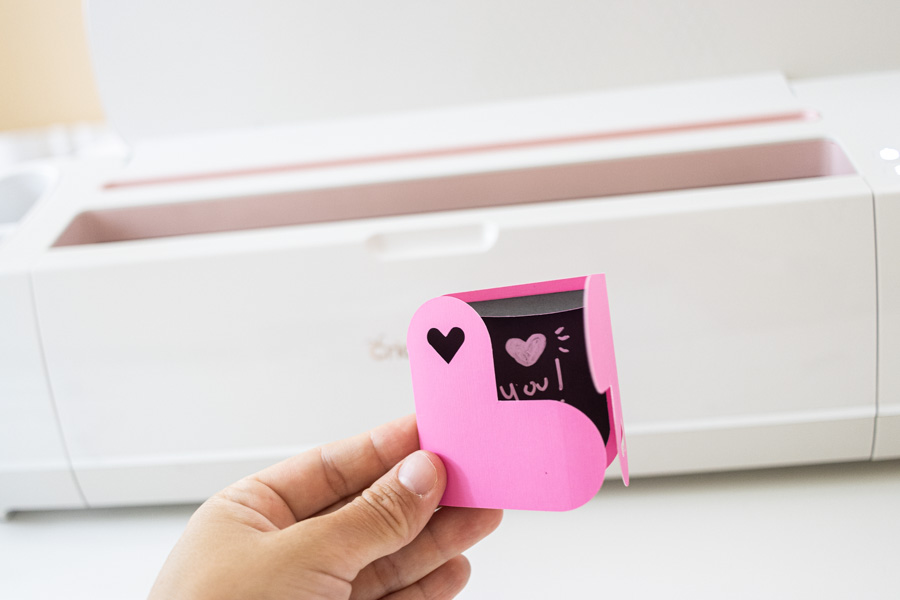
I love them all!
Sharing is Caring
I hope you enjoyed this tutorial and learned new things and concepts with it.
Do you know it takes me over 25 hours to complete a single Cricut article? I know it’s wild, but I want to make sure you understand everything!
I would appreciate your support on Instagram , Pinterest , and YouTube as I try to grow my audience and continue producing great content!
Thank you for sharing your talent with all of us! You are such an inspiration!
You’re very welcome!
Thank you so much, I am still new and how to do other things in Design Space. Do related on how to make envelopes your video’s helps me out. So grateful for your sharing.
Thank you so much. I am new user of EA2 and my project – related to envelope. This help a lot.
Bless you! I love your articles. I am new to this and found your information extremely helpful and thorough!
Wow!! I love your work and I love that you are a follower of Jesus. No one better to follow!! Thank you so much for your envelope lessons. I had no idea I could resize them! It has been a problem for me until I learned from you. Thanks a ZILLION!
So cute! Thanks for the freebies
it’s very thoughtful of you. Thank you.
Thank you so much for sharing your svg files with us. The envelopes are really cute and will be so handy too.
was pleased to come across your tutorial, I have had a cricut for about a year and have done very little on it, will give this a try your instructions look good. thankyou. I have subscribed . Pam
Great videos! So easy to follow and learn!
I Love the envelope templates. I just made the butterfly cut out one, but I can’t figure out how to put it together. What is the extra little “star” piece for??
It’s a little decoration to glue on the other side when you close the envelope. I’m glad you like them!
Thank you so much. You are such a blessing.
That’s very sweet thank you!
Thanks for the envelope templates, they are just what I am looking for, thank you for sharing them!! Appreciate you!!
Very glad that I got this email! Have to love all designs. Thank you for sharing.
Thank you for the free downloads. I would like to sign up for notices that you may have for anything that you might offer but I didn’t see where the sign up is. Thanks again!
You can subscribe by filing out this form: https://view.flodesk.com/pages/5e2203c8d9dee3002691bcca
Hi Catalina! I very much enjoyed reading your post! So much information. Thank you for all of it! I’m going to try making several envelopes, but was wondering what the little bits were on a number of them. Seems like there are extra pieces to cut… Please advise.
They are decorative pieces that you can glue on the outside of them!
I was just making some cards today. I’ve been hesitant to make cards without an envelope on file, but these will really help with that! I wont have to go digging through to find a project with the right size. Thank you!
I struggle to figure out this machine. Thank you for projects to learn by. I am greatful for this.
Blessings
Kelly -Cricutier
Thank You, I’m excited to start making these!!
Super cute designs. Thank you for sharing.
I’ve had a lot of health issues. Just now trying to get back into my Cricut, thank you so much for the help. I feel like I’m starting all over again, Your instructions are awesome, very clear, Thanks Again. God Bless
You’re very welcome 🙂
Thank you so much for all the work you do!! The designs are wonderful
I just wanted to let you know that this was a wonderful article. I had always had a hard time with the fonts for printing and able to put the addresses in the right spot. Thank you again for your article.
Oh this is the best informtion on how to do all the card and envelope projects I have been wishing I knew how to make. I will refer to these over and over and make so many really amazing cards and envelopes for family and friends. I am headed to a warm place for the winter and plan on taking my JOY machine and making cards for the whole years birthdays and anniversarys and more while I am there. Thank you again for all this inspriation!!
Glad I got this email! Love all the designs. Thank you so much!
Watched your Envelope instructions. Thank you! They were so detailed and helpful! Can’t wait to give it a try.
Thank you so much! So detailed and very visual! Loved it!
Thank you sooooo much for this tutorial. I am new to Cricut and am so glad I found you.
Happy I can help!
This was awesome. You are so wise to tell us to do a practice one first. It took me about an hour to make and address one envelope! LOL. It was an excellent tutorial, though, and I didn’t waste paper because your instructions were perfect! I’m looking for which glue you recommend.
I am glad this tutorial helped you! I love beacon 3-in-1 and crafters tape!
Can you send these home made envelopes thru the US Mail ? I know they have rules about sizes due to the automation. Should these be put inside another envelope for mailing ?
I don’t think you should have any problem unless you make it very little?
Thank you so much for all the tips!! What glue do you use?
Beacon 3-in-1 also I like crafter’s double tape.
I appreciate the info here bc honestly im still learning my Maker, but I couldnt figure out how to download the templates. Thanks so much for all the information! ????????????????
You’re welcome. You need to right-click on the image and click “save as” if it opens in another window.
THANK YOU SO MUCH for the free envelops and the free templates on how to make bows. I am 80 yrs old and recently bought a Cricut machine to learn paper crafting and etc. The Crafting helps me with health problems and pain. Giving and sharing what you do is so helpful to so many and know You are being really Blessed. Again THANK YOU!
You’re very welcome. I am so happy to help you on your journey!
Hi there!
I’m really new to this and english isn’t my mane language so I hope i can explain the right way..
382 / 5000
Vertaalresultaten
Hi! i hope i can explain it correctly but i am new to cricut and need help!
I really want to make an envelope, but it should hold 26 cards .. so I actually want an envelope with an (I think) extra fold? so that it gets thicker. how exactly can I add this to the template? or is this not possible at all?
i hope you can help me!
Design Space doesn’t have the capacity to edit the file to such details. You can look for envelope boxes files. I am sure Cricut Access has something that can help!
Thank you so much for the envelope SVG files. It is so wonderful you take the time to design and share your work. It makes it especially easy for us newcomers to have fun before we try to learn to do new things ourselves to share.
You’re very welcome! It’s a joy to share my files.
Thank you for the free downloads–so cute!
You’re very welcome 🙂
Hi Catalina,
Thank you so much for this information, it’s very helpful being I’m so new to the Cricut scene.
you’re very welcome. I am very happy I can help.
Love these!
I am always looking for good envelopes.
Happy to hear! 🙂
Thanks for another great tutorial! I have learned so much from you.
Thank you so much for the free envelope svgs and information for addressing them. I love making special envelopes, it makes my cards even more personal.
You’re very welcome! I am glad I was able to help. They really look super cute!
Thank you so much for the svg’s and the photo demonstrations. I find them much easier to follow.
I shall enjoy having a go at making my own envelopes
That’s awesome! I am happy you find it easy to follow. Enjoy making pretty envelopes.
As always, you have outdone yourself! Thank you so much for this tutorial and the freebies!
I am so glad you like this tutorial 🙂