If you feel overwhelmed with all of the differences between Cricut mats, what materials you should use with each one of them, and how to clean and care for them, you are in the right place.
I felt so confused when I first got my Cricut.
The purpose of this article is to help you avoid the same doubts I had about the Cricut mats and provide you with the right knowledge about them. If you read this article, you will be a PRO!
Before we go deep, let’s learn what a Cricut mat is and which ones are available.
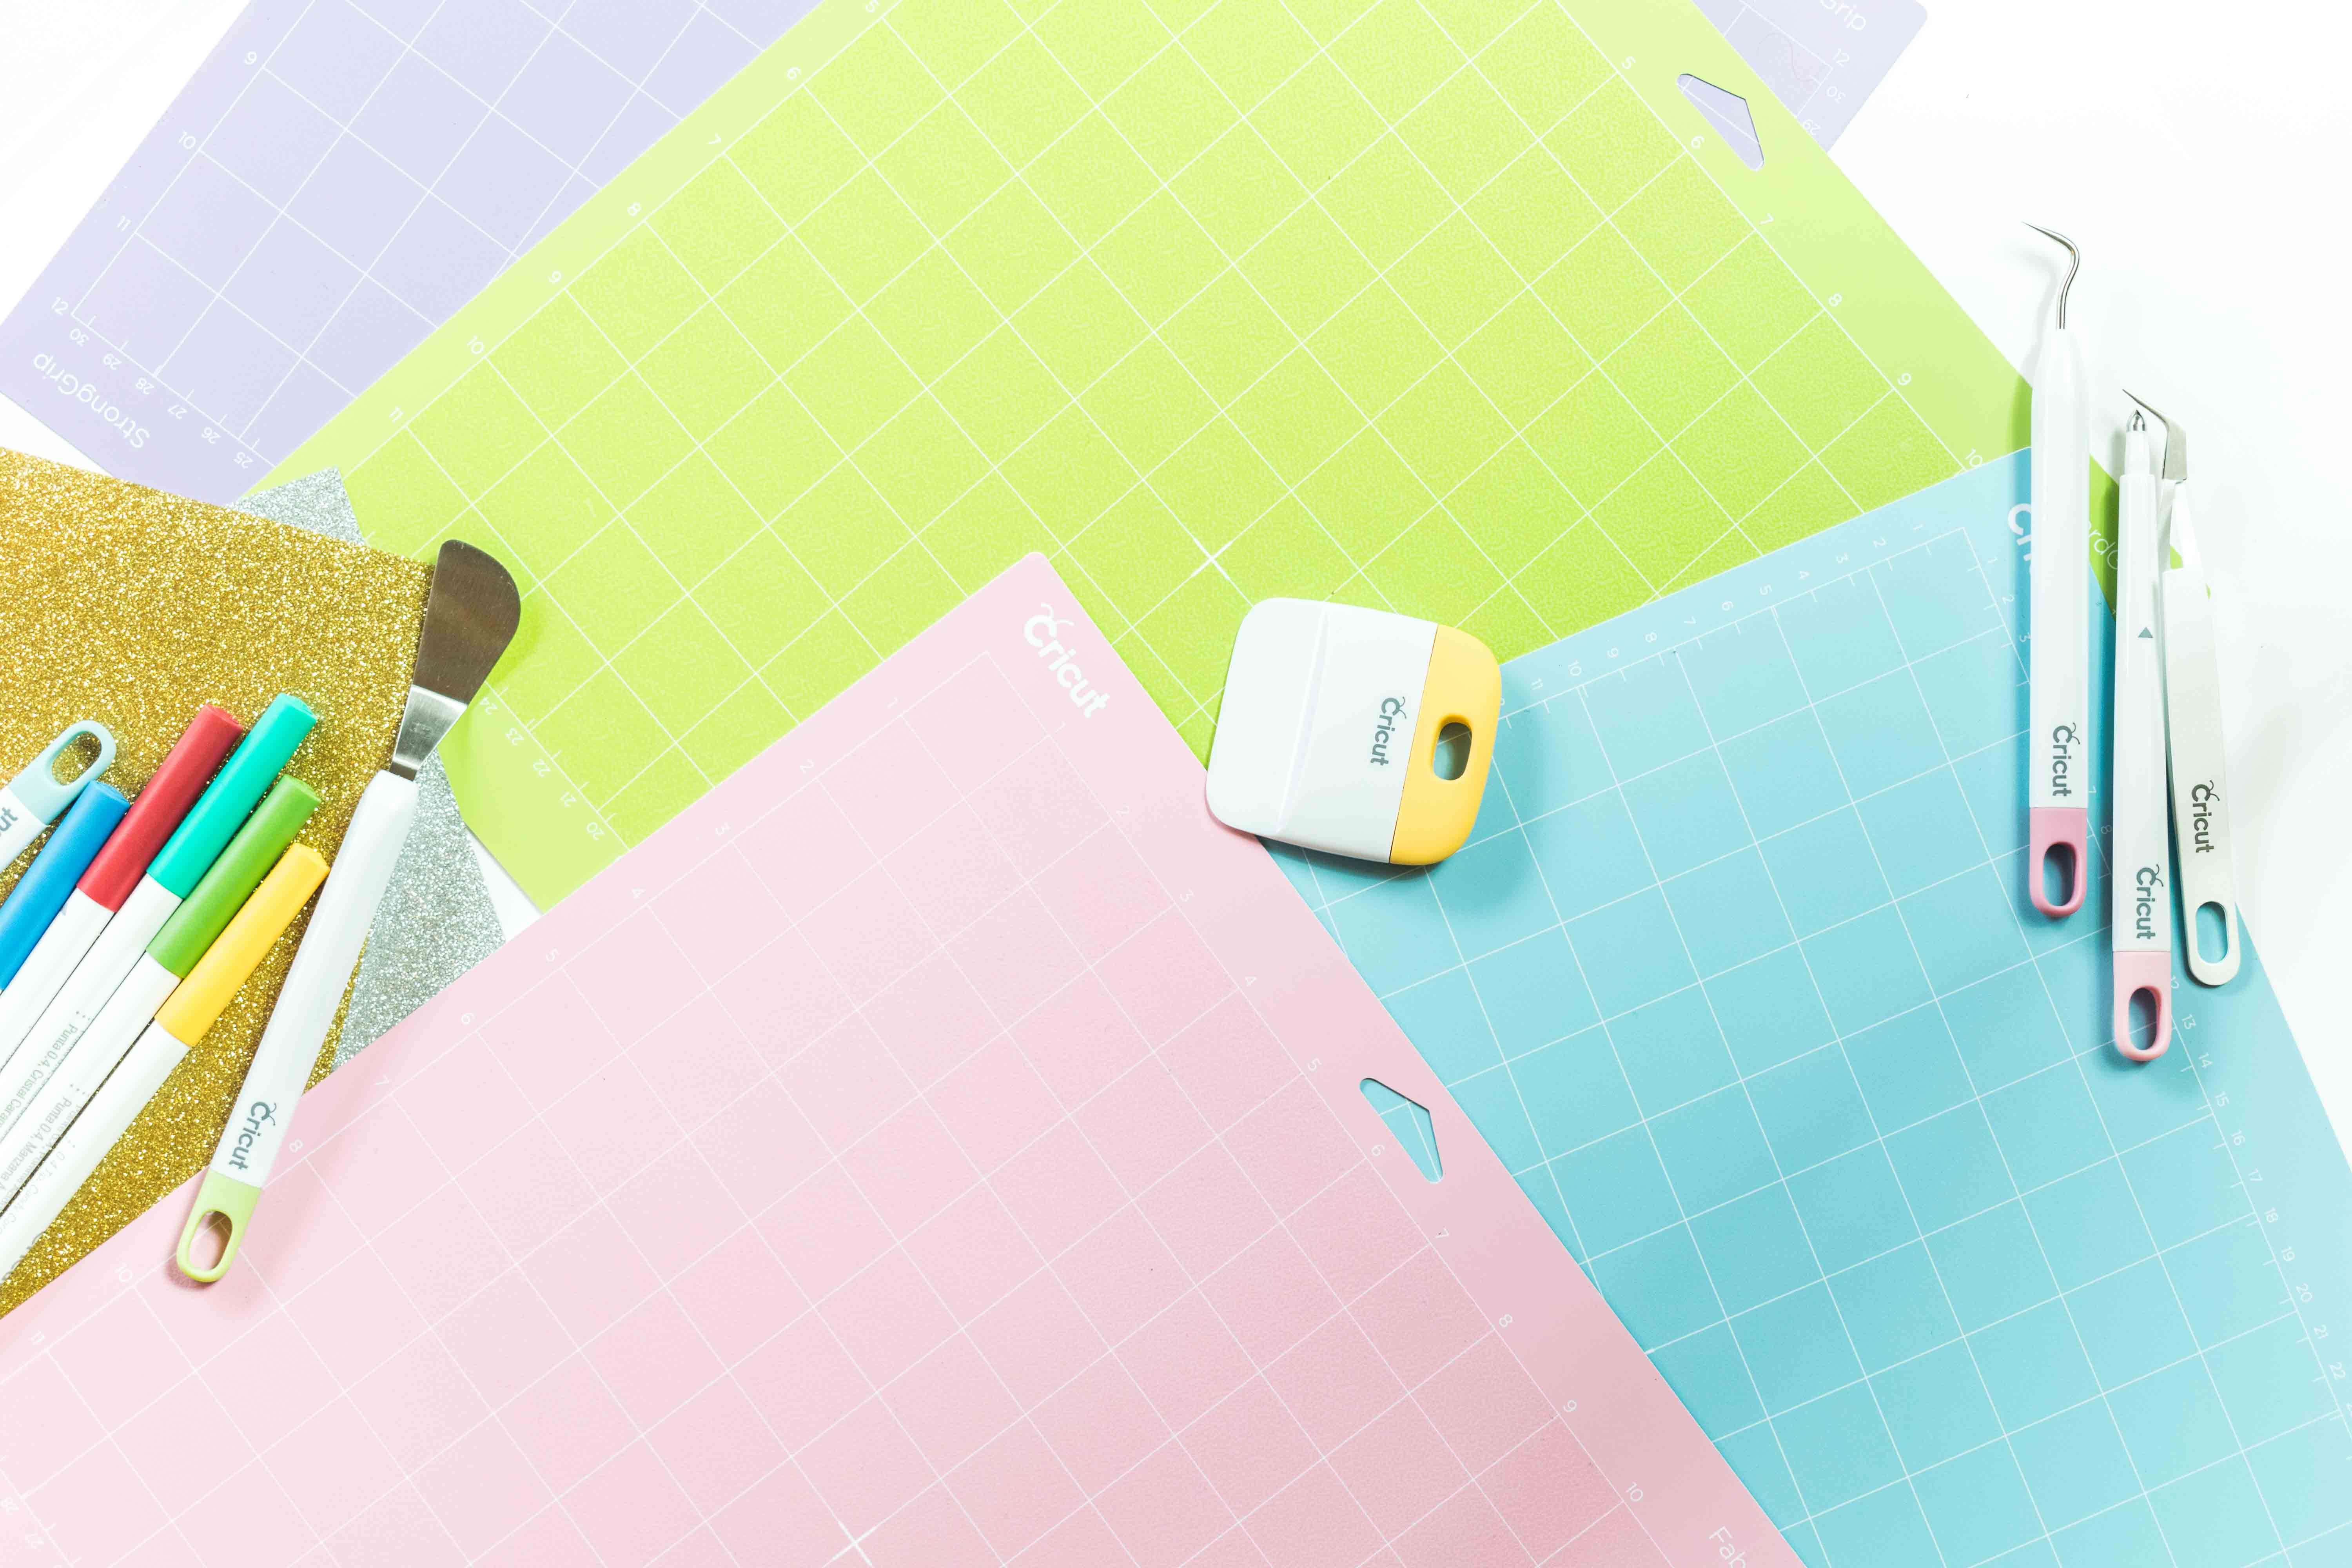
A “Cricut Mat” is the surface where you cut all of your projects. Right now, there are four different types of mats, Light Grip (blue), Standard Grip (green), Strong Grip (purple), and Fabric (pink).
Depending on the materials that you are working with, you will need a different mat.
If you don’t use the correct mat for your project, you risk running your materials and then have a tough time removing them from the mat.
Note: If you are still deciding what Cricut machine you should buy, make sure you read this article. It’s the most helpful and complete guide you will ever find on the web if you want to learn the most frequent questions new Cricutters have.
Everything you Need to Know about Cricut Mats
As I mentioned before, the “Cricut Mat” is the surface where you lay and cut all of your projects.
I always wondered if I needed a mat for all of my projects.
Well, the answer to that is yes, you will always need to use a mat for every single project; this is because every material you cut needs to be stabilized on a surface; otherwise, it would shift, and that’s a recipe for disaster.
Cricut Mat Anatomy
Before I got a Cricut, I was always so curious about why you needed different mats, and how hard it has to get a project out of the surface.
I seriously couldn’t understand it. If you feel like I did and have no idea how a mat feels well, this is a cool thing for you to know.
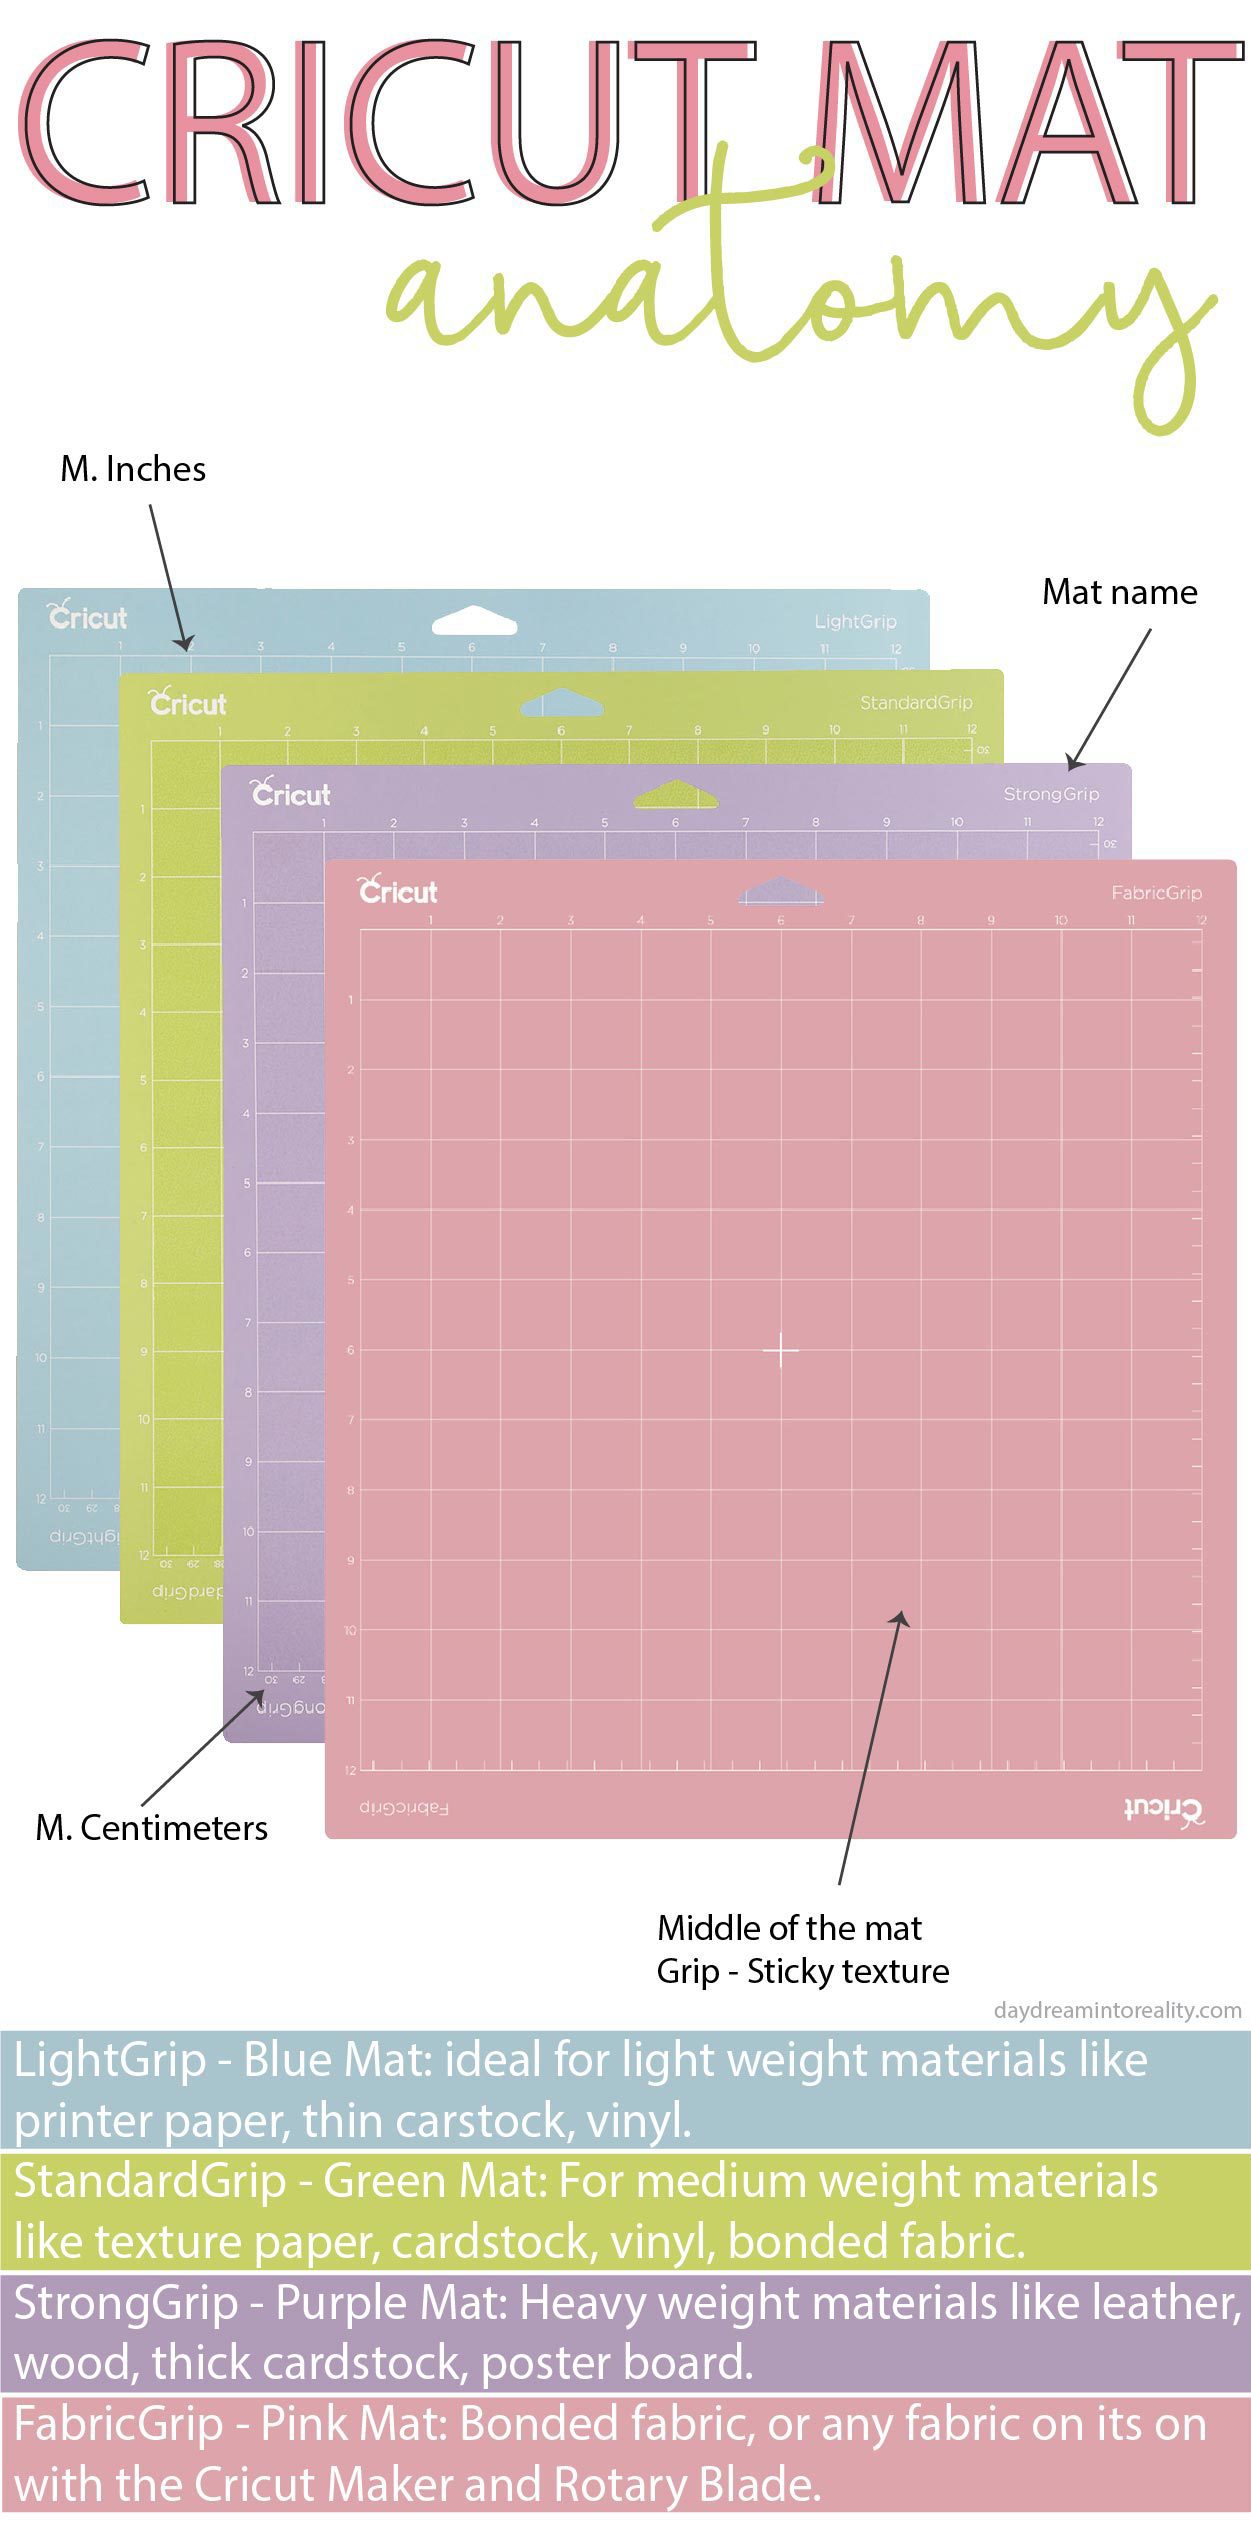
Cricut mats are sticky, and the level of stickiness dictates how secure the grip is. The stronger the grip, the heavier the material (like chipboard or thick card stock) you can cut, and the lighter the grip the thin or lightweight materials (like regular paper and vinyl), you can cut.
Mats are flexible, and this very useful because you can bend it to get out projects that are hard to remove otherwise.
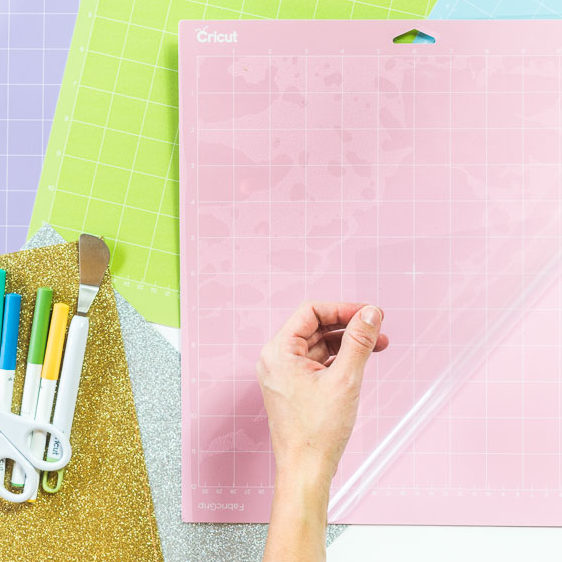
Protective cover: A new Cricut mat will always have a transparent cover that protects the surface of the mat. I add this as part of the mat (you don’t use this cover for any of the projects) because if you toss it, then your mat will be exposed to dust and other elements.
Outer Mat: This part of the mat doesn’t have any grip (or stickiness), and you’ll also find the name of the mat you are working with and the measurements both in cm and inches.
I like that Cricut takes into consideration these two measurements; I am actually from Colombia, and we use the metric system. (But I am getting used to inches now)
Inner Mat: The inner part of the mat is the sticky part, and it’s where you lay your projects before you cut them.
The inner part of the mat is divided by 1x1in squares; this is quite handy because when you are going to cut something, you can visually know where your material is located at all times.
What are the differences between Cricut Mats?
Depending on the materials you want to work with, you will need a different type of mat.
You need to memorize, or at least have an idea of which mat you should use because Cricut Design Space will not specify you which mat you need to use for different types of materials (It will tell you what blade to use though).
With that said, it’s always a good idea to have them all on hand, so you can cut anything that your heart desires!
Ready to learn the differences?
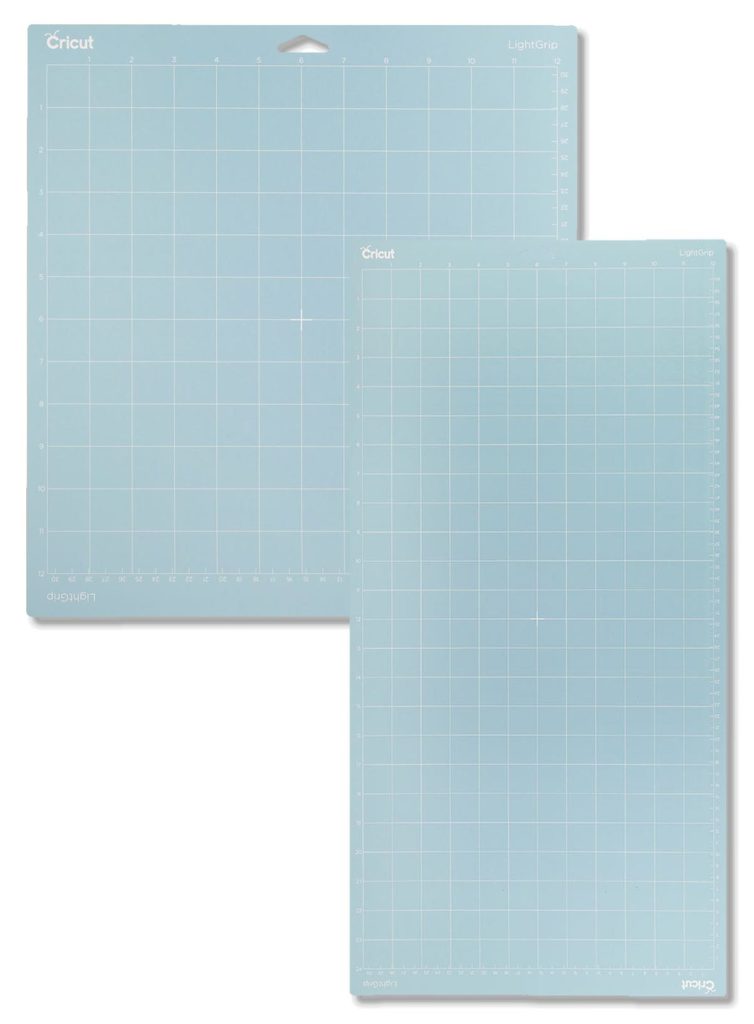
Light Grip – Blue Mat
This mat was designed to cut lightweight materials.
If you place a thin material on a stronger grip mat, it will be pretty much impossible for you to remove that material from the mat.
The most common materials you can cut with the LightGrip mat are:
- Normal paper
- Thin cardstock
- Construction paper
- Regular vinyl
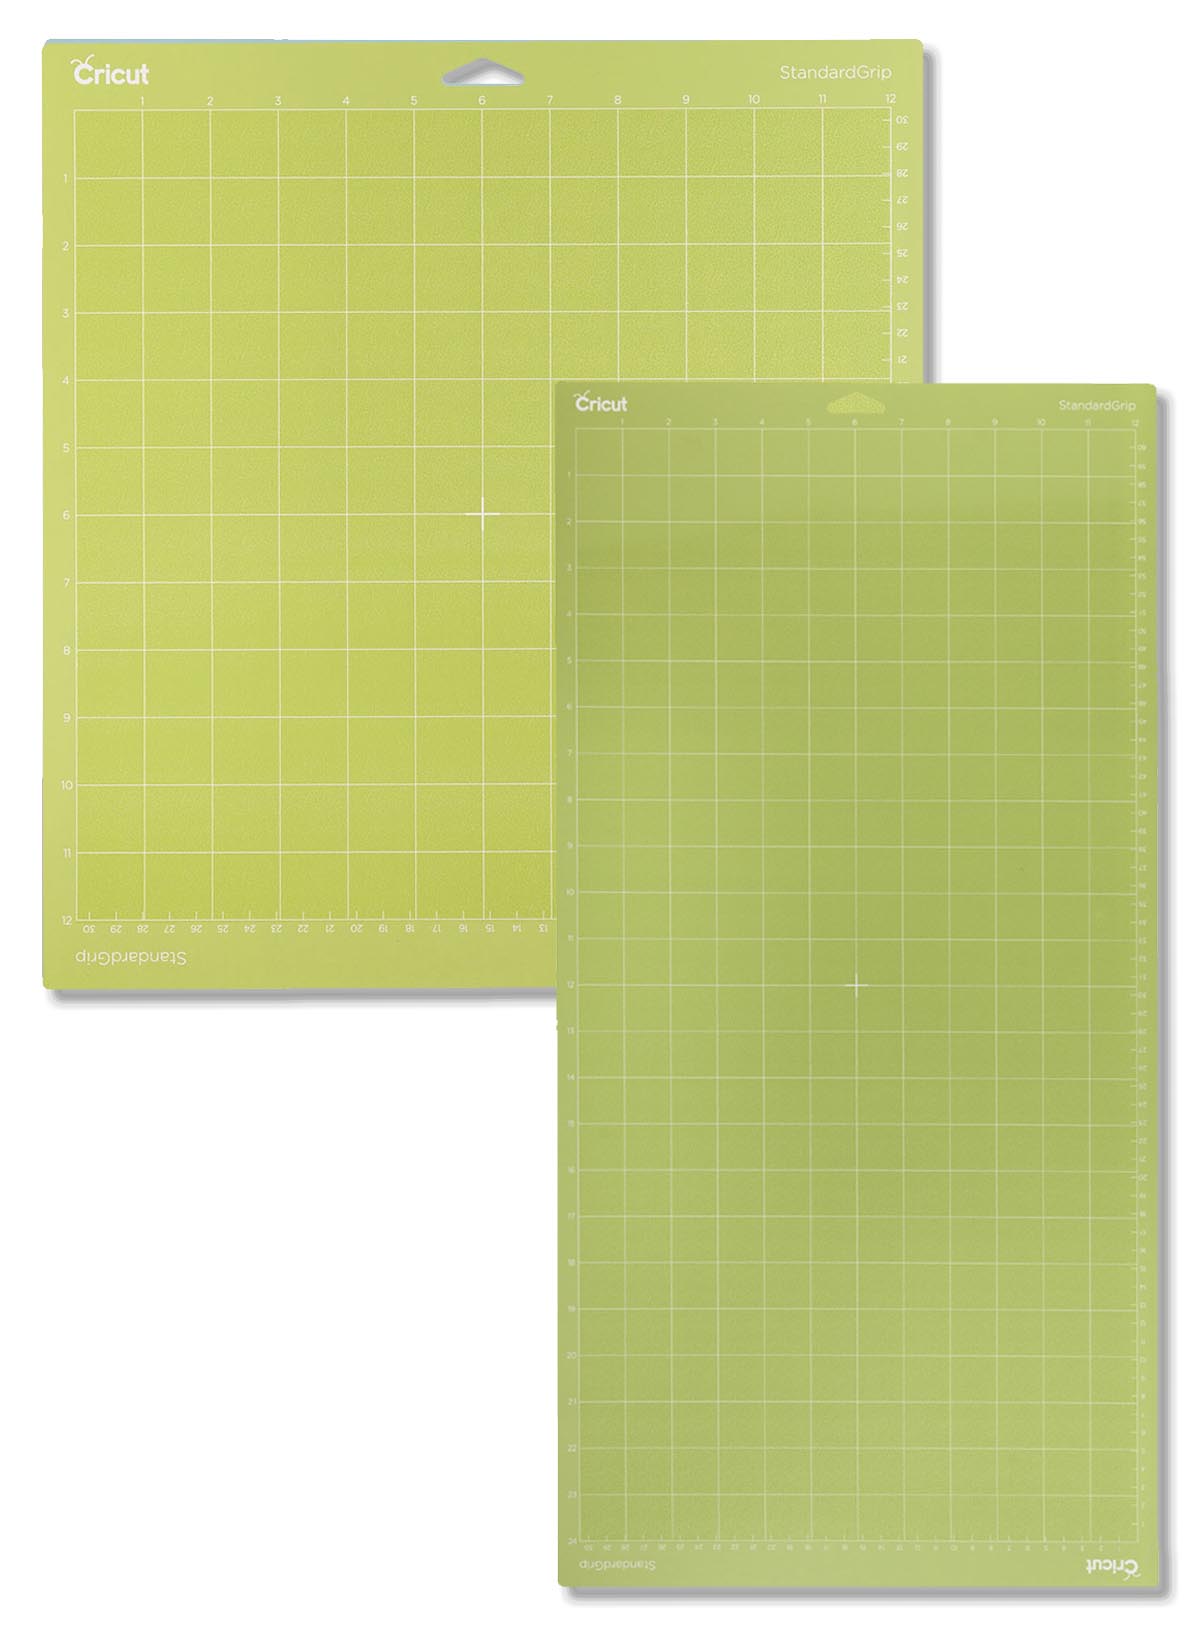
StandardGrip – Green Mat
The StandardGrip mat is the most common and affordable one, and it’s designed to work with medium-weight materials.
It usually comes with the purchase of any Cricut Machine (Make sure to check out the product description though), and it’s green.
For now, this the mat I have used so far. I think it is because I am focusing more on paper and vinyl. Once I master these materials, I plan on using thicker materials.
The most common materials you can cut with the StandardGrip or Green mat are:
- Cardstock
- HTV (Heat Transfer Vinyl)
- Permanent or removable vinyl
StrongGrip – Purple Mat
This mat was designed to hold heavy materials in place.
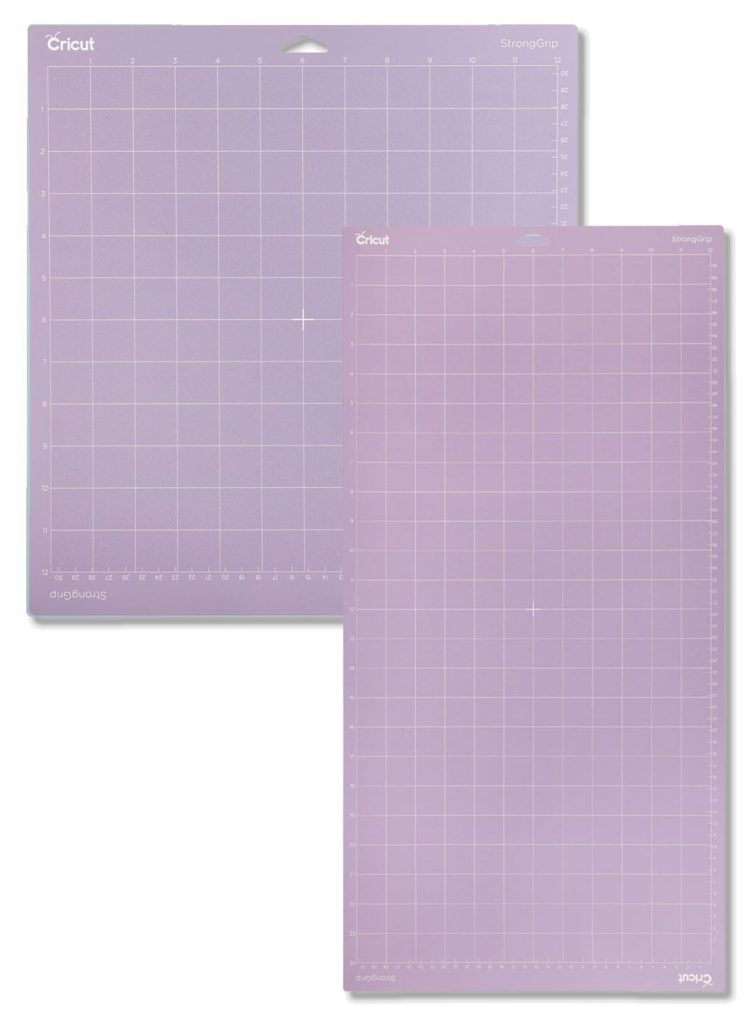
Sometimes, when you are using a heavy material like balsa basswood, the grip strength is not enough. In those cases, use painters tape to secure the material to the mat.
The most common materials you can cut with the StrongGrip mat are:
- Thick and glitter cardstock
- Balsa and basswood
- Chipboard
- Posterboard
- Leather
FabricGrip – Pink Mat
The Pink mat the newest mat, and it came out with the release of the Cricut Maker.
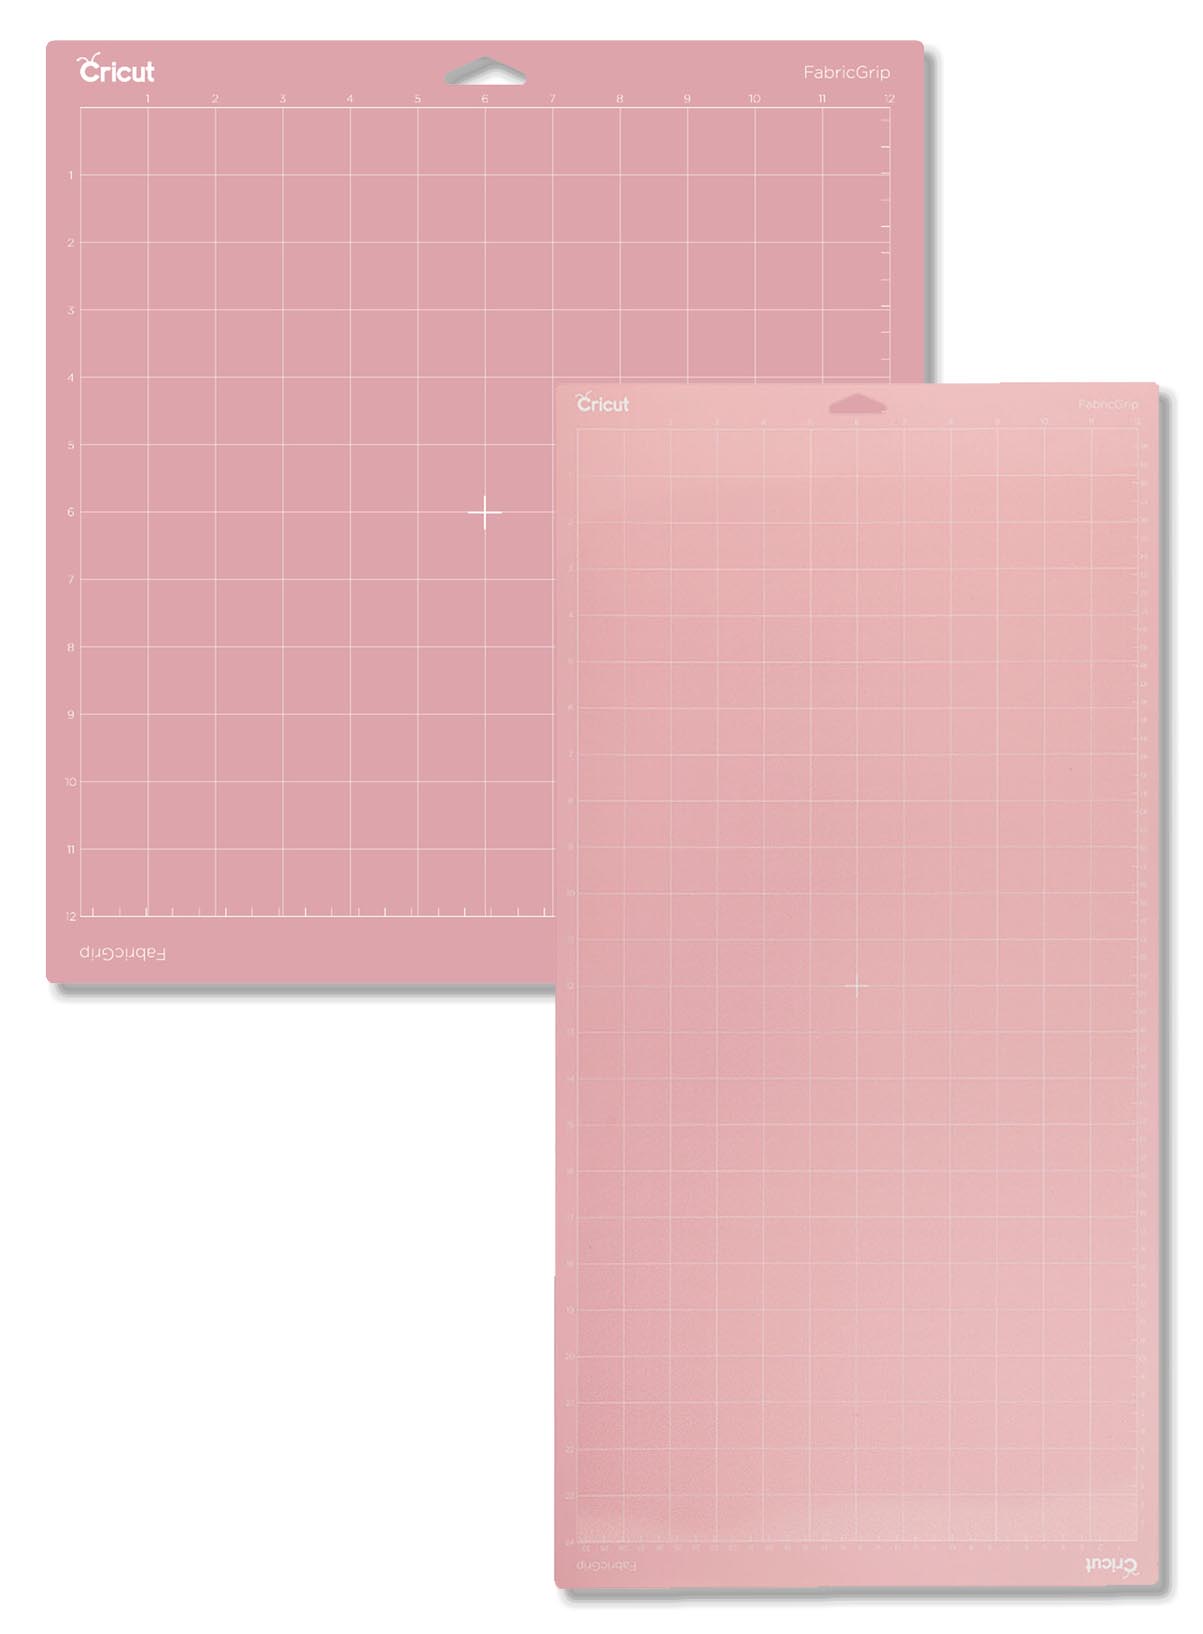
The FabricGrip mat is specifically designed to cut fabric. Bonded with any of the Cricut explore Family machines or just on its own with the Rotary blade and the Cricut Maker.
Although I own this mat, I haven’t been able to test it. However, while I was researching to put together this post, I learned that this is the mat that requires the most care and gets dirty the easier!
The most common materials you can cut with the Strong Grip Mat are:
- Bonded fabric (Explore family machine)
- Any type of fabric with the rotary blade and Cricut Maker
Cricut Joy Mats
With the Cricut Joy, materials labeled with the word “Smart” don’t need a Cricut mat. However, other materials like cardstock and regular vinyl need a mat to be cut.
The Cricut Joy has three different types of mats.
- LightGrip Mat – Blue: Use for thin materials like copy paper, adhesive vinyl, and iron-on.
- StrandardGrip Mat – Green: Use for medium weight materials like glitter cardstock, Infusible Ink, glitter iron-on, corrugated cardboard
- Card Mat: Use with insert cards. You can also use your paper and cut it the same size as the insert cards. (Learn how to use the CardMat)
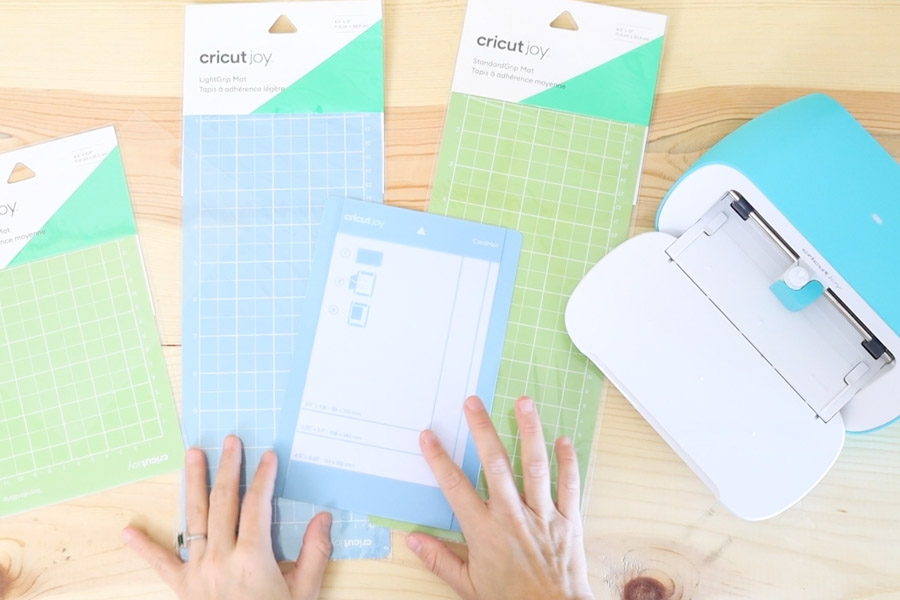
The LightGrip and the StandardGrip mat come in two sizes 4.5 x 6.5 in and 4.5 x 12 in.
Note: When you’re cutting with a mat (blue or green), your design can’t be larger than 4.25 x 6.25/11.75 in. And when using the Card Mat, your design can’t be larger than 4.25 x 6 in.
Learn more about the Cricut Joy in this guide I wrote!
What are the ideal projects for different mat sizes?
All of the Cricut mats come in two different sizes, 12 x 12 and 12 x 24 inches.
I have the 12 x 12 inches mats because the projects I am creating right now fit perfectly in this size.
If you are planning to cut the same design multiple times or make something that is bigger than 12 x 12 inches, then you should get the 12 x 24 inches mat size.

Let’s say you got the Cricut maker because wood and Fabric are your jam. With the 12 x 24 inches mats, you can cut bigger sizes of wood to decorate your home. The same applies to fabric; you could cut big pieces of Fabric and later sew a throw pillow cover.
Your imagination is the limit!
Where can I buy Cricut Mats?
I am pretty sure that every craft store has them on hand. However, I always buy these products online so I can compare prices.
Plus I am quite busy and going to the store is not an option for me.
When I first got my Cricut, I bought this pack on amazon because It had all four mats. Check out the prices here.
It’s always a good idea to check out the Official Cricut website. They have everything and sometimes outstanding deals.
Check out all of their available mats and prices.
How to care for and clean my Cricut mat?
Taking good care of your mat is very important to ensure that your cuts are always nice and smooth.
By showing your mats some extra love, you will extender their life and save money in the long run
Here are some of the best ways you can accomplish that:
Cover it after every use
Don’t ever throw away your protective cover, If you do, you will expose your mat to tons of dust and debris, and this will result in making your mat less sticky over time.
Every time you are done with the cutting and removing process, cover and put it away.
Use Cricut Mats with the right materials
Every mat is designed to be used with different materials. If you mess this up, you will have a tough time to remove them.
For instance, if you place light materials on the purple mat, you will have a tough time trying to get out that material, and this will add extra wear and tear to your mat.
The same applies to the way yo remove things from the mat. Be careful and try to remove elements with care and be patient. My mat ended up with a scratch the first time I tried to remove something from it.
I didn’t know better :/
Clean your mats often:
With time your mat will lose its grip; sometimes, there are built-up materials on it, and sometimes it’s just time for you to replace it.
Before you get a new mat, try to clean it. Here are three different ways you can clean them.
Light, Strong and Standard Grip
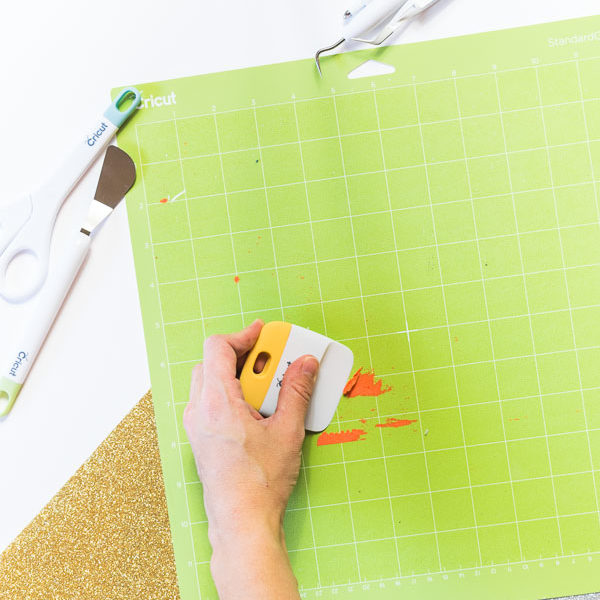
1. Use the Scraper: After each use, use the scraper to remove pieces of paper.
2. Lint Roller: use a lint roller to get little bits of materials left on the mat. This tip works great when you need to remove Fabric!
3. Non-alcohol baby wipes: For just a quick clean, you can always use some baby wipes; this works like a charm if your mat has just a little dirt.
4. Soapy water: For deep cleaning, you can always use a washcloth with soapy water. Make sure you use lukewarm or cold water because hot water can mess up your mat’s grip.
My favorite is to soak up a washcloth in soapy water and then place it on top of the mat for a few minutes to kind of let the dirt soften. Then, scrub very gently, let air dry and cover. Easy peasy.
If your cleaning involves water and your mat is wet, make sure to let the mat air dry. I know you’re going to be tempted to use it. But the wetness can’t not only ruin your materials but also damage your machine.
Fabric Mat:
The Pink Mat is very peculiar, and it requires a different type of care than the other mats!
Here are some of the best practices for cleaning and caring for the Cricut Fabric Mat
- Don’t use the Scraper: Don’t use the scraper because the adhesive of this mat is just right to hold fabrics, and it’s quite light; therefore, the scraper will peel off the grip.
- Use the lint roller to get rid of some of the Fabric left on your mat.
- Use transfer tape
- Don’t use soap or water on this particular mat.
- When manipulating your mat to place fabrics on it, make sure to keep your fingers off the grip.
- Cover it after each use.
Should I use Adhesive Spray if my mat is losing its stickiness?
Resticking your mat is a practice recommend it by many bloggers and forums out there. I’ve never tried it, and honestly, I don’t think I ever will.
I am not saying that they are wrong. And I am pretty sure that it has worked very well for some of them.
However, there’s a reason that Cricut has created four different mats with four different grips.
I understand you may want to save money, but by spraying adhesive on your Cricut mats, you are not restoring them to their original condition. You may be adding extra stickiness, but it’s not the one that was designed for each mat and material.
What comes after?
You can genuinely get lucky and make it work (There are tons of successful tutorials out there), you can ruin your mat altogether, or you can destroy your materials.
Try it at your own risk, and after you’ve had your machine for a whole year because this might void your machine’s warranty.
I know Cricut mats can be quite expensive over time, but by covering them after you are done with the cutting process, washing them once in a while, and taking good care overall, you can extend their life.
Am I missing something else?
I think I cover pretty much EVERYTHING you need to know about the Cricut mats. Is there something else that should be added to the list? Let me know in the comment section down below.
My special gift to you
I love creating and designing printables. However, I don’t have enough time to create a post for every single design, but I still want to create them!
I have created a fantastic FREE PRINTABLES LIBRARY of cut files and printables for any occasion. This library is only for my subscribers, more known as daydreamers. Become a daydreamer and get access to this growing library and have fun cutting until your heart is content.
Are you not convinced yet? Check out a preview of the library! Everything I do, I do it with my heart and soul. I would love for you to be part of this growing community.
Sharing is caring!
I spent multiple hours to put this useful content together! If you learned something and think someone else could benefit from this great article. Don’t be shy and share it on your favorite social media!
By doing that, you are also supporting my work!

Extremely useful tutorial. Thankyou !
To cut stiffened felt on my cricut explore, I have bought the pink fabric mat. I’m not having much success at the minute though. Its moving around. Would I need a rotary blade rather than the fine point blade do you think ?
You need the rotary blade to cut fabric without bonding. You can use the fine point blade and the fabric mat if you bond the fabric to something like HeatnBond®
Thank you so much for all the informative information,
I have learned so much now I can make a decision about what I need to purchase with my Cricut Maker.
Well, I just learned a lot! I applied an adhesive to my light grip mat and then the glitter vinyl stuck to mat while cutting. It ruined the vinyl. The mat could not be cleaned and I had to throw both away.
I’m glad you learned. Sorry, your mat got ruined 🙁
Roberta, Can I use the new Fabic Mat on my original Cricut Machine and if I can what Blade should I use on it?
I just bought a Cricut Maker 3. It doesn’t come with mats. DoI need them?
Yes you do! For pretty much everything.
Immensely enjoyed your informative Cricut article!! Found it to be packed with great tips and advice! Written so that it is easy to understand, which makes it very pleasant read. I actually feel enlightened instead of more confused as I have been with other articles in the past!! Thank you for sharing!
You’re very welcome! I am happy I was able to help.
Thank God for someone who speaks plain English.
I was so confused before reading this????
I feel like I can actually get started as of now!
You’re very welcome.
I am glad I was able to help.
Are self healing mats sticky or are they used for a different purpose, such as cutting with the xacto knife?
They are for other cutting with true control knives.
Hello, I have used my mat today to cut crepe paper on the light grip with a rotary blade and it has left little cuts in the mats whiter were on the curved sections of the cuts. I’m just trying to determine if this is normal? I used a lightweight when design space recommended a standard and wondered if that’s why. Will there be a problem using the same mat for other projects?
Thanks
Sally
It’s totally normal. As you use your mats, they will get marked with tons of lines from the blades. You can still use them no problem.
Thanks for the info! Can I use the 12 x 24 mat for smaller projects, too? I’m thinking if I need to get a green mat, I might as well go with the bigger size in case I need it for a bigger project?
You can use the big mats for smaller projects too. They are just a hassle to store!
Thank you!!! This was so informative and helpful!! You truly have a gift of explaining things!
You’re very welcome 🙂
Hi I have an older Cricut and I can’t find a 6 x 12 mat in stock anywhere, due to everything going on shipping is quite long….am i able to buy a bigger mat and cut it down? Thank you.
Hi Toni. Unfortunately, I don’t know a lot about older Cricut Machines. Try calling customer service!
Thank you so much for taking the time to share your expertise! I am brand new to the Cricut Maker and read your post to determine which Mats I will need and how to care for them. This means slot to us newbies!
You’re very welcome. I am happy I can help!
Amazon- Full Sheet Address Shipping Labels – 8-1/2″ x 11″ – 100 Labels The sticky area it about 2 mm smaller than the backing paper so they are easy to remove.
Which mats is will better: Standard or Light
2mm seems very thick. If it’s 2mm standard.
Thank you, this was very helpful! I am a new owner to a Cricut Joy and just getting started. One question I cannot find an answer to: Which setting do I use in DesignSpace when I want to cut regular copy paper on a LightGrip Mat? Thanks in advance and all the best from Germany, kind regards Birgit
Click on “Browse all materials” when you are trying to find the material you’re using. This is after you click on Make it.
I hope this helps 🙂
I lost the protective cover for one of my mats. Is there something else I can use to cover the mat and keep it clean while not in use?
Yes! Find some acetate or laminating sheets on Amazon. You can use 2 different sheets to protect the sticky part.
Hi Catalina! Great Article! I bought the Cricut because I need to make over 100 3-D flowers for an event. I am about 15 flowers in and my blue mat has DEEP GROOVES from using the same pattern over and over. I am starting to get ripping and tearing. Is this a sticky issue or a groove issue? Can I fix the grooves or do I need to go buy another $30 mat?! this could get expensive quickly if that’s the case. THANKS!
I think it’s a sticky issue. Try washing your mat! You can find great deals on mats on Amazon too!
Hi Catalina,
Not sure if I saw on your website or not. What is the best way to lay out your papers instead of using 8 mats to cut small pieces out. I use my iPad so it’s a little different than a computer.
Thanks
Chero
Check out this tutorial, where I cut multiple colors on one Cricut Mat! I think if will solve all your problems!
Although I appreciate all the effort that went into writing this article, I was very distracted by all the grammatical errors. I am aware that not everyone has writing skills, but you should at least have someone who knows grammar review your work before you post it.
Thank you for your feedback, Kim.
I just went back and corrected the mistakes I found. It was one of my first articles and hadn’t had the change to look over it. English is not my first language and I can’t afford someone to proofread at this moment. I have improved my writing skills since I first wrote this article, though.
I understand how annoying it can be, but I can’t limit my dreams because of my fears of missing the mark. I’ll get better as I go.
Have a great day.
You are doing a wonderful service helping all us newbies. If people would rather correct your grammar than see the great information you are giving, maybe they should not be on this site. Keep up the good work!
Arlene! Thank you so much! This means a lot to me. You have no idea! ❤️ It’s so hard when English is not your first language! I get better as I go!
Excellent info! It has helped me tremendously!
Yay! 🙂
@Catalina, I applaud your efforts. I also am a stickler for correct grammar but I learnt just now to not assume errors are careless mistakes. Your English is good enough to assume it is your first language so in a backwards kind of way you received a compliment. I’m going to start using my circuit after your excellent instructions. As soon as my broken arm heals that is. Many thanks and good luck.
Thank you so much! I guess it’s a compliment. I used to worry a lot, but I learned that no matter how many times you double or triple check, you’ll still have a couple of errors.
I hope you heal soon!
Catalina… thank you so much for providing all of your knowledge to all of us Cricuteers out here!! I’m a fairly “newby” but I’m so excited about becoming more creative with mr Cricut Explore Air 2! I feel so lucky to have found you!! Thanks again!!
In Texas
You’re welcome, Debbie! I am glad you’re learning with me 🙂
Thanks so much! I’m a newbie to the Cricut (I have the Explore Air) and these are very helpful tips, ESPECIALLY the “don’t use adhesive spray to re-sticky the mats” tip. I was wondering about that when I saw the tutorials on using adhesive spray- how would you know you have the right grip?
I am glad to hear!
Thank you so much! I love the way you have presented all of your tutorials!
I am a old lady and so far I have been able to understand your tutorials!
This makes me really happy. I am glad I can help 🙂
I was wondering how to insert the 12”x24” cutting mat into the air explorer 2? I used it to cut vinyl & it moved while cutting and ruined the cut. What am I doing wrong?
Hi Denice; you can use this size Mat with either the Explorer or Maker. This actually happened to me once, and what I found out was that my mat wasn’t sticky enough and my Cricut wasn’t 100% leveled. I hope this helps. You can also secure the vinyl with some tape.
Thank you very much for thorough information regarding Cricut mats. I am a newbie and found it very helpful.
Hi Laura I am really happy I was able to help you on your Cricut Journey!
If you’re a beginner this is th perfect side for you! Have a lovely day and happy cutting!