Hello Daydreamers!
If you have any of the Cricut Explore machines or a Cricut Joy and feel a little left out because you cant use the perforation blade, I have fantastic news to share with you.
I think perforation cuts are one of the coolest things Cricut has come out with. There are so many creative things you can make, and if you don’t have a Maker, I don’t want you to miss out.
That’s why I spent three full afternoons working and testing very thin lines in different shapes and sizes to simulate the perforation cuts made with the perforation blade.
If you have a Cricut Maker, read my tutorial on how to use the perforation blade.

Are you ready to learn this cool trick?
This is not a beginner’s tutorial. Although I explain everything with a lot of detail, this tutorial requires you to know how to use your machine and have a good understanding of Cricut Design Space.
If you get lost, you may want to visit the following tutorials.
- Full Cricut Design Space Tutorial
- How to Slice in Cricut Design Space
- How to Attach in Design Space
- What’s print then Cut
- Edit Shapes in Cricut Design Space
Ideally, you will read this tutorial from the beginning because, as we go, we will be implementing the concepts mentioned in the previews steps.
The Trick Behind Making Perforation Lines with Cricut Explore/Joy
As you know, the perforation blade only works with the Cricut Maker; however, if you take a close look, you will notice that this blade has small little teeth with a small gap between them.
These little teeth are what create the perforation cuts.
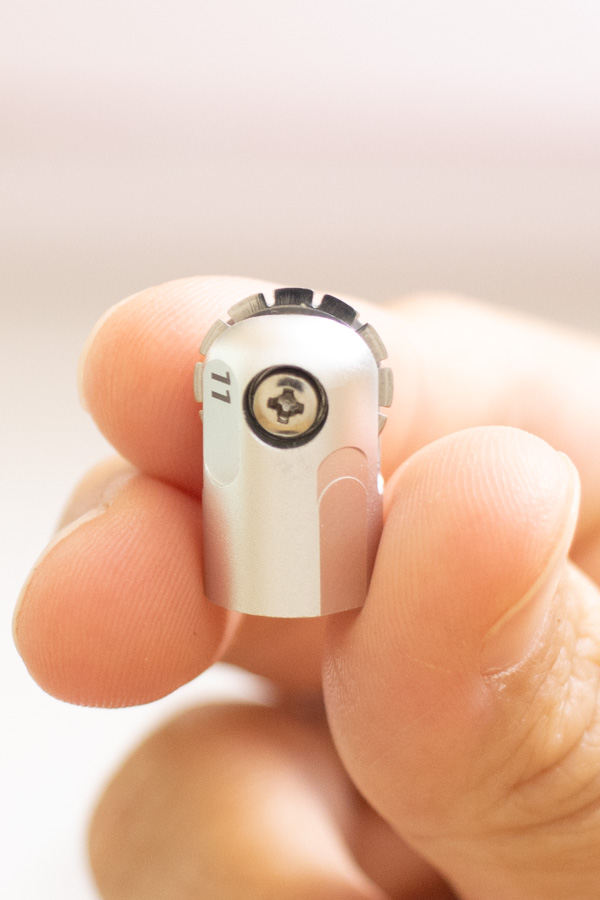
For you to make perforation lines with your Cricut Explore/Joy, you need to recreate those little teeth with the right amount of space between them.
I tried to do them in Design Space, but it’s incredibly annoying and pretty much impossible. So to achieve this technique, I designed particular files that you can download right down below.
I made them in the most common shapes, with regular and rounded corners, so I am pretty confident you can create as many projects as you want.
Tip: If you have a Cricut Maker and the not perforation blade, these files will also work for you!
Download any shape you want or need for your project, and make sure to read the step by step tutorial on how to use them, I don’t want you to ruin your materials.
Oh!
Just so you know, I also have a library full of free SVG files and Printables for all my subscribers, a.k.a. Daydreamers. You can see a preview right here or get access by filling out this form.
Are you ready to learn how to use them?
How to make Perforation Cuts with Cricut Explore and Joy
Before you use these files, there’s something fundamental you need to consider.
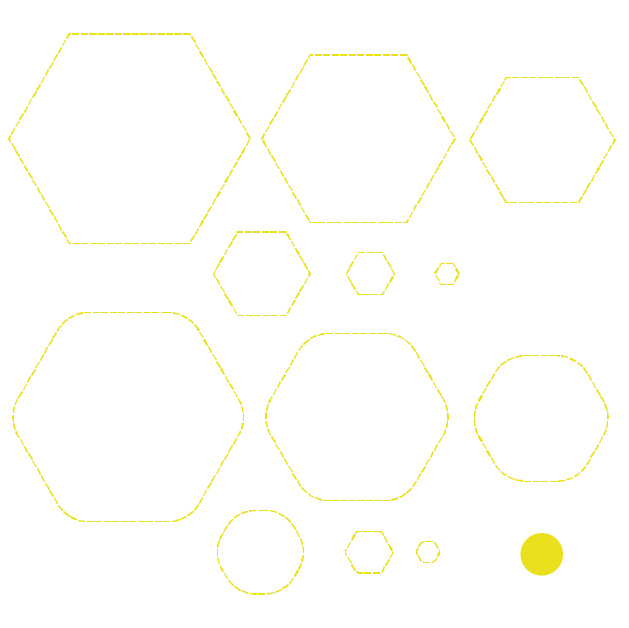
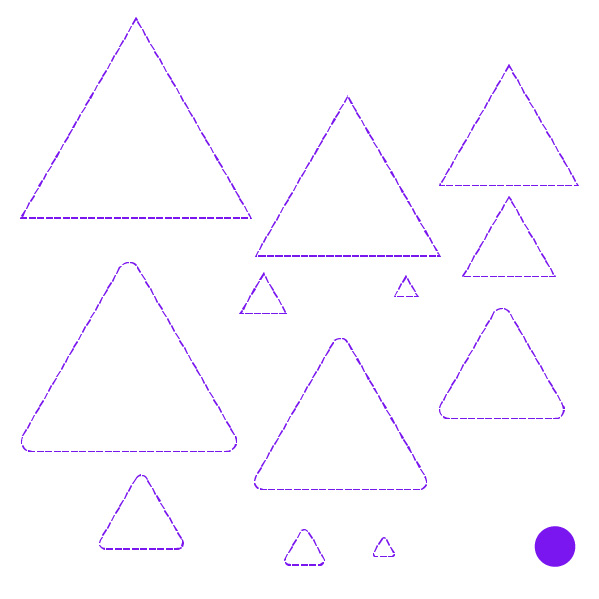
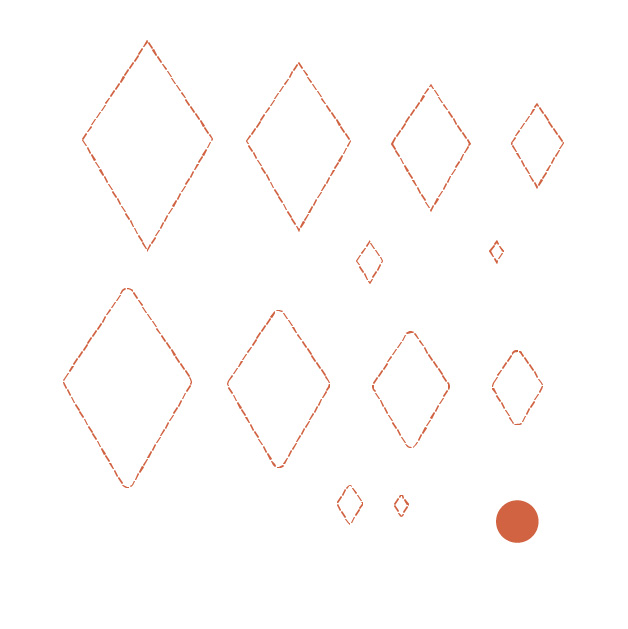
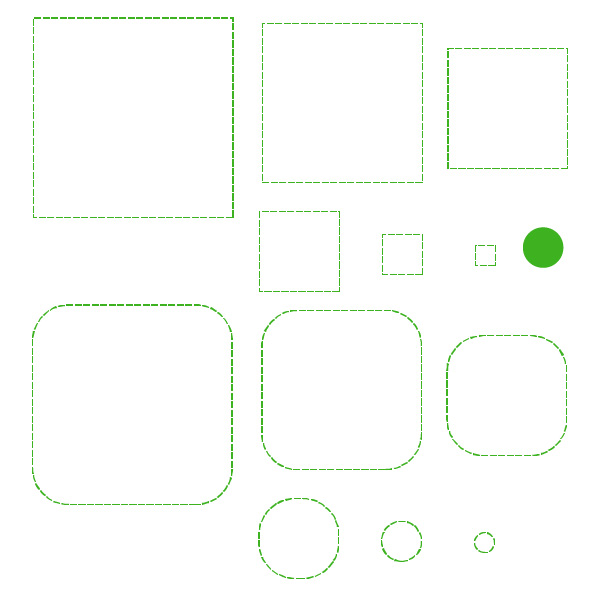
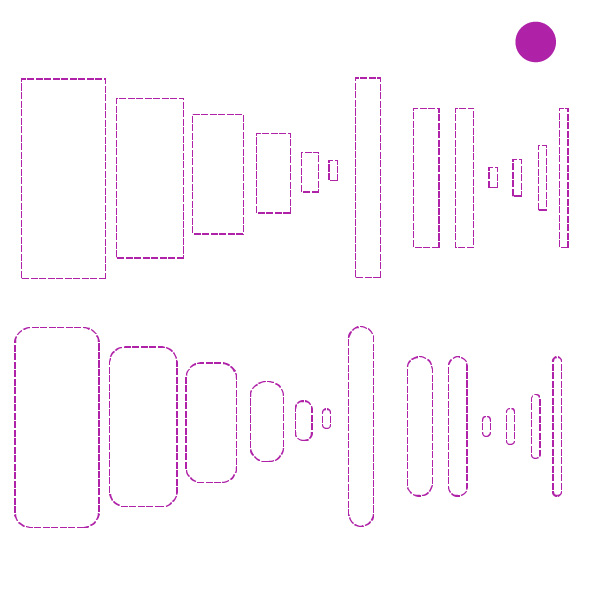
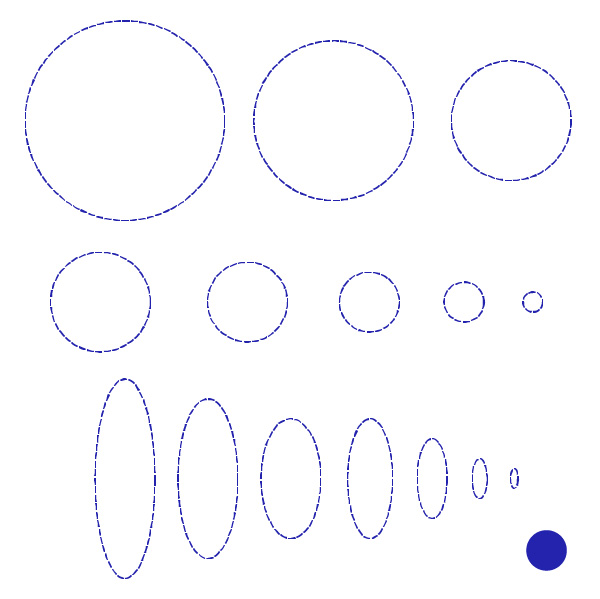
On each thumbnail, you will see that most shapes and lines are repeated because each figure’s size matters. I’ve included each shape in a 10″ 8″ 6″ 4″ 2″ and 1″ in height.
I also included rounded corners when applicable!
Here’s the caveat, the size of each shape/line matters a lot! That’s why I included so many dimensions.
So, for instance, if you want to perforate a circle that’s 3.5″ inches in height, upload the circle shape lines to Design Space, ungroup them, and pick the 4″ circle in the file and resize to 3.5″.
Don’t use the other sizes because be too big or too small and the cuts won’t work.
Always stay between 1″ max when sizing up or down. I preferably try to pick projects where you need to size down.
Let’s see how these files work.
Step 1 – Start with the project you want to Perforate.
When wanting to add perforation cuts, always start with the finished project.
In this case, I am doing an effortless test project to show you how to make perforation effects with your Cricut Explore/Joy.
I have a 5 x 5″ square.
I plan to add perforation lines vertically and horizontally. I am also adding a couple of stars.
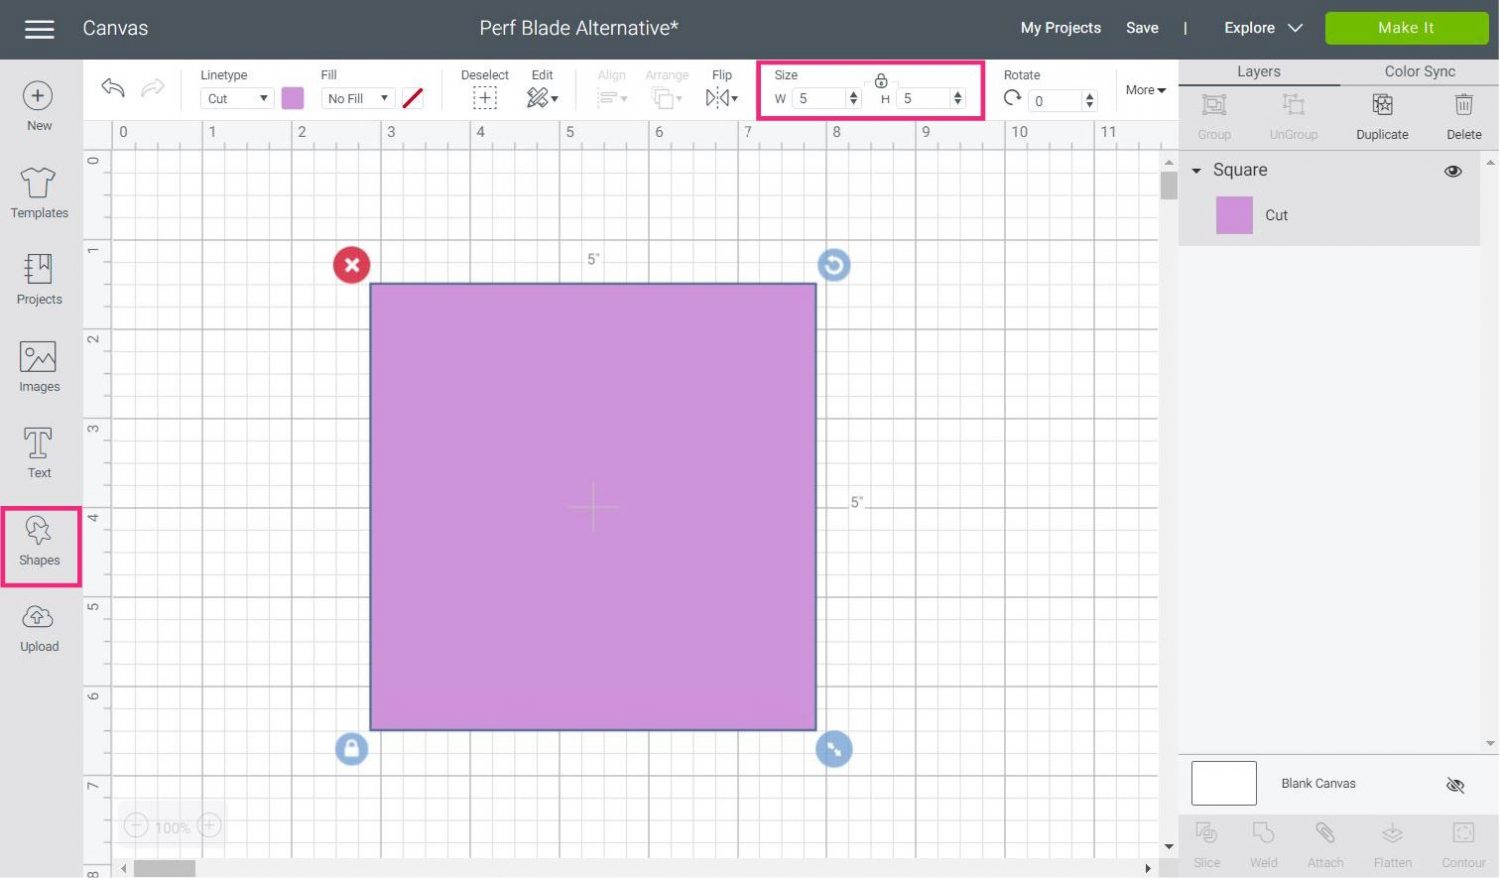
Since I want to add lines and stars, upload the individual files I included at the beginning of this tutorial.
Step 2 – Add Perforation Cuts
Click on “Upload” on the left panel and follow the prompts.
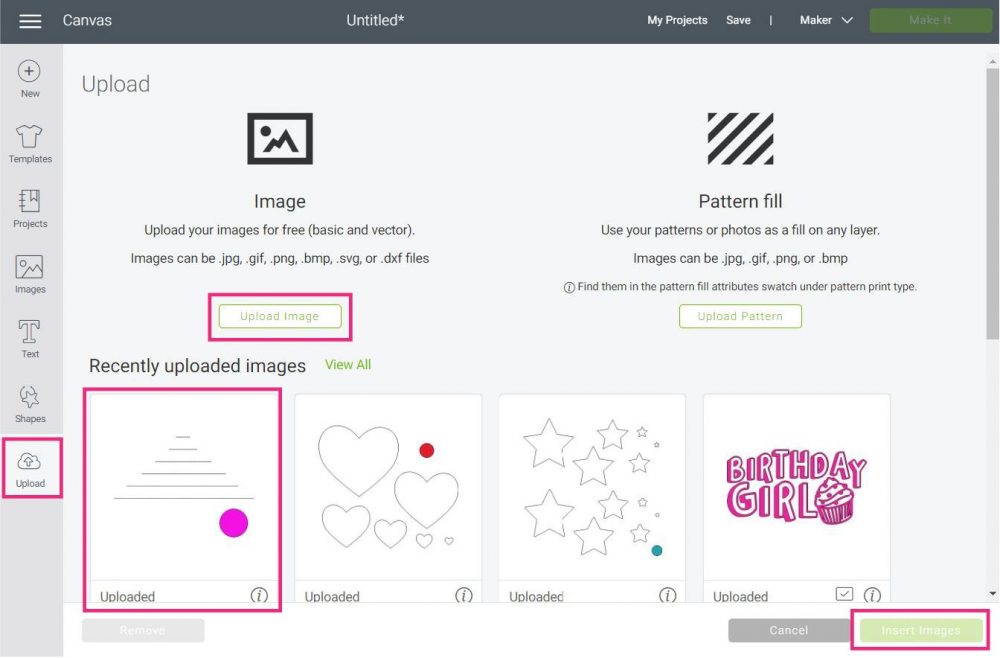
Initially, the file is grouped.
Select it, and click on “Ungroup” located at the top of the layer’s panel.
Each file has a circle mark; I found that the lines wouldn’t upload unless something big enough to be detected by Cricut’s software. Go ahead and delete it.
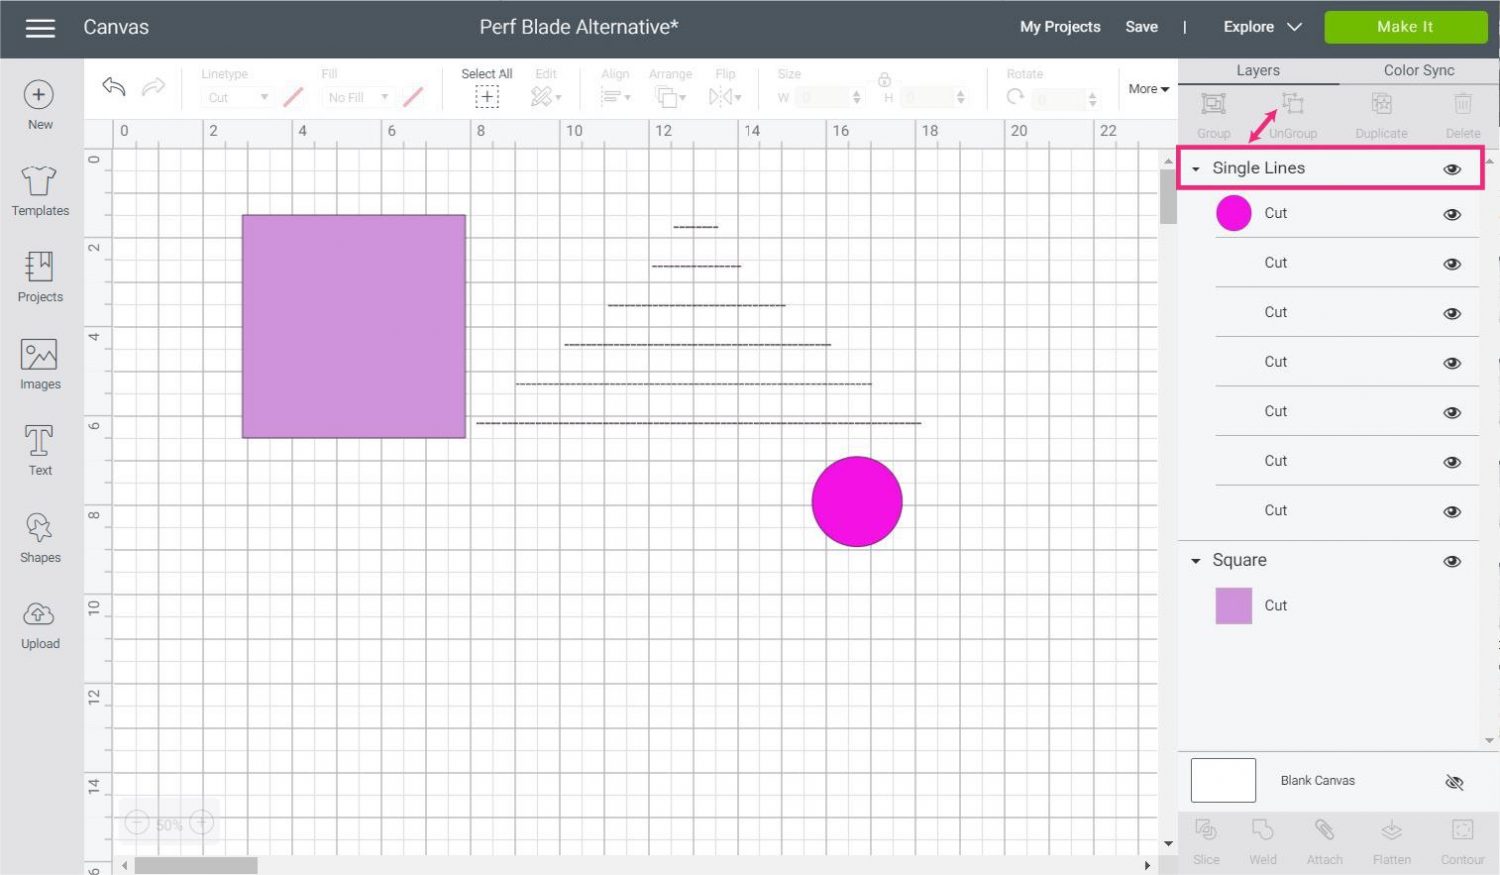
It’s time to select the right line for your project.
As I mentioned before, size matters. You can’t increase or decrease these lines/shapes more than 1.”
Step on each line, and find out which one is closer to your project size.
In this case, I picked the 6″ line.
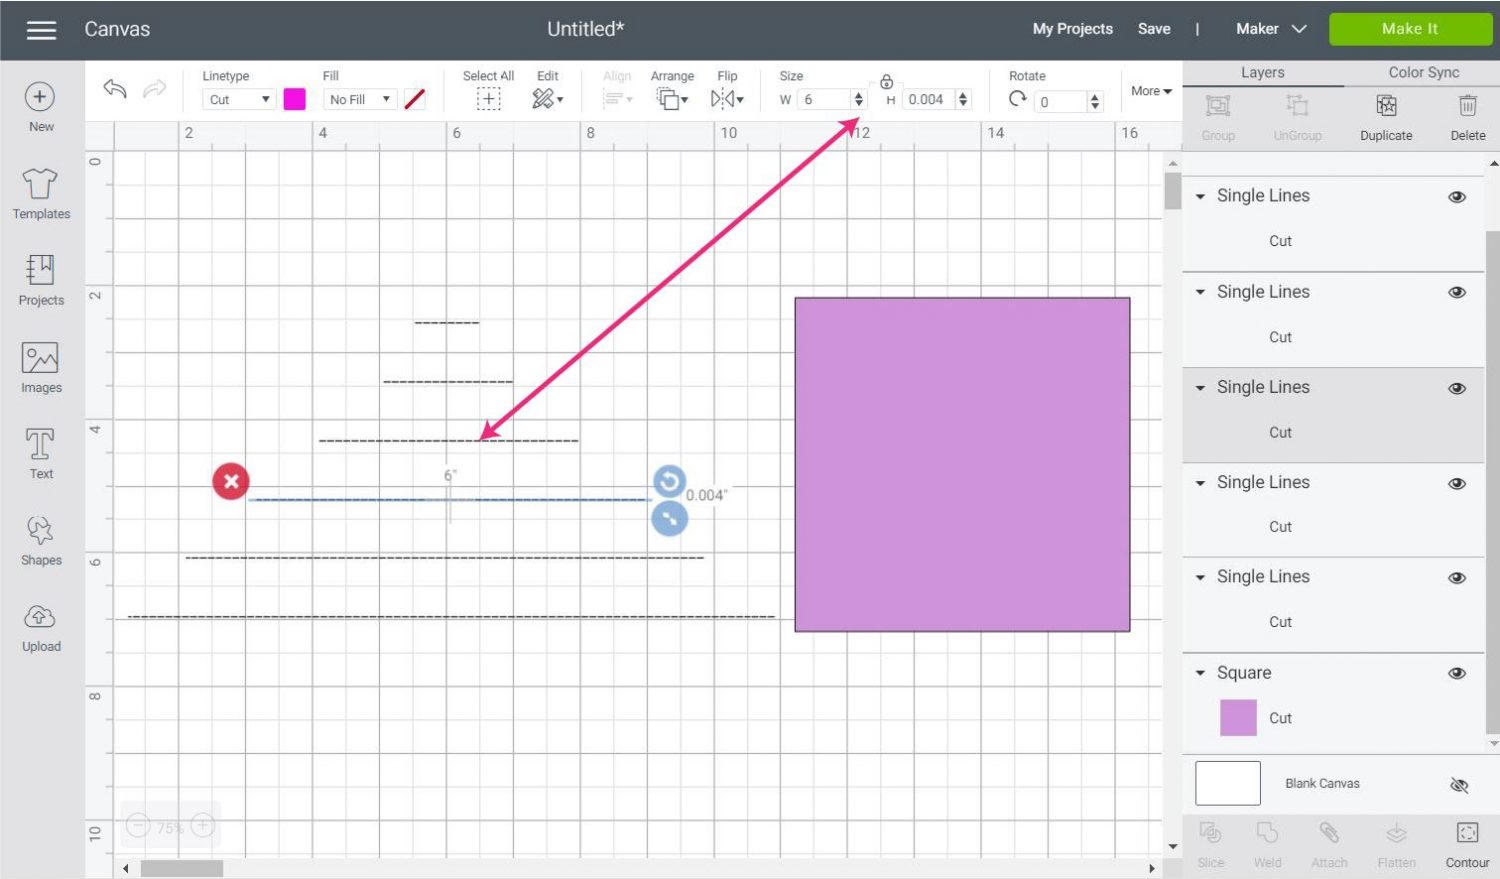
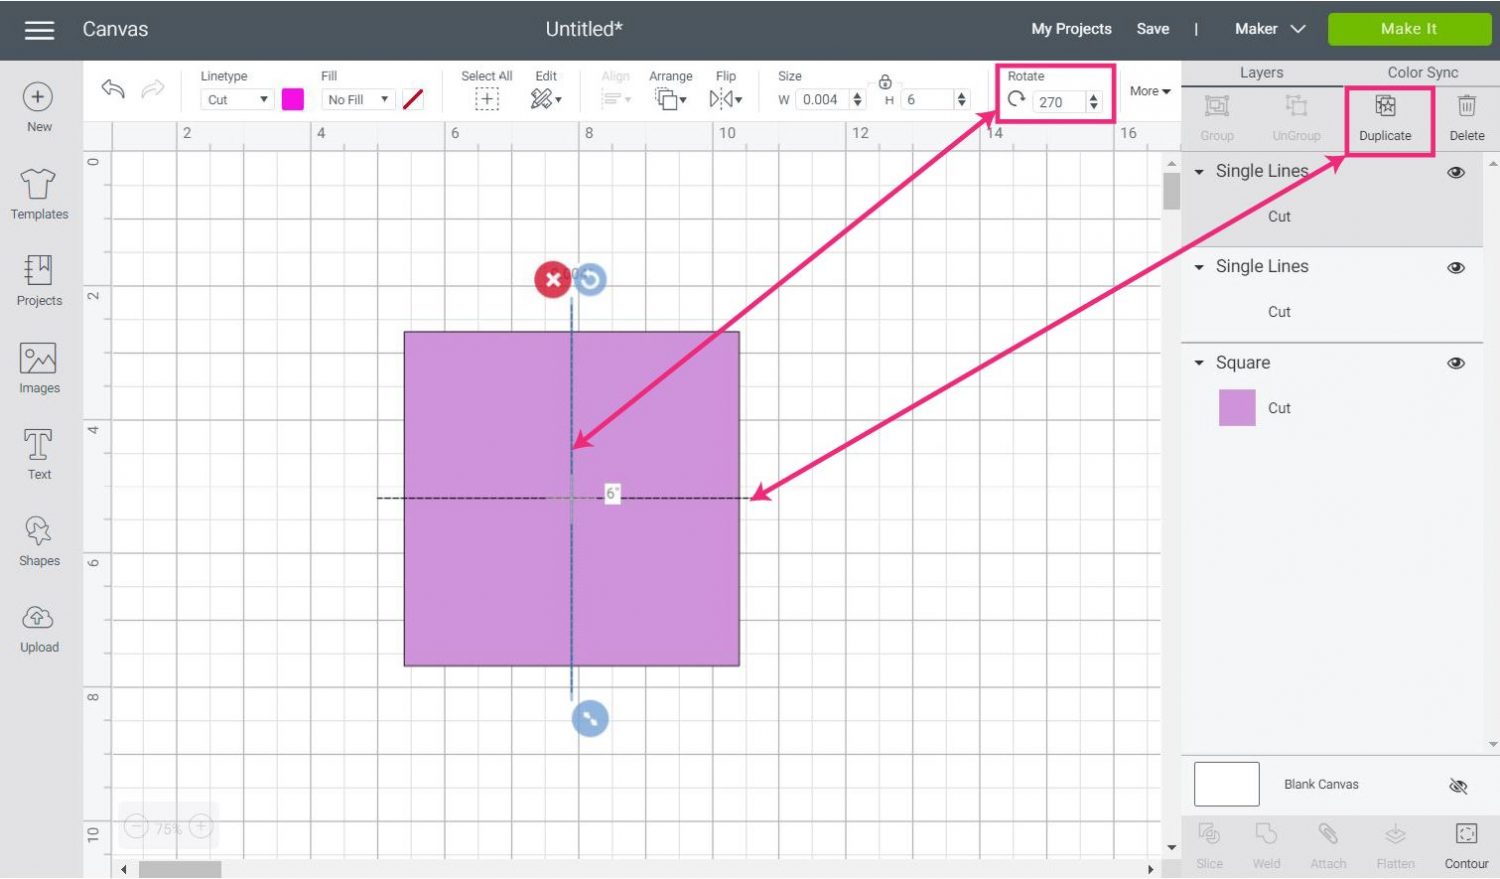
Place it on the square in the middle of, then duplicate and rotate (90 or 270) to create a perfect vertical line.
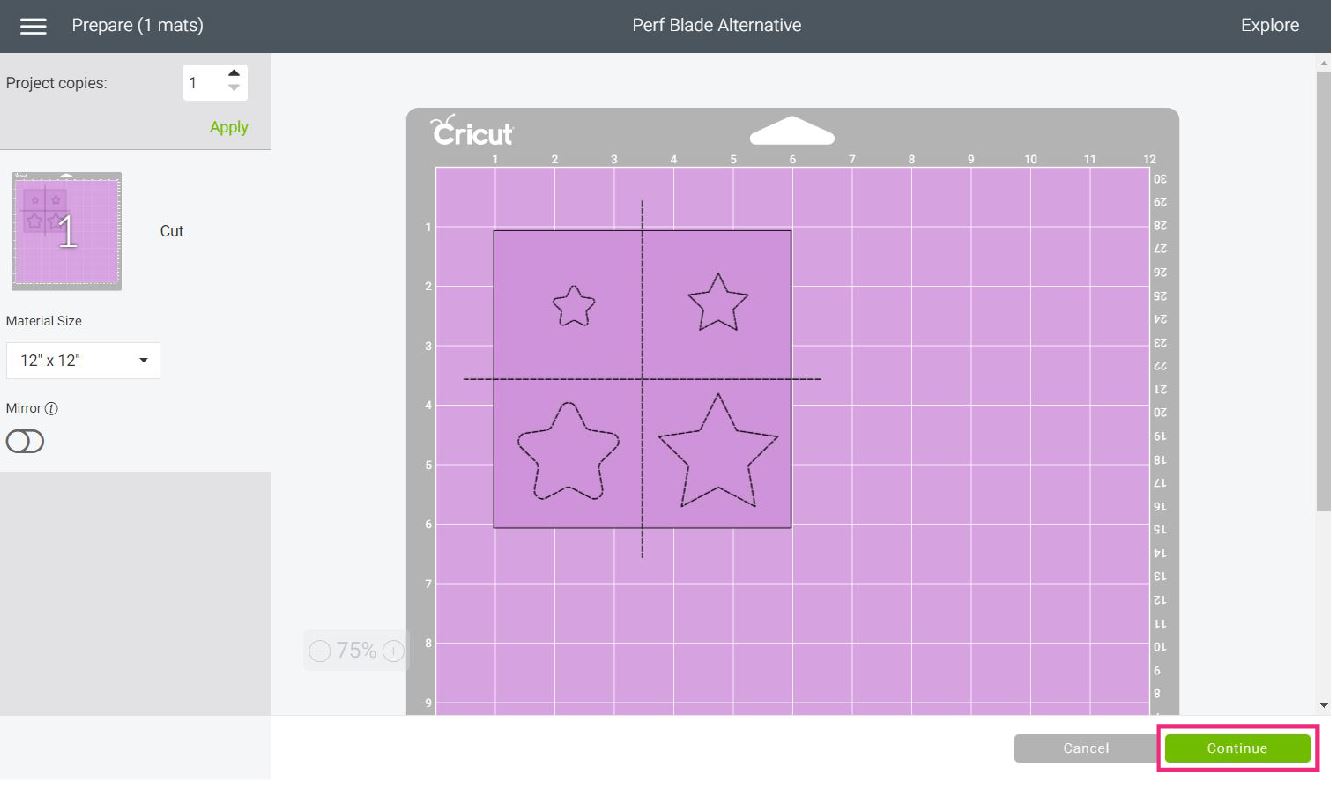
Arrange both lines on the square, so you divide it into four equal parts.
Now, upload the “Stars” file and “Ungroup” it.
By zooming out (lower-left corner on the canvas), pick the shapes that will fit the best in each quadrant.
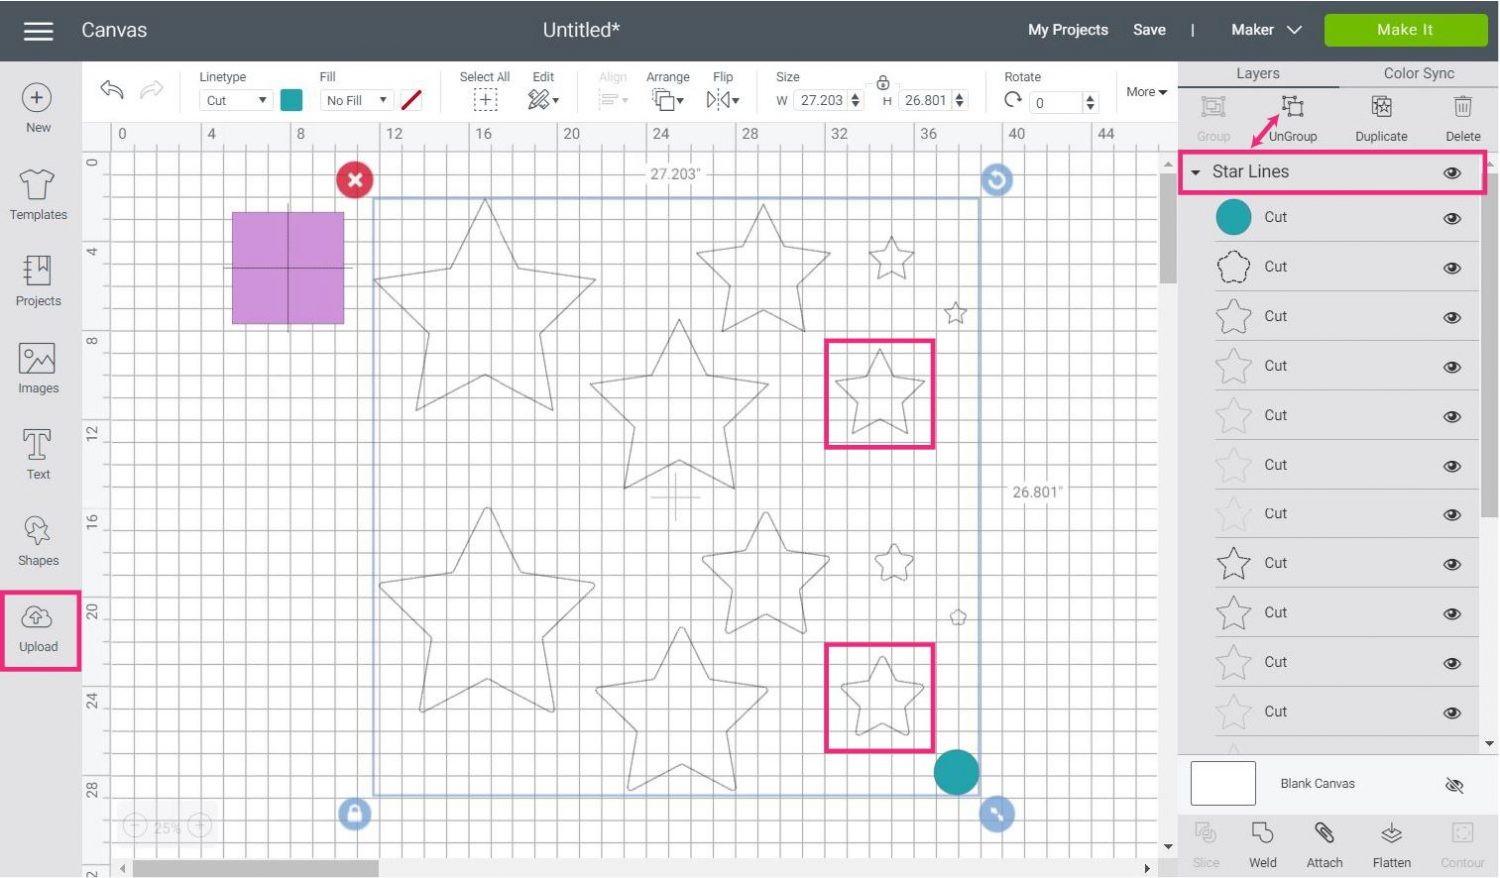
I decided to use two stars, one with sharp angles and the other one with rounded corners.
Then, I duplicated both stars and reduced their size by 1″ because I wanted to show you how the lines would work when you reduce the size.
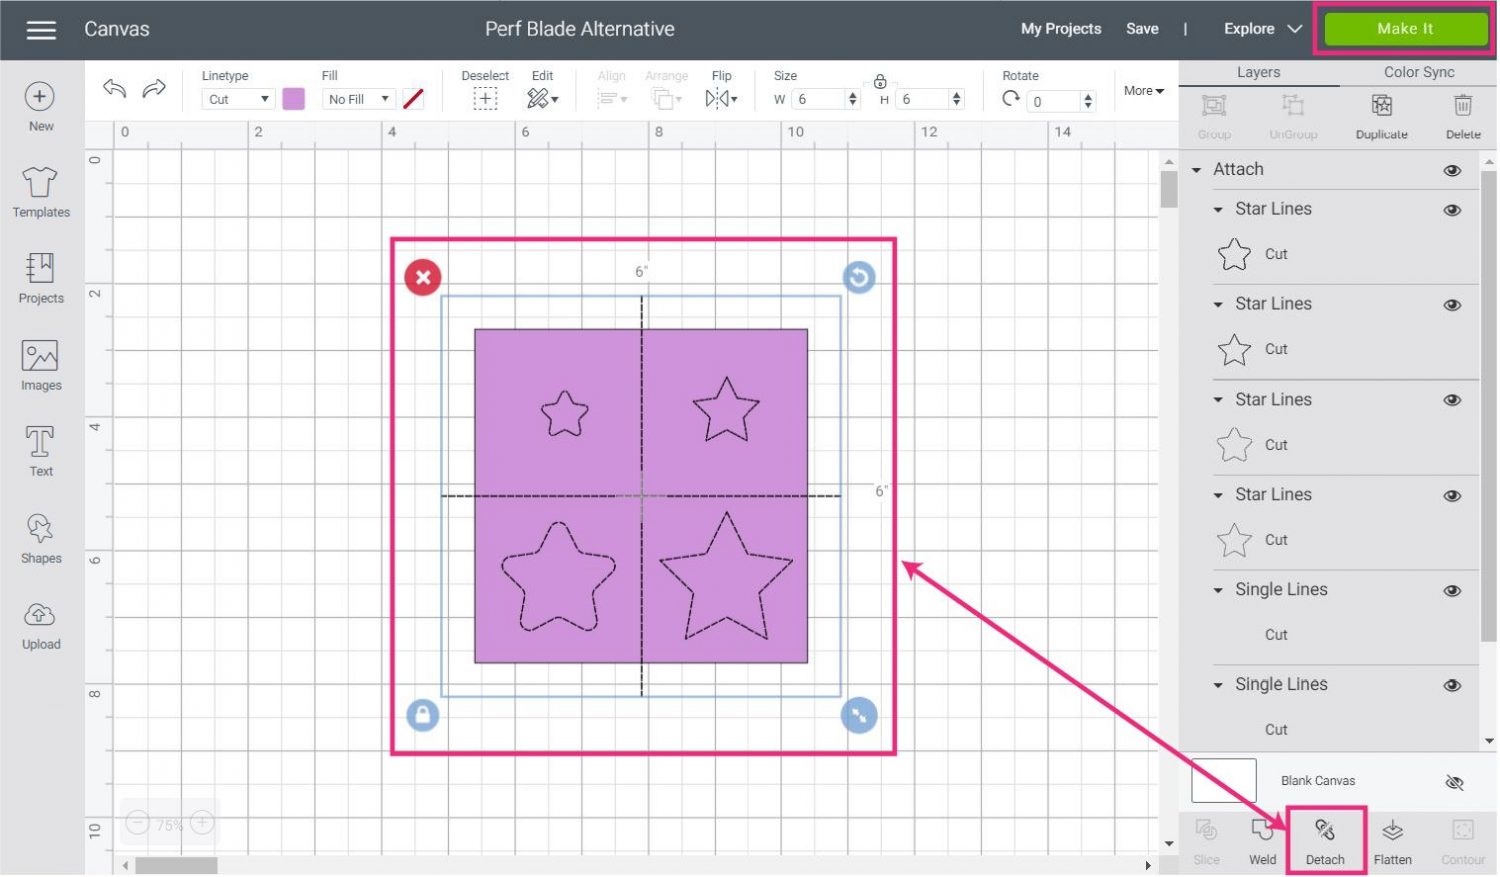
Once you’re done placing all the perforation lines/shapes, select everything on the canvas and click on “Attach” located at the bottom of the Layers panel.
Step 3 – Send to Cut
Your project must be all the way to the back (last layer on the canvas). You see, although the lines we just added don’t show any color, they have it, but because they are so thin, you can’t appreciate it.
If the lines aren’t on top of your project, the color of your project will change.
After attaching, click on “Make it” to send your project to cut.
If everything looks good, click on “Continue.”
It’s time to select your materials.
I tested this project with medium cardstock and regular copy paper. I wouldn’t use this trick on materials that require a second pass such a glitter cardstock.
You’re welcome to try, but I feel it would be too much for your machine.
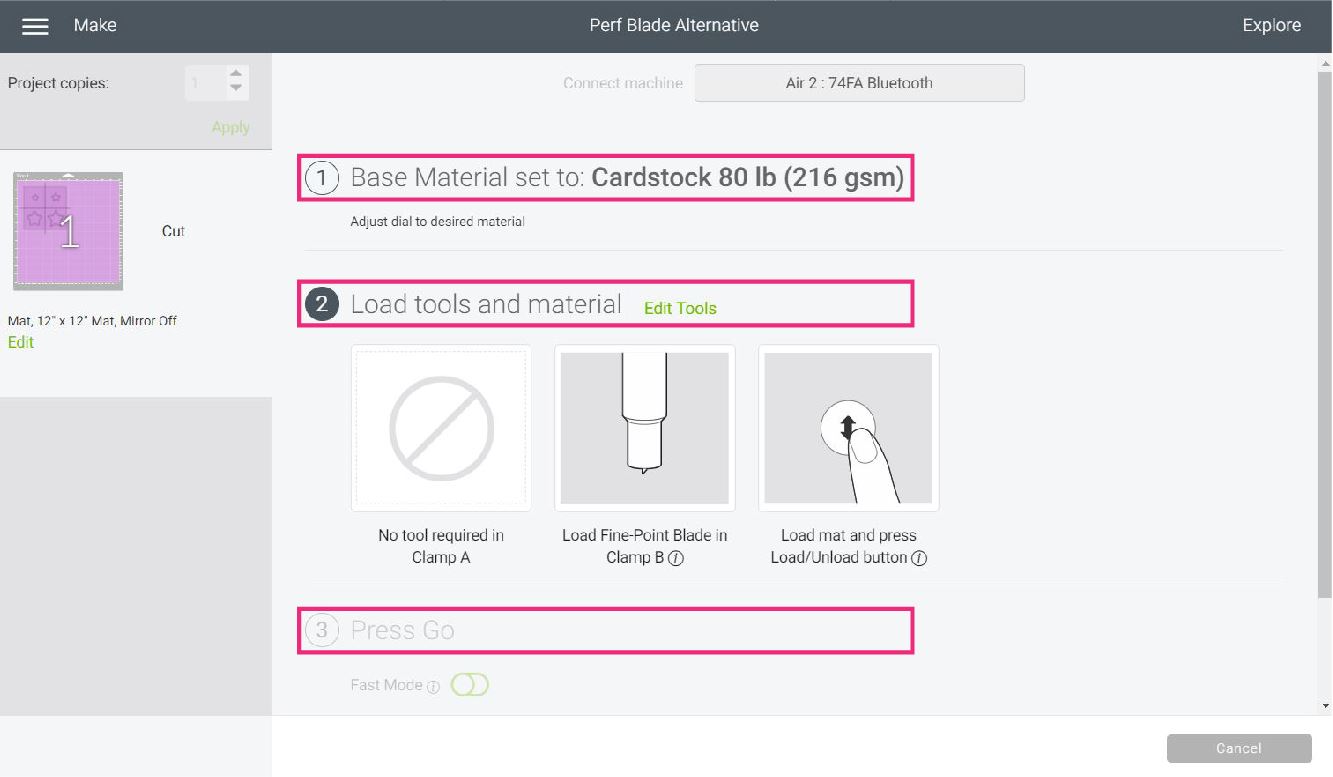
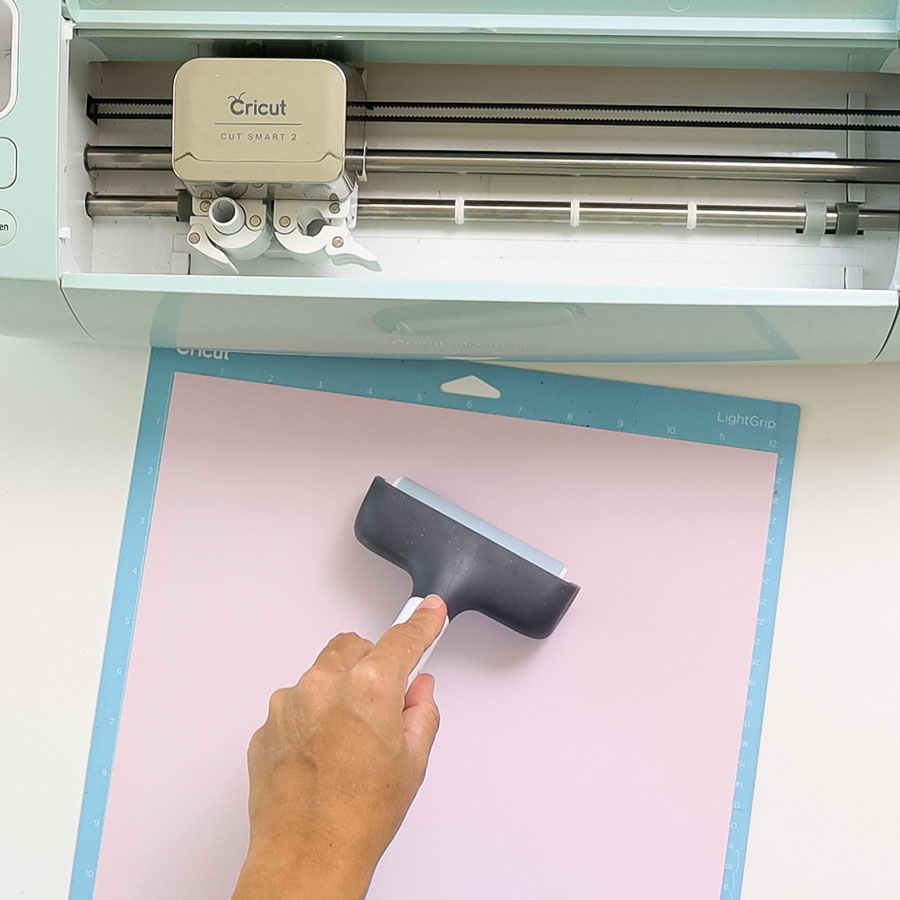
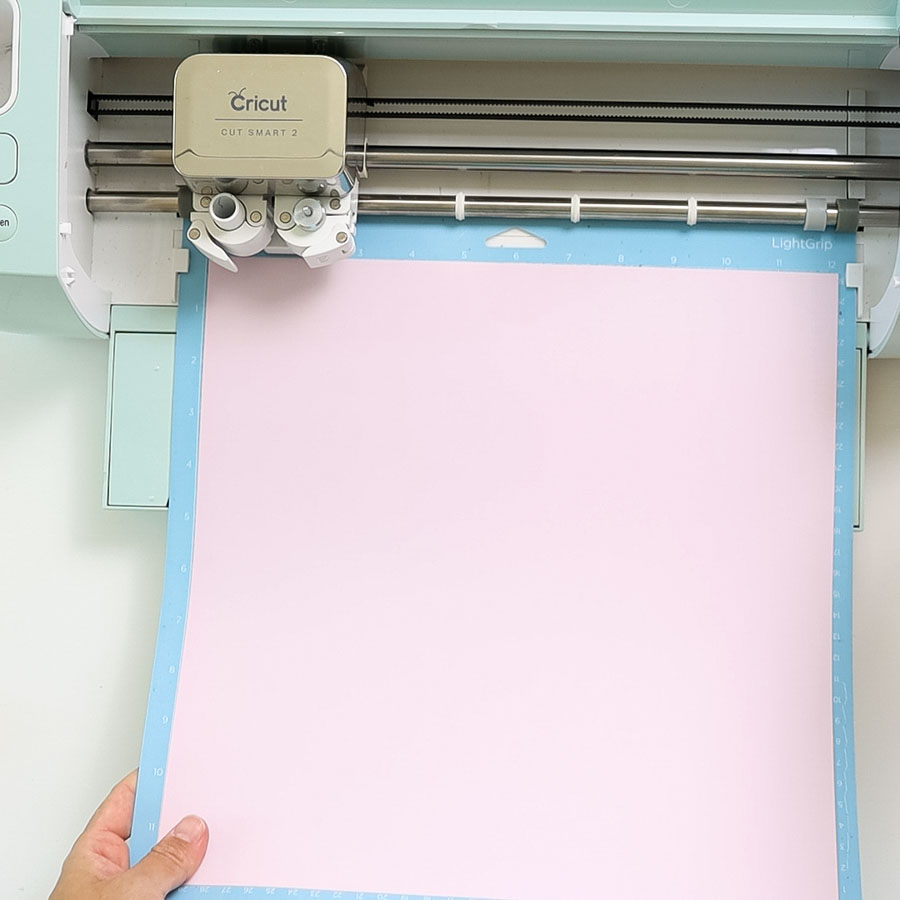
Since I used my Explore machine, I moved the “Smart Set Dial” to cardstock, then I installed the fine point blade, loaded mat with paper, and pressed the flashing go button.
You can also use this trick on your Cricut Joy or Maker (if you don’t have the perforation blade); the only difference is that you would choose the materials from Cricut Design Space.
When Cricut is done cutting unload mat, and remove the paper.
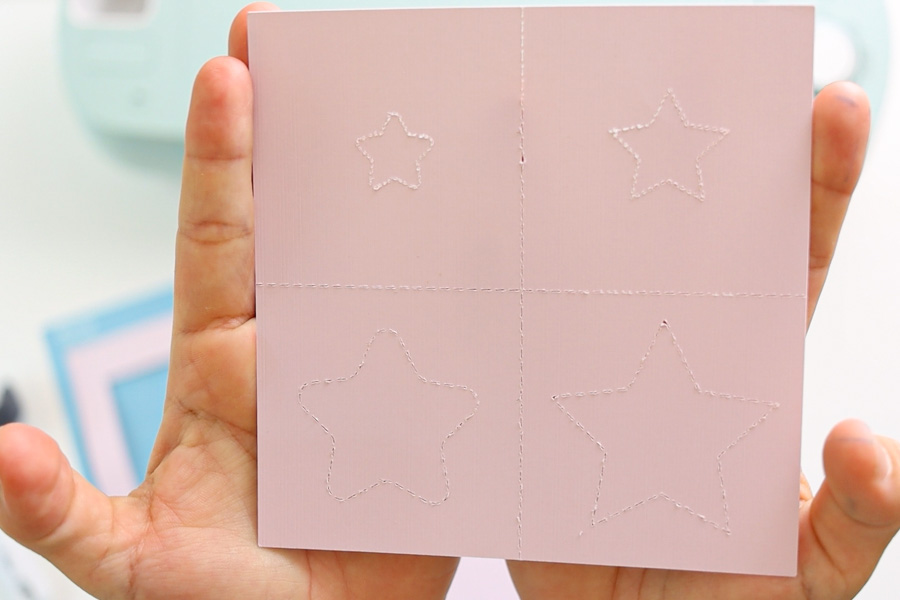
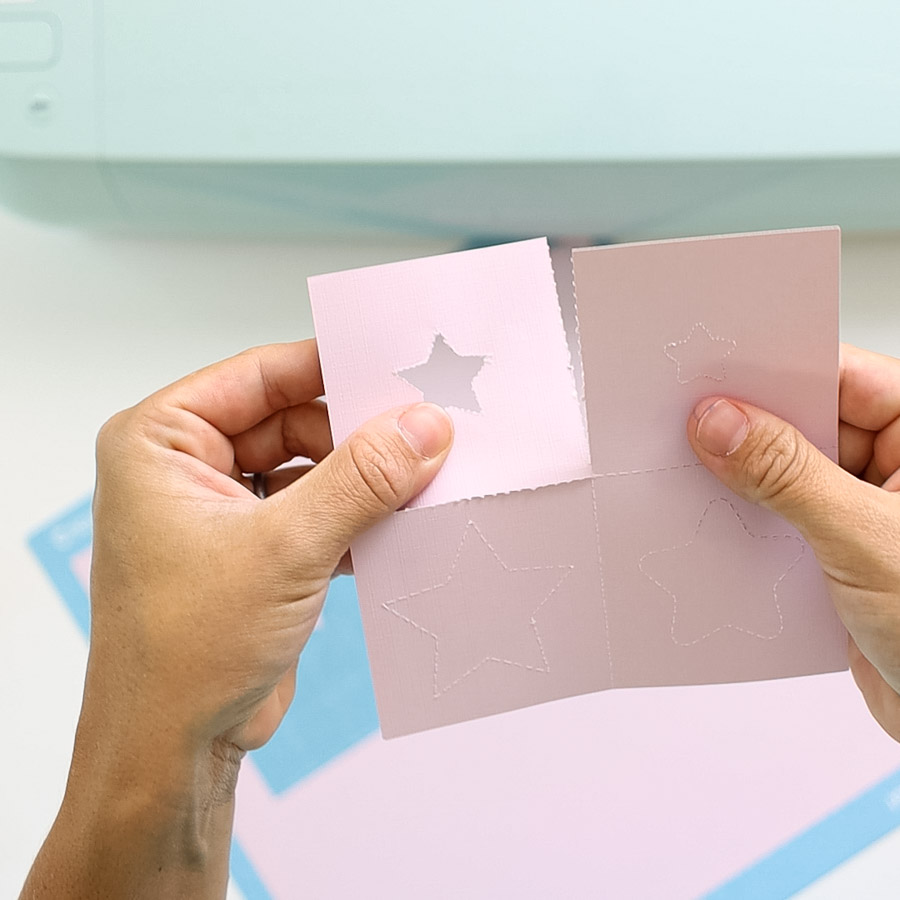
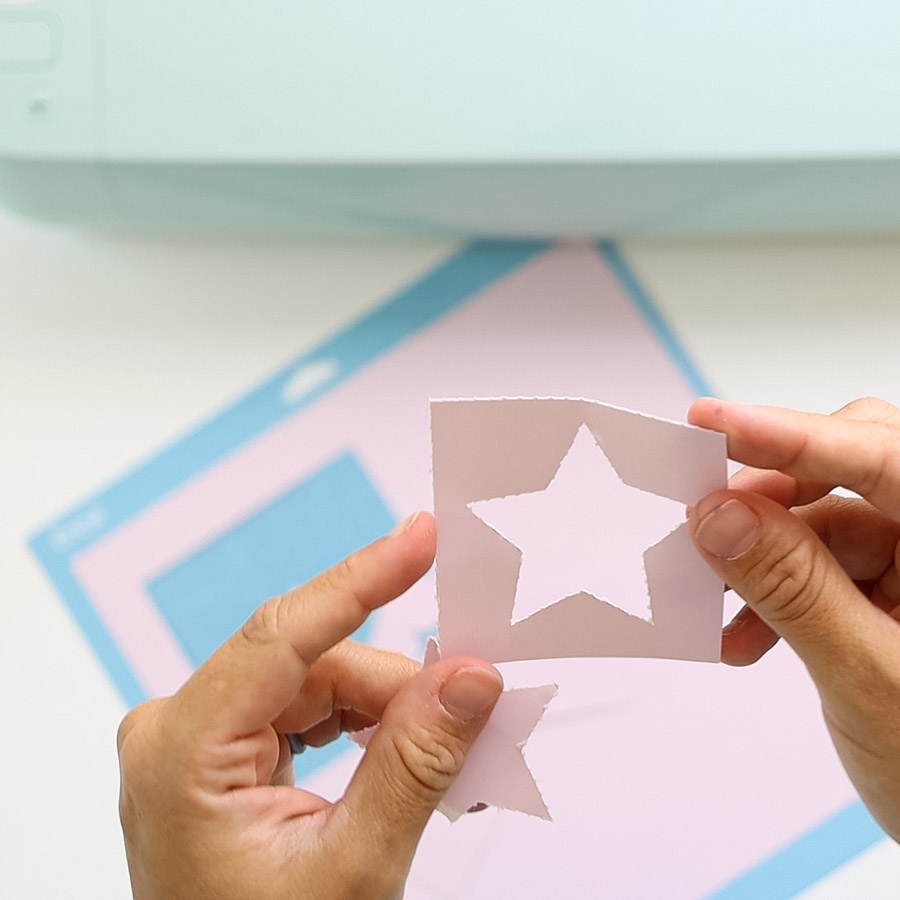
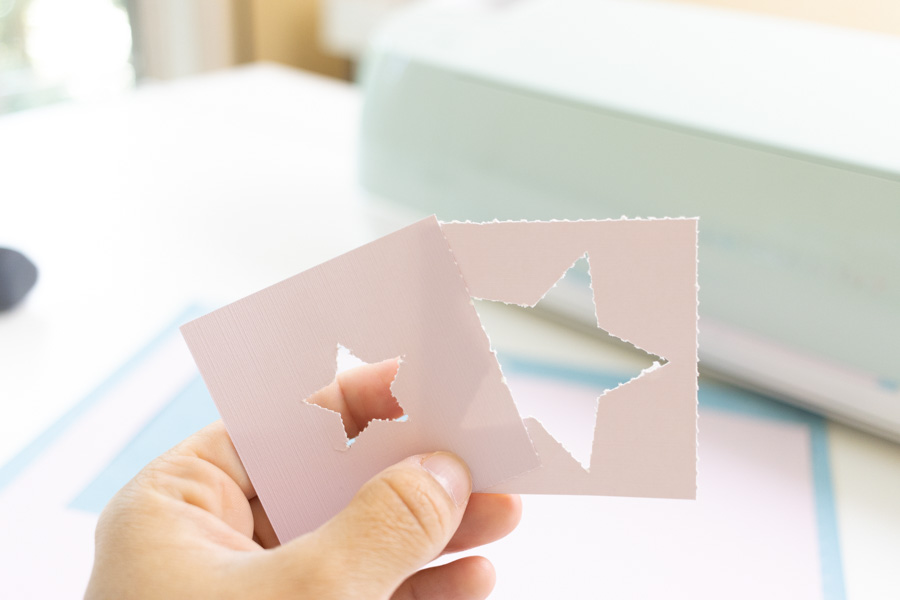
Notice all those perforation lines?
Look how little the lines are on the small stars because we resized them!
I encourage you to avoid resizing these lines and stick with the sizes on each file.
Make Perforation Cuts with Cricut Explore using print then cut.
You can also simulate perforation cuts using “Print then Cut.” Say hello to coupons, raffle tickets, and other cool projects you wouldn’t be able to do unless you had a Maker.
Note: Print then Cut only works on Maker and Explore machines. If you have a Cricut Joy, you can’t use this feature.
Let’s have a quick overview (I won’t repeat the same concept I mentioned on the preview steps).
First, start with your final project.
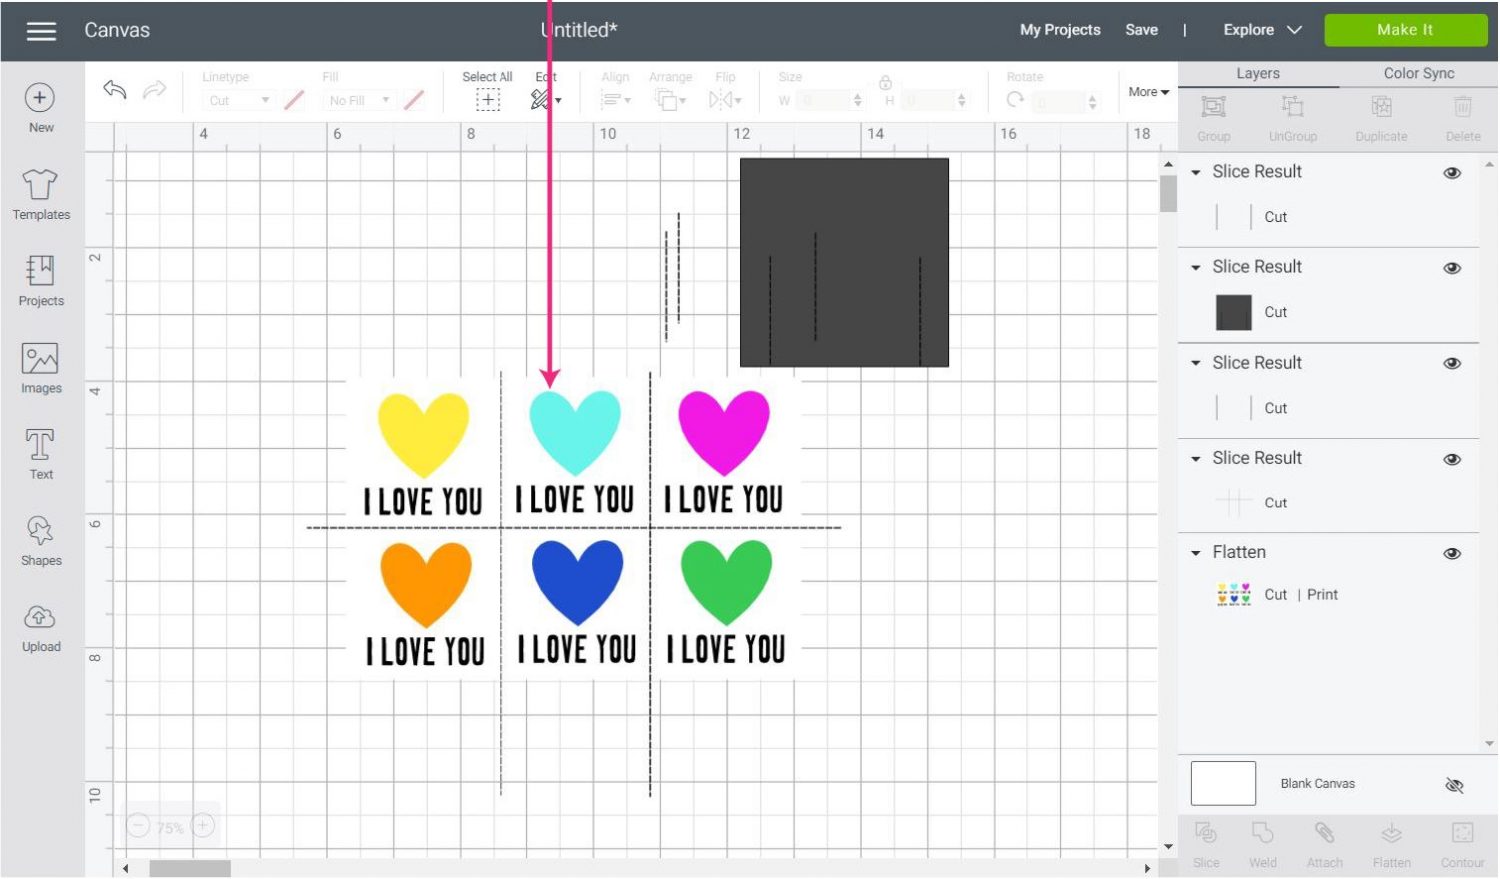
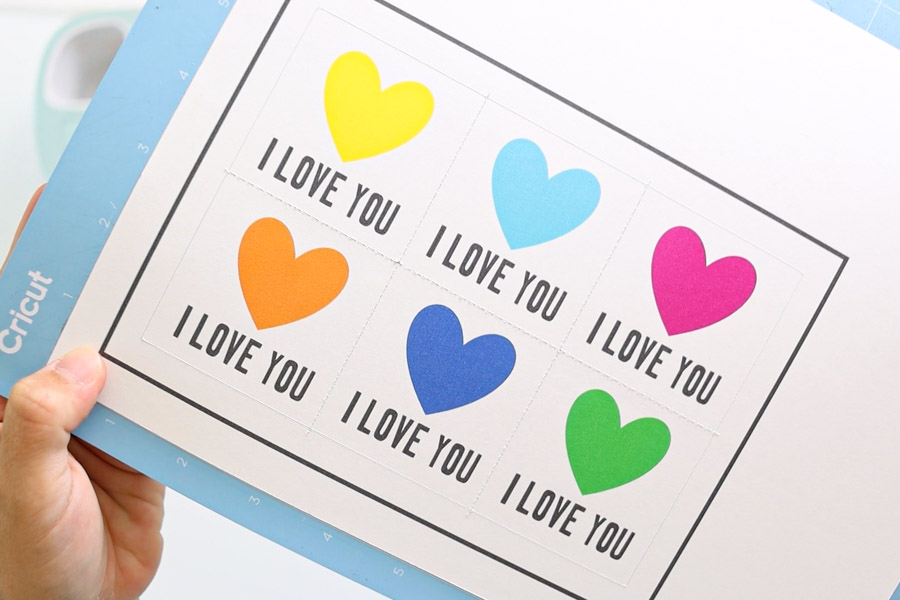
In this case, I have a page that I intend to divide into six equal parts with perforation cuts.
The “Print then Cut” file is already flattened, and I only need to tell my Cricut where to make the perforation cuts.
Something vital about using this trick with print then Cut is that the lines can’t be larger than 9.25″ x 6.75″.
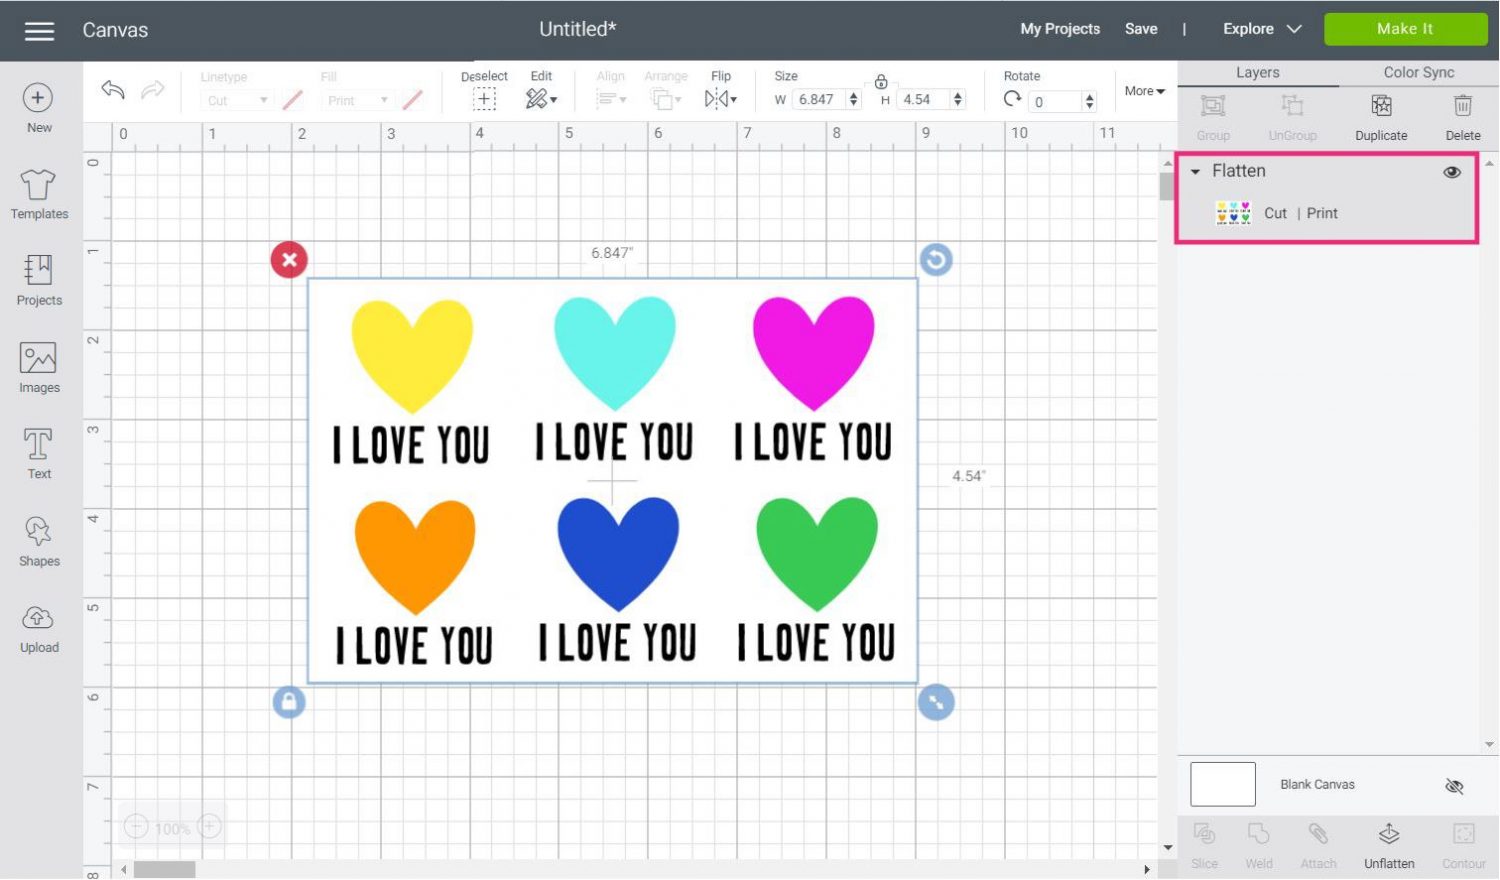
For this file, I am using the horizontal lines.
Upload, ungroup, and select the size the fits your project the best. For this particular test, I used the 8″ line.
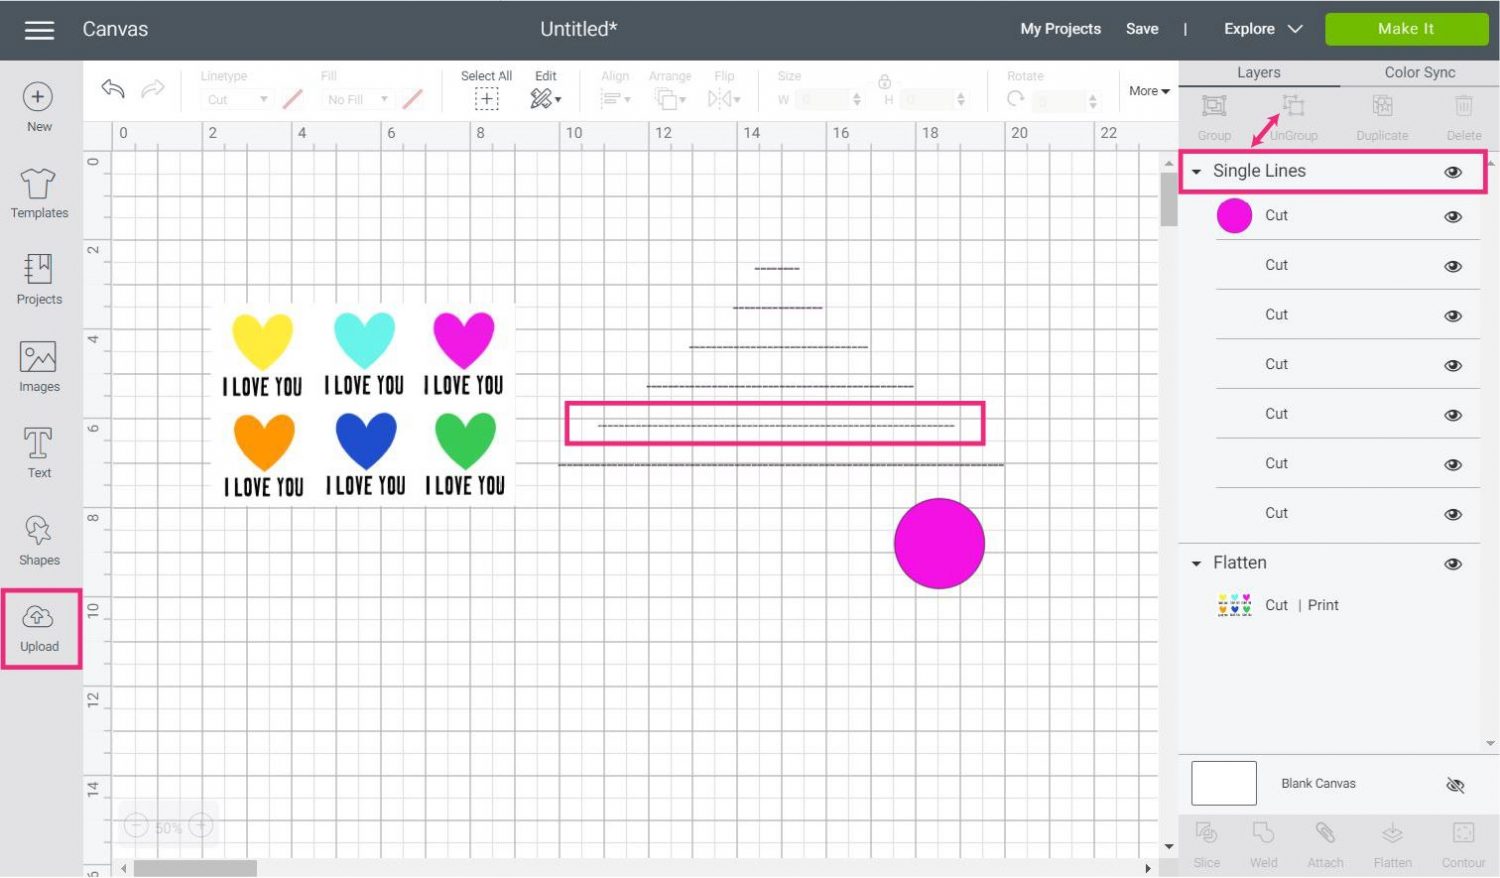
Duplicate that line twice and rotate both copies 90°.
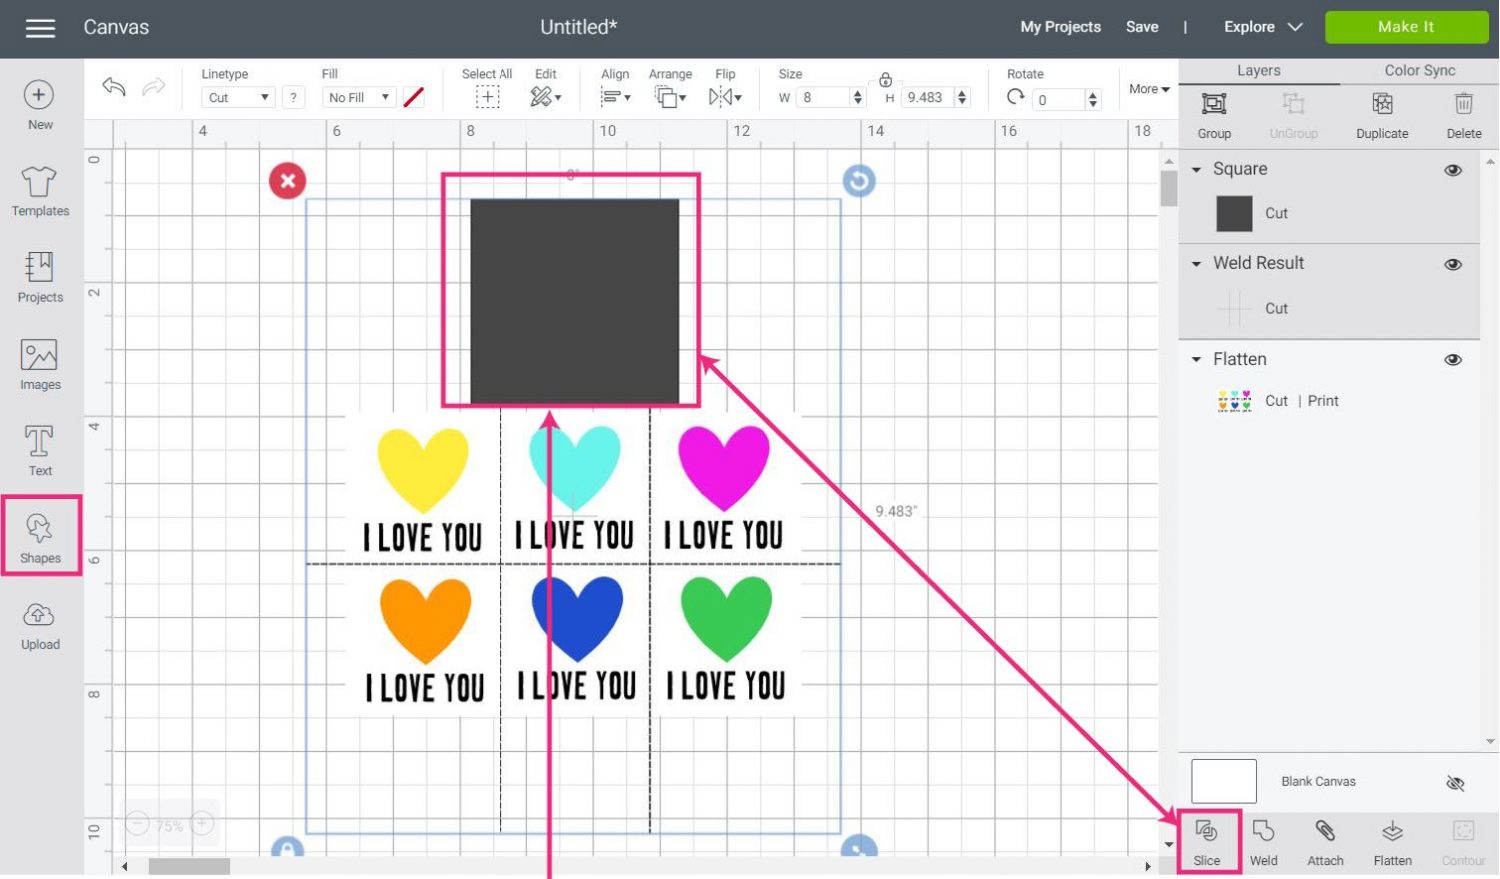
Arrange and distribute lines, so they look like the following screenshot.
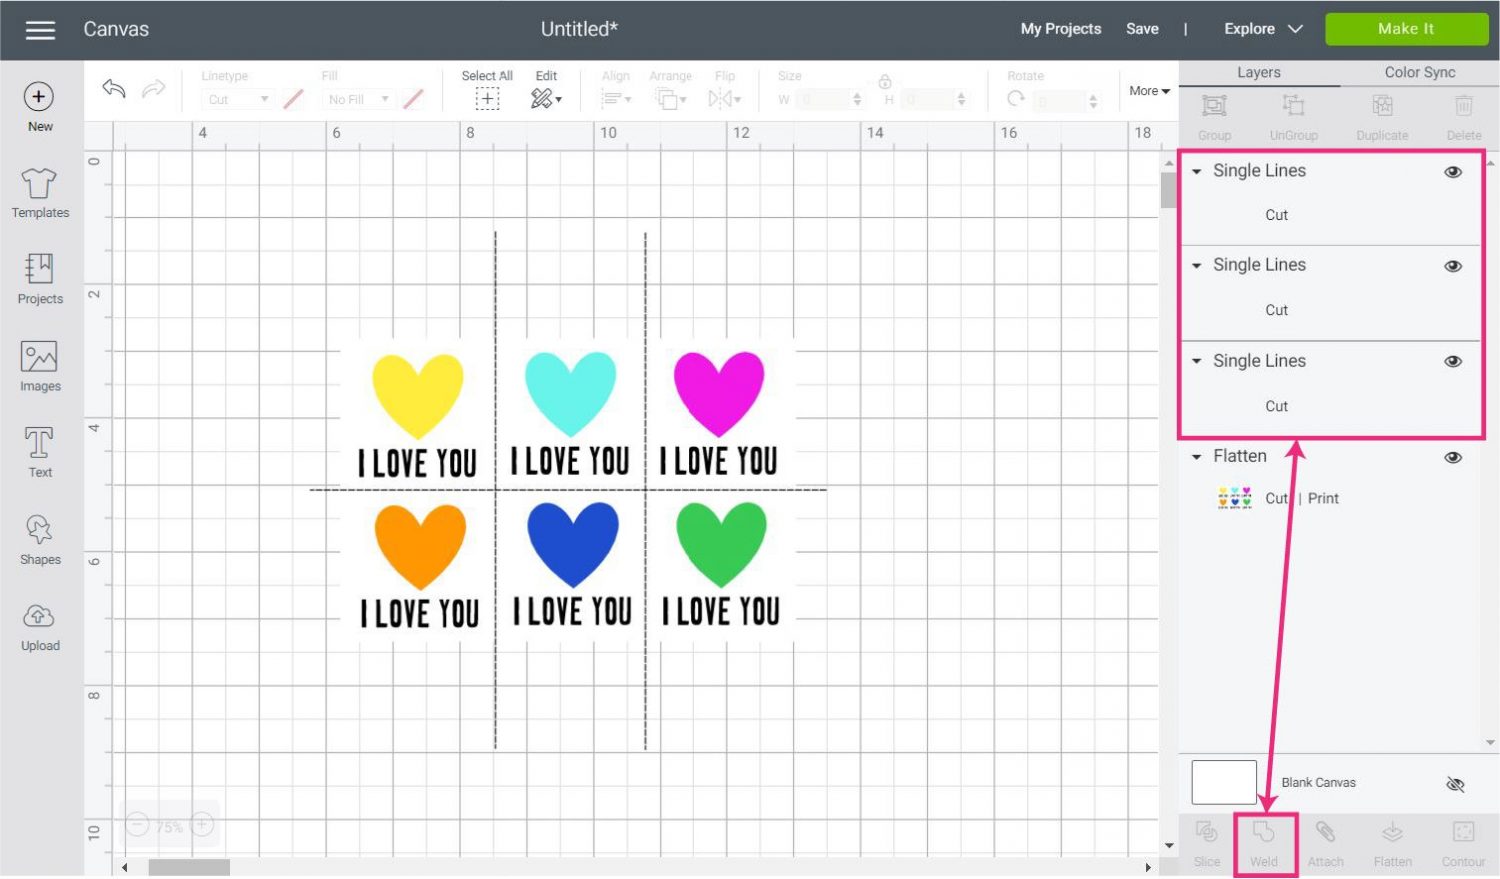
You must’ve noticed that the lines come out of the project, and I am sure you don’t want that!
To get rid of the excess, press Ctrl (Cmd on mac) at all times, then select the lines from the canvas area and click on “Weld” at the bottom of the Layers panel.
After welding, drop a square on the canvas and select it along with the lines on the top of the project (don’t select print, then cut image), then click “Slice” and delete the unwanted pieces.
You need to repeat this step on each side of the project.
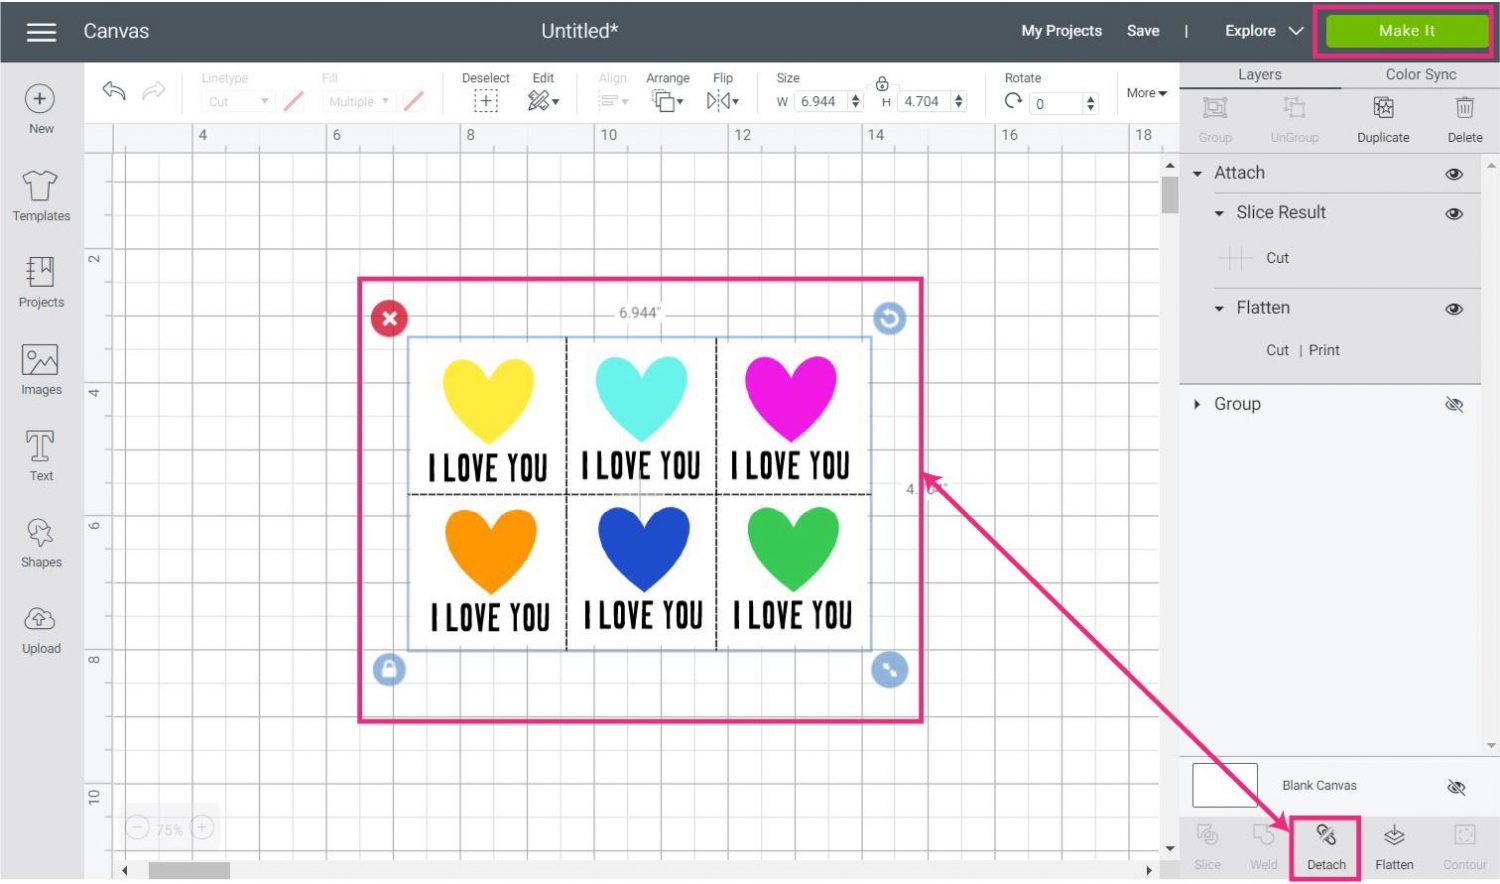
After you’re done, Slicing, select everything on the canvas and click on “Attach.”
When you’re ready to print then cut, click on “Make it.”
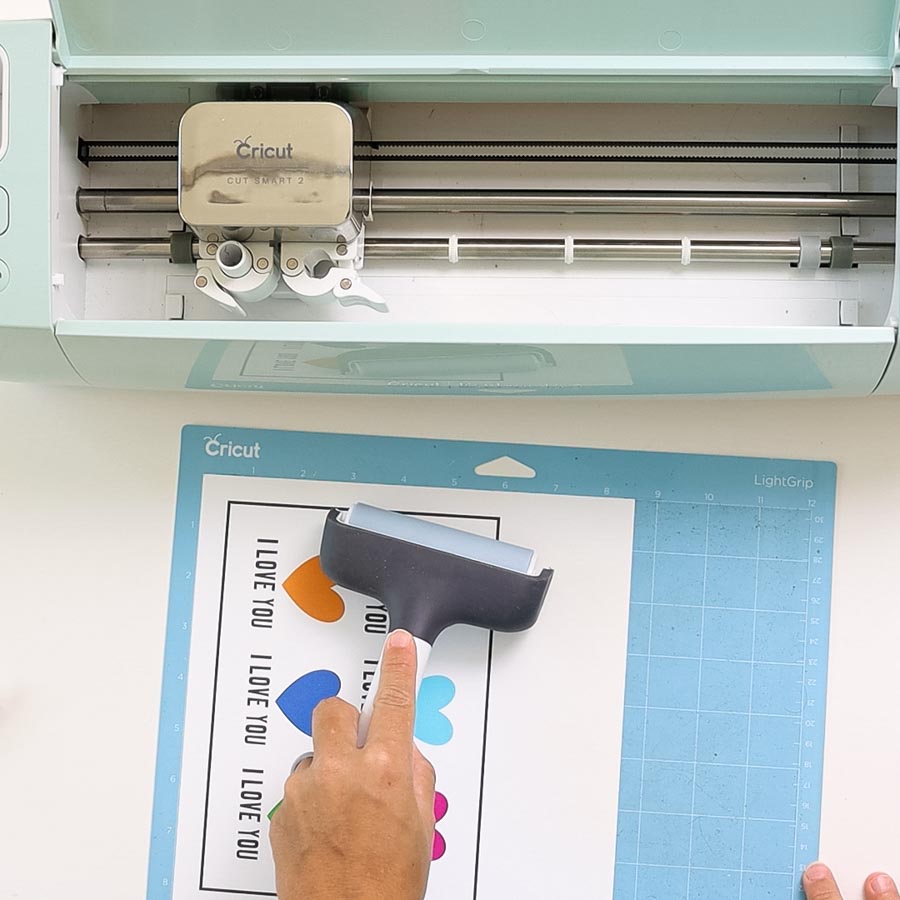
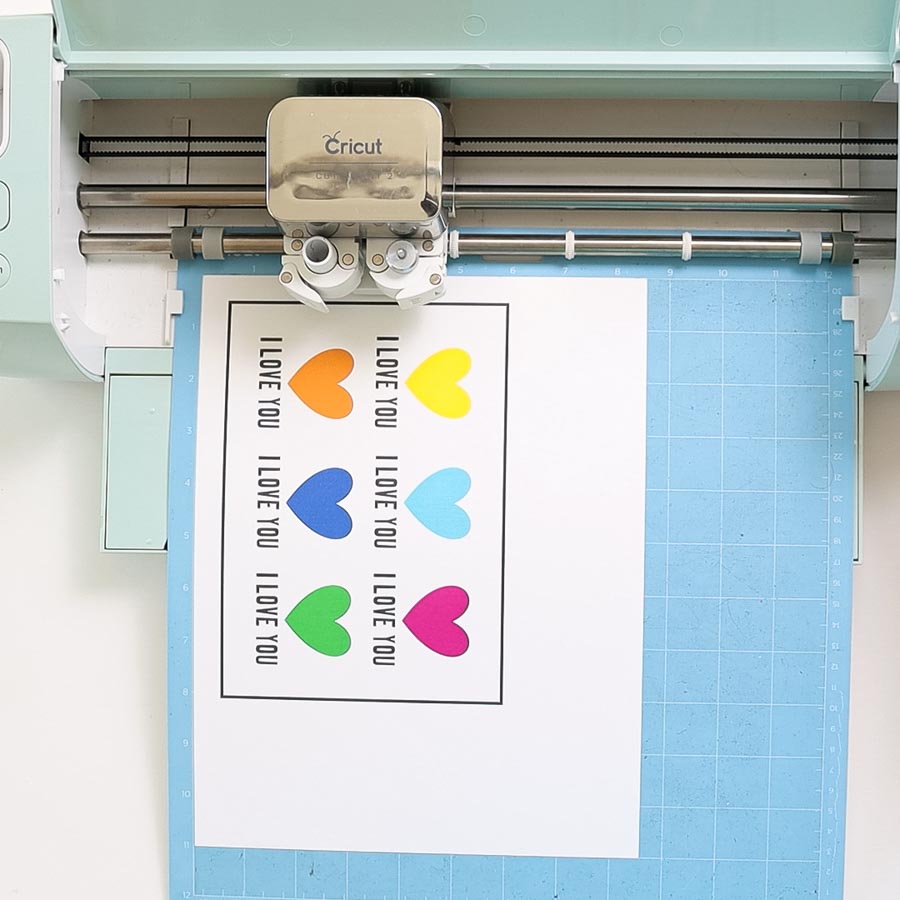
First, your Cricut will prompt you to print your project and then cut it.
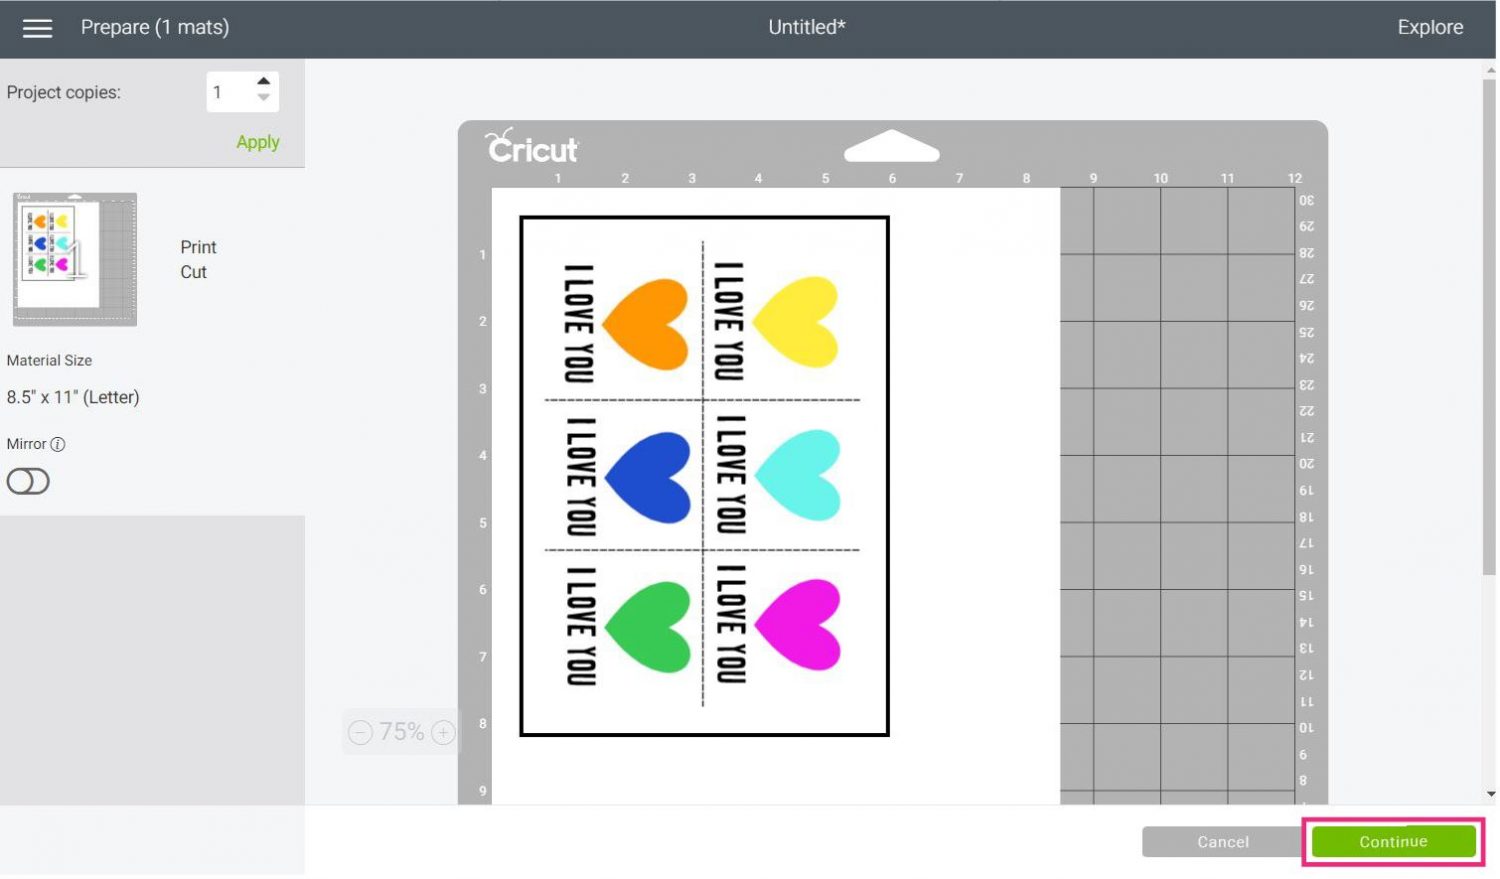
For this project, I used a white medium cardstock.
Remember, you can’t use colored or patterned paper with an Explore machine.
Look how nice and crisp those perforation lines look!
What do you think?
Are you going to try this trick?
Cons of Using this Method
Although this method is perfect for achieving beautiful and crisp perforation lines, I need to make you aware of a couple of things.
First, your Cricut will take a long time to cut a project with these tiny perforation lines. The purple square with stars took 7 minutes, and the print then cut took a little bit over 4 minutes.
I don’t know what kind of wear and tear this will have on your machine or your blade. If you plan on making perforation lines every day, consider investing in a Cricut Maker and a Perforation Blade.
Share it!
Do you know it takes me over 25 hours to complete a single Cricut article? I know it’s wild, but I want to make sure you understand everything!
I would appreciate your support on Instagram , Pinterest , and YouTube as I try to grow my audience and continue producing great content!





I’m new to all this Would this way work on cricut explore air 2 I’m wanting to make A3 size advent calendars with 24 perforated squares/rectangles on 300gsm cardstock
I don’t see why it wouldn’t work. Just make sure to follow the tutorial.
thank you for all the time you have spent doing something I wanted so bad….
You are a lifesaver! You saved my Christmas decoration box! Thank you so much!
THANK YOU so much! Last christmas I got the Explore Air 2 as a gift and was sad that I could not usw the perforation blade. Looked for an alternative for so long and finally found a solution here.
Thank you so much. I’m a beginner with the Cricut Joy and even I was able to follow your instructions. I also want to thank you for doing so much work to figure out how to make perforations with a regular blade and then sharing them for free!! You’re very awesome.
Thank you so very much!!! You are so sweet to share your creations, ideas and knowledge. I have subscribed and followed you on social media. Again, THANK YOU SO MUCH for sharing ????
THANK YOU THANK YOU THANK YOU!!!!!!
You are a genius and amazing!! Thank you so much for sharing this with all of us!! MAking so many fun gifts for our teachers!
You’re very welcome 🙂
Hi, I’m having the same problem with downloading the perforation lines. When I clicked on download, it opens, but there was no download.
Thanks,
Marisa
I’ve double-checked, It’s working! I hope you could download it.
I found your site when I was searching for perforations using the Joy. Thank you so much for sharing your genius.
Going forward I will follow you in Pinterest and share whenever possible.
Be blessed and again, thank you.
MsBee
Jackson, MW
You’re very welcome 🙂 I am happy I can help!
Hello,
I tried to download the perforation lines, and squares. When I clicked on download, it opened, but there was no download. I went to see if they were in the library, but I could not find them.
Thanks,
Joan
They aren’t on the library because they maybe confusing for people that don’t know what they are. If they open in other window right-click on them and select the option “Save image as.”
@Catalina, I was having the same issue as Joan. When I click “Download SVG” it brings it up in a new window. I then tried the “Save As” option, but it only lets you save it as a JPG, not an SVG. Any suggestions?
Also, I’m so glad you posted these! I’ve been trying to figure out everywhere how to perforate lines without a perforation blade. Thank you!
I just double-checked and there was only one file that had the JPG file. The first image! Sorry, I just corrected it, and if it opens on a new wind select “Save Image as.”
@Catalina,
Hi, I wrote a comment on July 19th and it’s still pending and I don’t think I’ve received an email yet. It was about the download link not working for the first perforation lines. None of the are working for me but all I need are the straight lines. When I click on download link it opens but there’s nothing to click on to download it. I’ve seen other comments with the same problem. Can you please help me?
Thank,
Marisa
Hi Marisa, the file is working. Sometimes files will open in a new window depending on your browser setting.
If that happens to you right click on the image and select save options as.
SVG files will save as a html file.
It wasn’t working and I took a look and I fixed back then. I just double checked and it’s there for you to download!
@Catalina, Thank you for the speedy reply and it works now! Yay, I’m excited to use it! Thank you! 😀