Hi Daydreamer!
Every day is a good day to learn, and today we are going to compare the Scoring Stylus against the Scoring Wheel.
Before we dig in let’s see a quick review of what these tools are.
Both, the Scoring Stylus and the Scoring Wheel, are accessories you can use with your Cricut Machines. They allow you to make folds on different types of materials like paper, cardstock, poster-board, etc. If you enjoy making boxes, cards, or other type of projects that require you to make folds, then; these accessories will make your life extra easy and also fun.
Here’s the thing, although the Scoring Stylus can be use with any of the Explore Family Machines and the Cricut Maker; the Scoring Wheel can only be used with Cricut Maker.
Make sure to read this article, If you want to learn all of the differences between the Cricut Maker and the Cricut Explore Machine.
On this post I will be covering all of the differences between the Scoring Stylus and the Scoring Wheel. I am also going to show you some pictures of how the score lines look in different types of materials, so you can make and informed choice of which accessory you need.
This is NOT a tutorial of How the Scoring Wheel works in Cricut Design Space. If you want to learn how this tool works check out my completely guide and step by step tutorial.
Are you ready?
Let’s get started!
Differences between Scoring Stylus vs Scoring Wheel
Although, the Stylus and the Wheel have the same purpose – make folds – they both look very different.
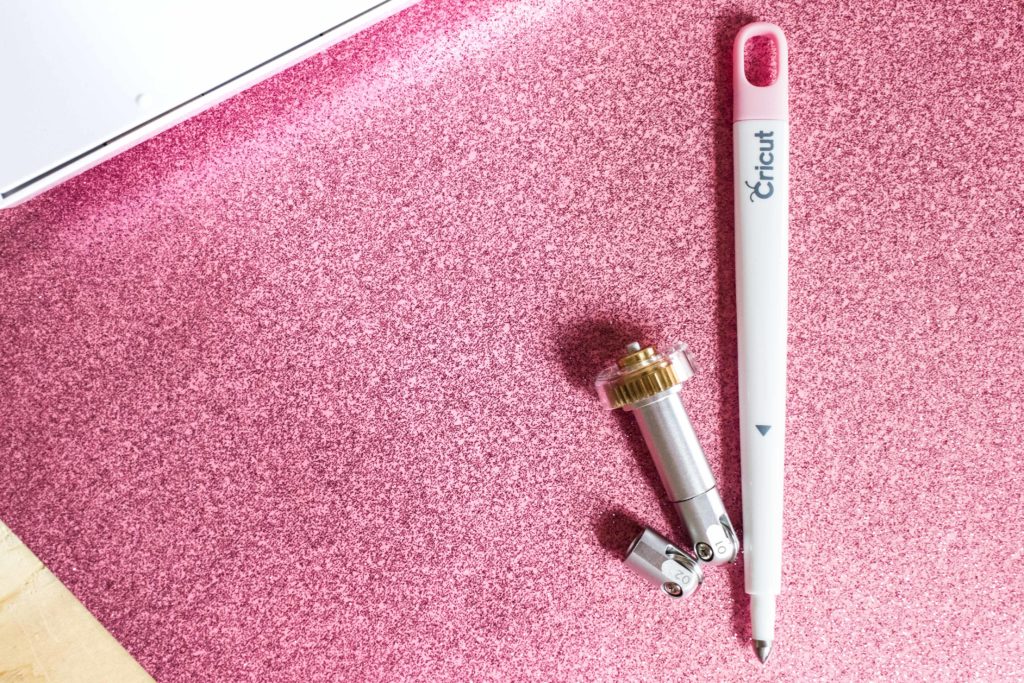
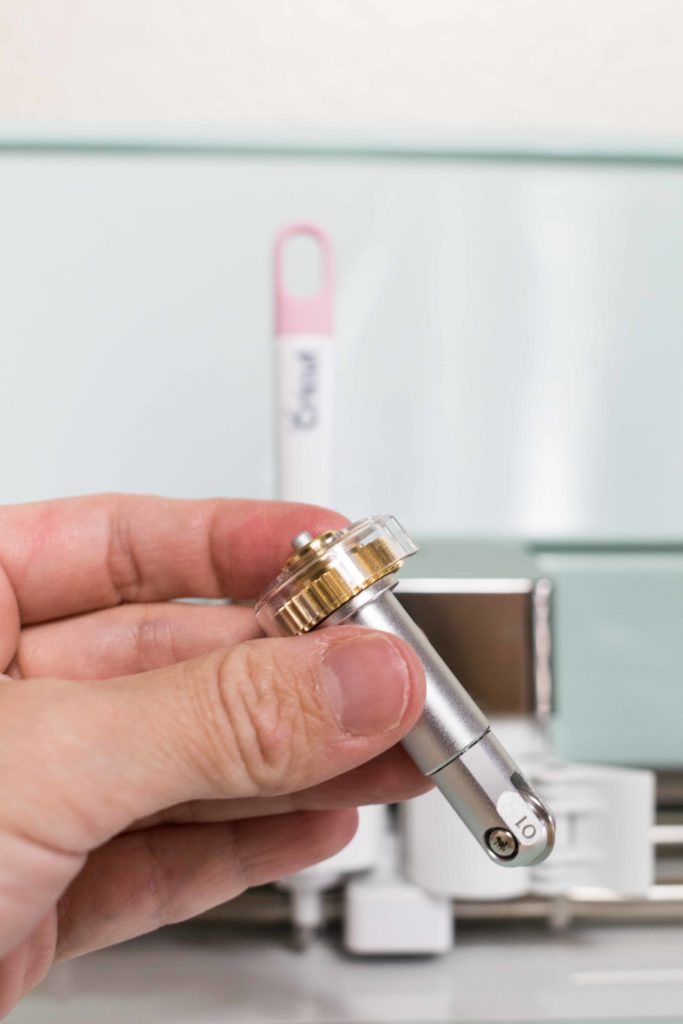
The Scoring Stylus looks very similar to other Essential Tools – weeding tools, spatula, etc – that Cricut has to offer. However, the Scoring Wheel looks very similar to a blade.
Something extremely cool about the Scoring Wheel is that it has two different tips that you can use. 01 for light materials like cardstock and regular paper and 02 for thicker materials like poster-board and chipboard; 01 stands for Scoring Wheel, and 02 stands for double scoring wheel.
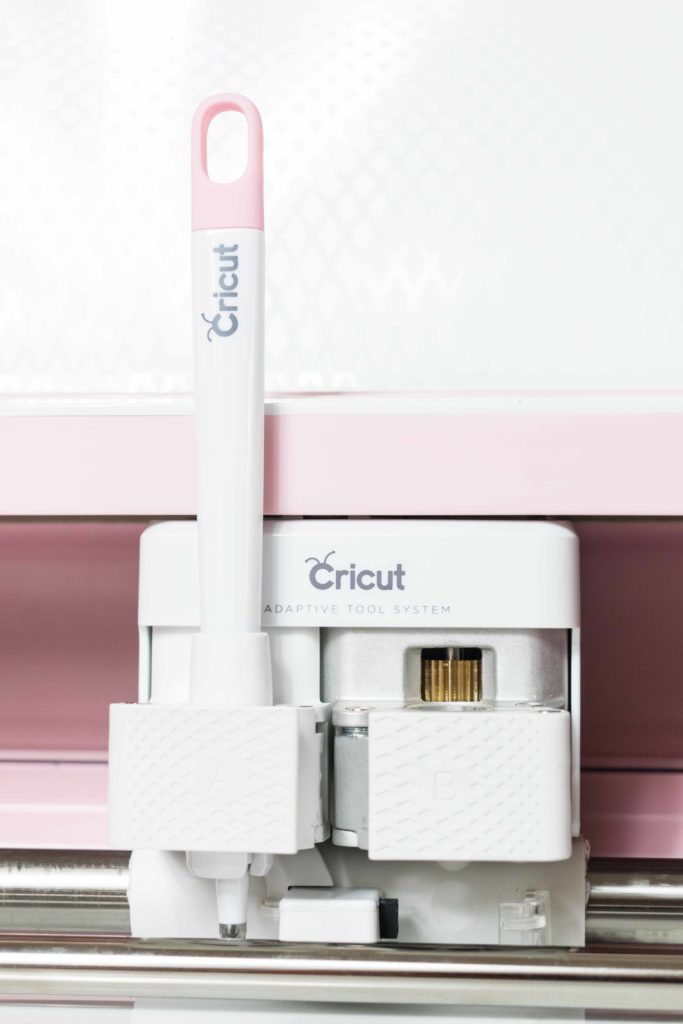
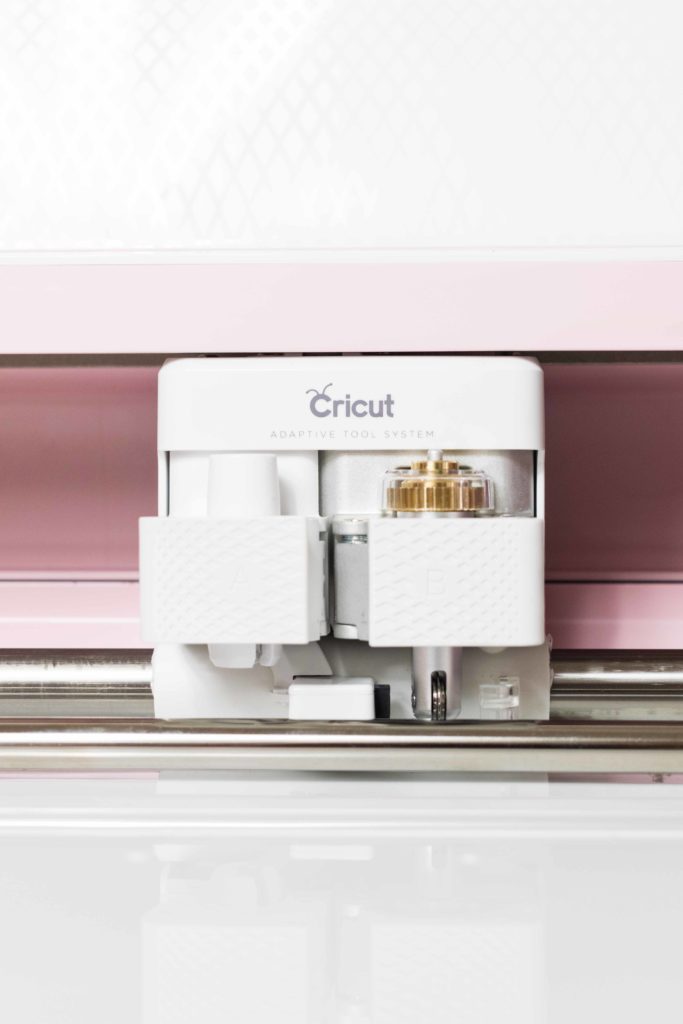
All Cricut Machines, except for the Cricut Explore One, have two tool holders or clamps. Clamp A is for accessories, and Clamp B is for Blades. The Scoring Stylus is always used with Clamp A and this is why you can use it with any of the Cricut Machines.
However, the Scoring Wheel can only be used on Clamp B. Here’s the caveat; though, just like the knife blade and the rotary blade the Scoring Wheel was built with Cricut’s new technology, the Adaptive Tool System.

Scoring Stylus Clamp A Scoring Wheel Clamp B
The Adaptive Tool System controls the direction of t the new blades and scoring wheel at all times. In fact, This technology is so amazing that it can adjust the pressure of the Scoring Wheel to match the materials you are working with!
That’s why, the Scoring Wheel has 10X the strength and power than the Scoring Stylus has. Therefore, by using the Scoring Wheel you are going to get extra deep and extra sharp score lines.
Awesome Right?
Scoring with different Materials
Now that you’ve learned the differences between the Scoring Stylus and the Scoring Wheel let’s see how they both work on different materials.
For this comparison I will be using the following Materials and using both the Stylus and Scoring Wheel (01 and 02).
- Colored Construction Paper
- Colored Cardstock
- Craft Board
- Metallic Poster-board
- Corrugated Paper
- Craft Foam
In total we will have 2 materials for light, medium-weight, and thick materials.
Note: If you have the Scoring Wheel, Design space will always show you what tip is recommended. However, I decided to try with both tips just so are able to see how each tip would look and all of these materials.
On some of the materials – the ones that Made sense – I also scored a star on top of the design. Sometimes you would want to score other elements, not just just lines.
Right?
Let’s see the results!
Beforehand, let me apologize for the way some of these photos look. In order for me to show you the score lines I really had to decrease the exposure and brightness of some of the photos. They don’t look as pretty; However, my commitment to you is far superior than just having pretty photos. 🙂
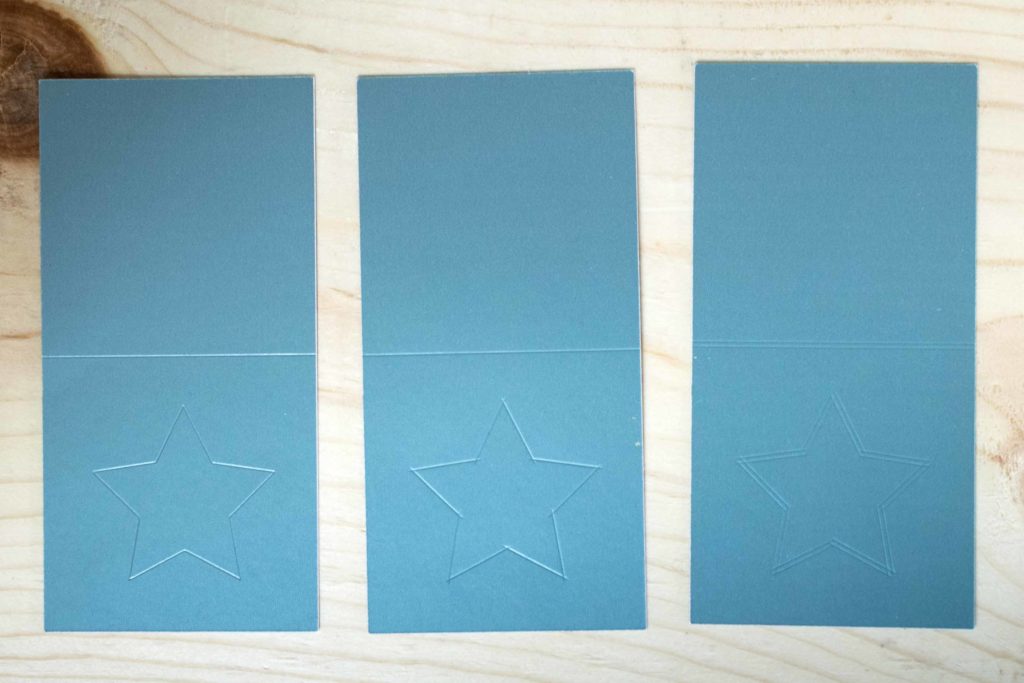
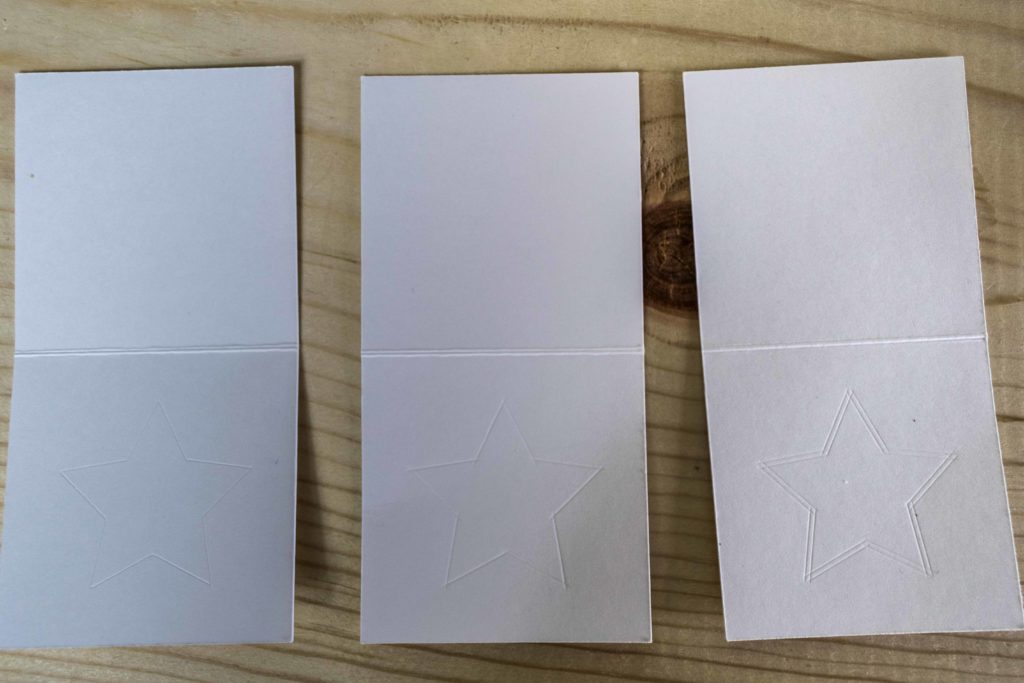
Colored Construction Paper & Cardstock
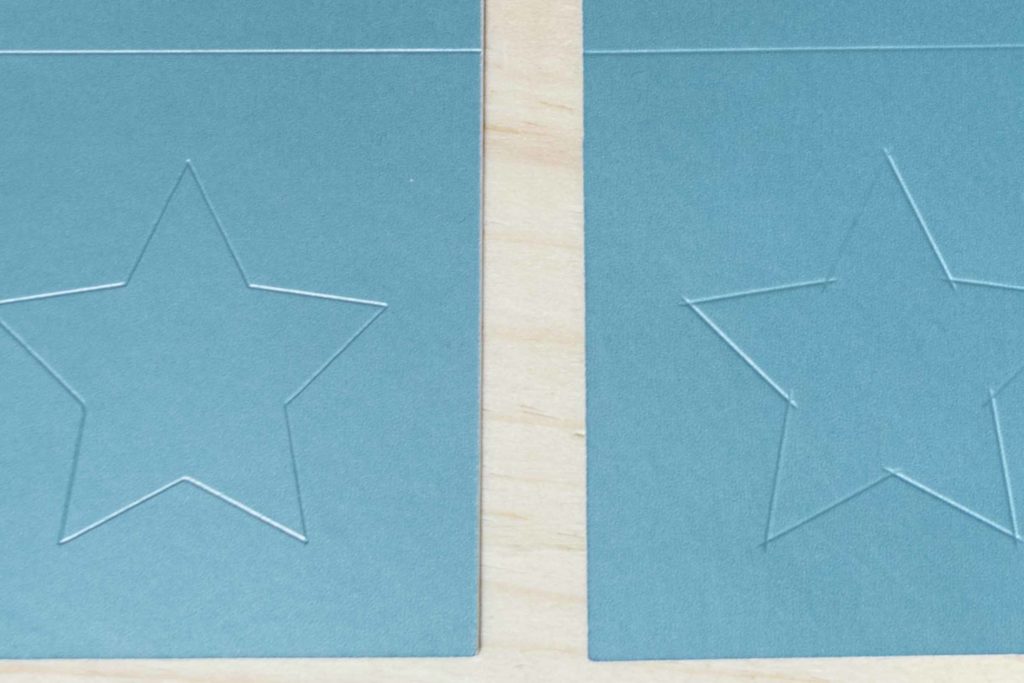
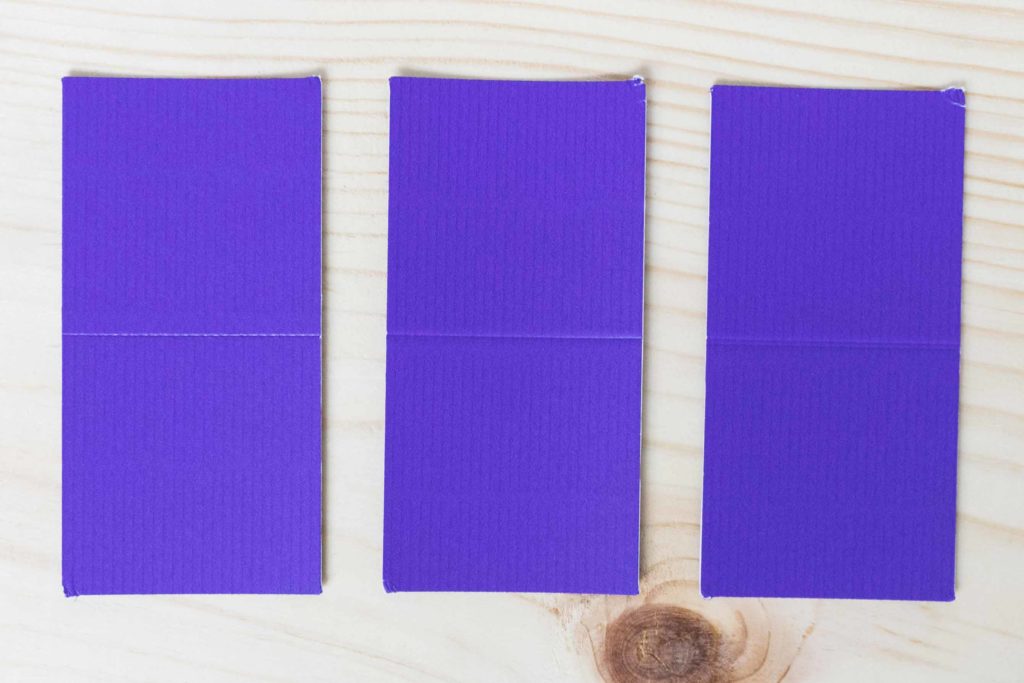
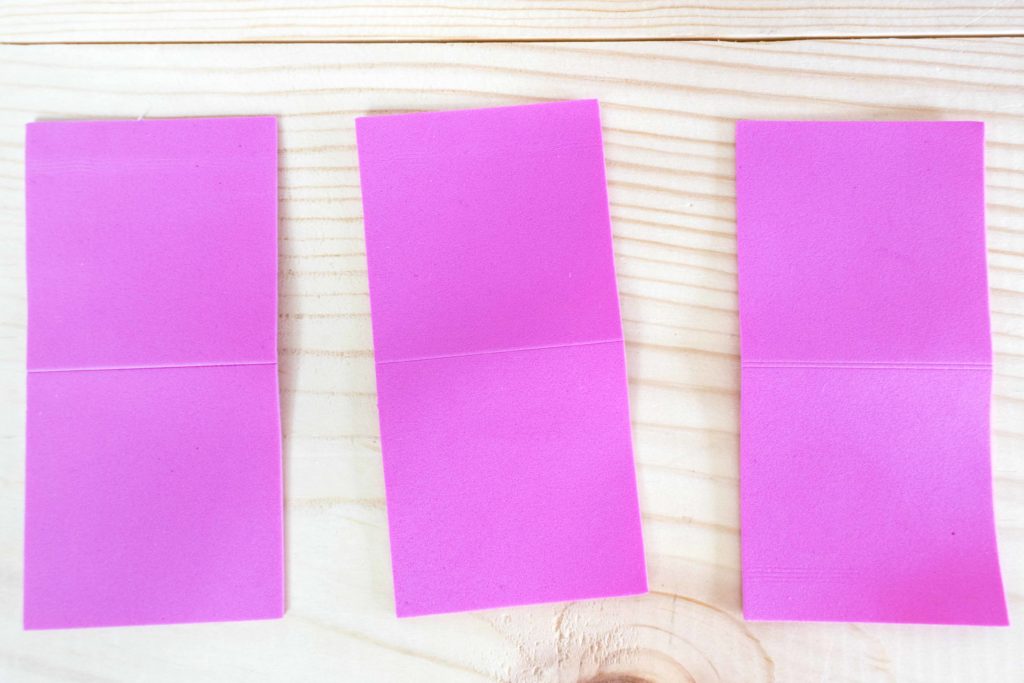
For thin materials you can barely see any difference in the depth or smoothness of the scoring line. Honestly they seem pretty much the same. However, if you look at the stars, you will see that the lines that make up the star with the Scoring Wheel 01 are overlapped.
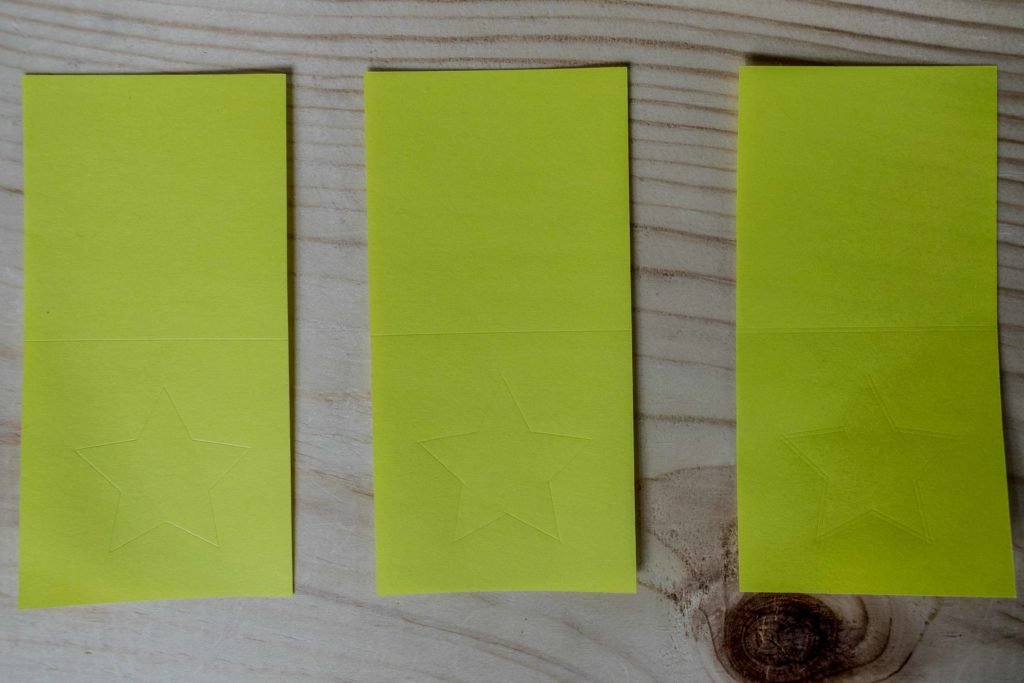
This is a little disappointing actually, but it’s totally understandable. You see, the scoring tip is driven by the Adaptive Tool System therefore it makes sense for some overlapping in the score lines. You will be able to see this difference in our next materials.
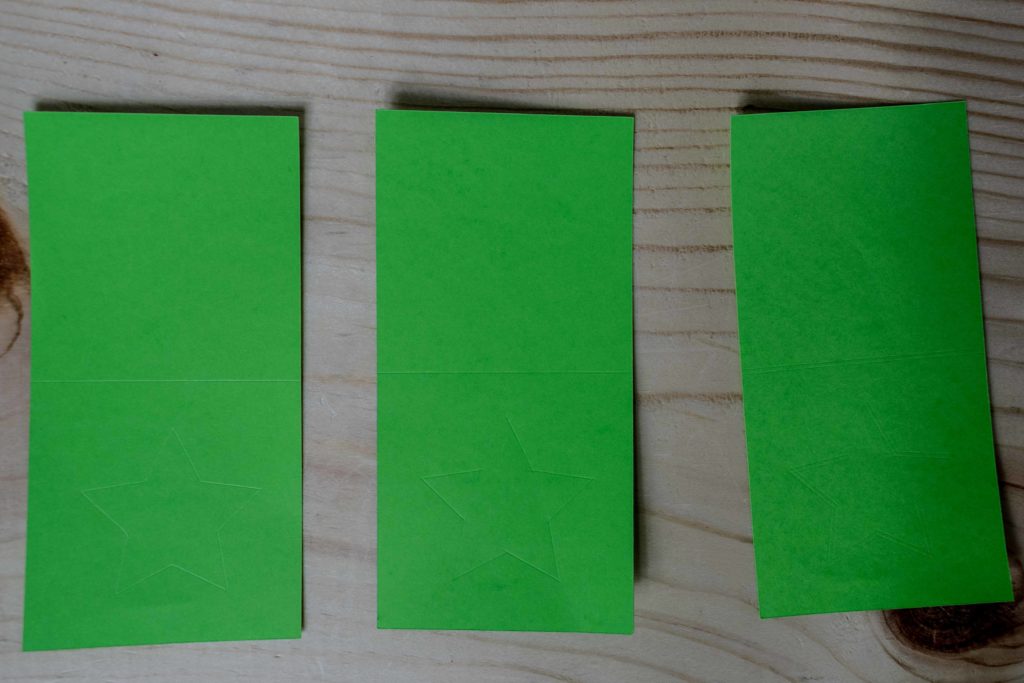
This overlapping doesn’t happen with the Scoring Stylus because there’s no driven process and every line is made in a single stroke.
Craft Board & Metallic Poster – Board
For these two medium weight materials I started to see some differences. As you can see, the score lines look somewhat smoother than the ones made by the Scoring Stylus.

Stylus, Wheel 01 and Wheel 02 in Order – Metallic Poster Board
Stylus, Wheel 01 and Wheel 02 in Order –Kraft Board
The Stars I made with the Scoring Wheel where also overlapped, but they do look smoother than the ones made by the Scoring Stylus.
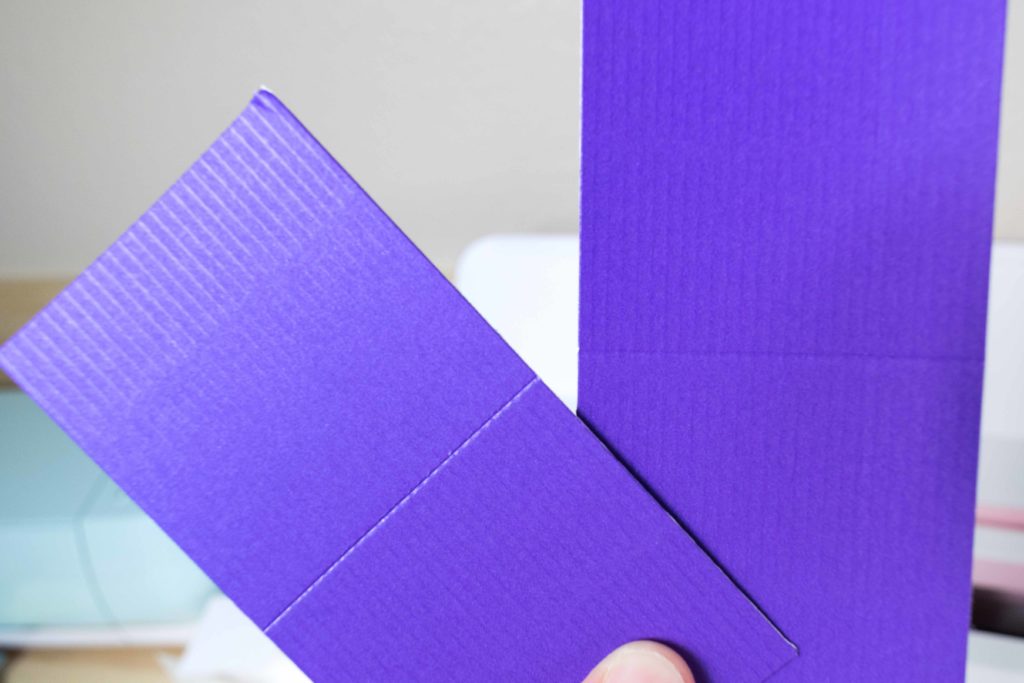
Now let’s look at how the Metallic Poster Board behaved when I folded it. Here’s is where you can see why the wheel is so powerful.
Materials that are coated like Glitter Cardstock and or Metallic Poster board tend to crack on the folding process. When using the wheel with the 02 tip you create a two scoring lines that will make the folding process way smother.
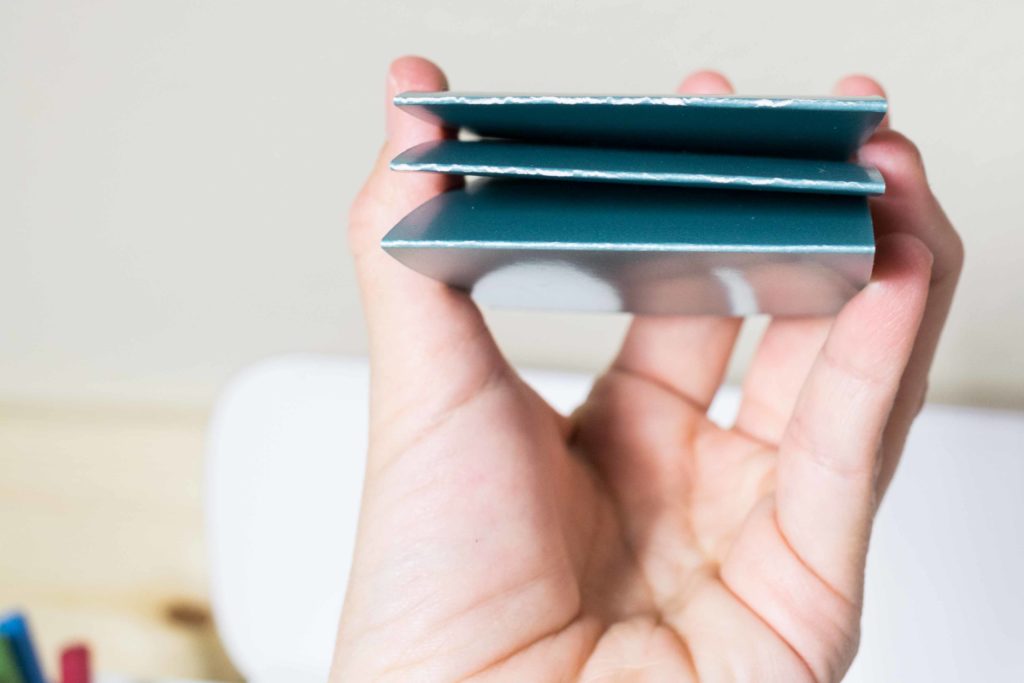
Notice how much the Metallic Poster Board cracked with the Stylus. It even cracked with the 01 Tip. However, look the fold with the 02 tip! It’s beautiful.
Corrugated Paper & Craft Foam
For these two relative thick materials I decided not to score the star I stuck with the horizontal score line.
Finally, with these thick materials – specially the corrugated paper – I was able to notice the difference in quality and crispiness for the score lines made with the Wheel.
This is what makes the wheel a one of a kind tool!
The Scoring Stylus was very tough with the corrugated paper and Craft Foam. Believe or not, this doesn’t surprise me at all.
Think about it!
The Stylus works by exercising pressure on its – pointy – tip. So, it’s expected that when you are working with thicker materials, the pressure of the stylus will be concentrated on a tiny point.
However, with the Scoring Wheel the pressure is well distributed across of the 01 and/or 02 tip. And, in my opinion, this is what makes the scored lines look crispy on thicker materials.
Which one Should you the Scoring Stylus or the Scoring Wheel?
I think the Scoring Stylus is a must have at all times. It’s so affordable, and you can create so may cools with it, that it does’t make any sense for you not to get it.
Now, the Scoring Wheel is a more expensive accessory. You can get it with just the 01 Tip, or as combo with both tips.
Compare Prices: For all of the scoring tools here
The decision of you getting the Scoring Wheel depends on what materials you are going use. As you just saw, when I used the Stylus and the Wheel on Light and Medium weight materials, the differences were very little.
Yes, it’s easier to fold when you score with the wheel, but not in a way that will leave you in disadvantage.
If you are planning on working with thick and coated materials, like the ones I used on this post, and or chipboard I highly encourage you to get the Scoring Wheel with both tips. Cricut Materials can be quite expensive and if you re planning on doing multiple projects you want optimal results every time.
I didn’t have chipboard on hand, but I am sure if I had used the Stylus instead of the Wheel I would’ve totally scratch it. You don’t want this to happen to you.
Note: Remember that the Scoring Wheel is only compatible with the Cricut Maker, so if you have any of the explore family machines, you can only use the Scoring Stylus.
Pros and Cons
While doing these comparisons with the Wheel and the Stylus I got a couple of mixed pros and cons that I would like to share with you:
- I love that with the Scoring Stylus you can Score and Write without extra intervention – you can set it and forget it – Since the Scoring Wheel goes on Clamp B – where all blades go – you need to change it and babysit your project till is done is scoring.
- The Scoring Wheel will work great on any type of material. However, if you have very intricate score lines – like the stars I showed you above – the folds will overlap each other.
- The Scoring Stylus works wonders to trace and score intricate designs. However, you are limited by the types of materials you can use. It works wonders with light and medium well materials, but not so great on thick materials.
What do you think?
Which tool is right fit for you? The Stylus or Wheel?
I can’t wait to find out, so make sure to let me know on the comments down below.
I love when I have comments ❤ I feel like I am not talking to the wall lol!
Oh!
Just so you know, I also have a library full of free SVG files and Printables for all my subscribers, a.k.a. Daydreamers. You can see a preview right here or get access by filling out this form.

Has anyone substituted the debossing tool for the scoring wheel? I don’t have either tool, but was wondering if the debossuing tool could be used for (sorta) scoring purposes. I just don’t know how wide of a path the debossing tool tool leaves, so I’m wondring if it’s too wide, or if the trough from debossing is deep enough. Let me kn ow your thoughts?
Thank you so much for this! It was incredibly helpful. I’ve never really known the difference between the stylus and the whee and this made it clear that I don’t necessarily need the wheel for the crafting I do! Thanks again!
Thank you so much for taking your time to put this together. I haven’t made my box yet, but shortly I will be using the wheel. You are a wonderful person for sharing this with everyone. Have a wonderful 2022 Holiday season!
I keep trying to use my scoring stylus but have terrible results, it gouges and tears my cardstock nearly every time even with simple envelope scoring. I’m so frustrated. It’s a new maker and has good mats/blades. I’m thinking the wheel will help. Have you had this issue?
What type of cardstock are you using? Only once it did this to my paper, other than that it works just fine.
thank you for putting this together!
It was nice to read and comprehend the post at my own pace rather than having to rewind constantly to listen/understand. Super helpful explanation! Thank you!!
Thank you so much!
I’m very new to the game so need all the help I can get!
Just got my machine yesterday and I’m still sitting looking at it in awe! Scared shitless to use it!????
Will start with making some envelopes/cards to build my confidence…I’m stop with my stylus for now! ????????
Keep writing my friend! ????????
What an awesome article. No fluff, just straight up info! 🙂 I have an Explore Air2 (just got it yesterday) and was not sure if I needed to go out and buy a wheel to used instead of the stylus that I already have.
Thank you so much for the help!
Thanks for this write-up. I’m looking into getting the scoring wheels. I bought a Maker this year and paper-craft was one of the main reasons.
I was hoping that it would make my stuff look more professional but so far it’s not been going so great.
A lot of my paper cuts have been tearing or at least slightly jagged on the edges, I can’t find a glue that will keep stuff stuck down bit not come through the holes or discolor the paper, and because I was spending so much on the machine & a few other tools I went for the stylus rather than the wheels when I bought it.
None of my score lines have been deep or crisp enough to fold along neatly without me doing a lot more work. I’ve used paper, thick paper, thin card & thicker stuff and so far nothing has been foldable without me having to use a metal ruler & the scraper to push against it.
I have nerve damage in my hands and a bad neck and was hoping the machine would make this all a lot easier. I wanted to use it to make paper decorations for Christmas this year. The stars I made at Halloween cut out beautifully but I basically had to rescore them by hand and it was a lot of work.
I was hoping if I bought the scoring wheels now it would make the difference but looking at these tests it may make a difference for the cards & straight line boxes or whatever but it doesn’t look good for the stars I was making. I mean the outside of the star was cut with the inner lines scored to make them 3D but if the score lines overlap I’m not sure how neatly they would sit.
Until I get them I’ll try the trick with copying and pasting another score line on top, though I feel that shouldn’t be necessary. Especially with projects they have created themselves. I don’t know why I’m not getting enough pressure out of the stylus. Your score lines here look pretty good. (I’m also having trouble with the rotary blade leaving fabric attached by little bits of threads, sometimes just a few, sometimes a whole lot so maybe I just need to run projects through a few times without ejecting the mat. Or maybe I have a lot more learning to do)
Everything is a learning process! With time you’ll be able to troubleshoot and get better and better.
Hi – thanks for this, v helpful. I am new to paper craft and have a Maker (not the v newest one). I am learning how to use it bit by bit as I find things I want to try. As I was only looking at standard card stock and papers at the moment, I bought the stylus as it was considerably cheaper. I have been really pleased with it until I tried using it to make decorations from old books, maps and music paper. The stylus is catching and ripping the paper. I have tried different paper settings but I am not sure it has made a difference. The encyclopaedia paper is not as smooth as the others, and rips most, but none of them are great. Do you have an opinion as to whether the scoring wheel would do this better? Thanks for any help you can offer.
The scoring wheel is smoother, but I can’t guarantee the tearing won’t happen because I haven’t been in that position yet. I do think you should give it a try!
I just received my Cricut Maker 3 days ago. I use it to model railroad paper buildings. Thank you for sharing.
This was very helpful! I feel like you went above and beyond!
Your help on the difference of these 2 tools really helped.
Thank you!
Thanks for this info it really helped me to make my choice .
I’m going for the scoring wheel????
Thank you. I’m new to Cricut and needed to understand the scoring possibilities. You explained them perfectly…and of course I “want” both, but I will start with the stylus.
You’re very welcome! 🙂
Thank you for your tutorial on the scoring tools. I have a cricut air 2 and my scoring stylus keeps popping up in the middle of a project, you gave me a solution to that problem. Another problem I’m having is my fine point blade isn’t cutting all the way thru 65lb paper. I’ve changed my blade several times thinking my blade was dull but even a brand new blade isn’t going all the way through. I’ve tried changing from the default setting to more pressure and then my blade pops up like the scoring stylus tool is doing. Could my blade clamp be broken also? TIA
That sounds a little odd. I would check with Costumer service as well. It’s never happened to me.
Hi Catalina! Thanks so much for your post! I got an Explore Air 2 a few weeks ago. I totally love it, but I am really jealous of the Maker’s scoring wheel!! I was frustrated that sometimes my score lines are not that deep for my cardstock greeting cards. THANK YOU SO MUCH for the tip of copying and pasting another score line on top of the original score line. Many thanks and I can’t wait to explore your blog! Have a great day!
You’re very welcome! Happy I was able to help.
@Emilie, 100% agree! So helpful! and I am also looking forward to exploring Catalina’s blog!
Thank you!
I am very new to Cricut Maker, I have just ordered a scoring stylus but my project is telling me to put the scoring wheel into the clamp. How do i tell the Cricut Maker that i only have the scoring stylus? Also what weight cardstock do you use for greeting cards, cut out and drawing on them.
Many thanks
Learn how to do it in this “How to use the scoring wheel tutorial.” I mention how to edit that tool in design space.
Hi Catalina, happy to have found your blog. It’s honestly the best set of Cricut reviews I’ve found after reading about this machine for about half a year—the least “I am so excited” passages and the most informative texts with many details. Thanks for them!
Now, this post of yours stirred confusion in me. I am into box making, and I am looking for a machine to upgrade from my manual work. It’s only for a hobby. The main reason I want a machine is precision, especially when I need to tune the package dimensions. So precision and accuracy are the main requirements. The machine should also be good at both cutting and scoring dense paper (400+ gsm).
Until now, I was torn between Silhouette Cameo 4 due to its great software, which allows precise dimensioning, and Cricut Maker due it’s scoring wheels not available for Silhouette machines. But this post of yours seems to indicate that the scoring wheel actually doesn’t add much. At the same time, I’ve heard that Design Space is a pain to use when one needs to adjust dimensions in the design. It’s good for printing pre-made figures when exact dimensions don’t matter, but it’s difficult to use and adjust one’s own design.
I would appreciate if you could comment on these two statements. FWIW, I am fine with doing the design in an external program (Inkscape).
Cheers from the Netherlands!
If you want full precision when working on a design you can’t do a lot of editing in Design Space. Things like moving angles, and other important things when making boxes from scratch is impossible. You can, however, design them and cut them Cricut. Cricut also has hundreds of boxes templates so everything will be 100% perfect. I also have a box tutorial with some free templates for personal use only.
I won’t lie to you. Design Space is not the program to design complex things. I would never use it for that. It’s mainly for small details.
@Konstantin,
Did you buy a Maker in the end? I too plot boxes. I mainly use Inkscape, also already creating different layers for cut, scoring, perforating, etc. so they end up in a separate group in Design Space.
For me, the choice between stylus and wheel is mainly depending on the quality I need. For a simple inlay, 400 grams still works with the stylus.
You’re unable to adjust the pressure for the scoring anyway, stylus or wheel. It does however work with custom materials, for perforation you need a separate run with some material from their list.
Btw, in my case at least, there is a slight misalignment between the score and a cut when using the stylus.
BR,
from a fellow Dutchy.
My daughter and I are new to Cricut. I bought a Martha Stewart version and we tried making a card that asked for a blade and scoring tool. I only have the scoring wheel. Is the Martha Stewart air 2 not use a blade and a wheel to make things? I feel the research I have done is now indicating I should have bought a scoring stylus instead of a wheel.
The Explore Air 2 doesn’t support the scoring wheel 🙁 Only the stylus.
Hi, I’m having a horrible time with my scoring stylus in my Cricut Maker. I put it in correctly and it will work but then in the middle of a project it pops up in the clamp and obviously stops working. Have you heard of this before, and if so, any suggestions?
Thank you.
Yes! It happened to me too! The pen/stylus adapter is broken and you need a replacement. You can call Cricut for that little part.
That’s happening to me too. So annoying
I have a question unrelated to this article. Somewhat newbie on cricut. I have been trying to have the cricut draw a character just for my kids to color. When I have it set to draw the photo looks fine. But when it actually draws out it looks like a lot of the lines are drawn twice- l think what the machine sees is a thick line so in between the two lines should theoretically be filled in by hand by myself. Like it is drawing the outline of the thick line wby making two small side by side lines. Is there a way to get it to just draw one line?
Hopefully I explained that ok.
Hi Dani. This is correct. It’s because of the type of shape. Single lines are vector lines. Regular pictures are not lines but shapes therefore they look double. Cricut had images that are designed for “drawing” on a single stroke. You can filter them in the “images” tab on the right panel.
I hope this helps.
Thank you Catalina for helping me differentiate between using the scoring wheel vs stylus. I was going to try the stylus on my glitter card stock but see that I really need to us my 02 scoring wheel.
You’re very welcome 🙂
Thanks for taking the time to explain the differences. I am a new owner of the Maker, but have been using the Explorer Air 2 for over a year now. I have been wondering what accessories I should keep, including the scoring stylus. Now I know that I want to keep my scoring stylus and put the scoring wheels combo on my wish list. 🙂
Happy to hear I was able to help 🙂
Thank you for the information on this, I had no idea what to do with the stylus when it asked for it while trying to make a card today. I tried for 2 hours to try to make a card with no luck. It wouldn’t cut or score.
I am glad I was able to help!
Thank you for your post explaining the differences in these tools. I’m a brand new Cricut Maker owner and am struggling to understand what tools are necessary and how to use them.
You are very welcome! I am glad I can help.
I have the maker but not the scoring wheel. How do I use the stylus for projects? I tried a free card but it wouldn’t work because I didn’t have the wheel.
Hi Sarah, when you are on the cutting process, when you are prompted to install your tools, there’s a link that says Edit Tools click there and select the Scoring Stylus. On my Scoring Wheel tutorial there’s a screenshot that shows you how to do it.
My scoring stylus barely leaves a line. What am I doing wrong? I have to go over them again with a ruler.
Hi Debby. What materials are you using? If you have a Stylus something that works for me, is to copy and paste another scoring line of top of that one. (Don’t forget to attach)
I’m using cardstock. I don’t know how to copy and paste on design space. Sorry this is late, I just saw it.
Hi Debby! Check out my Cricut Design Space tutorial where I explain you to detail how to use every little icon in Design Space (it will show you how to duplicate as well)