Hi Daydreamers!
Today you are going to learn how to use the Scoring Wheel from beginning to end. I really care for all of the details in my tutorials and I feel that the Scoring Wheel deserves an article on its own.
First I am going to be covering what’s the Scoring Wheel, how to install it, and swap both tips; then we will be making a step by step tutorial that covers both, the basics inside Cricut Design Space and the cutting process. And last but not least, we will be discussing what to do when your machine doesn’t detect the scoring wheel.
On my last post I talked about the differences between the Scoring Stylus and the Scoring Wheel, so make sure to check it out if you’d like to know which tool is the best for you.
Before we get going, and If you are here – mainly – because your Cricut Maker can’t detect the Scoring Wheel let me save you the frustration of searching this post; scroll all the way down to the troubleshooting title.
You ready?
Let’s get started
What is the Scoring Wheel?
The Scoring Wheel is a tool that allows you to created beautiful, edgy and crispy folds on your materials.
The Wheel is one of the newest tools that Cricut has released and it’s only compatible with the Cricut Maker. This tool works with the adaptive tool system, Cricut’s New Technology
The Adaptive Tool System controls the direction of the blades and scoring wheel at all times. In fact, This technology is so amazing that it can adjust the pressure of the Scoring Wheel to match the materials you are working with!
That’s why, the Scoring Wheel has 10X the strength and power than the Scoring Stylus has. Therefore, by using the Scoring Wheel you are going to get extra deep and extra sharp score lines.
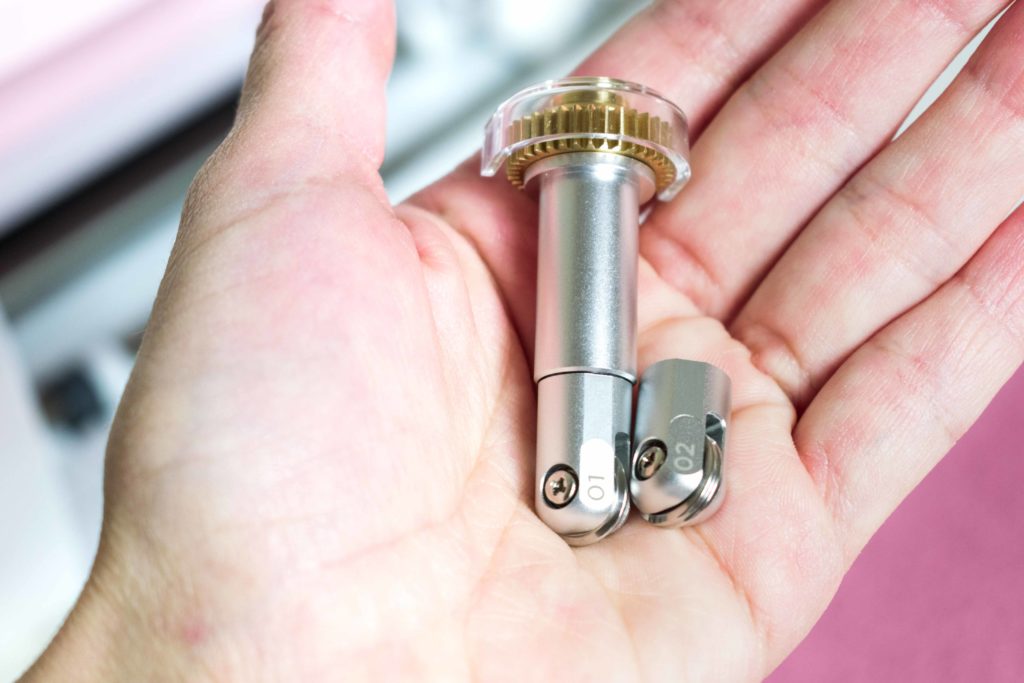
In order to give you the best results, Cricut has designed The Scoring Wheel with two different Tips, 01 and 02. Depending on the material you select, Design Space will suggest you the tip you need.
Tip 01: is ideal for light materials such as print paper, regular cardstock, etc.
Tip 02: is ideal for heavy and coated materials such as chipboard, glitter cardstock, metallic poster-board, etc.
How to Install the Scoring Wheel and Swap Tips
Installing both Scoring Tips on the drive housing is extremely easy. Look at the following photos and then, let’s chat how do it step by step.
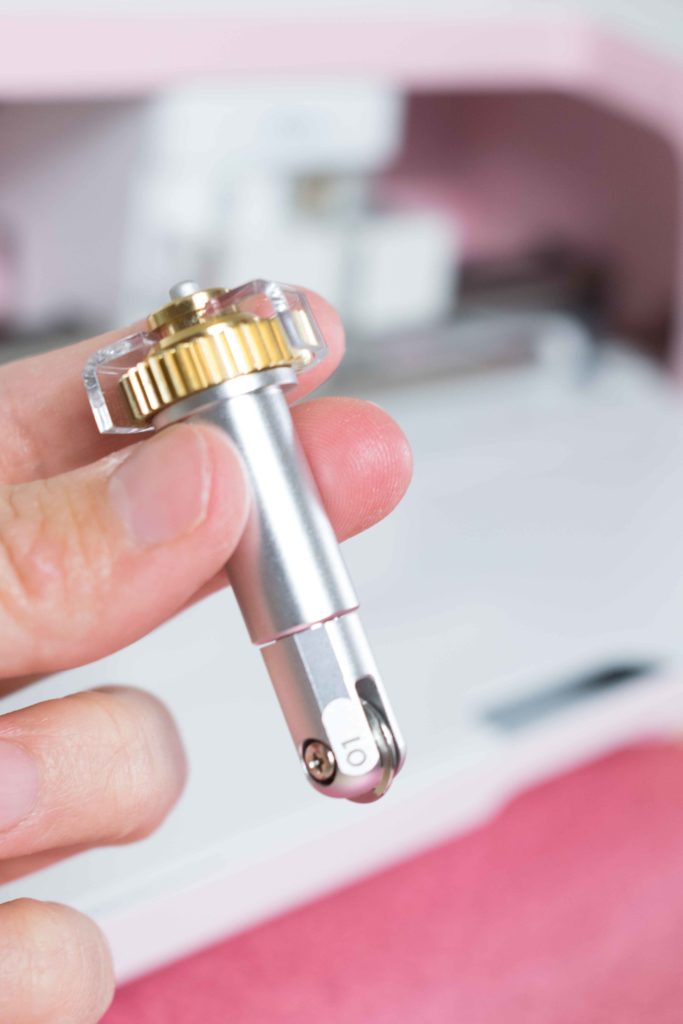
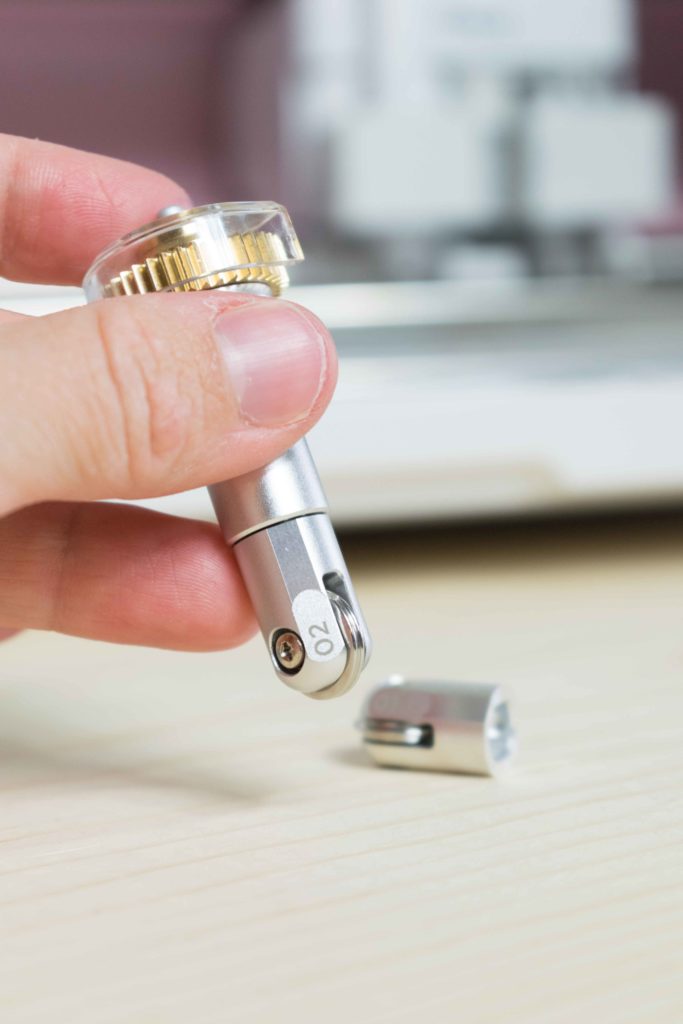
Step 1: Start by getting the Score Wheel and then press on the plunge – button – at the top of the housing.
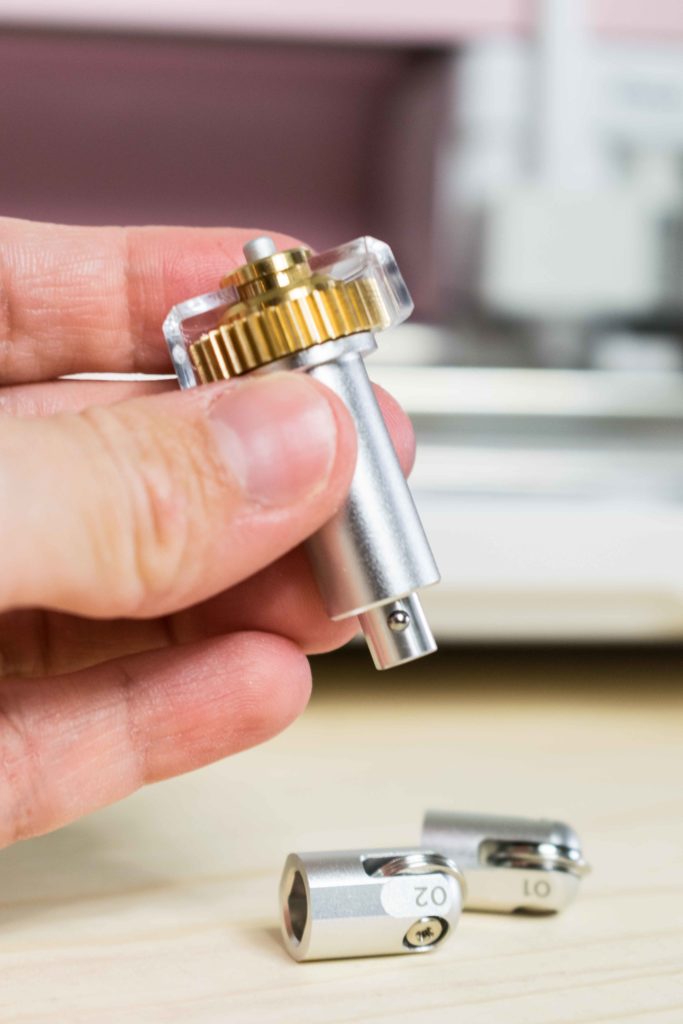
Step 2: While still pressing remove the tip. Pay attention to the little knobs coming out of the housing. Inside of the scoring tip you will see there are also two little holes, and these is how they need to be aligned.
Step 3: Keep pressing on the plunge and grab the tip you want to install; then align the tip in a way that both flat, and holes inside the tip are aligned with the flat and knobs of the drive housing.
Let go of the plunge and that’s it.
Easy, right?
Remember that the Scoring Wheel always goes on the right side – Clamp B – of the tool holders.

Now that you know the basics of the Scoring Wheel, let’s learn how to create a project with it!
Step to Step Scoring Wheel Tutorial
I think the best way to learn is by following along.
To help you master the Scoring Wheel we are going to be making a pillow box. I really encourage you to follow along this tutorial, so you are ready to tackle any project calling for the Scoring Wheel.
Also, across this post I will be giving you some tips and good practices to have when using the wheel.
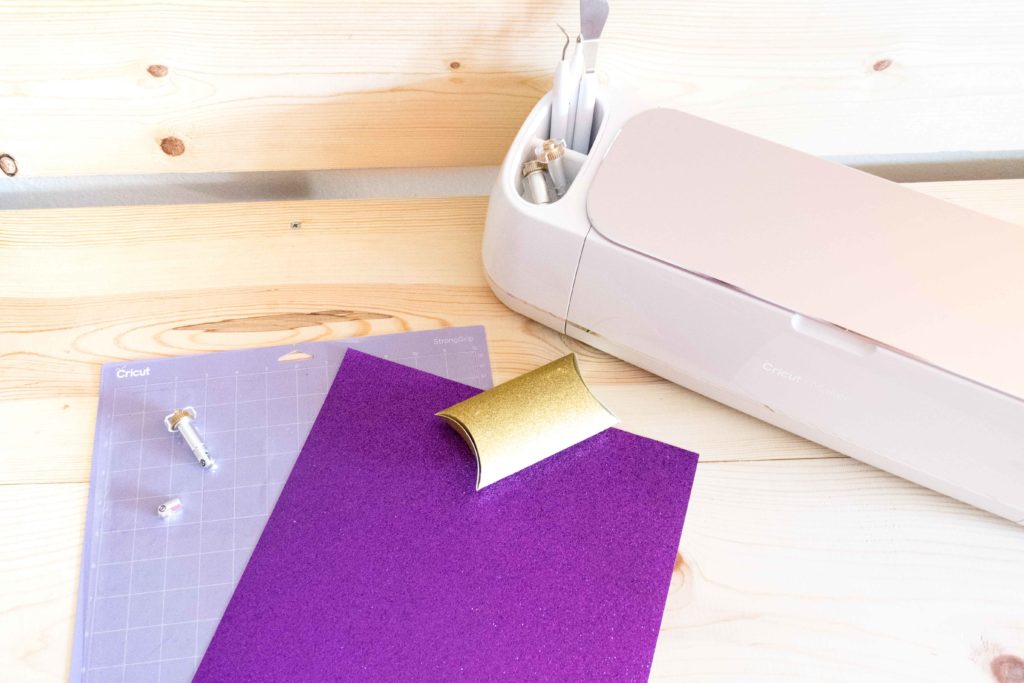
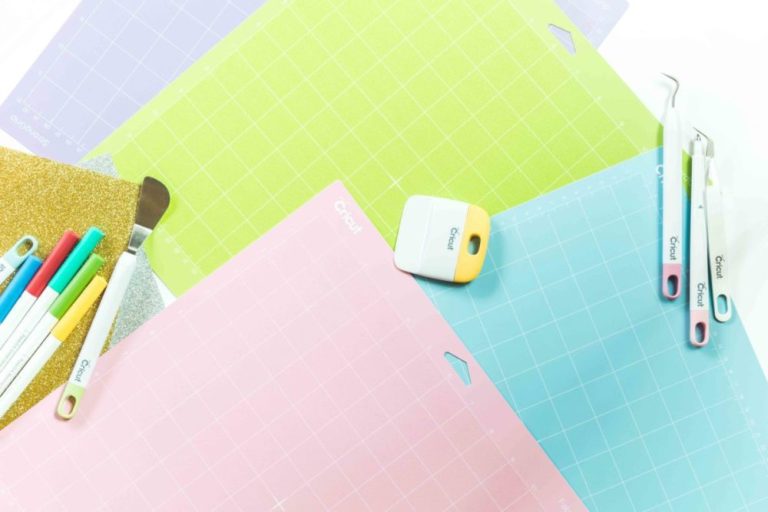
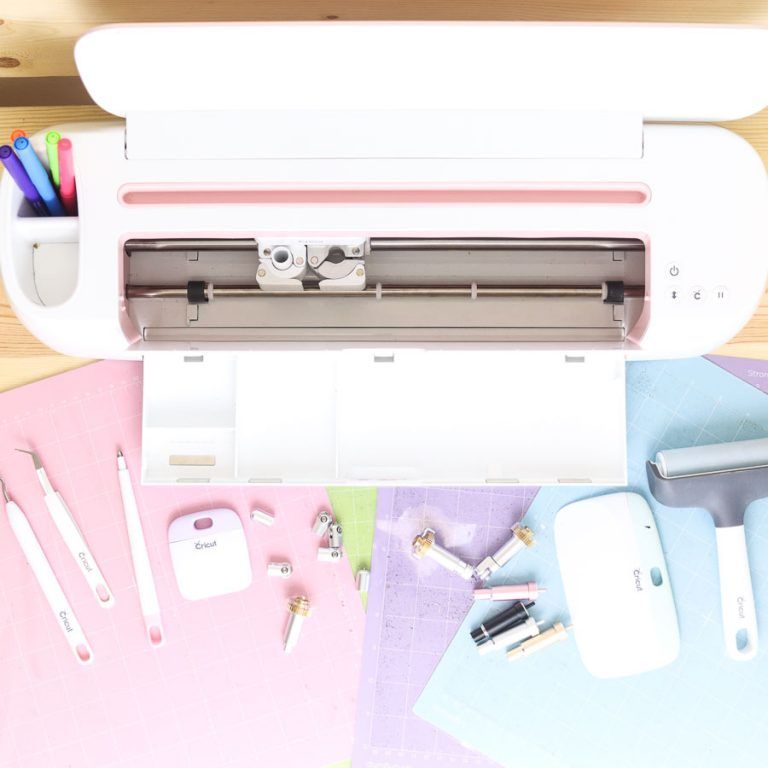
Materials
The materials we are going to use are the following:
- Cricut Maker
- Cricut Scoring Wheel – Tip 02
- Fine Point Blade
- Glitter Cardstock
- Strong Grip Mat (Purple)
- Glue
- Free SVG Pillow Template A new window will open. Right Click and Upload to Cricut Design Space
Oh!
Just so you know, I also have a library full of free SVG files and Printables for all my subscribers, a.k.a. Daydreamers. You can see a preview right here or get access by filling out this form.
Step 1 – Upload and Insert Design on Canvas Area
Go to your Cricut Design Space canvas area and then upload the pillow box template. (Available on the materials list) You can do this by clicking on the upload file located on the left panel of the canvas.
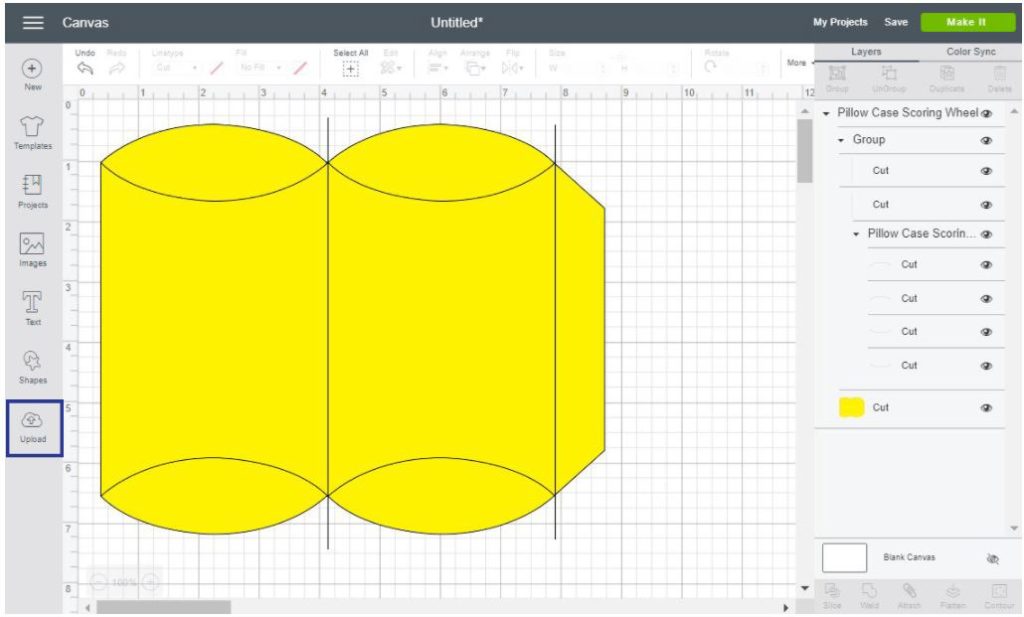
The above screenshot shows how your design will look like on the layer panel. I’ve already organized so it’s easy for you to edit it.
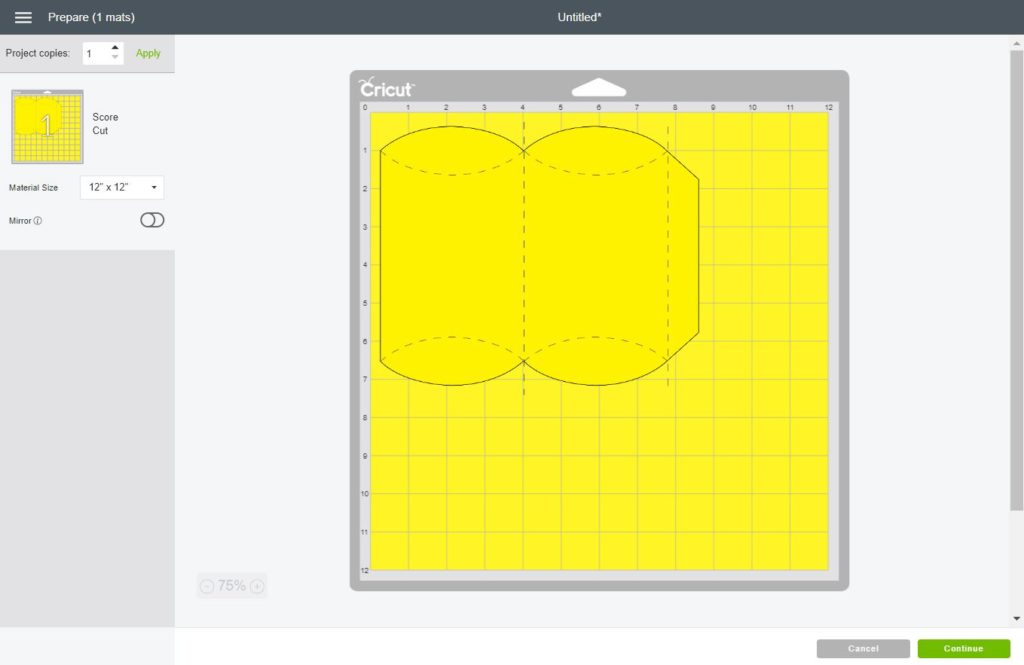
Step 2 – Define Scoring Lines, Attach, and Make it
When you first start all settings are set to cut. However, we need the black lines to score so we can use the Scoring Wheel.
To this we need to change the linetype – located on the top panel – of each line to score. Since I already grouped the lines (to make it easier for you) go ahead and click on the word group on the layer panel to select all lines that need to scored and change linetype to cut.
On the next screenshot you will be able to see how to do that.
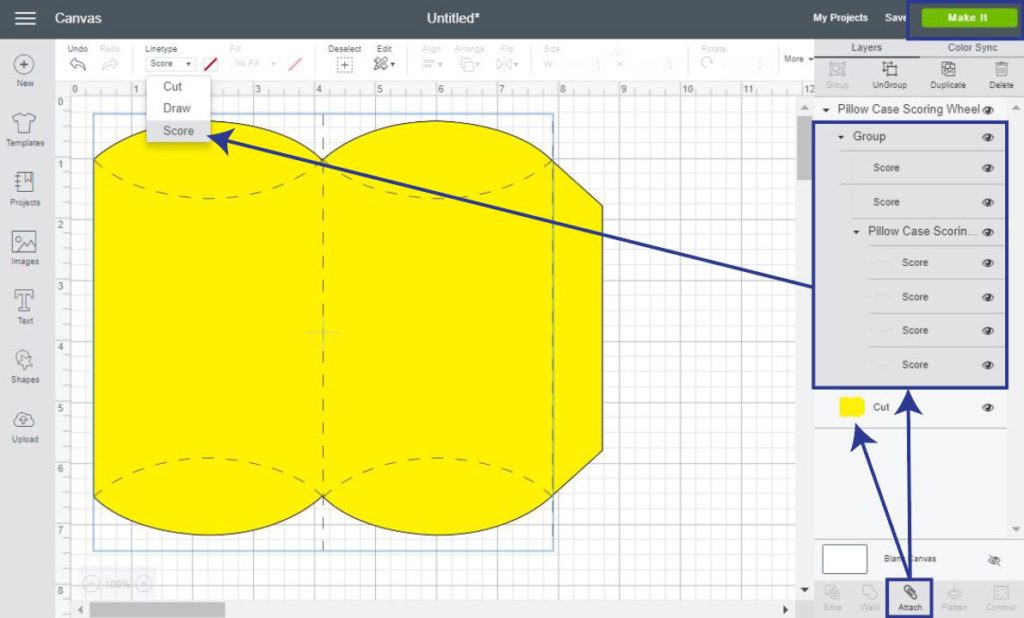
After you change the linetype for score, we need to attach both the scoring lines and pillow box itself.
This STEP is extremely important, if you don’t do it all lines will appear in a different Mat and in a random place. When you attach you are assigning the scoring lines to the pillow box.
So, when you click Make It everything will be where it supposed to be.
After clicking make it, go ahead and click continue, and let our cutting begin!
Select Material
For this tutorial I purposely used Glitter Cardstock, and this is why!
You see, it’s very important that, when you are working with a material that has two sides, the pretty one and just the plain one that you score the lines on the plain or normal side!
The reason behind this is that after you score you need to fold into the scoring lines (will show you in a little bit), otherwise very thick and coated materials can crack!
To do this we need to turn Mirror On and place our material pretty side down on the MAT just like I show you on the following Screenshot.
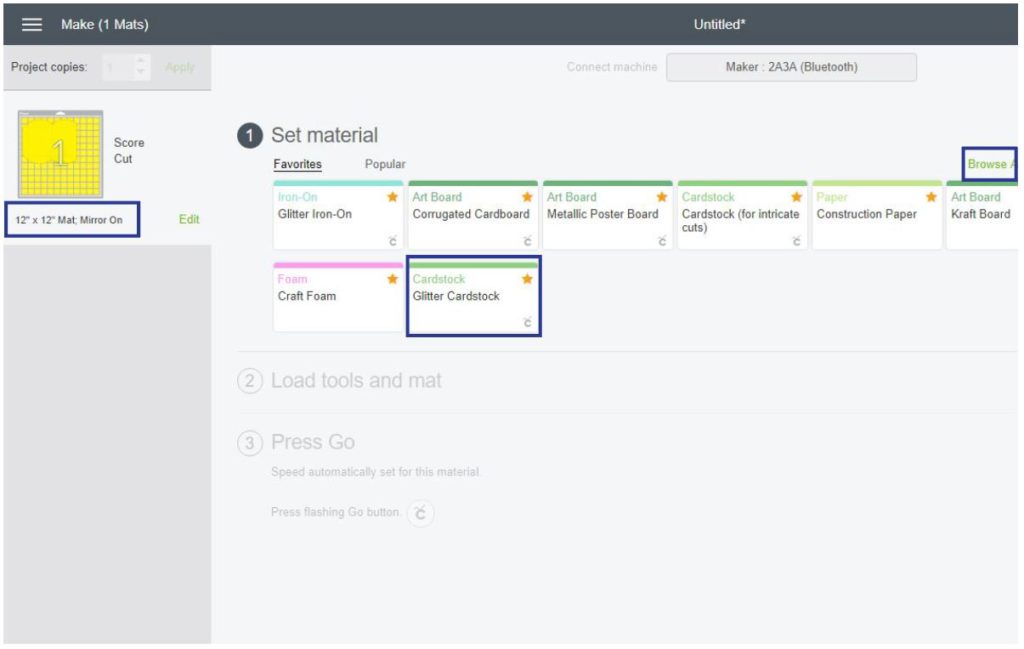
If you are following along and using glitter cardstock as well, you can find it by browsing all materials. You can also filter by keyword!
Load Tools and Mat
After setting your material, go ahead and load your tools. For this particular materials Cricut is calling for the Tip 02. If you just have the tip 01, or want to use the scoring stylus instead you can click on Edit Tools.
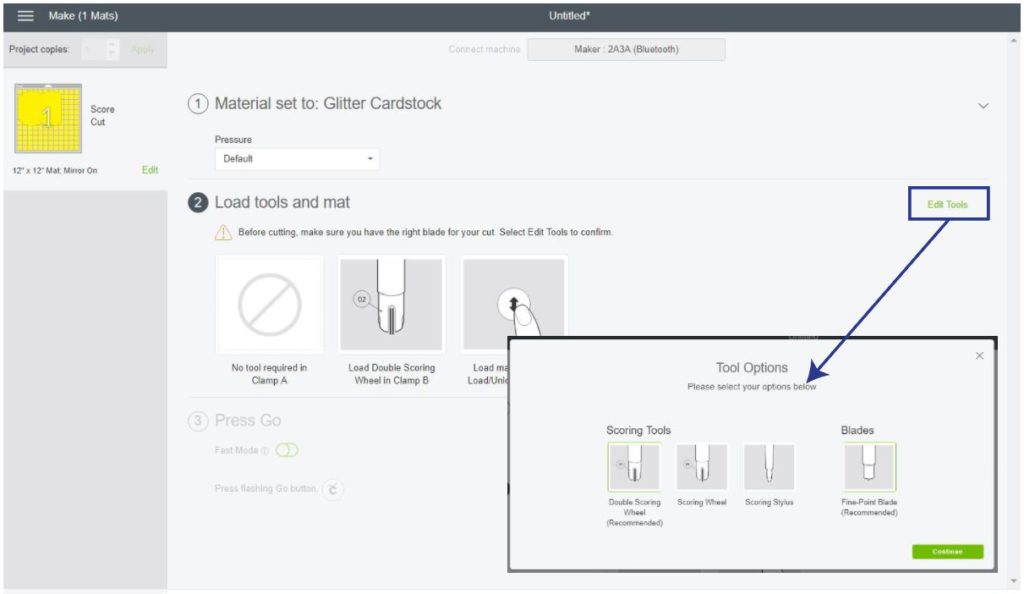
After clicking there, a little window will pop up allowing to change the tools for what you have on hand.
Once you finish this you can press go!
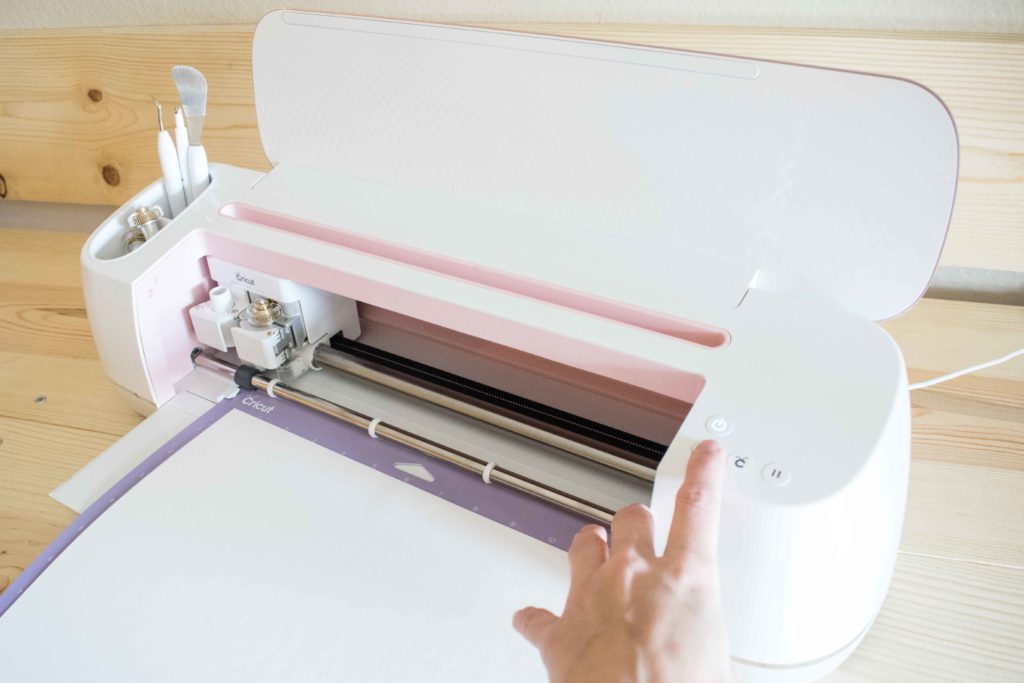
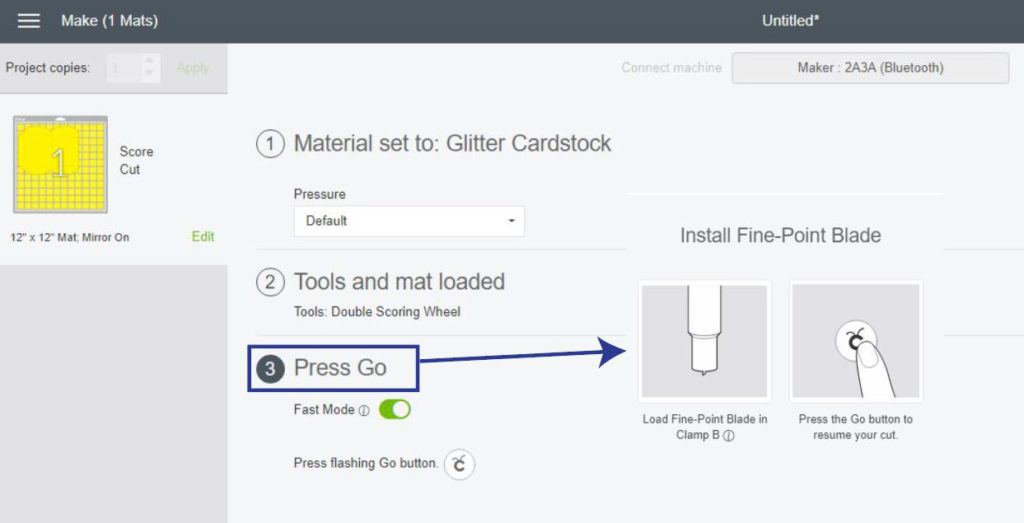
Press Go
Tap on the Cricut logo on the Maker to start the Cut!
I wanted to point out again that I placed my Glitter Cardstock pretty side down, because the pillows box needs to be folded towards the scored lines.
Every time you are scoring something you will be required to use the Scoring Wheel First.
No worries though!
Once your machines is done with that process a little window will pop up on the app telling you that you need to install your blade. For this case we are using the Fine Point Blade.
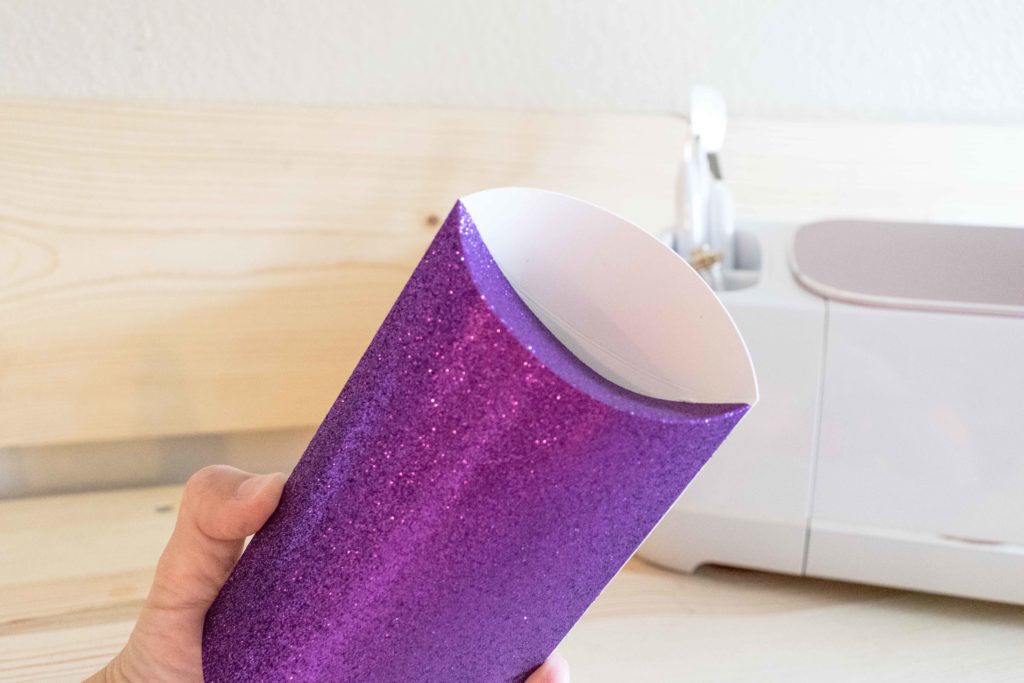
When your machines is done with the cutting process, unload the mat and let’s put together our pillow box!
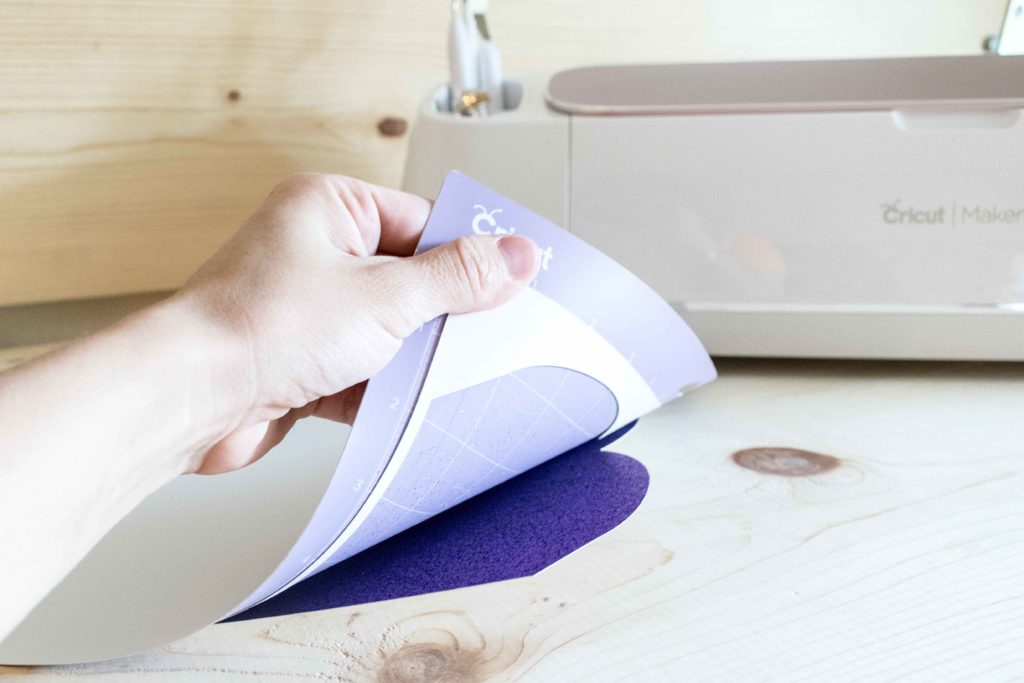
Step 4 – Remove from Mat, Fold and Glue
When I first got started with my Cricut I used to remove my projects while my mat was facing forward. If you do this – like I did – your materials can get damage.
The best to remove a project from the mat is by bending the mat like I show you in the photo down below.
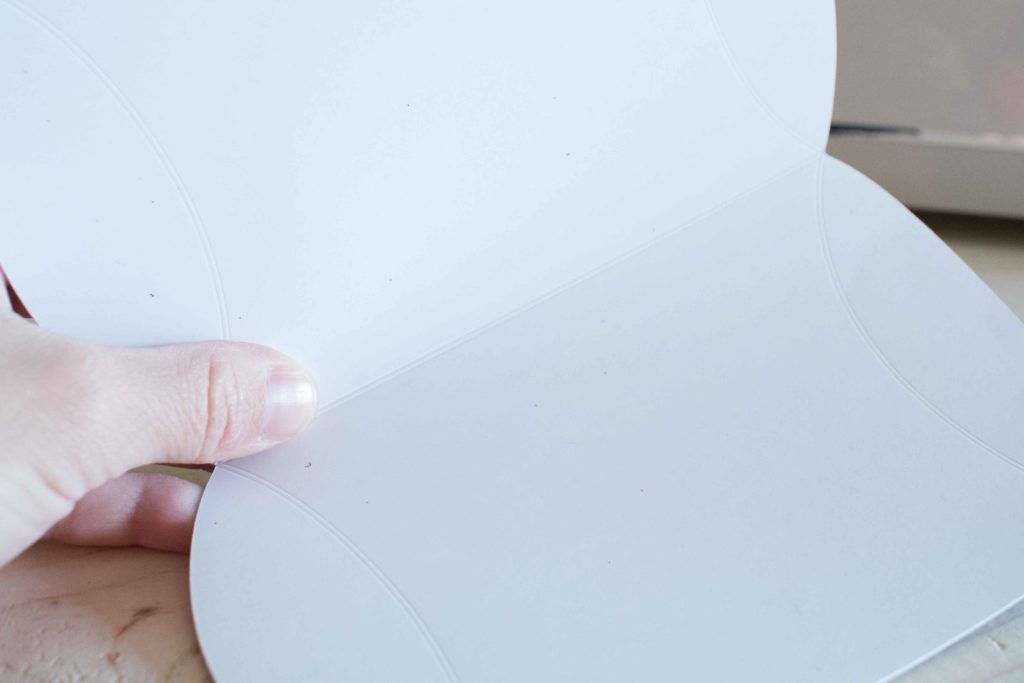
Now, we let’s fold our box.
Remember that you need to fold towards the score lines, that’s why we turn the mirror on before we cut our project.
So, gently fold all of the lines, and glue the tap to the other side of the pillow box. I think this type box is very self explanatory.
Don’t you think?
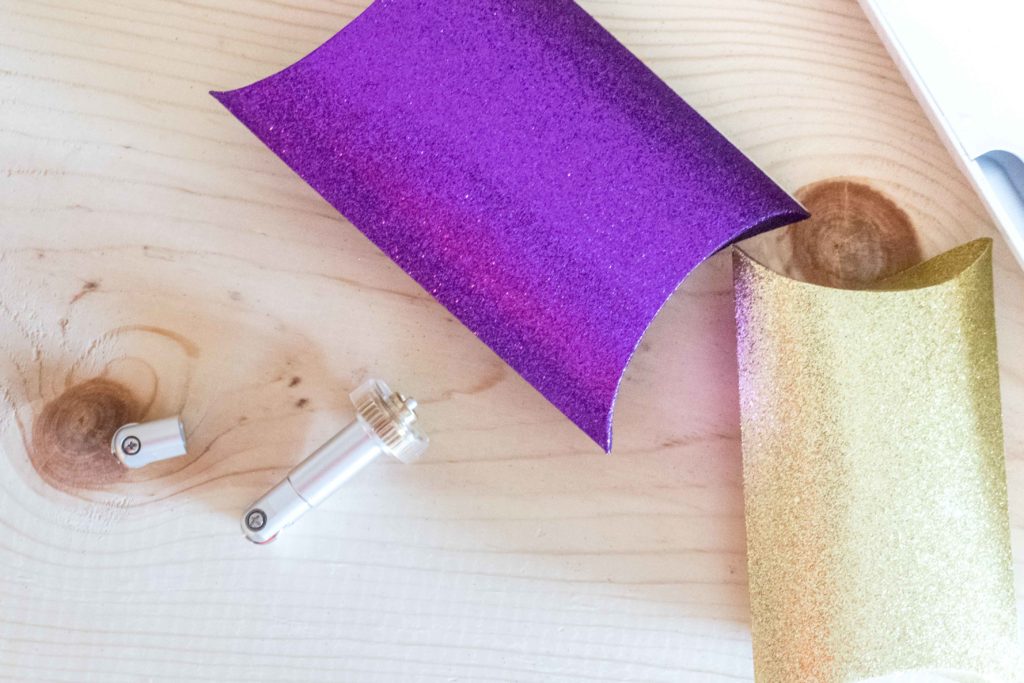
After you’re done, you should be left with a beautiful gift box. Now I just have a question. What are you going to put in there?
Who is the lucky person that’s getting a little present?
I am planning on making Earrings with my Cricut and give them to my Sister in Law! I’ll be sure to link that tutorial as well when I do it!
Troubleshooting – Cricut Scoring Wheel Not Detected
It happened to me – twice – and it can happen to you!
Although this pop up window is extremely frustrating, let me tell you that’s very easy for you to solve this problem.
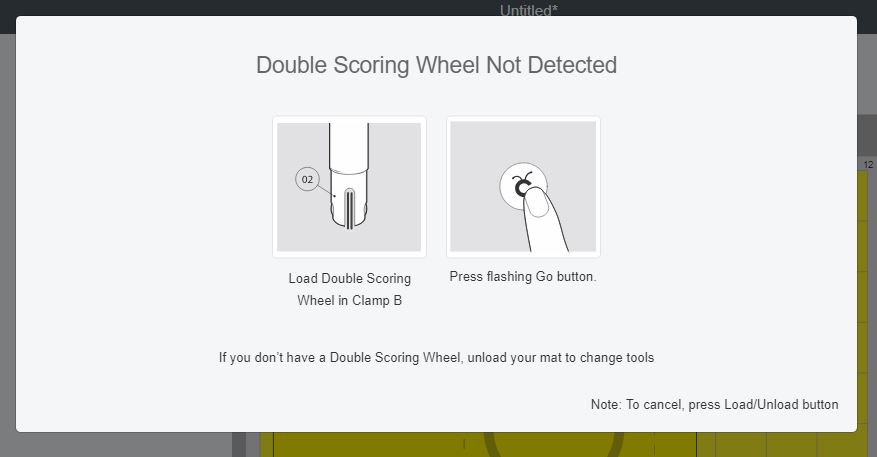
Try these few options – in order – to solve this problem.
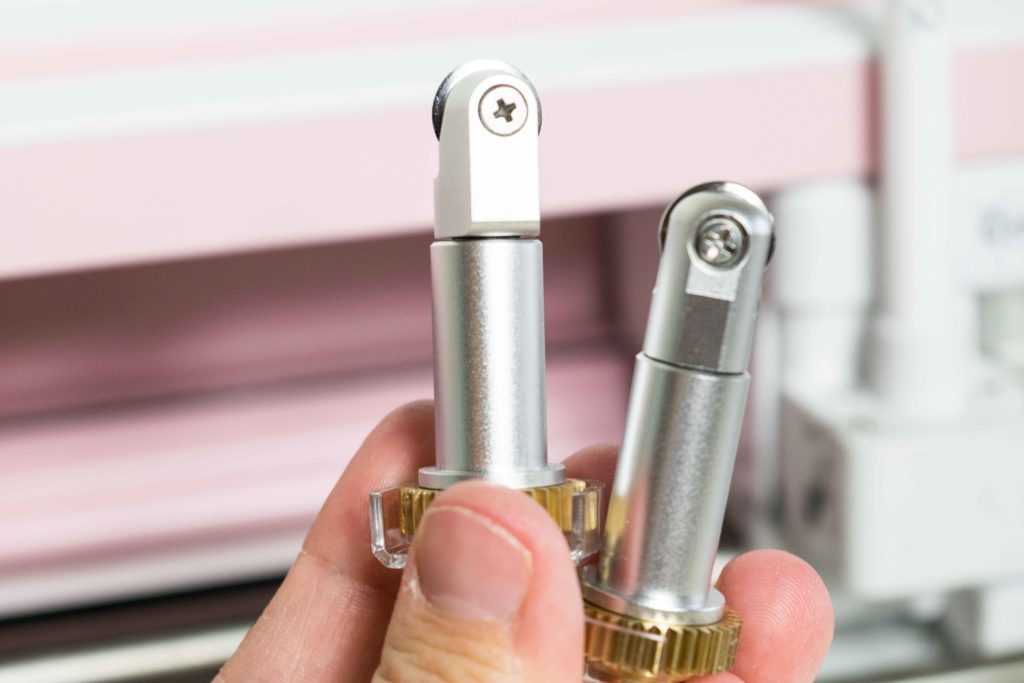
Make sure you are using the scoring wheel: the scoring wheel and the rotary blade look extremely similar. The first time this happened to me I was using the rotary blade instead of the wheel.
I tried and tried, until I gave up and when I went to check the Clamp B; the rotary blade was installed. ?
Make Sure you Install the tips correctly: If you use the Tip 01 and 02 very frequently. Make sure that the tip you just swapped is secure to the Scoring drive and housing.
Avoid touching the plunge – top button – when installing: The plunge button that you press to swap the scoring tips is very sensitive to the touch. The second time my Cricut Maker didn’t detect the Scoring Wheel, was because I pressed and the tip actually fell off the scoring drive and housing.
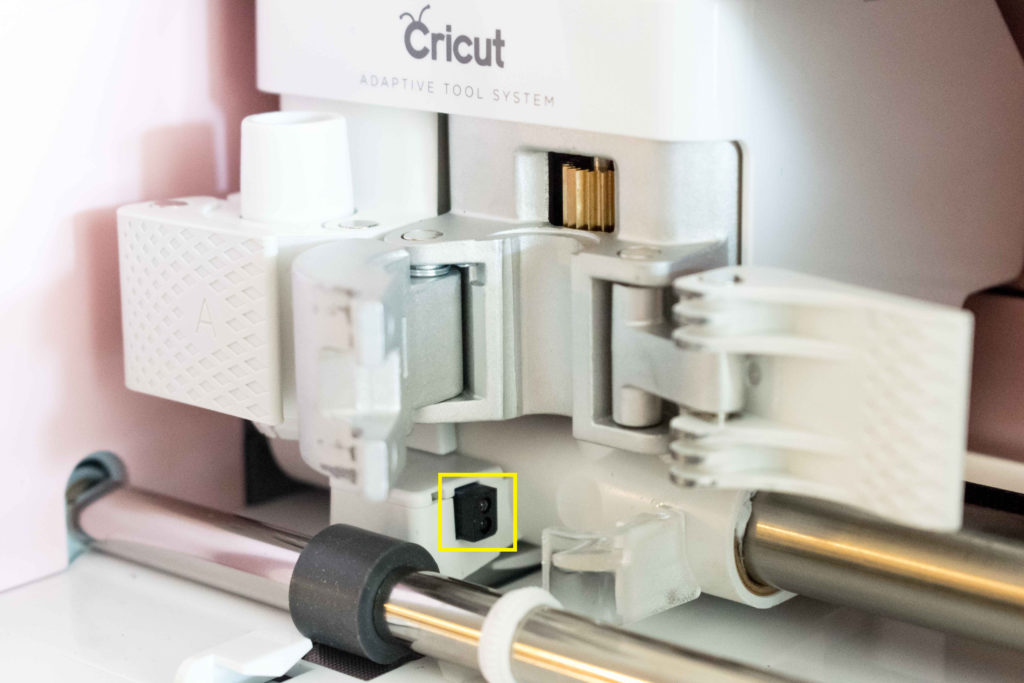
Clean Up Wheel & Maker Sensor Tool: Sometimes when working with different materials, sensors can get dirty and therefore not picked up by the Cricut Maker.
With a microfiber cloth, gently clean the drive and housing. And the little black sensor located on the Adaptive Tool System.
Restart Cricut Design Space: Sometimes things are just glitchy. So start from the beginning by closing the window. Make sure to save changes to your project before exiting the program!
Try Using other Tool: If you are still dealing with this pop-up window; try using another tool – make sure to change the linetype to Cut and use recommend materials – like the Rotary Blade or Knife Blade to discard problems with the Cricut Adaptive Tool System.
If the other tools worked, then your Scoring Wheel might have problems with the Drive Housing. At this point, I recommend you to call Cricut’s Customer Care.
Tell me all about it!
Did you make the box? Did you like the Scoring Wheel’s performance… I want to know all about it!
I know learning new things can be intimidating at first. However, I am here to help you out on your Cricut Journey!

Thank you for the explaining the two different scoring wheels.
Thank you, thank you, thank you! I cleaned the sensor as you suggested and my scoring wheel was detected immediately and worked perfectly! I never thought the solution would have been so simple!
Used your tips to solve my”not detected” problem and it worked like a charm! Thank you!!
Well written tutorial, thank you for sharing.
I have attached and the score lines show on my mat but it doesn’t tell me to load my scoring wheel. It just shows the knife. Any idea how to get it to score? I am frustrated!
Did you change the lines from “cut” to “score”?
Hi I’m new to the world of Cricut. I have the Cricut Maker. I just ordered the scoring wheel with both the single and double tips. Is the housing for this the same housing used for other tips such as the debossing and the engraving tip?
You’re correct. You can use the quick swap housing with the scoring wheel, debossing tip, perforation blade, engraving tip, etc.
My scoring wheel is always detected but over time, I can barely see where it scored. It’s like it’s not pressing down enough…i usually have to guess and go over it manually with a stylus. Any ideas? thank you so much!
You can create double lines in design space and have the scoring wheel do multiple passes!
I’m really happy ???? to of found your tutorials! Only have my Maker since beginning of month and you have been such a help!
That’s great news! I am happy you’re learning with me!
Thank you sooo much for the troubleshooting tips. I had the rotary and scoring blades confused and couldn’t figure it out. You are appreciated!!!
They are so similar! Aren’t they?
What kind of wheel do you use with the cricut explorer 2
The explore machine only works with the scoring stylus, there’s no wheel for it.
I tried my new scoring tool yesterday. I changed the line type, attached the score lines and was doing a test on a pillow box file I already had. I was using a lightweight cardstock for the test before cutting my good material.
Now, 2 questions!
Is there a way to have the score lines solid rather than dashed?
And, is there a way to increase the pressure on the scoring tool, without trying to “fool” the machine and select a heavier material?
I found that the score lines were so shallow that I couldn’t really fold the ends of the pillow box.
Thanks.
Dianne
The dashed lines are how Cricut shows in the software you have a score line so it will always be dashed. As for the line pressure, you can copy and paste an identical line on top forcing the scoring wheel to go twice. As far as I know, you can’t adjust the pressure of score lines.
Have a great day 🙂
You are the most knowledgable of all the articles I have read!!! I wish I would have found you sooner. Definitely book-marking you so I can always refer back. You should write a book .. or better yet .. an ebook! Bless your heart for taking the time to help all of us.
Thank you so much! Ebook coming soon!
Your tutorials are amazing! It is like you are sitting here with me! Thank you!
you’re very welcome, Lucy!
@Catalina, my maker wont except my stylist. what am i doing wrong