Hello Daydreamers.
Want a fun project to do with your kids whenever the mood strikes?
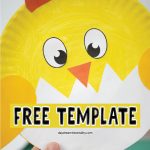
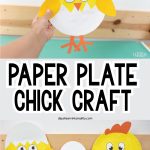
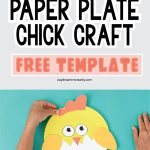
Try out the adorable Paper Plate Baby Chick craft! It’s simple, fun, and a great way to spend quality time with your little ones. And to make things even easier, I’ve got a free template ready for you. Just cut, glue, and enjoy the crafting process without any fuss.

There are also extra tips so your kids can customize their baby chick. I’ve provided many options if you want the baby chick hatching, completely hatched, halfway hatched, with a comb, etc.!

So, why not give it a go? Let’s make some cute chicks together!
Materials
- Template (download at the end of the article; you don’t need to subscribe!)
- 9-inch paper plate
- Scissors
- White cardstock (you can also print in yellow and orange cardstock)
- Glue*
- Yellow Paint
- Colors (optional)
- Markers (optional)
*The picture shows a glue stick, but regular glue works best. It’s a little hard to glue on top of paint.

Super tip: If you don’t have a paper plate, use white or yellow cardstock and cut in 8-9in diameter.
I’ve designed this craft so you can make it as easy or as complicated as you’d like. You can even buy yellow paper plates and have zero paint mess.
The point is that you can have the child color or print the colored pages.
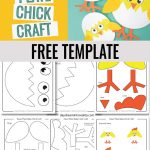
Step 1 – Print Chick Template
Print the template pages that best fit you (at the end of this tutorial). The printable has options for printing the wings, legs, beak, and comb if you only have a black-and-white printer and want your child to color.
You can also print the wings on yellow paper and the legs and beak on orange paper.

There are two pages for the eyes and the eggshells that should be printed on white paper.
Step 2 – Paint
Always start with painting! Drying takes longer; believe me, your child will want to glue as soon as he’s done cutting.

Step 3 – Cut Template
While your paper plate is drying, cut the pieces of the template you want to use. There are two sets of eyes, eggshell (top and bottom), wings, beak, and legs.


Step 4 – Glue
I included some assembly ideas on the template for your convenience. You can ask your child which chick he prefers to build.
I will be assembling the first one.

Start with the legs!

As you can see, I started with the gluestick but quickly discovered it wasn’t a good idea!

Next, you’ll want to glue the bottom eggshell. The template is set to fit a 9-inch-diameter plate. If yours is a bit smaller, you can adjust it with scissors.

Now, glue the top eggshell. Make sure you leave enough room for the eyes.
Tip: If your plate is sticking out on the sides, like the picture below, use some scissors to even out all edges.

Finally, glue the wings!

Doesn’t it look adorable?
A little hatching chick!

Other Assembly Ideas
Here’s another way to construct your baby chick! I love it; it looks vibrant (yellow is my favorite color).

You can also glue the bottom part of the eggshell and glue the comb instead!

You can also leave the legs out, as in the following picture.

The only requirement for this craft is to have fun!
Want an extra small baby chick paper plate?
I made an extra small baby chick with a 6-inch plate! Isn’t it cute?

You can do this by scaling the printable anywhere from 60% to 70%.

Download Template!
Just as I mentioned, here’s the chick template for your craft! Click the image or yellow button to open, save, or print the PDF.
Oh!
Just so you know, I also have a library full of free SVG files and Printables for all my subscribers, a.k.a. Daydreamers. You can see a preview right here or get access by filling out this form.
You May Like These…
So there you have it—a variety of fun and cute paper plate baby chicks to make with your children. Remember to keep things interesting by mixing and matching parts of the template!
Happy Crafting!

Baby Chick Paper Plate Craft
Materials
- Template
- 9-inch paper plate
- White cardstock (you can also print in yellow and orange cardstock)
- Glue*
- Yellow Paint
Tools
- Scissors
- Glue
- Paint brush
Instructions
- Download the template and cut the pieces you want to use.
- Paint the paper plate yellow and set it aside.
- Cut the parts of the template you want to use.
- Glue all the chick parts on the paper plate. If you decide to do a hatching chick, make sure you leave room for the eyes and beak.