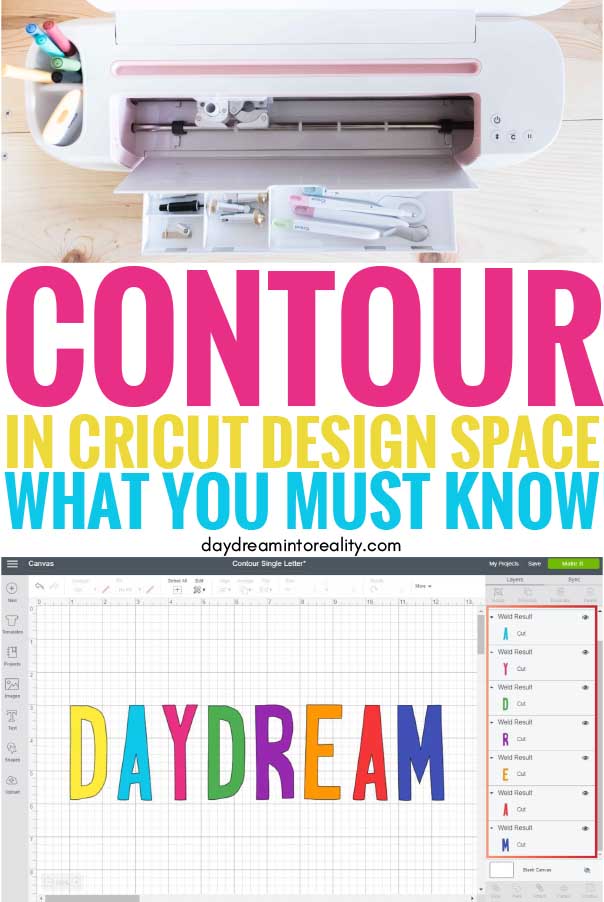
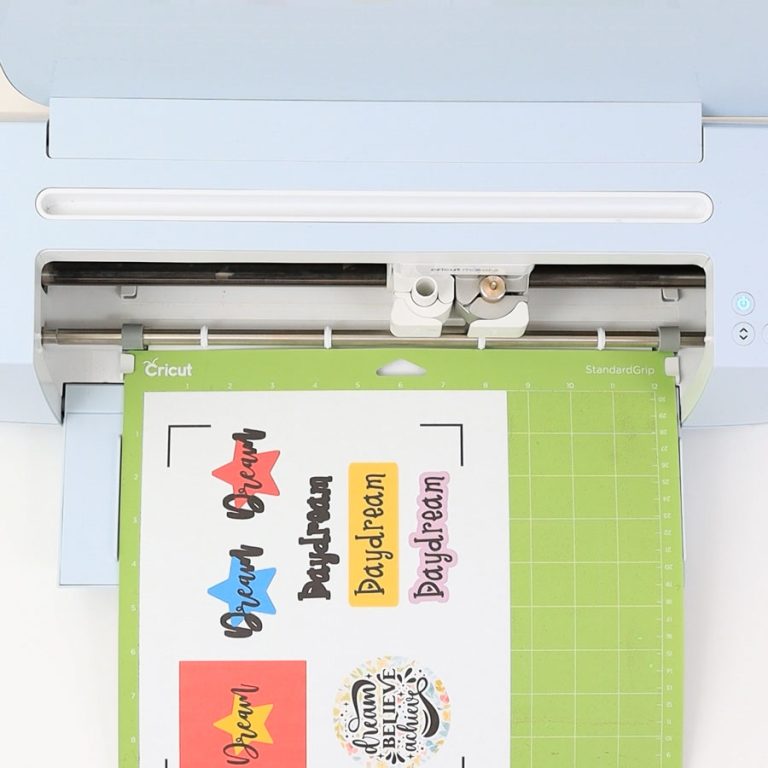
Hi Daydreamers!
On today’s tutorials you will be learning how to contour in Cricut Design Space like a Pro and we will also be checking out why is that sometimes the contour tool doesn’t seem to work.
Before we get started, let’s see a quick overview of what Contour is.
Contour, in Cricut Design Space, is a tool that allows you to delete/hide unwanted pieces from your projects. This option is extremely powerful because you can modify your projects to create a whole different effect or feel.
If you are a beginner still figuring out Cricut’s software, I recommend this comprehensive and easy Design Space tutorial.
I personally use Contour all the time, and on this tutorial, you’ll find out why!
Tip: If you want to learn everything you need to know about iron-on (HTV) and master its use on different surfaces, make sure to check out this amazing tutorial I put together.
Why is the Contour tool not working?
Normally I cover why tools aren’t working at the end of my tutorials. But, in this case, I find it necessary to mention it at the beginning, so we can continue the rest of our tutorial with the right set of mind.
First of all, the problem is not that the contour tool isn’t working. What is happening is that you aren’t using it the right way.
Here are some things you need to keep in mind:
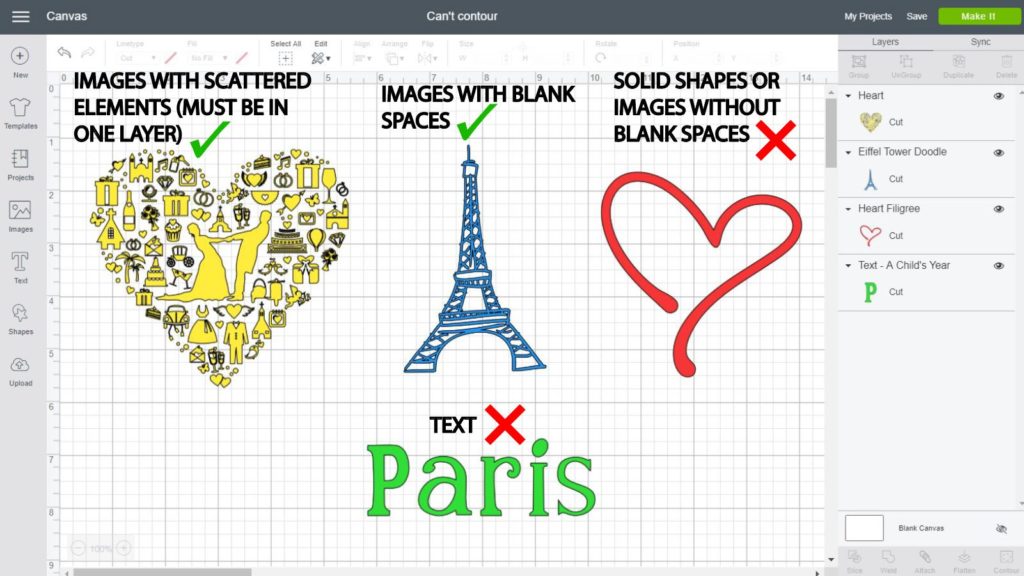
- Contour doesn’t work on images that DON’T have loose/scattered elements or holes/blank spaces inside them.
- You can’t Contour plain text (I have a step by step down below that shows you how to accomplish this)
- Contour only works with one layer at the time. So if you have more than one layer selected the tool won’t activate. If you need those two layers together, you will need to weld them first.
- Contour only works with SVG or cut files. Even if your PNG or JPEG images have blank spaces or loose/scattered parts, the contour tool won’t work on them.
These are the reasons why your contour tool may not be working. However, if you find yourself in a different situation, please comment at the end of the post so I can take a look and see why isn’t working for you.
How to Use the Contour tool in Cricut Design Space
Now, we are about to get into some pretty cool stuff so you can learn how to use the contour tool like a pro!
In a nutshell we will be covering:
- Contour Basics: where the tool is located, and the contour window.
- How to Use Contour with Images
- Change image color with contour
- Using contouring with text (there are some extra steps you need to do)
Contour Basics in Design Space
As I mentioned before, Contour is used mainly to hide or delete unwanted pieces of an image or design.
To activate the Contour tool, select the layer or image (only one at the time) you want to edit and click on the contour tool located at the end of the layers panel.
Check out the following screenshot (not the cutest design, I know) to see all the things we can do by just using contour.
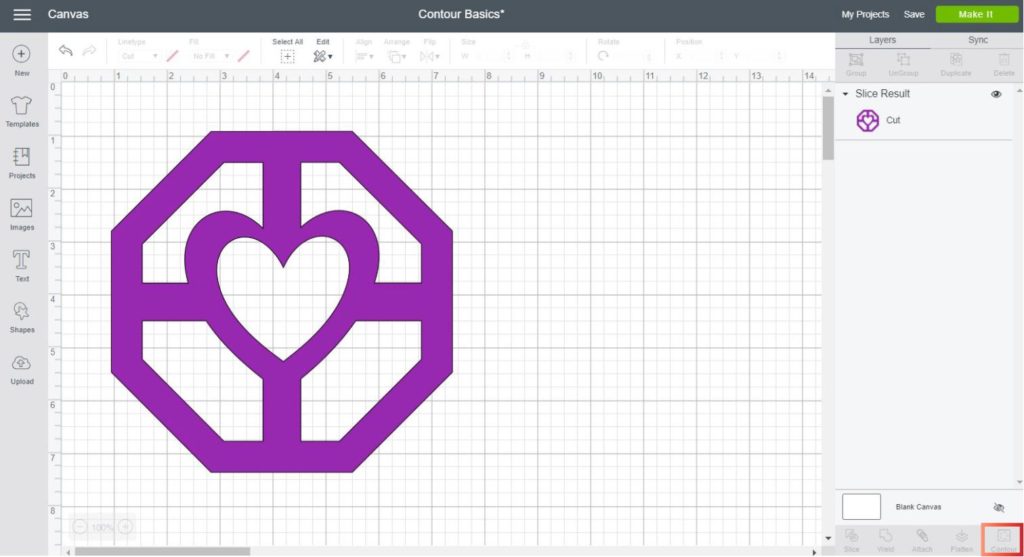
As you can see this image has multiple holes and blank spaces that can be deleted.
One thing that’s really cool about this tool is that you can turn blank spaces (holes) into active parts of the design and hide the active parts of the design and turn them into blank spaces (holes)
I know it sounds a little complicated, but it will make sense in a second.
When you click on contour a window will open were you will be able to edit your image by showing and hiding certain parts of it. Let’s dissect this little window so you take advantage of everything that the contour tool has to offer.
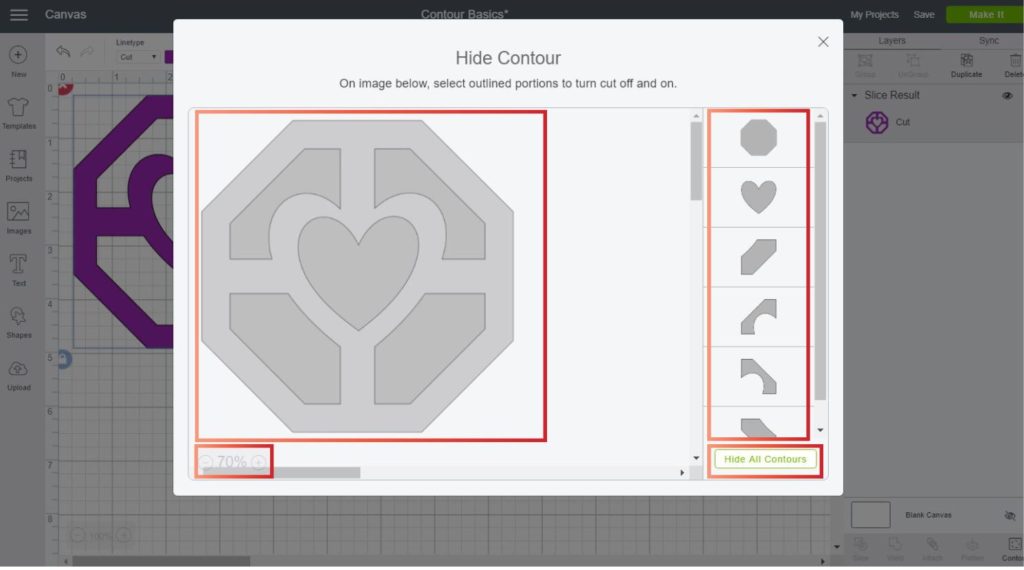
Image Area: Here you can see the image you want to contour, each scale of grey represents a separate element that you can click on to either hide or show. The grayest color represents the blank spaces or holes of your image.
Zoom: If you want to fit your image on the contour window, zoom out to have a better perspective. Or, if you are working on a very intricate design, zoom in to select what you want to hide/show.
Individual selection Panel: You can select the piece you want to contour on this panel. When you know what you’re looking for this can be quite handy. However, I don’t use it that much because it’s hard to visualize what you are doing.
Hide/Show all Contours: This little button is very useful, especially if you have a lot elements you can and want to contour on your image.
For instance, if your layer has 20 elements and you only want to show 3, then it’s better to click on “Hide all Contours” and then to click on the 3 you want to show.
After hiding all contours, the button will change to Show all Contour.
Now, look at all of the things I was able to do with just that simple design! I copied and pasted it just so I could change the contour options of each one of them.
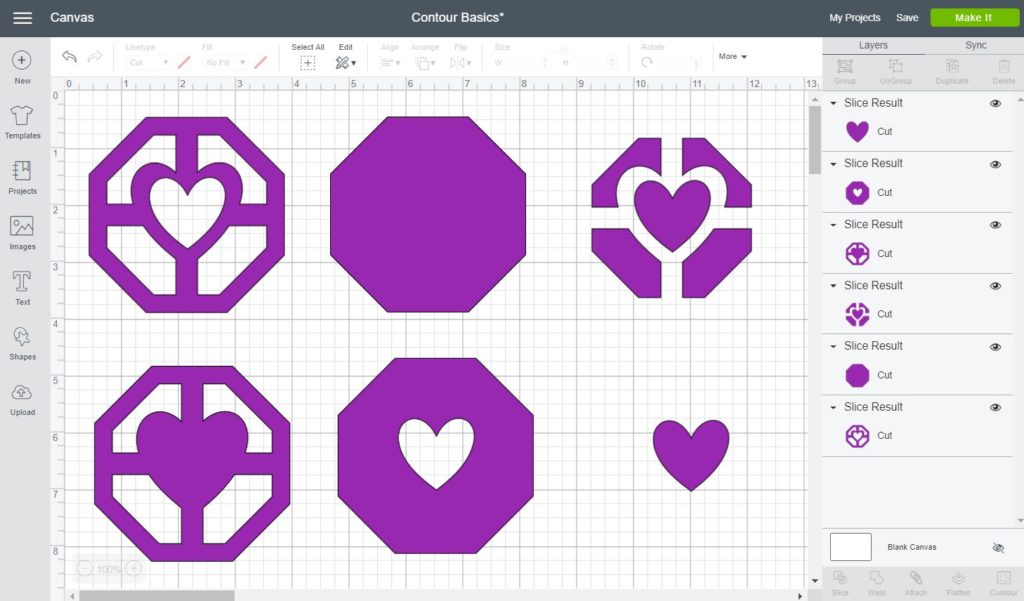
From one single Image I was able to create another 5. And I could’ve done more of them, but I just wanted to make a point.
How to use Contour with Images
Now, we are going to check out how to use contour with images. You can do this with one of Cricut’s images, or with your own as well. Though, keep in mind that you can only use SVG or CUT files.
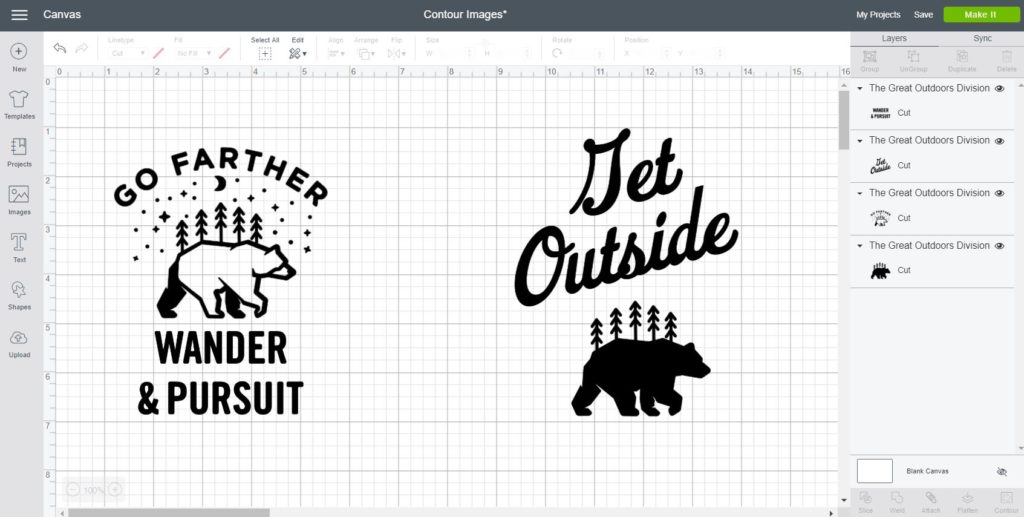
If you want to recreate this part of this tutorial, click on Images located on the left panel of the canvas area, then copy and paste this code #M71A34B3 on the search box.
When the image appears, select it and click on Insert.
Take a look at the image. What do you notice?
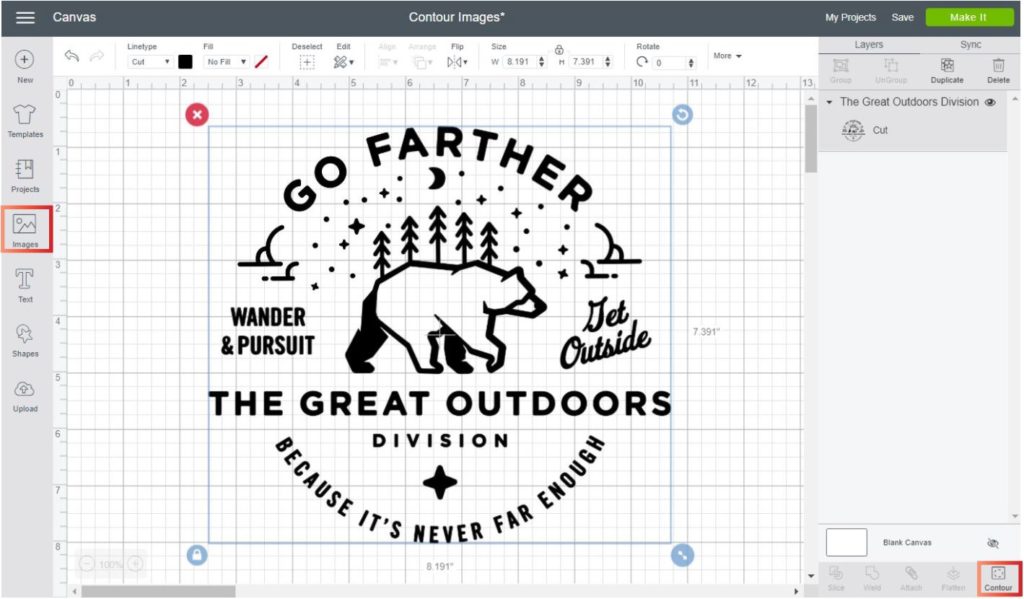
First off all, there are many elements, little and big that are part of the design, and secondly, since the image is in a single layer we can use the contour tool.
When you click on contour, look at all of the things you can hide, and also show. For instance, you can choose to only show the bear, or the stars. Or just part of a phrase.
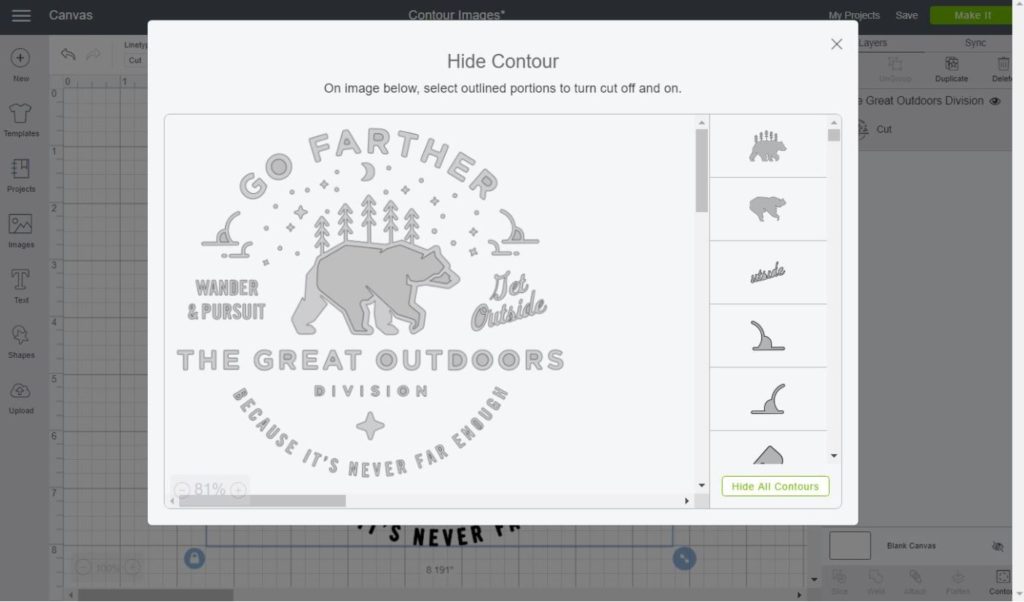
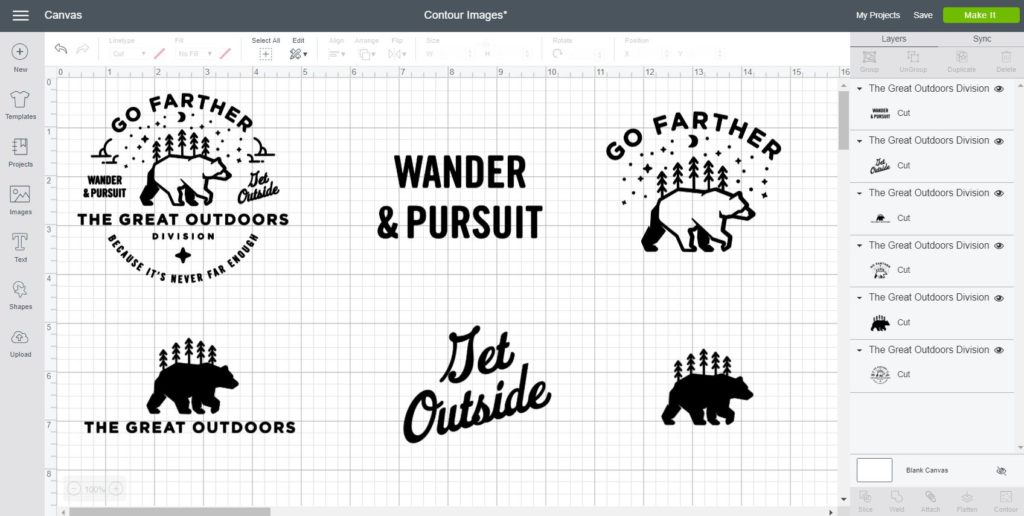
From the original image, check out all the different options I came out with in just about three minutes.
Isn’t that awesome?
What about combining two different contours?
I am still amazed of all the things you can do. Can you believe that you can overhaul an image to create something totally different.
The following designs, were made by contouring, resizing, and finally combining the original image.
How to Change Colors using the Contour Tool
Have you ever seen and image that you would like, but when you insert it is just one layer?
I know, it’s frustrating!
Say good bye to your frustration because with the contour tool you can change the colors of your images very easily.
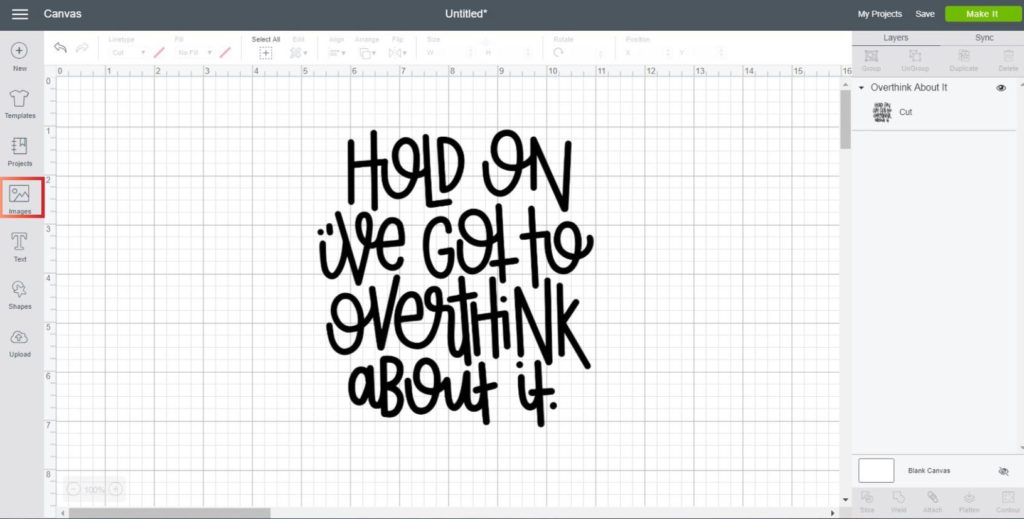
To follow along click on the images button located on the left panel and search the following code: #M105AD97. Then select the design and insert the image in Cricut Design Space.
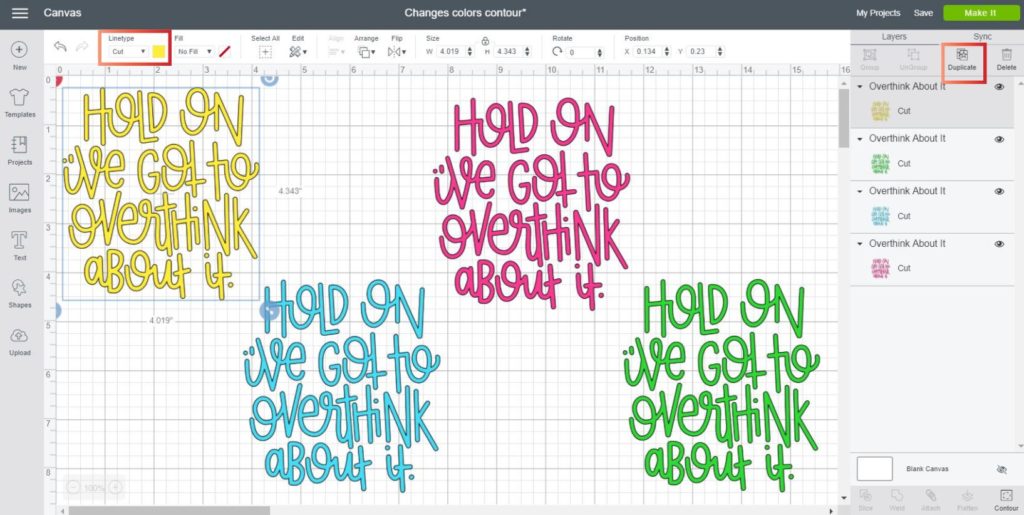
Once you insert the image, select it and (copy paste) duplicate it. The idea is to have a copy for each color you want to use.
I wanted a different color for each line, so I copy and pasted until I had four exact duplicates.
After you finish doing that, change the color of each image by selecting it and changing the color box next to linetype on the top menu.
Once you have all of the duplicates with the color you want to use, select all of the images and click on align (located on the top panel of the canvas area) and select the option center.

At this point you will only see one of the images, but behind it you’ll have the other three. Here’s the thing, if you try selecting from the canvas, you will always select the one on the front.
So, when trying to contour each image, select it from the layers panel (located on the right panel of the canvas)
Now, we are going to contour each image hide/delete everything we don’t want in a particular color.
To do this, select one image at the time and click on contour. On the following screenshot I have the colors I used for each line.
- HOLD ON: Click on the yellow layer and hide all other lines
- I’VE GOT TO: Click on the blue layer and hide all other lines
- OVERTHINK: Click on the pink layer and hide all other lines
- ABOUT IT: Click on the green layer and hide all other lines
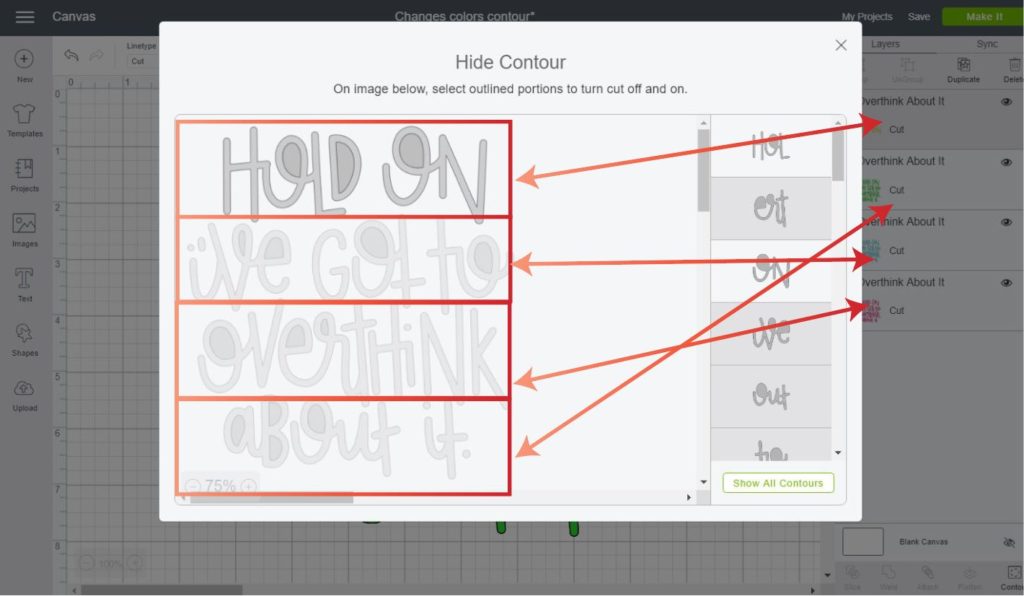
Tip: Since you will be hiding, more than showing. I recommend you to click on hide all contour, and then manually click on the line you want to keep.
This is how the design will look at the end!
Doesn’t it look pretty?
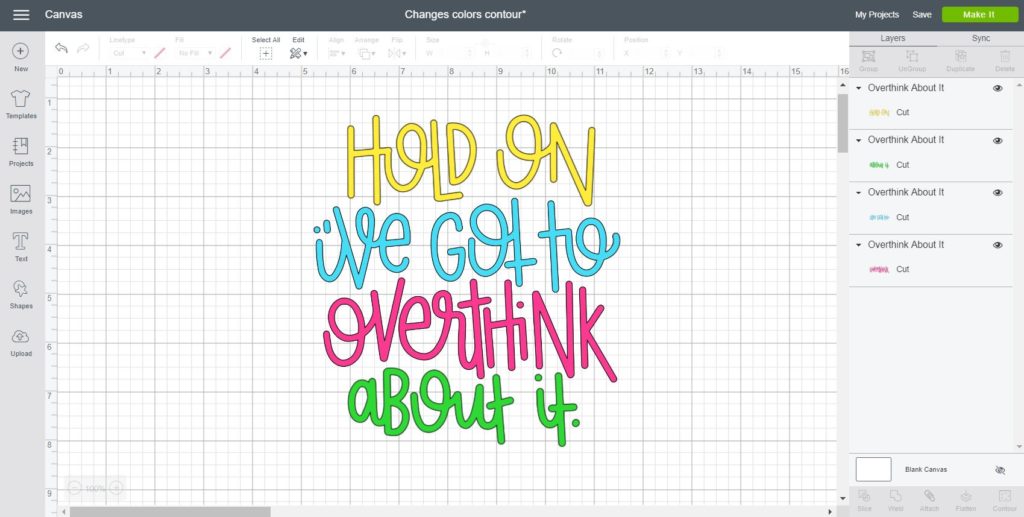
Notice each layer on the layers panel. Each image is showing, the line you picked.
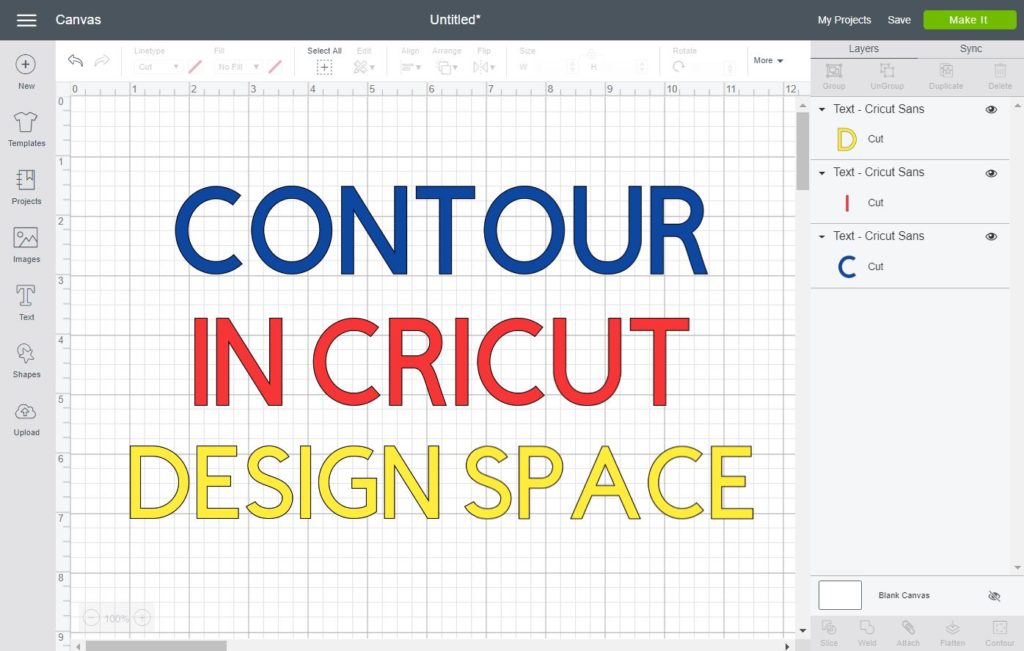
How to Use Contour with Text
To finish up this tutorial lets see how to contour text in Cricut Design Space.
By default you can’t use the contour tool on text.
Why?
I honestly don’t know, but my best guess is that text is dependent on the font itself, and with contour you’ll be modifying it so much that the program can’t really take it.
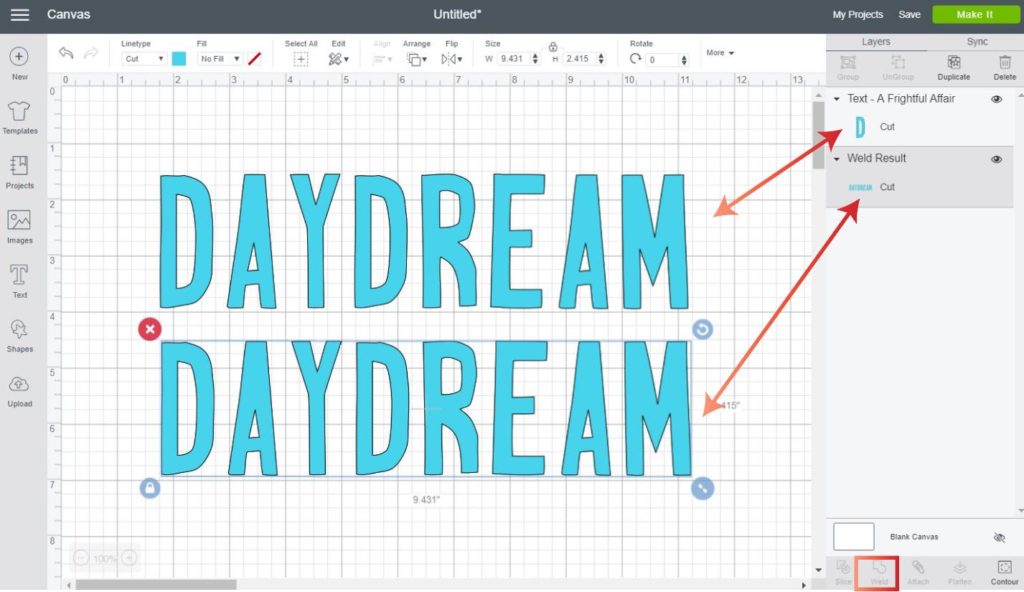
In order for you to be able to contour text you need to weld it!
To do this, just select the word or text you want to use and click on the weld button located at the bottom of the layers panel. After welding you can now contour your word, and get rid of letters, or blank spaces on your text that you don’t want.
Note: Keep in mind that you won’t be able to edit that text after you weld. So if you think you’ll need it down the road, save a copy of it.
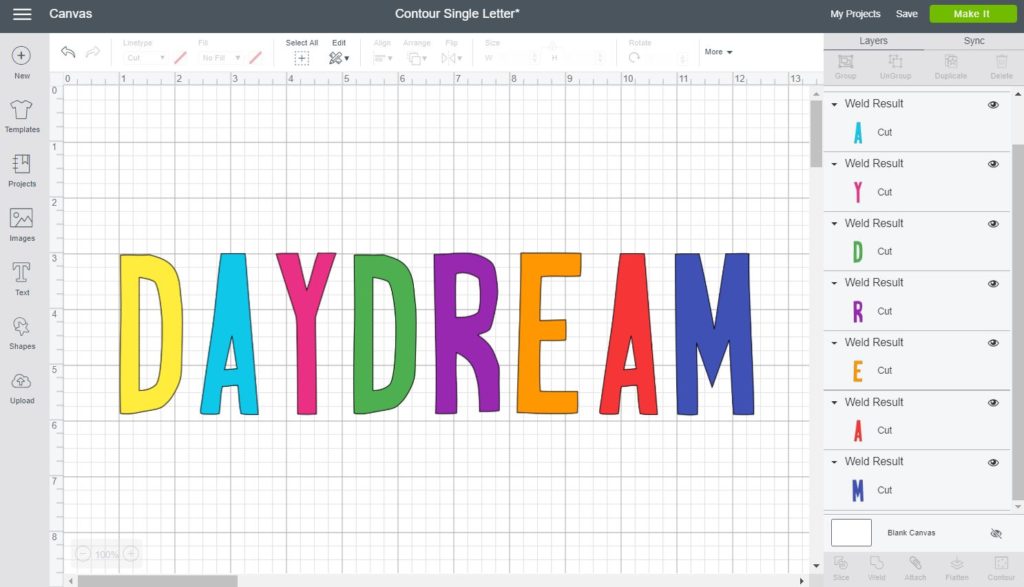
You can also repeat the process of copying and pasting the same design to change colors (like I explained above).
Look how it looks with different colors!
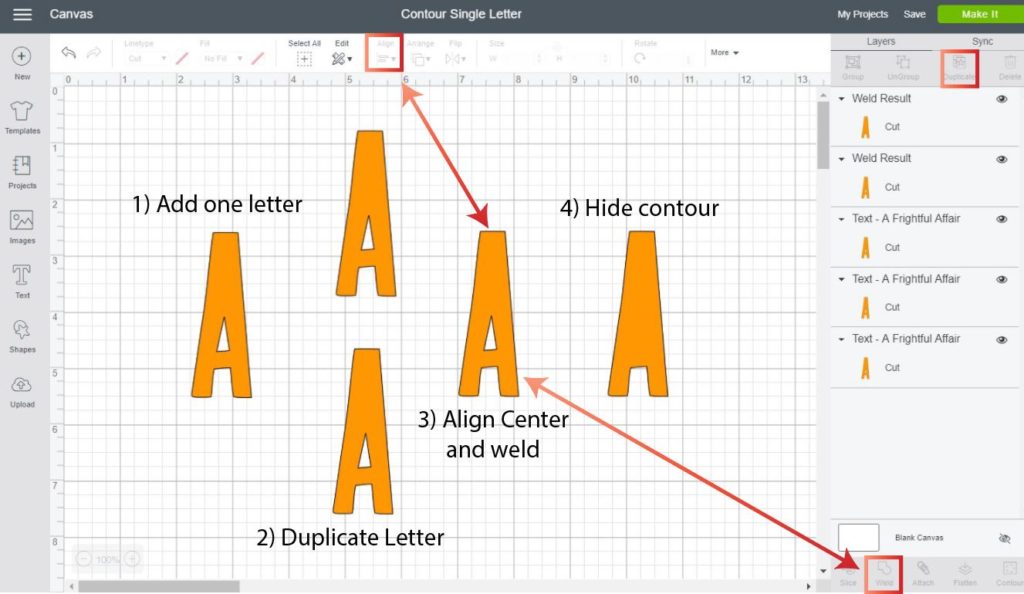
Before we finish this tutorial I wanted to point out that if you want to contour a single letter Design Space wont let you weld.
Ahggg… I know!
No worries though, you have two options here:
- The first option is to just write a word with two letters, then weld and with the contouring tool, delete the letter you didn’t want in the first place.
- The second option (check screenshot down bellow) is to duplicate the single letter you want to use, then align both copies center, and finally weld them both. After welding, you will be able to use contour with no problem.
Congrats!
If you followed this tutorial, let me tell you that you are a PRO at using contour in Cricut Design Space.
The question is… How are you going to use this tool from now on? Let me know in the comments bellow.


I am trying to “print it for later” at the bottom of the post but am unable to do so. why?
It’s supposed to say pin it for later. Sorry lol!
This was so helpful! I wish I had read this sooner. I had a few projects that might have taken less time if I knew more about this.
I am using the font imprint MT shadow. I duplicated it and attached on top of each other and then sliced it so it would be more than one layer. The bottom letters in blue and then the top in red since I would Iike to fill in the outlines of the text in red. I was able to contour most of the outlines but there are a few spots that I am unable to fill due to it not letting me contour certain parts of the letter. For example the letter “s”, “h”, and “e” I am unable to contour the outline on the top of the s and then the outline on the outside of the h Is there a way to fix it so I can fill it in with the color I want? Any help or advice would be greatly appreciated!! Thanks
The letter s and h won’t contour because they don’t have any hollow spots to hide/reveal. If the letter “e” doesn’t have the little hole it won’t work either. Have you tried using the offset tool to create a cut-out by slicing the offset and the original layers?
Hi I would like to know if I am able to remove the black background? Is there a way to send you png?
You need to upload an image and delete the background by following the prompts.
I don’t have any of those problems, yet contour still isn’t working! The offset of my sticker has 4 holes. When I have that selected only, the contour button is greyed out and unaccusable. 🙁
Sorry to hear that, try calling customer service.
Thank you for this tutorial!! After almost 4 years using Design Space, I tried Contour today for the first time! It was very helpful!!
Hi I have the Challenge contour font! Please help how can I get rid of the outline with the contour tool an is it possible?
I don’t have the font 🙁 I hope you figured it out!
I have given up on the Contour in DS … ever since the update to 6.10 came up I no longer can contour and it comes up blank on my screen. I have written to cricut who instructed me to delete a bunch of directories, un-install and re-install, force reload, and now they just ignore me.
I haven’t had these issues. I am sorry to hear. Is it working now?
The contour option is working very slowly, I can’t see what I’m doing. Is it because the image is too complex with too many items I can turn off and on? I’m trying to make a layered mandala with it so I will be doing this many times, but with the option being so slow it will take me a month to complete. Is there a way to speed it up somehow?
I am sorry. Sometimes, Design Space can be a little glitchy :/
Have you tried the app? Also, try using the zoom in and out to speed up the process.
Hi I’m trying to add color to my picture of babs and buster bunny but when i go to use contour either turns one completely black even when I duplicate I still end with a black outline no color how do I get color back
you have to contour different parts of the image, don’t click on “Hide all contour” otherwise you’ll have this. Also when contouring your image should be one color. You add color to each peace you want to contour.
I have another tutorial about “filling” and image with Color in Design Space.
This was great thanks so much ! I definitely will pass this info on to anyone else wanting to learn.
Your time and effort into all these great tutorials is so very appreciated.
Thank you for sharing! I am glad my tutorials are helping you!
THANK YOU!!!!! You showed me exactly what I needed to know. I am making a shirt with a cow on the front…. she has a bandanna on her head and glasses. I wanted the glasses outline and the bandanna red!!! You are amazing!! I am going to get all of your tutorials!!
Yay! I am happy I able to help!
I converted a jpg to svg. It is a picture of a dog. I need to contour the black nose and the black around the eyes. But my contour button is light grey and can’t click on it. What am I doing wrong .
Where did you convert the images? Does the image have clear distinct spaces or blank spaces? Make sure to select one layer at the time.
Thank you, Great tutorial, I did not know contour even existed, but I’m a little confused. After selecting the image, you want to contour and before doing anything else are you “cutting” or “drawing” the image? Also, once you are done contouring is there a way to draw the layers you have filled in with color or must you print/cut?
You can use contour with a cut or draw linetype. To fill in color you need to use Print then Cut. I have a really handy tutorial if you want to check out how colors work in Design Space.
I have a Mac. The contour button never gets dark so I can click on it. I don’t know what to do when I make a monogram. There are not a lot of places that address using Cricut with many Mac.?
I am really happy to hear this!
Hello, I hope you can help. I have an image that I purchased (PNG) that when I upload all is fine, but once I change it from PRINT CUT to just CUT, the image turns grey and is basically gone except for the grey circle (the image is a circular drawing). I need to do just CUT as its for printing on vinyl for a coffee mug.
Hi Shannon, upload it as a Print then Cut image.
Great tutorial, thank you so much! I had some knowledge from other tools, but I wasn’t familiar with some of the tools/options. Your tutorial filled in the blanks perfectly! I’m looking forward to reading more!
I am glad you learned new things from this tutorial.
Is there any way I can print your instructions that you post on Pinterest?
Hi Linds, at the moment I don’t have printable options for my Cricut tutorials.
I just stumbled across this tutorial… awesome! I have often wondered if there was a way to change certain elements of a design! I have used Cricut machines for years but never knew of this. Thank you!
You’re very welcome Gayle!!
Loved this tutorial – I will definitely try these different ways of using contour – bless you my dear – I too am a follower of Jesus.
You are welcome, Marlene.
Blessings!
I don’t get it! I understand the mechanics of it, but, why is it necessary or why do I want to do it?
The first example I understand if I want to be creative and make a new design. But, wouldn’t slicing or isolating the letters accomplish the same?
And why do I want to remove the negative spaces? Like with the heart in yellow with the silhouette and letters? What does it do for you if you’re not changing colors?
I am not making an argument to not use contour. I just don’t understand.
I appreciate your time!
Hi Kristin. As you mentioned there are many ways to accomplish the same things on Design Space; I am here just to show you the possibilities.
With the heart in yellow you may want to use just the couple and hide the other pieces; It would take a lot of time to slice it out on the first try. Does that make sense?
Also, there’s no really a way for you to Isolate a little part of a compound image (unless you slice) and that’s why contouring is so cool!
Thanks for your Critical thinking though (it’s the best way to learn), you may be a more advanced user and can see what to do in different cases with different tool. When someone reads any of my tutorials I assume they just bought the machine.
Hi Catalina!
I am having troubles contouring a portion of an SVG file that I downloaded and wonder if you have any ideas.
The cut file has text and a cabin image that are already welded together into one image. I want the cabin to be a different color from the text, however, there are a couple letters on either side of the cabin that are connected to the cabin image so when I try to contour the cabin, the letters on either side get removed too. I have tried to add a cut line onto the cabin and attach them (weld is not an option) but then I cannot contour the image.
Any ideas?
Hi Sthephanie!
If some of the letters are connected to the cabin, then you can’t change colors. something you can do is to use small rectangles and slice them against your design to add a little space and separate the letters from the cabin.
I hope that helps!